
Neighborhood Snapshot ~ First Hill, Seattle

Food Blog Talent:
Adhi Potoba ~ Food From Pune, from Applebee’s Country
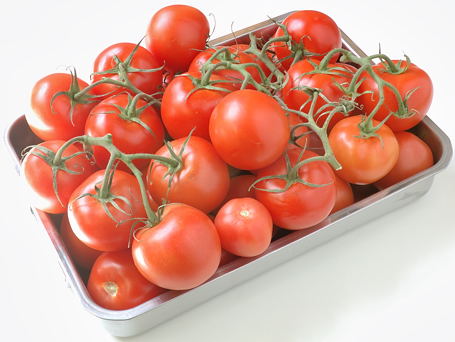
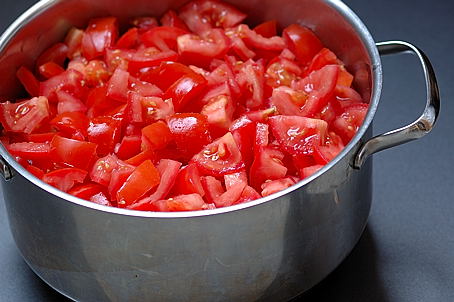
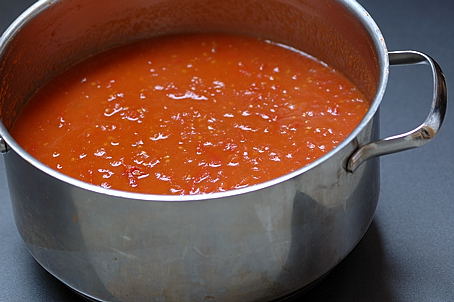
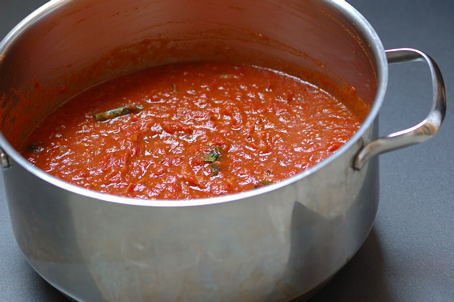
Thanks all for your interest in tomato pickle. Here is the Recipe:
The Art of Making Tomato Pacchadi
If you think you have benefited in some way, by using any of Mahanandi’s recipes and you want to show your appreciation by donating some money, here is Mahanandi’s Cause.
“Provide the Seeds to Sow”. Spread the word and donate.
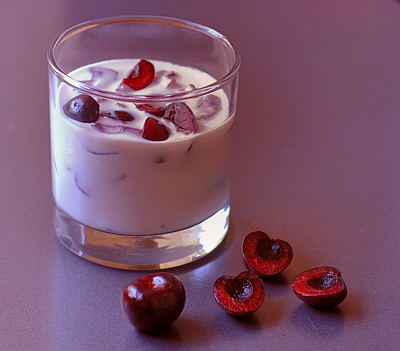
Diminished appetite and constant need for something cool, it’s that kind of hot day here in Seattle.
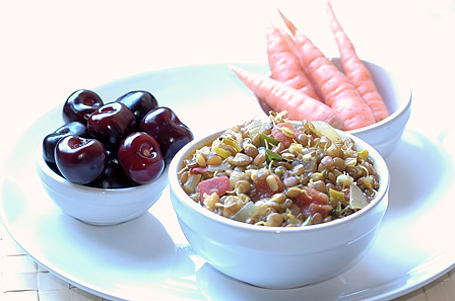
To revive the sweltering spirits, I had to prepare something pleasant. Sweet and juicy, in rich mahogany color, Washington state’s own beautiful bing cherries came to the rescue. Few cherries halved, pitted and mixed with yogurt, then refrigerated for half an hour. Preparing chilled cherry yogurt at home is a simple process with delightful results.
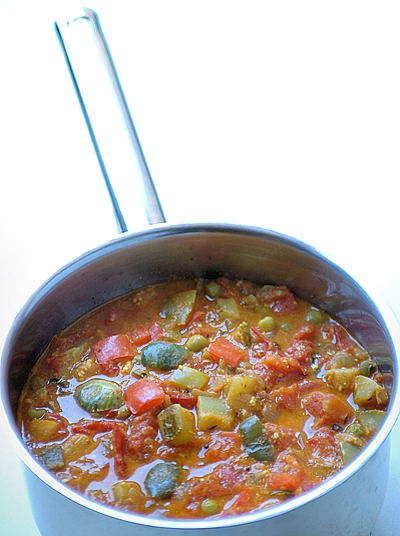
When it comes to international cuisine, French cuisine ranks among our favorites. Then again, we are devotees of Tibetan, Thai, Mexican and Italian … well you get the picture. But back to French food, if we may. So delighted are we of the new Pixar animated movie, we decided to recreate one of our favorite French recipes at home. Cheeseless and cheerful ~ The Ratatouille.
Dictionary defines Ratatouille as “A vegetable stew, usually made with eggplant, tomatoes, zucchini, peppers, and onions, seasoned with herbs and garlicâ€Â. Ratatouille, Pulusu, Kurma or Subzi …different names in different languages but the underlying wisdom is the same. Isn’t it? When vibrant and fresh looking vegetables are available, the recipe served will make happy people happier and comforts those who aren’t. Really, we don’t have to do much in order to make a miraculous meal.
The India inspiration is addition of poppy seeds. When added to bobbling vegetables in the pot, the powdered poppy seeds will bring sweet aroma and subtly enriches the ratatouille in a typical Indian way.
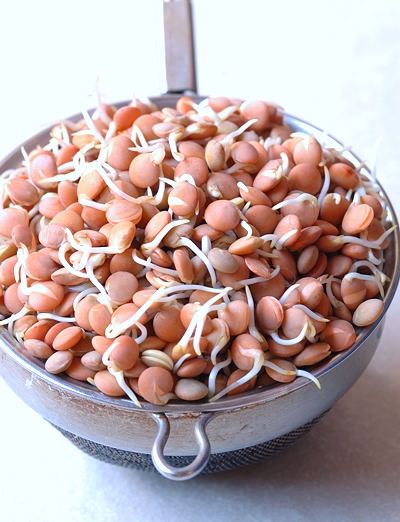
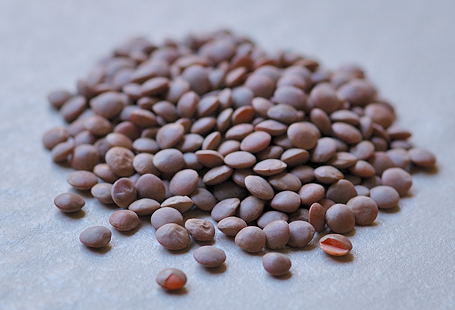
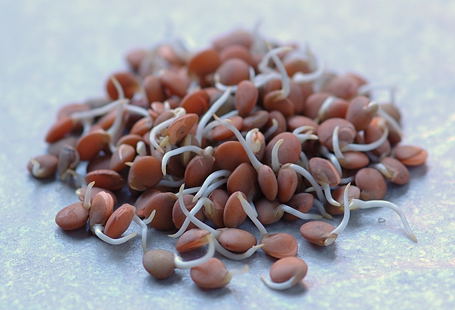
Whole masoor dal is quick to sprout. Just few hours soak-time in water and few hours hang-time in a cotton cloth under the warm rays of the sun. That’s about it. Like the sensitive student that staunchly strives to deliver a stellar performance, masoor dal swiftly transforms itself from drab brown to dazzling shade of orange-brown within a day. Truly impressive.
This is the first time I did the sprouting thing with whole masoor and I found the process undemanding and the sprouts pleasant tasting. I remember from science classes that the sprouting process turns the starches in lentils and legumes into more digestible sugars. Whole masoor dal provides a textbook example. Prominently perceptible sweet taste, crisp texture, delicate and a delight, masoor dal sprouts are a must try for sprouts connoisseurs. I totally recommend.
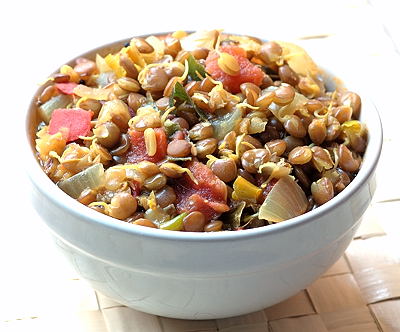
This is what I’ve prepared with sprouted masoor dal. A light and easy, low-calorie stew with a taste that humbles even the contrived sprouts-cynic. That’s how I felt after the meal.
Recipe:
1 teaspoon peanut oil
2 each – curry leaf sprigs and garlic cloves, coarsely chopped
¼ tsp each – cumin, mustard seeds and asafetida(inguva)
1 onion, 2 tomatoes and 3 green chillies – finely chopped
2 cups sprouted masoor dal
¼ tsp each – turmeric and salt, or to taste
1 lime – juice squeezed
Few Springs of Fresh Coriander
In a big saucepan, heat the oil until a curry leaf tossed in it sizzles. Lower the heat to medium. Add the curry leaves and the garlic to cook to pale brown. Toss in cumin, mustard seeds and asafetida. When seeds start to jump, add the onions, tomatoes and chillies. saute for few minutes until they soften.
Stir in sprouted masoor dal, turmeric and salt. Add about a cup of water. Bring to a boil and reduce the heat and simmer until the dal reaches fall-apart stage, about 10-15 minutes. Add lime juice and few sprigs of fresh coriander leaves. Mix and serve warm. It tastes good on its own. No rice or chapati is needed to enjoy the sprouted masoor dal and that makes it a perfect meal for calorie-conscious.
Notes:
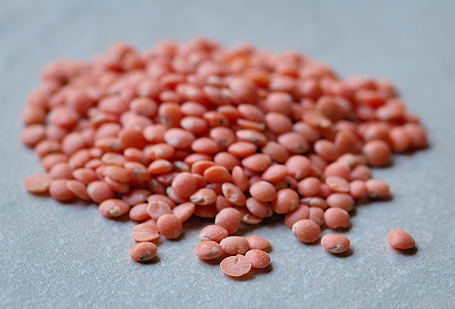
Whole masoor dal (brown) and Split masoor dal (Red) can be bought at Indian groceries and also at natural food stores in bulk bins here at US.
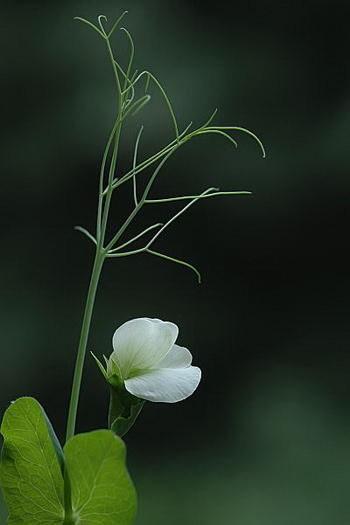
Flowers in Food Blog World:
A Rosie Delight ~ Gulkhand
Mango Flowers and More ~ From Bharat
Onion Flowers
Radish Flowers
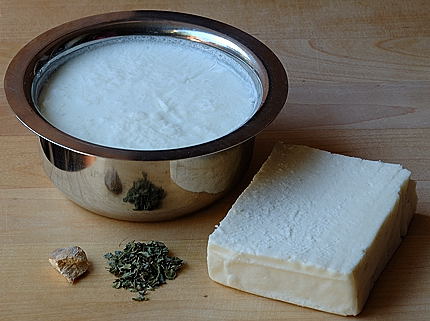
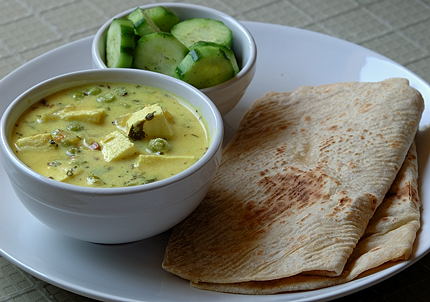
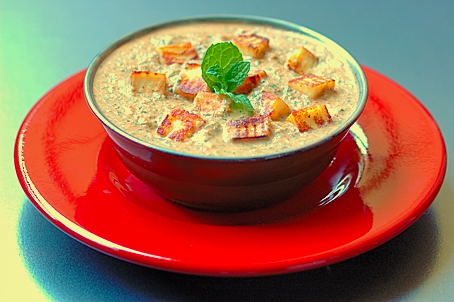
Unusual and distinctive, paneer kadhi has much potential. At the beginning it may seem undefined and unclear, but at the end, it assumes clear and unmistakable identity that is fascinating and enchanting.
Dried mango powder (Amchur), ginger powder (sonti) and kasoori methi adds to the mystique, giving a deeply memorable taste to paneer kadhi.
Recipe:
In a small sauce pan, heat a teaspoon of oil.
Add and saute the following ingredients in the order mentioned:
Urad dal, cumin and mustard seeds – half teaspoon each
Green chillies, slit in the middle – 4
Finely chopped onions and fresh green peas – half cup each
Dried mango (amchur), ginger(sonti) & kasoori methi– half tsp each
Turmeric, sugar and salt to taste or quarter teaspoon each
Small, bite-sized paneer cubes, about 12 to 15
At the end, add about two cups of fresh homemade yogurt. Whisk the yogurt, thoroughly mixing with sautéed spices. Garnish with finely chopped coriander leaves and serve warm with chapatis or rice for a delightful meal.
Thank you Musical for suggesting Paneer Kadhi name to this recipe.
Recipe Adapted from Annita’s “My Pleasure and My Treasure”
Yogurt is prepared with 2% milk (so, the thin watery like consistency on whisking).
What brought on this paneer craving, you might ask?
Party at a restaurant. A platter of most delectable paneer pakoras. Slim pickings, thus born a paneer state of mind.
Pudina Paneer has the perfect punch to serve with pulaos and parathas on a picnic party. It’s good with grilled chicken and fish too.
Recipe is easy to execute. Involves grilling and grinding.
Grilling :
On stove-top or on a hot grill, place a slab of paneer and grill each side for a minute. Remove, cool and slice the paneer slab to bite sized cubes.
On stove-top or on a grill, place an iron skillet and heat the oil until it’s very hot. Add and saute Pudina leaves till they wilt. Remove to a plate.
In the same skillet, place onions, tomatoes, garlic and green chillies. Grill to brown.
Grinding:
In a food processor or mixer, take roasted peanuts. Grind to fine consistency.
Add the sautéed Pudina leaves, grilled onions, tomatoes, garlic and green chillies. Also tamarind, salt and two cups of water. Process the whole thing to smooth paste. Remove to a cup. Stir in grilled paneer cubes and serve with pulao or parathas.
Recipe source: My own creation
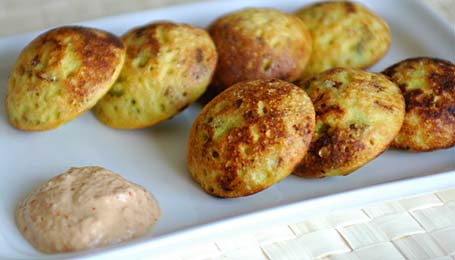
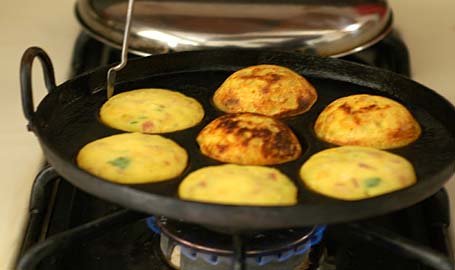
In our homes, whenever relatives from other regions of Andhra or from other states visit us for holidays, out comes the “ponganala Pennam”(ponganala skillet). Round, golden colored ponganalu, hot off from the skillet, always elicits oohh… aahh… from our relatives and from their weird offspring (are there any other kind?:) ). Because they are unique to our region, preparing them is our showoff kind of thing to out of staters who were related to us by marriages etc.
Preparing ponganalu, it’s all in the skillet . Right kind of skillet delivers or breaks a ‘ponganam’. Nothing can beat an old world style, well seasoned iron skillet. They are the best and the place where you can buy is of course India. I’ve seen some non-stick skillets here in US in some Indian shops lately. They are also fine, if you don’t mind the non-stick coating.
Recipe:
For 3 to 4 batches of Ponganalu
Ponganala batter:
1 cup rice
½ cup urad dalSoak rice and urad dal in water for about 6 hours. Drain (reserve the water) and grind them into smooth batter adding just enough water (add the drained water that was kept aside). The consistency of the batter must be thick, like idli batter or like condensed milk (commercial kind). Take the batter into a big vessel, cover and let it sit overnight in a warm area for fermentation.
(Sour and dayold dosa batter is perfect to prepare ponganalu.)
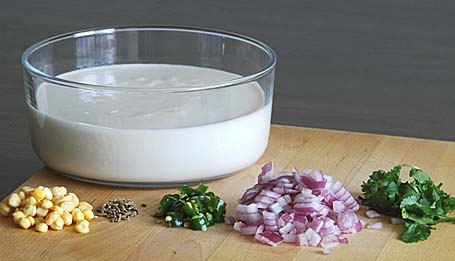
Seasoning (Add to the overnight fermented batter):
1 big red onion or 6 shallots – finely chopped
(Because we mix them in the batter raw, avoid yellow onion for its smell & awful rawtaste)
4 green chillies – finely chopped
Few springs of cilantro – finely chopped
A fistful of chana dal (soaked overnight)
1 teaspoon of cumin
½ teaspoon of turmeric and salt
Add all these ingredients to the batter and mix thoroughly.
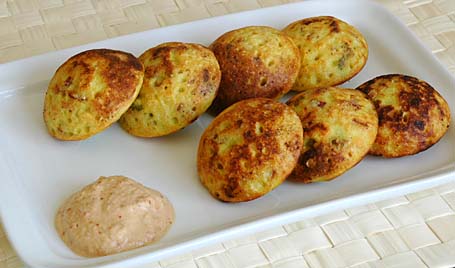
Also prepare peanut or coconut chutney.
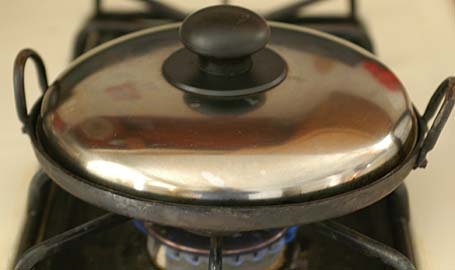
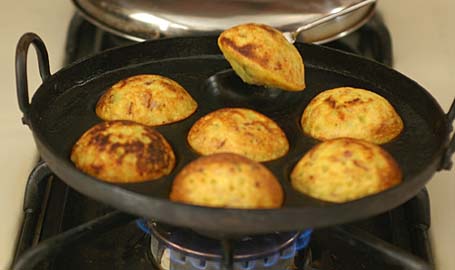
Cooking: Place the ponganala skillet on medium heat. Add few drops of peanut oil into each impression. With a spoon or with a piece of paper towel, rub oil around, to season the skillet. When the skillet is hot and ready, proceed like this, following the images.


This recipe was originally published on March 20th, 2006 on Mahanandi.
Ponganalu ~ Sweet and Savory


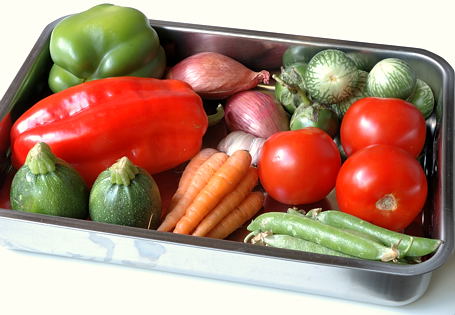
The summer season for vegetables is coming into full swing here in Seattle. It’s overwhelming to see so many American as well as Asian vegetable varieties and it is getting impossible not to lose mind and money. The choice is endless and I love to be greedy. But, how many and how much one can buy, cook and eat? So, I am trying very hard to keep my cool at farmers’ markets and pick only the ingredients I’ve known from my childhood days that speak to my heart.
One fresh vegetable that I am enjoying to the fullest along with green brinjals is fresh amaranth. (Thotakura in Telugu). The label at the local farmers’ market says Chinese spinach or red spinach and one bunch is usually priced at one dollar. I have been buying this vegetable almost every week since May simply because I love the fresh amaranth taste. It is one of those “looks simple and yet yields results far outweighing the effort” kind of vegetable. In today’s recipe, another Nandyala classic, the fresh amaranth is paired with spinach and tomatoes. A stellar combination and a scrumptious curry!

Recipe:
1 teaspoon peanut oil
¼ teaspoon each -cumin, mustard seeds and curry leaves
1 big onion – finely sliced, about one cup
2 tomatoes – finely chopped, about one cup
5 green chillies -finely chopped
1 teaspoon – ginger garlic paste
½ tsp each- turmeric and salt
1 bunch fresh amaranth (leaves and tender stems) – finely chopped, about 5 cups
1 bunch fresh spinach – finely chopped, about 5 cups
I have also added about ½ cup chori/adzuki beans (pre soaked in water overnight). This is my choice and optional. Chickpeas, kala chana etc also taste good.
Heat peanut oil in a wide skillet. Add cumin, mustard seeds and curry leaves and let them sizzle a moment before adding the sliced onion, tomato, green chillies and red beans. Also stir in the ginger-garlic paste, turmeric and salt.
Let everything stew together for about 10 to 15 minutes, stirring occasionally, until the whole thing comes together into cooked soft mass with tender chori (adzuki) beans.
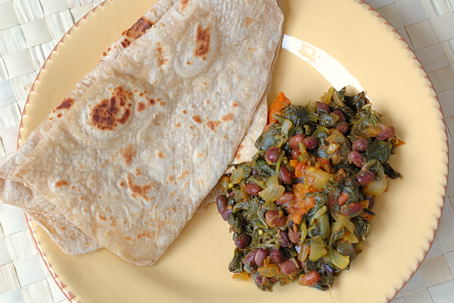
Now add the fresh amaranth and spinach. Stir to mix and cook covered on medium-high for about five minutes until the leaves wilt. Remove the lid and cook another five minutes. Turn off the heat. Let the curry sit for few minutes so that the flavors could mix well.
Serve the curry warm with chapatis or sorghum roti and a cup of yogurt plus fresh fruit for a complete meal.
“Let’s consider a situation when you are all alone at home. You are hungry and would like to satisfy your cravings. What will you cook if you want to cook for yourself?”
Asks talented foodblogger Live2Cook.
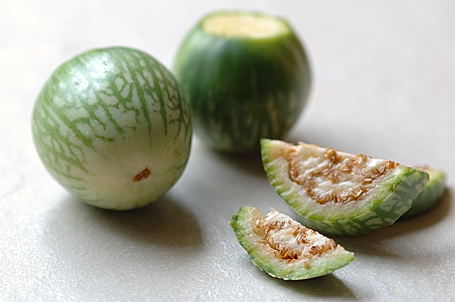
Just like her, if brinjals are in my vegetable stash, instead of indulging in junk food, I would be motivated enough to prepare a decent meal. I enjoy brinjals that much. Particularly green brinjals which we call Poluru Vankayalu in Telugu. I am one of those people with a passion for green brinjals.
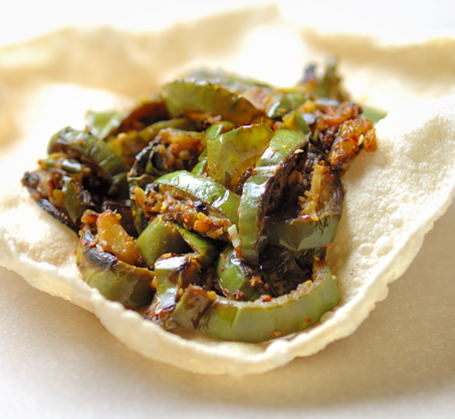
Meal is for myself, so I would go for simple ten-minute preparations like brinjal with ginger or today’s recipe, “Brinjal with Cumin”. This little-known but worth-knowing cumin flavored brinjal curry is a delight to the senses and a must try for green brinjal fans.
Recipe:
Aromatic Cumin Powder (Jeelakarra Karam):
Take 1 tablespoon cumin, 1 roughly chopped plump garlic clove, 4 red chillies and a pinch of salt in a grinder. Grind to smooth without adding water.
Green Brinjals (Poluru Vankaya):
Pick 15 young and firm green brinjals. Remove the stem end and wash. Finely slice brinjals lengthwise like shown in the picture above.
Cooking the Curry (Kura):
Heat a wide skillet. Add a teaspoon of peanut oil. When the oil is hot, add a pinch each – cumin, mustard seeds and five each – curry leaves and roughly chopped garlic pieces. When they start to turn to gold, add the brinjal pieces.
Saute on medium-high heat, mixing in-between. Green brinjals cook fast, so be ready with aromatic cumin powder. Sprinkle the cumin powder and also turmeric and salt to taste. Toss to mix well and cook few more minutes, until the brinjal pieces are just tender but still green. Serve hot.
Cumin flavored green brinjal curry tastes great with rice/chapati, toasted bread/bagel or with papad.
Recipe source: Amma, Nandyala
How many of you know that green brinjals are cultivated in India and they are named after a village called “Poluru” near Nandyala region, Andhra Pradesh?
More Green Brinjal (Poluru Vankaya) Recipes:
Stuffed Brinjal Curry (Gutti Vankaya Kura)
Brinjal-Potato Curry
Green Brinjal-Fresh Amaranth Curry

