Mahanandi

Living in Consciousness ~ Indi(r)a’s Food and Garden Weblog

Black Pepper~Turai Chutney

బీరకాయ మిరియాల పచ్చడి

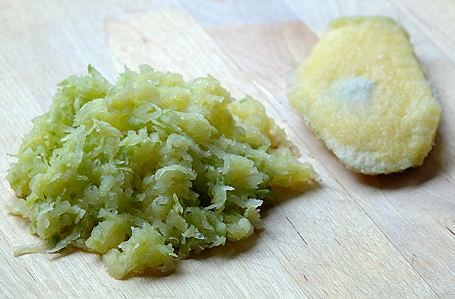
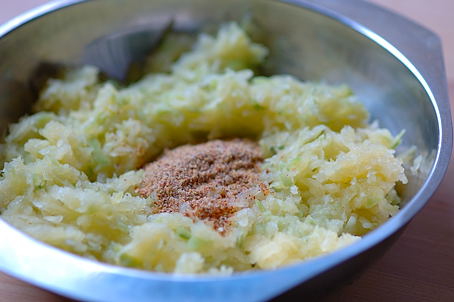
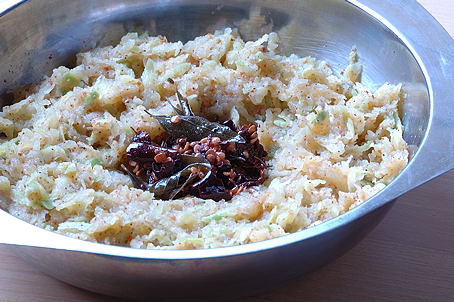
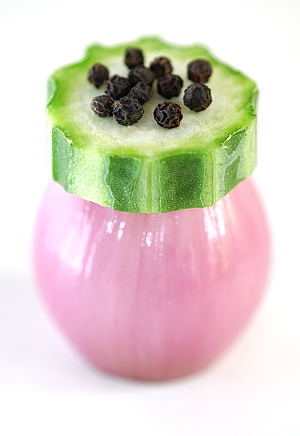
Shallot, Turai, Black Pepper
Shallot, Turai and Black Peppercorn

If there is a turai fan club, I would be a card-carrying member. I would go to farmers markets to demonstrate turai dishes and to dispense turai seeds to the interested. I enjoy this vegetable that much.:) Recently I came across a new chutney recipe with turai, and I tried it today for our meal. Sweet turai and fiery peppercorn, it’s a good combination. A must try for fellow turai fans, I recommend.

Black Pepper ~Turai Chutney:
(makes about a cup and half)

1 Turai (ridge gourd, బీరకాయ)
2 shallots (erra gadda)
½ teaspoon black peppercorn (*Hot*)
1-tablespoon tamarind pulp
½ teaspoon cumin
¼ teaspoon salt
1-teaspoon oil

1. Add tamarind pulp to two tablespoons of water. This will soften the tamarind and helps to blend well. Peel the ridges, wash turai, and cut to big chunks (about two cups). Peel the skin and chop shallots to big pieces (about half cup).

2. Heat a cast iron skillet. Add and heat oil to smoking point. Add black pepper and cumin. Fry for few seconds. Add the shallots and ridge gourd pieces. Sauté to tender for about five minutes. Turn off the heat and allow the contents to reach room temperature.

3. Take them all in a mixer or mortar. Add salt, tamarind pulp and the water it was soaked in. Mix once. Blend to coarse consistency. Remove to a cup and serve. Good to mix with rice, or as a spread on chapati/roti/bread.

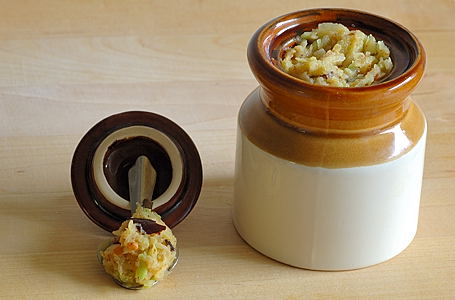
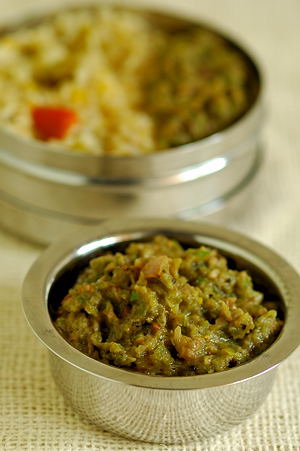
Turai- Black Pepper chutney
Turai Pepper Chutney ~ for Meal Today


Recipe adapted from:
Paajaka. Thanks Mythreyee for this tasty turai recipe idea.
Reduce peppercorn to quarter teaspoon if you prefer mild hot level.

Posted by Indira©Copyrighted in Beera kaaya(Ridge Gourd),Peppercorn (Wednesday May 7, 2008 at 6:14 pm- permalink)
Comments (36)

The New Home of Mahanandi: www.themahanandi.org

Weekend Pamper ~ Avocado Face Freshener

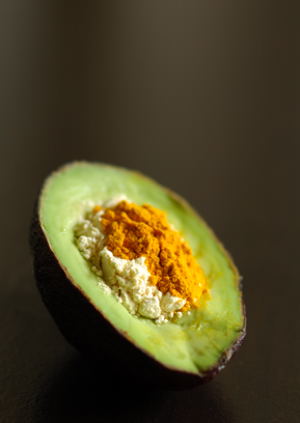
Avocado, Gram Flour and Turmeric
Avocado, Besan and Turmeric

Face fresheners are fun thing I used to do with my sisters, when summer was as long as a lifetime and a month could pass without me ever knowing what days of the week it was. It has been ages since I applied one and I miss the laughter and lazy talk of facemask days.

Traditional teenage face-freshener consists of besan, turmeric, yogurt and honey. They are mixed together and applied to the face. Besan is a soothing skin-scrub and turmeric is known for it’s antibacterial and anti-inflammatory properties. Yogurt and honey, the calming moisturizers make the mask more palatable.:) Buttery avocados are good in place of yogurt, and facemask puts the avocados to great use, particularly when avocados are two for one dollar.

Avocado Face Freshener:
(for two faces, for one rinse)

Avocado pulp – about 3 to 4 tablespoons
Besan (gram flour) – about a tablespoon
Turmeric – about half teaspoon

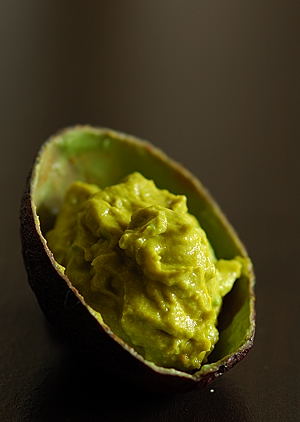
Take avocado pulp in a small cup. With a sturdy spoon mash to smooth. Add besan and turmeric. Combine thoroughly without any lumps. Apply on your face generously. Stay green for about 15 to 30 minutes and then rinse for a happy glow. Relaxing thing to do on a lazy weekend or after a costly trip to Indian grocery.:)

Avocado Face Mask with Turmeric
Avocado Face Mask with Turmeric ~ for Sowmya

Posted by Indira©Copyrighted in Avocado,Gram Flour (Besan),Turmeric (Pasupu) (Sunday April 27, 2008 at 10:25 am- permalink)
Comments (14)

The New Home of Mahanandi: www.themahanandi.org

Presents from Pooja

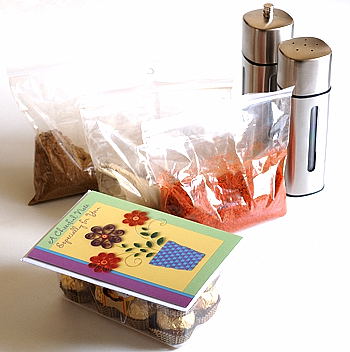
Arusuvai Friendship Package from Pooja

“Oh my! She shouldn’t have to” I thought while opening the parcel.

Aachari, garam and jaljeera – three types of masala powders, all homemade. Hazelnut chocolates. Stainless steel pepper mill and saltshaker. And a greeting card.

When I first started food blogging, I knew it was something I would enjoy, but I had no idea how much fun it could be. Neither a sweet talker nor a social butterfly, essentially a social hermit and a solitude seeker, I have never expected neither attention nor affection. But that’s exactly what food blogging has brought to my life. It has been an Arusuvai kind of experience. (Arusuvai means six tastes in Tamil and refer to theepu-sweet, karam-hot, kassappu-bitter, pulupu-sour, uppu-salt, tuvarpu– like umami, a special taste that one gets from raw vegetables and herbs.)

Without a doubt, one of the best aspects of this arusuvai experience has been the surprise gifts that led to special relationships. It happened again last week. Pooja of My Creative Ideas has sent me a friendship package. I’ve been following Pooja’s writings since she started her blog. Cheerful personality, creative nature with childlike innocence. It’s impossible not to be charmed by Pooja’s passionate flair and delightful exuberance.

Thank you dear Pooja, for this special arusuvai friendship package!

Here is what I have come up with Pooja’s Aachari masala (pickle masala powder). I’ve put together six tastes in an attempt to create an Arusuvai experience, and it has turned out to be a memorable success.

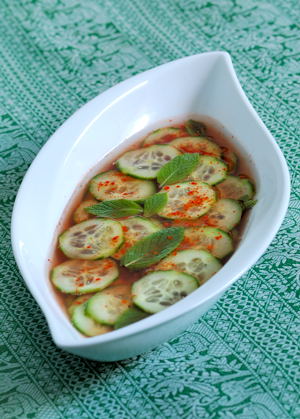
Cucumber-Mint Relish
Cucumber-Mint Relish with Pooja’s Aachari Masala
~ A Convergence of Arusuvai Friendship

Recipe:

1 palm-length cucumber (Moroccan/Indian variety), cut to thin rings
2 sprigs fresh mint – leaves plucked
¼ cup – kokum water
¼ cup – limejuice
1 tablespoon – jaggery gratings
½ teaspoon – Aachari (Pickle) masala
¼ teaspoon – salt

In a cup, take kokum water, limejuice, jaggery, aachari masala and salt. Mix with a spoon for few minutes until jaggery dissolves.

In a shallow serving bowl, place cucumber rounds and mint leaves in layers. Pour the juice. Top with mint leaves. Refrigerate or place in a cool area for about ten minutes. Serve as a light snack or as a side dish to main meal. Munch on a piece of cucumber and mint. Then sip a teaspoon of juice. Sweet, sour, bitter and spicy with some tuvarpu (umami), this cucumber relish will be truly an arusuvai experience.

Kitchen Notes:
Aachari Masala (R/C Pooja) – Dried red chilli, fennel seeds, fenugreek seeds, mustard seeds, Nigella seeds and garlic. Skillet roast in few drops of oil. Add salt and powder them together to fine.

Posted by Indira©Copyrighted in Cucumbers,Kokum (Amsool),Limes/Lemons,Mint,Zen (Personal) (Friday April 18, 2008 at 10:31 pm- permalink)
Comments (12)

The New Home of Mahanandi: www.themahanandi.org

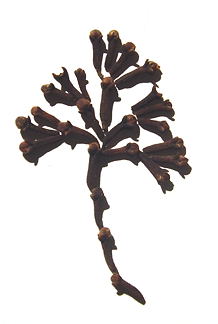
Clove (Laung, Lavanga)

Cloves (Lavanga) - Photo by Anjali Damerla

During the 16th and 17th centuries, Portuguese, French and Dutch, all fought to control the trade of this amazing spice. The Arabs tried to keep the origins of their cloves cargo a closely guarded secret. Columbus sailed west in search of this aromatic spice and found the West Indies. Few years later, Vasco da Gama sailed around Cape Good Hope to India searching for this same spice.

That’s the power of cloves.

Cloves are unopened flower buds of a very attractive evergreen tree. Clove buds are picked when they reach the full size and just about to turn pink. Once picked, the buds are dried in the Sun, at which point they turn reddish brown in color. Cloves derive their name from Latin “clavus” meaning “toenail”. To me it looks more like an engagement ring with some clasps. In Sanskrit, it is aptly called “DevaKusuma”, meaning divine flower.

Cloves work as an astringent, a stimulant, a rejuvenator and an aid to digestion. They help to reduce nausea and hiccups. Cloves increase blood circulation and known to relieve stomach pains.

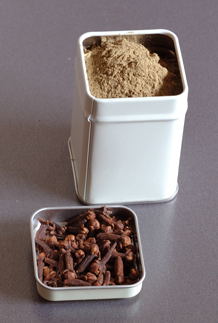
One of the famous Ayurvedic medicines Lavangadi Vati is mainly made of cloves and is used to cure colds, cough and sooth sore throat. Cloves are well known for their antiseptic properties and are essential in toothpaste, tooth powder and mouthwash preparations.

Clove tea is great as a stress buster and for treatment of depression. Steep some cloves in hot water to make Clove tea. This aromatic and warming tea is used to get relief from nausea during travel and it also encourages the body to sweat, which is helpful in fever. Clove tea compress can relieve sore muscle aches.

One of most attractive avatar of cloves is Pomanders (also called Clove Oranges). It’s the most aromatic, easiest and natural potpourri that one can make in 15 minutes. It is a nice project for kids, a perfect gift for many occasions.

Neem-Clove Tooth Powder - Photo by Indira SingariPomander - Photo by Anjali Damerla
Neem-Clove Tooth Powder ………………… Pomander

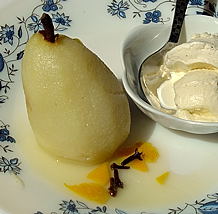
How about using cloves in dessert? Cloves are added to Apple pie, Pumpkin pie and Apple cider. Another interesting and simple dessert is Poached Pears with Cloves and Cinnamon.

Recipe:

3 Pears (choose ripe but firm ones)
4 cups water
7-8 cloves
2 cinnamon sticks
Zest and juice of 1 orange
¾ cup sugar

Boil water with cloves, cinnamon, orange zest. Once water starts boiling, add orange juice. Peel the pears and place them in the water. Cover and simmer for about 12-15 minutes. Take the pears out and boil the water for another 15 minutes until it concentrates to thick and syrupy.

Serve poached pears with some syrup drizzled over it and some ice cream on the side.

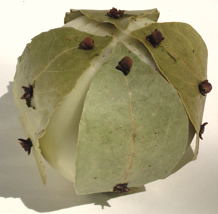
Cloves are an essential ingredient in many masala powders and used as whole or ground in traditional Indian recipes. Bechamel sauce, one of the mother sauces in French cuisine, is made with something called Onion pique (pee-kay). Onion pique is a peeled, raw onion that is studded with bay leaves and cloves. Onion pique is a simple way to flavor the sauces and the soups. This cute website even has a song on onion pique.

It is amazing how much flavor and aroma Mother Nature has packed in this tiny, unopened flower. Mother Nature sure is very humbling and awe-inspiring.

Onion PiquePoached Pear in Clove Syrup
Onion Pique ……………. Poached Pear in Clove-Sugar Syrup
~ for Think:Spice-Cloves at Canela and Comino

by Anjali Damerla

Health Notes:
Cloves: Nutritional Profile

Posted by Indira©Copyrighted in Anjali Damerla,Cloves(Lavangam),Fruits,Herbs and Spices (Thursday April 17, 2008 at 12:31 pm- permalink)
Comments (17)

The New Home of Mahanandi: www.themahanandi.org

Maamidi Thurumu Pacchadi

Grated, Green Mango Pacchadi

Ugadi is just around the corner. So, it’s mango time at my home and I made thurumu pacchadi in advance for festival day meal on Ugadi. The preparation took about 20 minutes. Very easy, a delight to the senses, I like this pacchadi very much.

Mango Thurumu (Grated Unripe Mango)
Maamidi Thurumu (Maamidi = Mango, Thurumu = Grate)

Preparation:
(makes about two cups of pacchadi)

Green, Unripe Mango:
Take one extremely firm, unripe mango of medium size. Wash. Lightly peel and remove the skin. Using a grater, grate the mango until you reach the seed on all sides, like shown in the photo above. Mango gratings came about two cups for me.

MethiMustard Seasoning:
Heat a cast-iron skillet. Add and dry-roast without oil:
one teaspoon each – methi seeds and mustard seeds to two minutes.
4 Indian variety, dried red chillies to pale brown.
Take them all in a mixer or spice grinder. Add half-teaspoon salt. Grind to fine powder.

Popu or Tadka:
In a tiny pan, heat a teaspoon of peanut oil. When oil is hot, add and toast in this order, constantly stirring:
6 half-inch pieces of dried red chillies to pale brown
8 curry leaves to golden
¼ teaspoon of urad dal to red color,
A pinch each – cumin and mustard seeds
When seeds start to pop, add a pinch of asafetida (hing, inguva)

Putting Together the Mango Turumu Pacchadi:

1. Take mango gratings in a vessel. Add the methimustard seasoning. Combine well.

2. Add the toasted tadka ingredients to the mango gratings. Mix thoroughly.

3. Store the pacchadi in a clean jar. Stays fresh for two to three days upto a week, and traditionally we do not refrigerate. Just don’t use wet spoons.

Mango turumu pacchadi tastes wonderful when mixed and eaten with rice and dal or sambar.

Mango Pacchadi
Mango Thurumu Pacchadi for Ugadi

Recipe Labels:
Amma, Traditional India-Vegan, Vitamin and Mineral Rich food

Posted by Indira©Copyrighted in Amma & Authentic Andhra,Mamidikaya (Green Mango),Methi, Kasuri Methi,Mustard Seeds (Aavalu) (Friday April 4, 2008 at 4:30 pm- permalink)
Comments (11)

The New Home of Mahanandi: www.themahanandi.org

Ragi Kudumulu with Garlic Ghee

Ragi kudumulu is an old classic from Andhra Pradesh, India. Dumplings like kudumulu are prepared with ragi flour and steam-cooked in flavorful kura (curry). The main ingredient of kura in which ragi kudumulu are steamed changes with the seasons. Sometimes the kura is prepared with vegetables, sometimes with meat or a combination. Depends on the cook’s mood and the market prices. Popular in agricultural community, this protein powerhouse is a build or nourish the muscle-on-the-bone kind of one-pot meal.

For Mathy’s Jihva, I have been thinking about a new recipe using garlic-ghee. Then I thought, why not incorporate garlic-ghee into ragi dough and make kudumulu with it. When people say developing new things or techniques is like constantly rediscovering the wheel, it’s very true, indeed. Years of nutritional strategies and accumulated wisdom among cooks throughout the world before us are right to benefit us all through good times and hard times.

Ragi kudumulu is one such nutritional strategy, and here it is in a new avatar. An acquired taste, but a delight to an adventurous palate. Give it a try.
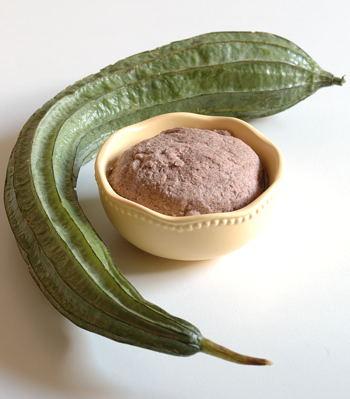
Ridge gourd and Ragi Dough
Ridge Gourd and Ragi Dough (Beerakaya mariyu Raagi Mudda)

Recipe:
(for two adults, for two meals)

Recipe happens in three steps. 1. Prepare Ragi dough for Kudumulu.
2. Prepare kura (curry or kurma) for Kudumulu. 3. Prepare kudumulu and steam-cook.

Step 1:

Take one-cup ragi flour in a bowl. Add a tablespoon of garlic-ghee puree and quarter teaspoon salt. Stir in a tablespoon of garlic infused ghee. Sprinkling few tablespoons of hot water, make soft dough. Cover and keep it aside for about 15 to 30 minutes. The dough firms up on resting.

Step 2:

While the ragi dough is resting, prepare kura for ragi kudumulu. It can be with either vegetables, (traditional choice: Indian broad beans, silk squash and ridge gourd), or meat (chicken or mutton). For my meal today, I have prepared Ridge gourd curry (beerakaya kura) for ragi kudumulu.

– – 2 ridge gourds: peel, rinse and cut into ½ inch, big pieces
– – 2 tomatoes and one onion – finely chop to small pieces

Heat a tablespoon of garlic infused ghee in a wide, deep-bottomed skillet. Add and toast a pinch each – cumin and mustard seeds. When seeds start to pop, add the onion. Sauté to soft. Then tomatoes. Add about a cup of water and cook the tomatoes to mush on high heat.

While tomatoes are cooking, prepare the kura masala:
For kura masala: Two tablespoons of grated coconut, 4 green chillies and an inch of peeled ginger, two cloves, one inch cinnamon, a teaspoon each – coriander seeds and cumin. Take them all in a mixer. Add a pinch of salt. Blend to fine consistency.

Tomatoes will be cooked to soft by now. Mush them by pressing with a sturdy spoon. Add the ridge gourd pieces and the masala paste to the skillet. Also half teaspoon each- turmeric and salt. Stir in another cup of water. Close the lid and simmer on medium-low heat.

Step 3:

While kura is cooking, quickly prepare Ragi kudumulu.

Take the ragi dough out onto a plate. Knead and divide into small, about key lime-sized rounds. The dough came about 16 rounds for me. Take a round on your palm, and close the fingers around the round to make a fist. The shape changes to cylindrical with conical ends. That’s what we call “Kudumu” shape in Telugu. Compared to the round shape, the kudumu shape will have more surface area exposed, and that would facilitates thorough steaming. Prepare all rounds in this way. You have to make them fast in two to three minutes.

Place them one after another neatly in simmering kura. Close the lid tightly, and steam for about 15 to 20 minutes on medium-low heat. Ragi kudumulu have to be cooked properly inside. To test, take one out and cut into half. A well-steamed one has the color of red soil (erra mannu) that you see in moderate rainfall areas like Telengana, Andhra Pradesh. On taste, they should have the comforting texture of a well-chewed bubblegum.:) Sticky with unique ragi flavor. The size/volume also increases on steaming.

Garnish with fresh coriander leaves and lime juice. Serve hot. Until serving time, cover the skillet with tight lid and keep the kura hot on low heat.

How to serve: Place four ragi kudumulu in a wide bowl or plate along with vegetable or meat pieces. Pour the tomato-masala gravy around.

How to eat: With fingers or spoon, take a portion of ragi kudumu with kura. Blow to cool for once or twice. Eat. Ragi flour has gummy properties and it would stick to the mouth roof. So don’t chew on the kudumu, just swallow. The masala gravy and vegetables or meat pieces, together they make a memorable meal experience.

Why: Ragi is rich in Iron, minerals and protein, gluten-free, and is known for it’s health benefits. Ragi is cultivated from ancient times in many parts of India, and in fact the name Ragi is a Sanskrit word. So, Ragi consumption means nourishment to the body and also nourishing the traditional agricultural practices.

Here is the preparation process in photos:
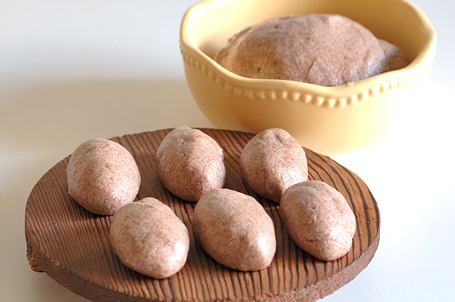

Ragi Kudumulu and Ragi Dough
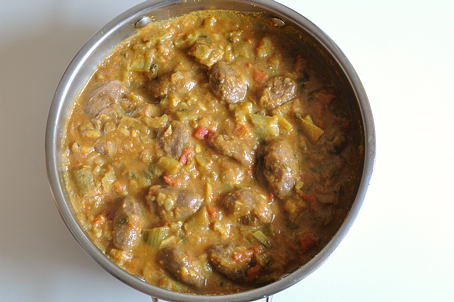

Steamed Ragi Kudumulu in Ridge Gourd Kura
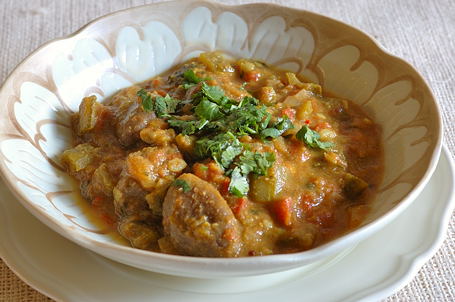

Ragi Kudumulu Flavored with Garlic Ghee in Ridge Gourd Kura ~
Meal today and My Contribution to Mathy’s Garlic-Jihva Event.

Notes:
Ragi flour is available in most Indian grocery shops.
Kudumu is singular and kudumulu is plural in Telugu language.
Traditional Kudumulu from other parts of Bharath:
Jonna (Corn) Kudumulu from En Ulagam
Jowar-wheat Kudumulu from My Food Court

Do you have this type of tradition where kudumulu or dumplings are steam-cooked in the stew itself?
Posted by Indira©Copyrighted in Amma & Authentic Andhra,Beera kaaya(Ridge Gourd),Garlic (Vellulli),Ghee,Ragi,Ragi Flour (Tuesday April 1, 2008 at 5:45 pm- permalink)
Comments (26)

The New Home of Mahanandi: www.themahanandi.org

Garlic Infused Ghee

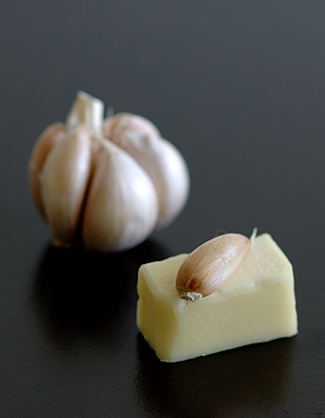
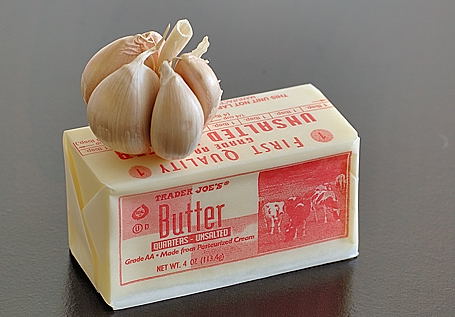
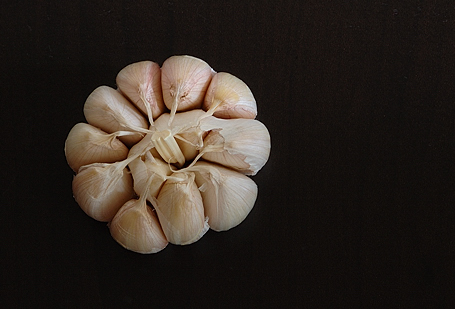
Garlic and butter for garlic-ghee

Garlic roasted in ghee was a favorite summer time snack growing up. It was the only way I could eat garlic when I was a child. They are also specifically prepared and fed to new mothers after delivery. Garlic is well known for it’s disease-preventing properties and toasting in ghee makes garlic more palatable. So, it’s no wonder garlic-ghee combination has traditional roots. Also, garlic seems to enjoy ghee’s company. The special affinity between them is evident by the deep blush and the sweetness of garlic when ghee is around. Even the aroma changes to stimulating from another “s” type.:)

The following is a recipe that I have come up with while playing in the kitchen yesterday afternoon. I started out with the idea of preparing garlic-infused ghee, then during the process I realized I could make two types of garlic-ghee. Garlic infused ghee and garlic pureed in ghee. Both of them tasted so good and the aroma was wonderful, they have made the whole process of cooking a great adventure instead of an annoying chore. And with garlic-ghee on hand, I know miracles are possible with many savory entrées.

Recipe:

The following quantity makes about one cup of garlic-infused ghee and quarter cup garlic-ghee puree.

Unsalted butter – 4 OZ (113 grams)
Garlic cloves – 6 to 8, skins peeled
Black peppercorn – 8
Salt – a pinch

Tea or coffee strainer
Small mortar and pestle

For preparation, follow the photo pictorial below:

Garlic and butter for garlic-ghee

1. Finely slice each garlic clove into thin layers. Inside you see white or pale green stem. The pure white ones are preferable for this recipe, and discard the garlic if you see any green growth inside.

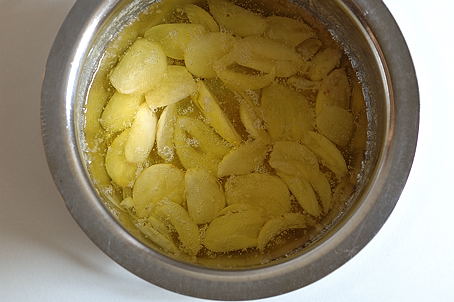
2. Place the garlic and butter in a medium saucepan. Bring to a simmer over medium-low heat.

Garlic simmering in ghee
The garlic and ghee will look like this in the beginning.

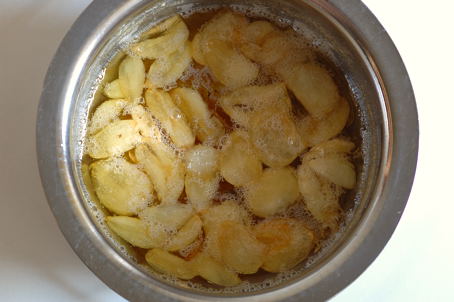
Garlic simmering in ghee

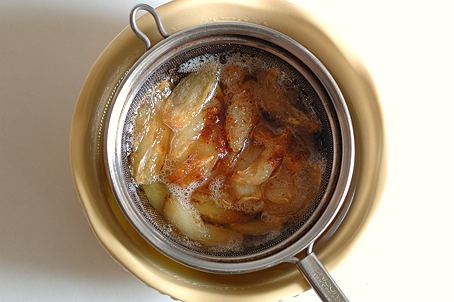
3. After about 20-30 minutes of slow simmering, the butter changes to crystal-clear, aromatic ghee. Pale reddish-brown sediment forms at the bottom of the pan. The garlic also changes to soft and golden. Turn off the heat now.

Straining out the sediment and garlic from ghee

4. Pour the garlic-ghee through a strainer into a cup. The golden sediment and garlic will get separated from garlic-infused ghee.

Preparing Garlic-ghee Puree

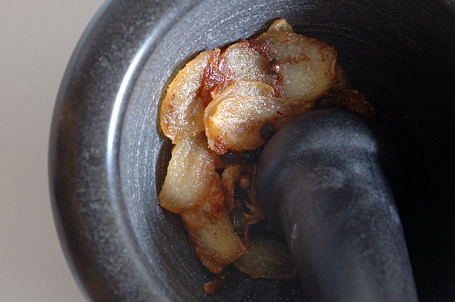
5. Take the contents of strainer in a mortar. Add peppercorn and salt. Gently mash them to coarse paste.

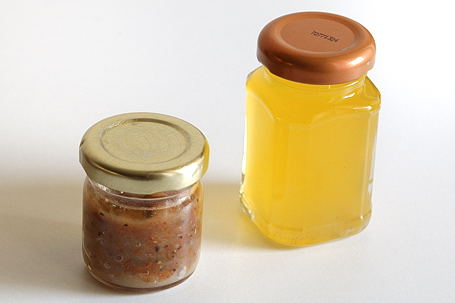
6. Allow the garlic-ghee puree and garlic-infused ghee to cool. Store them in clean jars.

Garlic-Ghee Puree and Garlic-Infused Ghee
Garlic-Ghee Puree and Garlic-Infused Ghee ~ for Mathy’s Garlic Jihva

Greens, vegetables, dals, meat and fish, just a teaspoon would be enough and both, the garlic puree and ghee make wonderful additions to any savory preparation.

Posted by Indira©Copyrighted in Garlic (Vellulli),Ghee,Jihva For Ingredients (Monday March 31, 2008 at 1:42 pm- permalink)
Comments (42)

The New Home of Mahanandi: www.themahanandi.org

Jihva for Garlic

Garlic, Vellulli
Garlic (Vellulli, Lasoon) ~ for Mathy’s Jihva

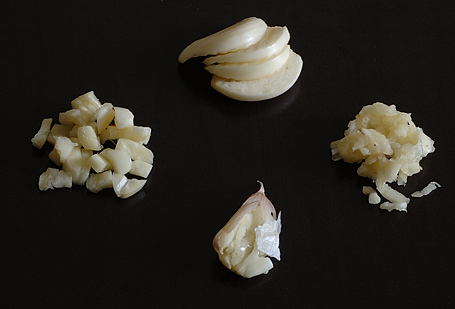
For me, the taste of garlic changes with the way it is cut. I usually finely chop the garlic to tiny pieces and toast them in oil or ghee, as a part of the popu preparation for dals and curries. My latest thing is slivering. The garlic cloves here are so big that they can be easily sliced into thin layers like decorative almonds. The large size also makes it easy to hold and grate garlic like we do ginger and coconut. Whenever I find teensy-weensy garlic, which is a rare event in this size-obsessed land, then I simply follow my mother’s method and whack it with either the pappu gutti or the pestle. This simultaneously flattens the clove, releases precious juices, and facilitates removal of the skin. It is my preferred method of garlic preparation. To peel large quantities of garlic, following an old-time tip, I simply add the garlic cloves to warm water for about one to two minutes. Skins will then slip off easily.

So, which method you prefer and how do you prepare garlic for cooking?

Chopped Garlic ~ Four Ways
Finely Chopped, Slivered, Grated and Whacked
Garlic Preparation, Four Ways ~ for this Week’s Indian Kitchen

Posted by Indira©Copyrighted in Amma & Authentic Andhra,Garlic (Vellulli),Indian Ingredients,Indian Kitchen (Sunday March 30, 2008 at 9:29 pm- permalink)
Comments (25)

The New Home of Mahanandi: www.themahanandi.org

Artisan Food ~ Healing Herbal Rice

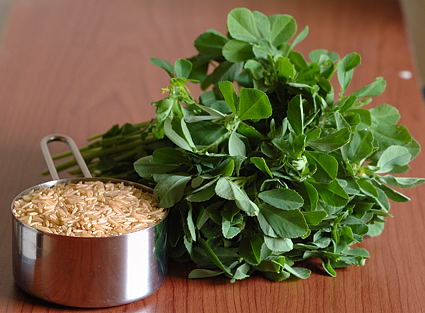
Brown Basmati and Fresh Methi

Nutritional supplements and natural herbal remedies don’t have to be in capsule form. Example is this healing herbal rice I have prepared for our meal yesterday.

Three types of fresh herbs with potent medicinal properties and brown basmati, a nutritionally supreme rice are cooked together. The result –

a tasty and tantalizing herbal basmati.

Possessing great inner strength and capable of exerting strong nutritional benefits, this herbal rice with healing fire in its heart is the kind of meal that would provide a nourishing surround to a flourishing imagination.

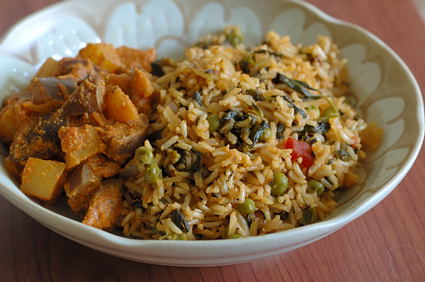
Healing Herbal Rice with Brown Basmati
Healing Herbal Rice with Potato Kurma ~ Celebrating St. Patty’s Day

Recipe Details:

Artisan Food: Healing Herbal Rice
Ingredients: Brown Basmati, Methi, Mint and Dill
Skill level: Easy. From Novice to Expert
Labels: Vegan, Wholesome, Herbal and Iron rich Food
Price: $2.00
Format: PDF

Healing Herbal Rice PDF

Buy Now

How it Works: After payment via Paypal, PDF file will be emailed to you to download the recipe. For any questions about the recipe or the download process, please email me at mailmahanandi@gmail.com .

****************

Artisan Food Aim and Purpose:

“Artisan Food ~ Revenue through Recipes” program aims to raise money, however small the amount, to support the children at Swami School at Nandyala. This will also lend a sense of purpose to my food blogging, and help me feel like I am accomplishing something through my activity in this Web world.

Previously in Artisan Food:

Artisan Photo Gallery

Posted by Indira©Copyrighted in Artisan Food,Basmati Rice,Biyyamu (Rice),Brown Basmati,Methi, Kasuri Methi,Mint,Suwa (Dill) (Monday March 17, 2008 at 5:46 pm- permalink)
Comments (3)

The New Home of Mahanandi: www.themahanandi.org

Kokum (Garcinia Indica, Amsool)

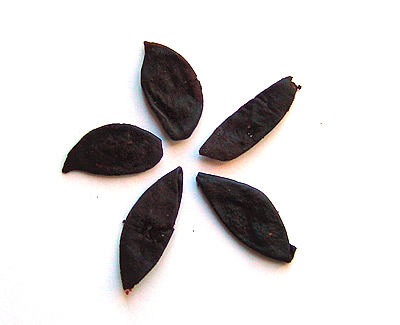
Kokum (Amsul, Amsool, Sol)
Kokum (Amsool, Amsul, Sol)

The kokum tree is a graceful tropical tree and grows in the Konkan, Malabar and Kanara regions of Western India that are gifted with rich soil, adequate rainfall and very good sunshine. Kokum tree reaches a height of 10-15 meters, has dark green foliage and a pyramidal shape. The tree blooms from November to February and the fruits ripen in April-May. The kokum fruit ratamba looks similar to small variety plum, and has dark purple color when ripe. Fruits are harvested when ripe and only the rind is preserved by drying in the Sun. That is Kokum. Sometimes salt is rubbed onto the rind to speed up the drying process.

Just like tamarind, kokum is mainly used as a souring agent. Kokum has a fruity and tangy flavor. Kokum fruit is considered to act as a Cholagogue, and is also used in treatment of skin rashes caused by allergies. Kokum fruit is steeped in sugar syrup to make Amrut-Kokum, and is used to avoid sunstroke.

When buying kokum, look for soft, pliable rinds. Good quality kokum is dark purple in color. I have seen Kokum with white crystals on it and it just means that too much salt was used in the drying process. No worry. Just wash the kokum rinds in cold water before using.

Another avatar of kokum is Kokum Butter, an excellent emollient, and is now used by the cosmetics industry for lotions, creams, lip balms and soaps. Kokum butter has a relatively high meting point, considered one of the most stable exotic butters (Shea butter, cocoa butter, etc) and hence doesn’t need refrigeration. It is extracted from the kokum seed and is supposed to reduce degeneration of skin cells and restore elasticity.

Ayurvedic medicine considers Vrikshamla, Sanskrit name for kokum, to be pitta pacifying and uses the fruit, root, bark of Kokum tree to treat acidity, pitta related allergies and some abdominal ailments.

Konkani cuisine has given the world an amazing gift of Sol Kadhi, an appetite arousing drink prepared with kokum and coconut milk. Sol kadhi involves almost no cooking. Some enjoy Sol Kadhi with rice and roti, but I love to drink it just by itself.

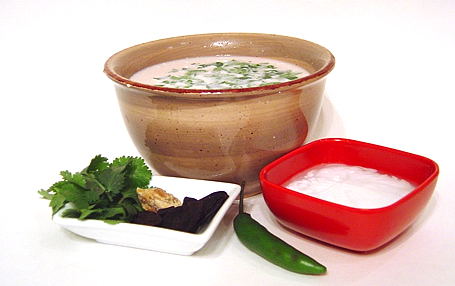
Sol Kadhi Ingredients
Coconut Milk, Green Chilli, Kokum, Cilantro, Cumin and Jaggery

Sol Kadhi

5 or 6 Kokum
1 cup coconut milk (Homemade, or Canned unsweetened type)
1 green chilli
½ teaspoon cumin seeds
Sugar or jaggery, and salt – to taste
2 fresh sprigs of fresh cilantro

Soak Kokum in a cup of warm water for half an hour, to soften and to release juice.

Grind green chilli and cumin to fine paste.

Once the kokum water turns pink, take it in a big cup or glass. Add coconut milk. Stir in sugar or jaggery and salt to taste. Also the cumin-chill paste. Mix. Garnish with cilantro leaves and drink immediately. Do not leave kokum soaked in as it will make the sol kadhi sourer than normal. (Some also like to add a pinch of grated ginger and garlic.)

During winter, I warm up the sol kadhi for few minutes and enjoy it as a soup. During hot summer months, I prefer to take it at cold or at room temperature.

If you have never tried Kokum before, then Sol Kadhi would be a good start. The agreeable flavor and sweet, acidic taste will get you hooked on this amazing Kokum drink.

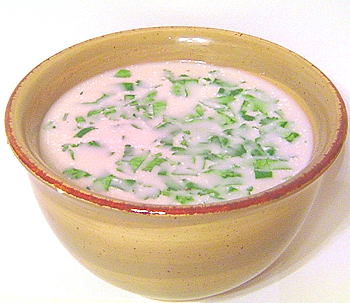
Sol Kadhi
Soul’s Awakening in Baby Pink ~ Sol Kadhi

By Anjali Damerla

Previously on Anjali’s Supreme Spice Series: Herbs and Spices

Posted by Indira©Copyrighted in Anjali Damerla,Coconut (Fresh),Herbs and Spices,Kokum (Amsool) (Thursday January 24, 2008 at 12:42 pm- permalink)
Comments (25)

The New Home of Mahanandi: www.themahanandi.org

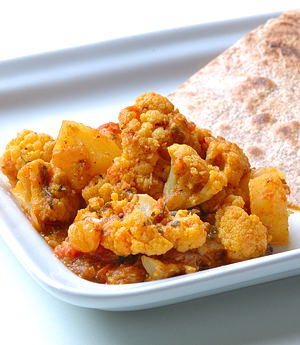
Aloo Gobi with Kasuri Methi

You know how it is sometimes. You prepare a new recipe, you like it so much, you have to make it again the next day. That’s what happened to me with cauliflower. I loved the gobi I prepared last weekend very much, I made it again today. This time, I also added few potatoes to the pot. The friendship between brain-like cauliflower and belly-like, comforting potatoes is legendary. The fragrant kasuri methi and the sweet golden raisins addition made this lovely friendship even more endearing to me. I can surely say that this is the best cauliflower curry I have ever made next to my amma’s recipe. Good use of cauliflower that’s in season.

Aloo Gobi with Kasuri Methi and Golden Raisins

Recipe:

3 cups cauliflower florets
1 cup, cubed potato
2 cups, finely chopped tomatoes
½ cup, finely sliced onion
Seasoning:
1 tablespoon each – grated coconut, and kasuri methi
½ teaspoon each, or to taste – Turmeric, red chilli powder and salt
¼ cup – golden raisins
For popu or tadka:
1 tablespoon peanut oil
1 garlic, finely chopped and a pinch each- cumin and mustard seeds

The preparation is easy. Heat oil in a sturdy pot over medium heat. Add and toast garlic to pale brown, and then cumin and mustard seeds. When seeds start to pop, add onions. Saute to soft. Next goes the tomatoes. Cook them to soft on high heat, and mush them using a sturdy spoon or spatula.

Add potatoes, and cook to just tender. Add cauliflower. Also the items listed in seasoning, along with half cup of water. Mix. Cover the pot and simmer. When cauliflower reaches the tenderness you desire, turn off the heat. Serve the curry hot with rice or with roti.

Kasuri methi adds wonderful aroma, whereas golden raisins soaked up in spices add khatta-metha taste to aloo-gobi. Delightful!

Posted by Indira©Copyrighted in Cauliflower,Methi, Kasuri Methi,Potato (Tuesday November 27, 2007 at 5:40 pm- permalink)
Comments (26)

The New Home of Mahanandi: www.themahanandi.org

Gobi Kasuri Methi with Golden Raisins

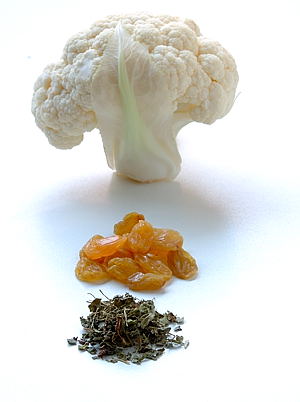
Cauliflower, Golden Raisins, Dried Fenugreek Leaves
Gobi, Golden Raisins, Kasuri Methi

Recipe:

Skillet
Peanut oil, slivered garlic, cumin, and mustard seeds for tadka
Red onion, ripe tomatoes and fresh cauliflower
Kasuri methi, golden raisins, grated coconut, turmeric, chilli powder and salt
With puri, chapati or with rice.

Puri and Gobi Kasuri Methi with Golden Raisins
Puri and Gobi Kasuri Methi ~ for Weekend Brunch


Feel free to size up the recipe, for a sweet tasting and serenely scented Gobi Kasuri methi.
From Hindi to English, Gobi=cauliflower, Kasuri Methi=Sundried Fenugreek Leaves

Posted by Indira©Copyrighted in Amma & Authentic Andhra,Cauliflower,Golden Raisins,Methi, Kasuri Methi (Monday November 26, 2007 at 1:10 am- permalink)
Comments (22)

The New Home of Mahanandi: www.themahanandi.org

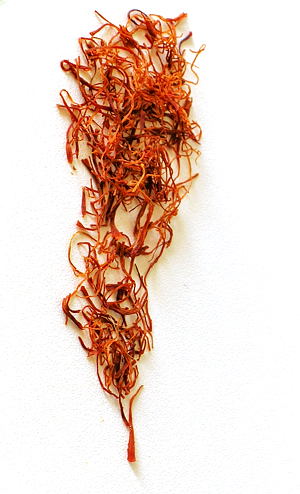
Saffron (Kesar, Kumkuma Puvvu)

Saffron, Kesar, Kumkuma Puvvu (Copyrighted Image by Indira Singari)

The majestic Saffron is one spice that rightfully deserves our respect. The number of hours spent plucking the saffron flowers and then the stigmas is just mind blowing. Something like 50,000 flowers, a football field-sized patch, must be grown to produce just one pound of saffron.

Saffron is the stigma of crocus flower, so the botanical name Crocus sativus. Harvest season lasts for 2 weeks and the flowers are picked each morning. The 3 stigmas in each blossom are hand-picked. After plucking, the stigmas are light roasted which dries the stigmas and fixes the flavor in the threads. This delicate stage of roasting is done only by the most expert of farmers. Even as little as a minute too long on the fire and the whole batch would be ruined.

The saffron crocus is sterile and the crop is propagated by corm multiplication. Each corm lasts only for one season and then is replaced by up to 10 cormlets. The size of the corm has a very significant effect on the production of daughter corms, and on the production of flowers and the yield of saffron. Saffron flower is amazingly beautiful and fragrant. It has pale lilac petals with dark colored veins. Saffron crop can tolerate frosts and an occasional snow. It grows in a wide range of soils but thrives in clay-calcareous soil.

Saffron is used in Ayurveda as a good heart tonic for all three doshas, and is also an important ingredient in many Ayurvedic medicines. For example, “Shatavari Plus” has saffron as one of its main ingredients. Saffron has circulatory stimulant properties, is warming and very rejuvenating. Saffron milk is an excellent remedy for Anemia. It is also known to tonify the female reproductive system. The cosmetics industry uses saffron in lotions and creams for its ability to nourish and lighten the skin.

And, of course, we all are familiar with the bright golden yellow Saffron robes of Buddhist monks. The color of their robes speaks volumes of their renunciation. When a young green leaf turns yellow or orange, it falls off from the tree. The Buddhist monks wear yellow saffron robes to constantly remind them to let go and not cling to the earthly pleasures.

Since Saffron and Kashmir are inseparable and I am such a big tea fan, we have to have a cup of Kahva (Kashmiri chai with saffron). This tea is amazingly aromatic and an experience in itself. Here is a very good post on Kahva. Note that this Kahva is different from Kava, a herbal drink from south Pacific.

A classic and simple dessert with Saffron is Shrikhand.

Classic Shrikhand with Saffron:

1-cup whole milk yogurt
1-cup sugar
Saffron – 1 teaspoon, or to your liking
Charoli (chironji) – 1 tablespoon, or to taste
Crushed cardamom seeds – ¼ teaspoon

Tie yogurt in a clean muslin cloth. Keep in a sieve and place a heavy pan over it. Keep overnight to drain all water. Once all water is drained from the yogurt, add sugar and mix really well. Sugar must be dissolved completely. Add crushed cardamom, saffron. Serve with charoli on top.

Some of you might remember that I mentioned once about growing mustard seeds and enjoying the beauty of Punjab in my own backyard. Now, how about a little Kashmir in your back yard. We can grow our own Saffron!. Looks like some avid gardeners are even growing Saffron in containers. There are a lot of online vendors and nurseries where you can buy the saffron corms. Growing Saffron is time consuming and needs a lot of patience. But I think I am up for this project too.

Now let’s see… I have mustard from Punjab, Saffron from Kashmir… Hmm … what’s next?

by ~ Anjali Damerla of Supreme Spice

Notes:
For a fabulous array of saffron recipes: Think Saffron

*************

Play, Learn and Earn Rice to Help
What was the score, and how many grams?:)

Posted by Indira©Copyrighted in Anjali Damerla,Herbs and Spices,Saffron (Kesar, Kumkum Puvvu) (Thursday November 15, 2007 at 4:07 pm- permalink)
Comments (17)

The New Home of Mahanandi: www.themahanandi.org

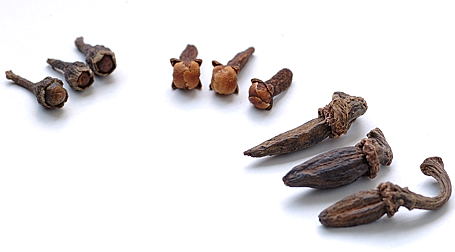
Naaga Keshar, Cloves and Marathi Moggu

NaagaKeshar, Cloves and Marathi Moggu
Clockwise from left: Naaga Keshar, Cloves and Marathi Moggu
Special Spices from India ~ for This Week’s Indian Kitchen

Posted by Indira©Copyrighted in Herbs and Spices,Indian Ingredients,Indian Kitchen (Sunday October 14, 2007 at 1:52 pm- permalink)
Comments (29)

The New Home of Mahanandi: www.themahanandi.org

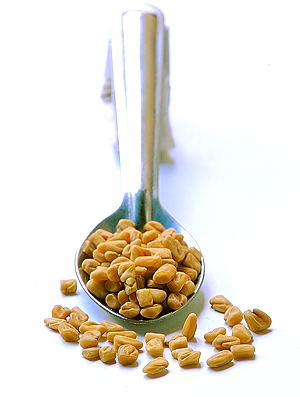
Fenugreek Seeds (Methi, Menthulu)

Fenugreek Seeds (Menthulu, Methi)

The one flavor category that is fading away from our meals today is the “bitter” flavor. The bitter taste category is considered to be one of the most healing and cleansing tastes by Ayurveda. Use of fenugreek seeds in traditional tadka is a good way to incorporate the bitter taste once in a while.

Fenugreek (Trigonella foenum-graecum) is a member of the pea family. Fenugreek plant is an annual with yellowish-white flowers and its pods contain 10-20 seeds. The common method of harvesting is to uproot the whole plant, allow them to dry in the Sun and then remove the seeds by threshing.

Whole fenugreek seeds have no aroma but once ground, they release flavor and sharp, spicy aroma. These seeds are very high in protein. 3.5 ounces (100 gms) of uncooked seeds supply 23 gms of protein. This is almost equivalent to the amount of protein found in a 3 -3.5 ounces serving of meat, fish or poultry.

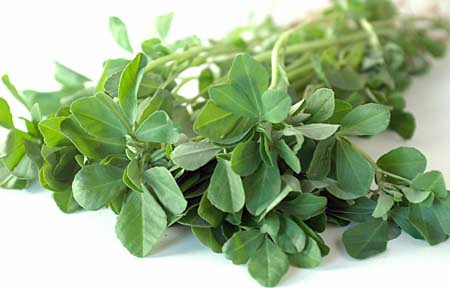
Fresh Fenugreek, Menthi Kura, Methi
Fresh Fenugreek Leaves (Menthi Kura, Methi)

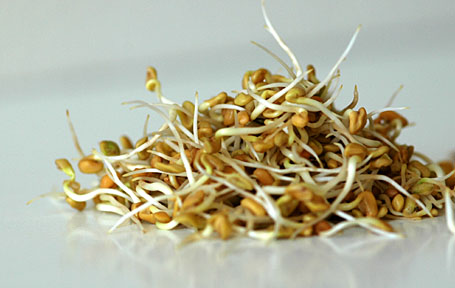
Methi (Fenugreek) Sprouts
Fenugreek Sprouts (Methi, Menthula Molakalu)

Fenugreek seed sprouts are used in salads. These sprouts are rich in iron and phosphorous. Juice from the sprouts is considered a cleanser of the kidneys and bladder.

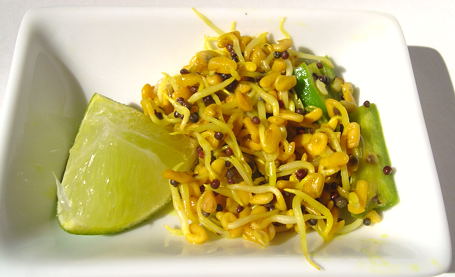
In Maharashtra, we make an interesting pickle with methi sprouts, called Methi-Mirchi. This pickle stays good just for one to two days .

¼ cup fenugreek sprouts
1 Green Chilli – slit in middle and then cut into small pieces
2 tsp Mustard seeds
Pinch each – Asafoetida and turmeric
1 Lemon and salt to taste

Heat oil. Add mustards seeds, asafoetida, and turmeric. When mustard seeds start to pop, then add fenugreek sprouts and green Chilli. Mix well. Take off the heat. Add salt to taste and squeeze lemon juice. This pickle has a great combination of bitter, spicy and sour tastes.

Methi-Mirchi Pickle ~ From Anjali's Kitchen
Methi-Mirchi Pickle ~ From Anjali’s Kitchen

Fenugreek seeds are antiseptic and warming. It also has expectorant qualities and is used to ease coughs and sore throat. Fenugreek tea is used as a Blood builder and cleanser.

To make fenugreek tea – bruise 2 tablespoons of seeds. Add four cups of water and bring to a boil. Cover and simmer for ten minutes. Add honey or lemon to flavor.

One of the five spices in Panch phoran is fenugreek seed. They are also added in curry powder, sambar powder and essential picking spice. It’s a very common practice for most of us to add a few fenugreek seeds to tadka when making everyday dal.

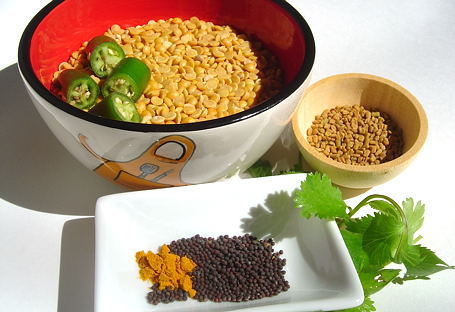
Dal-Methi with fenugreek seeds is a common dal among us Maharashtrians. I make this dal at least 2-3 times a month and it’s a good way to introduce fenugreek seeds to kids.

To one cup toor dal, add two to three teaspoons of fenugreek seeds and two cups of water. Pressure-cook to soft. Heat oil. Add mustard seeds, turmeric, green chilli and asafoetida. Add the toor dal-methi mix. Cook for two minutes. Season with salt and cilantro. Serve with roti.

Ingredients for Dal-Methi ~ from Anjali's Kitchen
Ingredients for Dal-Methi ~ from Anjali’s Kitchen

Ah! And how can we talk about fenugreek seeds and not talk about Fenugreek Seed Laddu (Methi Laddu)? Considered to be good for health and winter warmers, methi laddus are consumed in winter season to ward off cold, cough and fever. Here is a simple methi laddu recipe from Bawarchi.

It’s also a common practice in many parts of India to give methi laddu to the lactating mothers. I had these laddus after my daughters birth and many who have tasted these laddus would agree with me that they do not bring out the “hmm…” feeling. But Lakshmi Ammal of “Cook Food and Serve Love” has come up with an interesting Sweet Fenugreek Pongal. I wish I knew about this pongal eight years back.:) (Since fenugreek seeds are considered a uterine stimulant, they are avoided during pregnancy.)

Packed with protein and punch, and with so many benefits, it’s no wonder that the tiny fenugreek seeds have earned a very respectable place in our Indian spice box.

~ Guest Article by Anjali Damerla of Supreme Spice

******************

If you have questions about fenugreek seeds, please post them in comments section. Anjali would be glad to answer them for you. Thanks.

Posted by Indira©Copyrighted in Anjali Damerla,Indian Ingredients,Menthi Kura(Fenugreek),Methi, Kasuri Methi (Thursday October 4, 2007 at 6:16 pm- permalink)
Comments (44)

The New Home of Mahanandi: www.themahanandi.org

Previous Page »