Mahanandi

Living in Consciousness ~ Indi(r)a’s Food and Garden Weblog

Semiya Payasam

Photo Purchase Keyword: Semiya, Payasam
(Please don’t photosteal. Make a photo purchase to digital download and to print.)

From hearing the Purandaradasa’s spiritual keerthana “Rama nama payasakke“, we will know that the semiya payasam we prepare at home has at least 500+ years of history. The recipe ingredients and the method have remained unchanged all these years. That is the greatness and as well as the simplicity of this recipe. What has changed is our attitude and regard towards such honest and soulful food. But that is a topic for another time. For now, continuing the 500 plus year old tradition, here is how I prepared the semiya payasam at my home for Neivedyam.


Semiya, Sugar, Ghee, Milk, Cashews and Draksha ~ Ingredients for Payasam

Recipe:

4 cups whole milk
½ cup cane sugar, ( or to taste)
Fine semiya, one bunch, about the size that fits baby’s fist (10″ long)
2 tablespoon of ghee, melted
16 cashews and 16 golden raisins
4 cardamom pods, seeds powdered

Heat ghee in a wide pot. Add and toast golden raisins to pink balloons first, and then cashews to pale gold color. Remove them in to a plate.

In the same pot, add and toast the semiya for one to two minutes. (This is to remove the raw wheat smell of semiya and I usually do it, but this is optional.) Take the toasted semiya to a plate and keep aside.

In the same pot, add the milk and stir in sugar. Bring the milk to a rolling boil. Reduce the heat and add the semiya. Also the cashews, golden raisins and cardamom powder. Simmer on slow heat for ten minutes. The fine semiya floats like water lily stems in a pond of sweetened milk. That is the consistency we want in semiya payasam.

Serve warm or cold, and enjoy this fine, honest dessert in the name of tradition.


A Sweet 500+ year old tradition ~ Semiya Payasam

Note:
Semiya, the fine wheat noodles are a speciality of India. They are prepared with durum wheat flour and water. Semiya is egg free, and that is the major difference between western egg-laden vermicelli and Indian semiya. (Semiya is available at Indian grocery shops).

*************

Posted by Indira©Copyrighted in Amma & Authentic Andhra,Indian Sweets 101,Milk,Naivedyam(Festival Sweets),Semiya,Sugar,Traditions (Tuesday January 15, 2008 at 7:13 pm- permalink)
Comments (14)

The New Home of Mahanandi: www.themahanandi.org

Kalakand


On Krishnatashtami, we celebrate the Bhagavan Krishna’s birthday. The scriptures portray bala (baby) Krishna as a happy and mischievous child with boundless energy and great fondness for all things milk. Milk, yogurt, buttermilk, cream, ghee, venna, and milk based sweets are lovingly offered to bala Krishna during this festival time. In our family, for pooja neivedyam we prepare venna (the cream layer from yogurt) and pala kova or kalakand.

Kalakand, an exquisite milk-based sweet preparation is an interesting process. Concentrated milk called khoya and fresh paneer called chhana are mixed and simmered together with sugar to a luxurious thick, firmness. The mixture is cooled, then cut to squares and garnished with pistachios. That is kalakand of my hometown Nandyala. As you can imagine, the kalakand has a rich taste.

Depending on the khoya-chhana ratio and sugar variety, kalakand is 2 types.
Milky-white kalakand: Three parts chhana and one part khoya together simmered slowly with white sugar for hours. Continuous stirring and low heat cooking result in a pure-white kalakand. It’s a labor intensive process and usually you will find this milky-white kalakand at Indian sweet shops.
Coral-pink kalakand. Chhana and Khoya are in 1:1 or 1:3 ratio and unprocessed, old-world style red sugar (turbinado) sweetens and colors the kalakand. This is the type we prepare at our home. Both varieties taste equally delicious, but I prefer the Coral-pink colored kalakand. Here is how I made it for Krishnashtami prasadam.

Recipe:
(takes about 2-3 hours. Makes about 18 to 20 2x2x1 square shaped Kalakand)

½ gallon whole milk and juice from one lime – to prepare chhana
½ gallon whole milk – to prepare Khoya
2 to 2½ cups – unprocessed cane sugar (turbinado)
1 cup, shelled and unsalted pistachios – coarsely crushed for garnish
Silver or gold foil to decorate the kalakand

2 big, sturdy, wide based pots
Lots of patience. Family or friends on the side definitely will help and make the process more enjoyable.


Chhana for Kalakand

1. Milk: Place the pots on stove-top and add half gallon milk to each pot to prepare chhana and khoya simultaneously.

Chhana: In one pot, once the milk starts to boil, reduce the heat. Add the limejuice (lemon juice) and stir. Within minutes, you will see small clouds like white curds floating on top. Wait till they get bigger (if they don’t, add some more limejuice and stir) and the whey below gets less milky. This process takes few minutes, so wait at least five minutes. Switch off the heat and let it stand for few more minutes. Then pour the whole thing immediately into a clean muslin or cheese-cloth in a colander, over a sink. Gather the curds by twisting the cloth into a firm lump. The fresh paneer called chhana is ready.

Milk simmering thickened milk after 1 hour on the stove
Simmering Milk ………….. Thickened milk (khoya) after 2 Simmering Hours

Khoya: In another pot, once the milk starts to boil and lower the heat and simmer, until the milk gets thick and is reduced to about one fourths of the original quantity. This is khoya. (While thickening, stir frequently. Care must be taken that milk does not stick to the bottom of the pot and burn/black.)

2. Add Sugar: To the khoya, add the freshly prepared chhana (paneer) and sugar. On low heat, cook, continuously mixing, until the khoya-chhana mixture thickens to a waterless-firm lump. This process takes about 45 minutes to one hour.

3. Decorate: Pour the firm mixture onto a plate. Level it evenly and allow to cool completely. The mixture thickens and firms up even more on cooling. With a knife, cut the cooled kalakand to squares or diamonds. Place the gold or silver foil on kalakand and sprinkle pistachios. Offer the jewel like decorated kalakand neivedyam to Bhagavan Krishna and enjoy the prasadam pieces with family and friends.

Kalakand stays fresh up to a week when refrigerated.


Kalakand Cooling


Kalakand Cut to Squares

Kalakand
Kalakand Jeweled with Pistachios ~ for Indian Sweets 101

Posted by Indira©Copyrighted in Indian Sweets 101,Milk,Mitai,Naivedyam(Festival Sweets),Paneer,Pistachios (Wednesday September 5, 2007 at 3:42 pm- permalink)
Comments (64)

The New Home of Mahanandi: www.themahanandi.org

Scrumptious Sabjis ~ Methi Matar Malai

Here is an easy meal idea that will taste like you spent hours in the kitchen, when in reality all you would need to do is pluck few leaves, open few packets and grind some masala paste. 10 minutes in front of the stove, the result would be a very comforting creamy curry that is appropriate for family meal or a gathering of friends.

Speaking of friends get-togethers, we were invited a potluck party yesterday and I prepared some sweets with homemade malai. I kept a small cup of malai to the side to prepare this scrumptious sabji today. Store bought evaporated milk or concentrated almond milk/rice milk also works for this recipe. Give it a try.


from Hindi to English – Methi (Fenugreek), Matar (Peas) and Malai (Cream)

Recipe:

Fresh fenugreek leaves (methi) – 1 cup
Fresh peas (matar) – 1 cup
Malai (cream) – half cup
(homemade or store-bought evaporated milk – unsweetened variety)
2 red potatoes – peeled and cubed to bite sized pieces
Salt and turmeric to taste or half teaspoon each
Peanut oil or ghee – one teaspoon

Masala paste: One small red onion or shallot, one inch size ginger, six green chillies, two cloves, one inch piece of cinnamon stick, one teaspoon cumin and quarter cup of fresh peas (peas are added to thicken the sauce) – Grind to smooth consistency by adding half cup of water in a blender.

Heat oil in a wide skillet.

Add and saute the masala paste for 5 minutes on medium heat until the paste starts to turn red.

Now add one after another, first potatoes, then fenugreek leaves and finally peas. Do a quick stir-fry until the leaves wilt.

Add malai (evaporated milk). Stir in salt and turmeric and about 1 cup of water. (I also added a half teaspoon of jaggery which helps to bring out the sweetness of peas. But this is optional.) Cover and cook for about 15 minutes on medium heat until potatoes and peas are cooked to tender and the sauce thickens. Serve warm. Tastes superb with chapatis or with naans.

My latest find is garlic naan from frozen section of Trader Joe’s. One packet is priced at 2 dollars and contains 4 good sized naans which are prepared in India and vacuum packed. We just have to heat them on stove-top or in oven. The flour, the layers, the garlic topping – very flavorful and quality stuff. Well, they are from India. Need I say more?

Methi Matar Malai with Garlic Naan
Methi Matar Malai with Garlic Naan ~ Our Meal Today

Recipe adapted from Vee’s Past, Present and Me

Posted by Indira©Copyrighted in Baby Potatoes,Menthi Kura(Fenugreek),Milk,Peas (Bataani) (Thursday February 15, 2007 at 2:31 pm- permalink)
Comments (40)

The New Home of Mahanandi: www.themahanandi.org

Pumpkin Halwa with Butternut Squash


Pumpkin Halwa with Butternut Squash and Almonds ~ For JFI:Deepavali Treats

When talented food writer, photographer and blogger Vee of Past, Present and Me announced special edition of Jihva to celebrate Diwali festival, I was really elated and thought it was an appropriate idea. “Jihva for Ingredients” (JFI), is an online food blogging event, created to celebrate the natural ingredients and what they can do for our Jihva.

The ingredients that we use in our cooking may not be constant but love, family and tradition, the natural, real ingredients that we share to celebrate the Deepavali festival are going to be constant and would always be there to sustain us through our life journey. Also if there is one festival that truly unites India, it is Deepavali~the festival of lights. All ages and religions joyously participate – Lighting the divas, sharing sweets, presents or enjoying firework displays. The festival has something for everyone. Even the grinch among us would shine and smile during this time.

Deepavali is also about giving and receiving a second chance in life and I am glad to share with you my second chance with pumpkin.:) To tell you the truth, I am not a big fan of pumpkin, I never was. My dislike of this vegetable started in my childhood, continued through upto now. But after seeing several of my fellow food bloggers’ fabulous creations with this vegetable, I too wanted to join the fun. But would the pumpkin accept me, I was skeptical. So I took the help of almonds, milk kova and of course our true friend that would instantly bring joy to any occasion, ‘the sugar’. With the help of all these ingredients I have prepared pumpkin halwa with butternut squash. Boy, oh boy, what a delight that was. I was astounded by how generous the pumpkin was with its gentle sweetness and its ready mixing with other ingredients. It may look all bulky and intimidating, but the vegetable has a sweet taste of a kind giant.

Many thanks to my fellow food bloggers (dear InjiPennu , where are you?), to my new friend pumpkin for inspring me to take this second chance and also to lovely Vee for hosting this special edition of Jihva. If it’s not for you guys, I would have never tried pumpkin again, I think. And this pumpkin halwa sweet truly is a special Diwali treat for us, and is going to be a tradition from now on in my family.


Butternut Squash ~ Cut in Half and Grated

Recipe:

Butternut Squash, almonds, milk and sugar
Ghee, rose water and cardamom

Prep work:

1. Almonds – Soak half-cup almonds in warm water for about 2 hours. Remove the skins and make a smooth powder in a food processor.

2. Butternut squash (2 pounder) – Peel the skin and cut into half lengthwise. Remove the seeds and finely grate using a mandoline. Comes about 3 cups of tightly packed grated squash.

3. Meanwhile prepare milk-sugar syrup: take 5 cups of whole milk and 2 cups of sugar in a big, thick-bottomed vessel. Cook the mixture until is gets thick and is reduced to about one fourths of the original quantity. Takes about 30 to 45 minutes.

4. Take 8 cardamoms, remove the skins and in a mortar pound the seeds into fine powder with a pestle.

Showtime:

1. In a big sturdy, wide bottomed vessel, heat about 2 tablespoons of ghee on medium heat.

2. Add the grated pumpkin to the melted ghee. And with a big slotted spoon, gently mix and cook the pumpkin. Cook for about 20 minutes, stirring in between, until the raw smell of pumpkin disappears and color changes from yellow to orange-yellow.

3. Add the almond powder and condensed milk-sugar kova. Add cardamom powder and two teaspoons of rose water. Gently mix and constantly stirring, cook the whole mixture until it comes together into a solid firm mass. Takes about 10 to 15 minutes.

4. Remove the halwa to a pan. Level it even and let cool. Keep it in the freezer for about one hour to firm it up even more. Remove and cut into squares or use a cookie cutter to cut round shape discs.

5. Serve chilled.

I think this halwa can stay fresh upto one week, when refrigerated.


Pumpkin Halwa ~ Our Diwali Treat ~ For 101 Indian Sweets
and My Entry to VKN’s “Festival Foods” Event

Recipe source: My own creation
I have prepared this halwa on less sweet side. My preference. Increase the sugar quantity if you like more sugary sweet taste.

Posted by Indira©Copyrighted in Almonds,Indian Sweets 101,Milk,Mitai,Pumpkin,Sugar (Thursday October 19, 2006 at 2:08 pm- permalink)
Comments (57)

The New Home of Mahanandi: www.themahanandi.org

Paramannam (Sweet Rice)


Paramannam Prasadam for Indian Sweets 101

Recipe:

6 cups of milk
2 cups of cooked rice
1 cup of sugar/powdered jaggery or to taste
¼ cup of – golden raisins and cashews together, roasted in ghee
4 cardamom pods – seeds powdered
1 tablespoon of ghee

In a large, thick-bottomed saucepan, combine milk and sugar (or jaggery). Cook until sugar melts and milk thickens (just a little bit). Add cooked rice, cashews, golden raisins, cardamom powder and ghee. Mix thoroughly and cook on medium-low heat for about 15 minutes, stirring in-between, until the whole thing comes together. Turn off the heat. Keep it covered for few minutes. Paramannam further thickens on cooling. Serve warm or for a cool refreshing taste, refrigerate for about one hour.

Posted by Indira©Copyrighted in Amma & Authentic Andhra,Biyyamu (Rice),Cashews,Golden Raisins,Indian Sweets 101,Milk,Naivedyam(Festival Sweets),Sona Masuri Rice (Friday August 4, 2006 at 2:55 pm- permalink)
Comments (19)

The New Home of Mahanandi: www.themahanandi.org

Moong Dal Payasam (Pesara Pappu Payasam)

A Cup of Moong dal Payasam
A Cup of Moong dal Payasam for Indian Sweets~101

If I have to choose between a cup of payasam and a slice of cake, I’d always go for the cup. Here, mothers prepare cakes lovingly; back in India, payasams are the norm. Every Saturday my mother would prepare payasam for puja naivedyam. I believe she prepared payasam mainly because of us, four little darlings:), who would come home from school hungry for something sweet. We had half-day school on Saturdays and afternoon meals at my mother’s home always included a type of payasam. Creamy rich with full of cashews and golden raisins, it was like spoonful of heaven on a warm afternoon.

Together between my mom and mother-in-law, there are recipes for at least a dozen different payasams. Who would really need a cook book when you have this type of rich resource right a phone call away? Because they all follow a basic method, it’s not that difficult to remember the procedure. Moong dal payasam is one such easy recipe I picked up from the family.

Moong dal is cooked in sweetened and thickened, rich poppy seed milk. Light golden hue, incredible, inviting aroma and delight to the senses – this is how I would describe this payasam.


Roasted in Ghee – Yellow Moong Dal

Recipe:

Moong dal, yellow (pesara pappu) – 1 cup
Sugar – 1 cup
Milk – 5 cups
Poppy seeds (Khus-khus, gasa gasalu) – ¼ cup
(Soaked in ½ cup of warm water for at least half an hour, to soften them)
Cashews and Golden Raisins, each – ¼ cup
Cardamom (Elachi, aluka) – 6
Ghee (neyyi) – 2 tablespoons

Prep Work:

1 In an iron skillet or tava, heat a teaspoon of ghee on medium heat. Add and roast, yellow moong dal until the color changes from yellow to light red and releases the wonderful fragrance. Remove them to a plate. Aromatherapy starts with this first step.

2 In the same iron skillet or tava, heat a tablespoon of ghee on medium heat. When it is hot, add and toast first golden raisins and then cashews. Golden Raisins puff up like little gold balloons and cashews turn from creamy white to light gold. Take care not to burn. Remove them to a plate.

3 Powder cardamom seeds to smooth powder in a mortar using the pestle or in a spice grinder.

Toasted in Ghee - Cashews and Golden Raisins
Toasted in Ghee – Cashews and Golden Raisins

In a pressure cooker, take roasted moong dal, sugar, milk and soaked poppy seeds along with the water it’s soaked in. Mix and close the lid. Pressure cook until two whistles. Once all the valve pressure is released, remove the lid and with a wood-masher or immersion blender lightly mash the dal. Pressure-cooking is my method; I follow it mainly for the convenience of not stirring and for the speed. In actual recipe, they would take all the ingredients in a wide, thick-bottomed vessel and cook until the dal reaches fall-apart stage. If you don’t have a pressure cooker at home, then follow the second method. It may take little bit more time, but the end result will be worth the trouble, I promise.

Add the toasted cashews and golden raisins along with the ghee they toasted in. Also stir in the cardamom powder to the cooked payasam. Have a taste and add sugar and milk, if needed. Simmer the payasam on medium-low heat about 20 to 30 minutes, until it reaches thick, creamy consistency. Serve warm or cold.


A Cup of Moong Dal Payasam with Poppy Seeds, Cashews and Golden Raisins

Poppy seeds can block the cooker nozzle and that may create a mess, if they not soaked in warm water beforehand. Soak poppy seeds in water first, if you are to cook this in a pressure cooker.
Chana Dal Payasam – Link

Posted by Indira©Copyrighted in Amma & Authentic Andhra,Indian Sweets 101,Milk,Moong Dal (Washed),Naivedyam(Festival Sweets),Poppy Seeds,Sugar (Friday June 9, 2006 at 8:31 pm- permalink)
Comments (45)

The New Home of Mahanandi: www.themahanandi.org

Pancake Ponganalu with Mango Sauce (Ebleskivers, Danish Pancakes)

Ponganala Pancakes (Ebleskivers)

Pancake ponganalu or Ebleskivers is one of the recipes that I prepared last weekend for JFI-Mango event. By the way, event hosting is a very time consuming thing one can do, I can tell you that. I have more respect for the bloggers who host this type of events month after month. They must really love doing this.

How did you do it Indira? Enquired few future hosts of JFI. The way I did it was gathering all entries in one place, arranging them in neat piles and then did the write-up. Adobe photoshop/picasa(free) helped a lot with image resizing. Instead of following the traditional roundup style filled with adjectives and superlatives, I chose a different, practical approach for my recap. Also in a proper Indian way, I returned the courtesy by thanking all my participants individually. If you ever plan to host or have already committed to host this kind of event, expect to dedicate one full day to do the roundup. Of course, it all depends on the number of responses the event generates; still it takes minimum one day. So, plan ahead my peeps. 🙂

Few weeks ago, when I posted ponganalu– a unique south Indian breakfast preparation, the post generated interesting comments with links to almost similar type of Danish breakfast preparation called danish pancakes or Ebleskivers. In Danish version, they mix the pancake flour with eggs and milk and prepare the rounds and serve them with fruit jam or sauce. I am a big fan of fluffy pancakes so thought to try this version; also I already have the well-seasoned special type of iron skillet that’s needed to prepare them.

Recipe is simple to follow. Mix pancake flour with milk and I went with mashed ripe banana instead of eggs. Prepare the Danish pancakes, ponganalu style and serve them with homemade or storebought type of mango sauce. Delicious! They were like fluffy round pillows; delicate crust outside and insides are like biting into a warm cloud. You want to float forever in these clouds. I loved and had them dunked in Nirav mango pulp/sauce whereas Vijay went with the classic, the maple syrup. Anyway you prefer they are worth a try.

Pancake Ponganalu (Danish Pancakes) With Mango Sauce
Pancake Ponganalu (Ebleskivers, Danish Pancakes) With Mango Sauce

Recipe:
1 cup of pancake flour (I used Aunt Jemima brand mix)
Peeled and smoothly mashed, half banana
1 to 1½ cups of milk
Ponganala Skillet and
Mango Sauce
Take the flour, milk and mashed banana in a vessel, whisk them thoroughly without any lumps. Consistency of batter must be like condensed milk (store bought), little bit tighter than the batter for regular pancakes. Heat a ‘ponganala‘ skillet and follow the photo-steps outlined here in my previous post about “ponganalu. Serve them hot with mango sauce.

Posted by Indira©Copyrighted in All-Purpose Flour(Maida),Bananas,Mango,Milk (Thursday May 4, 2006 at 12:23 pm- permalink)
Comments (20)

The New Home of Mahanandi: www.themahanandi.org

Yogurt Rice With Mango ~ For Jihva

Yogurt Rice with Mangoes

Yogurt rice with mango is a nostalgic meal for me. Usually, after dinner, the leftover rice is mixed with warm milk, a spoon of yogurt culture is added, mixed and kept covered overnight in a tiffin box. By next morning, milk would turn into yogurt and is already mixed with rice – school lunch box would be ready. My mother used to prepare yogurt rice in this way and would also add small cubes of mango for mid-day meal, during our hot summer school days.

The quote, ‘Looks can be deceiving’ applies to this one. Even though, the whole thing looks homely and common, the taste is simply unique and very satisfying. Rice soaks up milk and when milk turns into yogurt, the rice also changes. It looses its biting kind of inner resistance, turns into soft, supple kind of grain. Addition of fruit, like mango, as a topping makes it even better. The meal is not only nutritional, also follows the ayurvedic principle of balancing the food ingredients, hot ones with cold one. Mango is famous for its heat generation where as yogurt is known for its cooling properties on human body. Combination of them together, makes this, a well-balanced, simple meal/dessert kind of food.

Adding yogurt culture to warm rice-milk mixture

Recipe:
1 cup of cooked rice
2 cups of warm milk
¼ teaspoon of salt or to taste
Fruit Topping
I ripe mango – peeled and cut into small cubes

Mix the rice with milk. Add a tablespoon of yogurt culture and mix lightly; cover the vessel with lid and keep it in a warm area overnight. By next morning, the milk will be turned into yogurt. Stir in salt to taste. Sprinkle the mango cubes on top. With each spoon, take a small portion of yogurt rice and one cube of mango. Enjoy the sweet mango with creamy rich yogurt rice.

This is my contribution to the event “Jihvā For Mangoes”. I am very excited to host this event and thank you all for your enthusiastic participation with wonderful mango recipes. I am planning to do a recap of all the entries that I received, by tomorrow.

Posted by Indira©Copyrighted in Amma & Authentic Andhra,Jihva For Ingredients,Mango,Milk,Sona Masuri Rice,Yogurt (Monday May 1, 2006 at 5:36 am- permalink)
Comments (29)

The New Home of Mahanandi: www.themahanandi.org

13. Chana Dal Payasam (Sanaga Pappu Payasam)

Yesterday, on Ugadi, the weather was perfect with temperatures around 70 F. It felt like spring and Andhra weather. To celebrate this perfect day on Ugadi, I prepared chana dal payasam (sanaga pappu payasam) for puja.

Payasam is the most common type of dessert served in homes across south India. Prepared with basic ingredients and following a simple method, Payasam– the liquidy dessert, is a people pleaser. Usually the base is a thickened milk and sugar or jaggery syrup. The solid component varies – protein in the form of chana dal or moong dal are added. Or by adding carbos like rice, vermicelli, sabudana and nuts like almonds; different types of payasams are prepared. Real easy and the outcome is always sweet mouthfuls, it is a favorite among children and adults all alike. Here is the recipe for one of my favorite payasams:

Recipe:
(For two)

1 cup chana dal
¼ cup sabudana (Sago, Saggu Biyyam)
separately, soak them in water for at least two hours. Presoaking both chana dal and sabudana (sago) reduces the cooking time, considerably.
For sweet syrup
1 cup of powdered jaggery or sugar
3 cups of milk
Flavoring
1 tablespoon of ghee
¼ cup of cashews and golden raisins
4 cardamom pods – seeds finely powdered

Chana dal, Sabudana (Sago), Milk and Jaggery - Ingredients for Payasam

1. Take chana dal and one cup each of milk and water in a pressure-cooker. Pressure-cook the dal until one whistle, just to soften the chana dal. Do not disintegrate the dal; take care not to over cook.

2. Meanwhile in a thick bottomed, big vessel, take half cup of water. Add sugar or powdered jaggery. Stir and cook, until the sugar/jaggery melts. When the syrup starts to thicken, add the soaked sabudana, and 2 cups of milk. Cook them on medium heat for at least 15 minutes, stirring in between. To this milk-sugar-sabudana syrup, add the contents of the pressure cooker – chana dal and the milky liquid it is cooked. Stir and check the sweetness level, add sugar if needed. Simmer on medium heat, Uncovered, stirring occasionally for another 15 minutes or until it reaches consistency/thickness, you desire. Keep in mind payasam further thickens on cooling.

3. When all this is happening, heat a spoonful of ghee in a small pan. Add and toast – first cashews, then golden raisins until light brown. Add these toasted things along with ghee, to the simmering payasam.

4. Finally stir in powdered cardamom, simmer another 5 minutes. Switch off the heat, cover the pot with a lid and let it sit for at least half an hour. Serve warm or cold.

Golden Raisins fried in ghee, Cashews, Soaked Chana dal, Payasam (Sanaga pappu Payasam)
Chana dal payasam (Sanaga Pappu Payasam) ~ For this week’s Indian sweets 101

Variations:
I also prepare the same payasam with chana dal(bengal gram) without adding the sabudana(sago).
Sometimes, I also add fine semolina instead of sabudana to chana dal payasam.
Toasted fresh coconut gratings are also added along with cashews and golden raisins for that rich nutty sweetness.

Posted by Indira©Copyrighted in Amma & Authentic Andhra,Chana Dal,Indian Sweets 101,Milk,Naivedyam(Festival Sweets) (Friday March 31, 2006 at 1:15 pm- permalink)
Comments (31)

The New Home of Mahanandi: www.themahanandi.org

Cashew~Walnut Laddu (Kaju-Akhrot Burfi)

When I invited my friends to celebrate Sankranthi festival, in addition to the traditional ‘sweet pongal’, I also prepared cashew walnut laddu. Low in sugar calories, high in nut energy! Cashews and walnuts are first roasted and powdered, then cooked in milk-sugar kova till they all came together into solid fudge like consistency. Cooling further solidifies the mixture and then small portions are taken and shaped into rounds -‘laddus‘ or cut into squares-‘burfis‘. I like the round shape, so I always go with round laddus. Very convenient to hold and eat, children particularly love laddus.

Cashews, Walnuts, Milk and Sugar in the Background

Recipe:

Half gallon- Whole milk
2 cups-sugar (3 cups if you like the laddus on the sweeter side)
1 cup – cashews
1 cup – walnuts

Preparation:

Milk and Sugar: In a thick bottomed big pot, bring milk to boil. Add sugar. Stirring occasionally, simmer the milk-sugar mixture until it gets thick and is reduced to about one fourths of the original quantity. It takes at least 45 minutes to one hour.:) Do this on medium heat. Avoid high heat and take care not to scald the milk.

Cashews and Walnuts: Meanwhile, lightly roast cashews and walnuts separately in an iron skillet. Let them cool down to room temperature. Separate 10 pieces from each and chop them into small pieces. With the remaining ones – make fine powder of them in a food processor/mixer.

Milk and sugar simmering thickened milk and sugar after 1 hour on the stove
Milk and sugar simmering………………..Thickened milk and sugar kova after one hour on the stove

Kova into Laddu: Add this fine powder to the thickened milk-sugar kova and cook for 15 minutes, stirring continuously, until the mixture is firm. Sprinkle chopped chunks of cashews and walnuts that were kept aside. Continue cooking for another 10 minutes until the mixture is almost crumbly and comes away easily from the sides of pan.

Take a spoonful of mixture and press it with your hands into a ball. If it holds shape, then mixture is ready for cooling. Turn off the heat. Spoon the mixture into a greased square or round pan. Level it with a spatula and let it cool for at least 4 to 5 hours. Cut into squares for burfis or take a spoonful of mixture, shape it with your hands into a round ball for laddus. Store the laddus in glass jar. They will stay fresh for upto one week.

(This recipe makes 15 medium sized laddus.)

Cashew-Walnut Laddu

One medium sized cashew-walnut laddu, my entry to ‘Sugar-Low Friday’ event hosted by lovely Sam of Beck & Posh.

By the time my friends left, I had only four laddus remaining out of 20. Two for me and two for Vijay, enough for us. This is how I do my ‘Sugar – Low’, by portion control. In my view, this is also one of the ways to lower the sugar consumption.

Tagged with:

Posted by Indira©Copyrighted in Cashews,Indian Sweets 101,Milk,Mitai,Sugar,Walnuts (Friday January 27, 2006 at 7:16 pm- permalink)
Comments (26)

The New Home of Mahanandi: www.themahanandi.org

Sweet Pongal, The Sankranthi Sweet

Sankranthi:

Harvest festival Sankranthi is all about celebrating rice in our part of world. Particularly in South India, rice plays an important role as the main cultivated grain and as nourishing food that people subsist on every day of their life. It’s no wonder that there is a festival dedicated to the almighty rice. Equally worshipped are the man’s best partner, the kind-hearted cow, and the elements – sun, earth and water. They make rice cultivation a success, and also add a magic touch to the rice, making the rice a cherished, beloved food of the people.

Sona Masuri Rice - Grown and Imported from Andhra, India
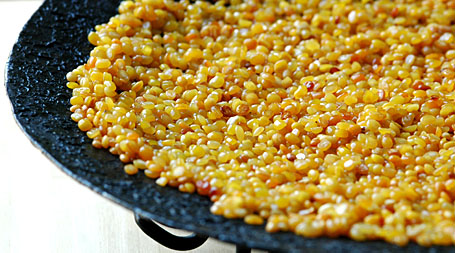
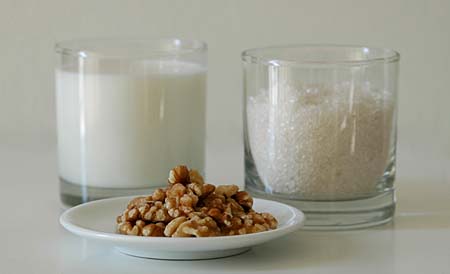
Sona Masuri Rice – Grown and Imported from Andhra Pradesh, India

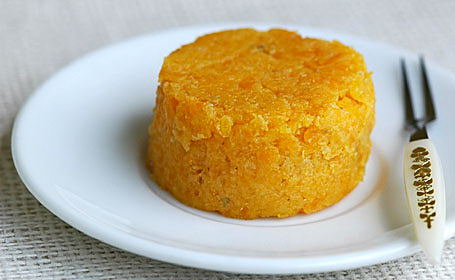
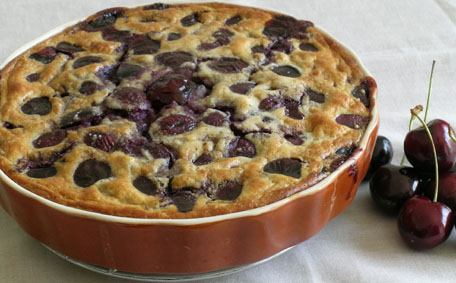
Sweet Pongal (Tiyya Pongali):

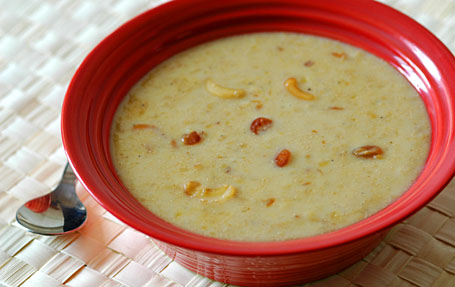
This famous south Indian, Sankranthi sweet is traditionally made with freshly harvested rice. Very simple to make but spectacular in taste, the ordinary rice becomes mouthwateringly extraordinary in sweet pongal. The rice soaks up the milk, absorbs the jaggery, picks up the cardamom scent and takes up the generously added moong dal, cashews and golden raisins. And in this new avatar, becomes an offering to the Gods (naivedyam, we call it), and also simply irresistible to all who try it.

Some Tips:

Jaggery:

I follow the classic recipe and don’t do or like shortcuts. Method is neat and easy and the end result is always like the prasadam offering of temples. Jaggery is the traditional sweetener of sweet pongal and my choice too, simply because sweet pongal tastes better when made with jaggery and not sugar.

Rice:

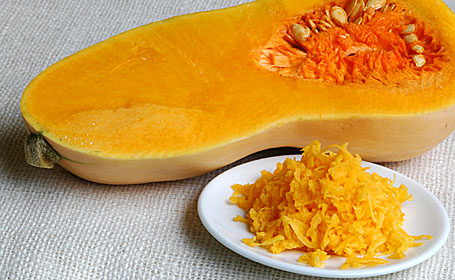
The rice that I prefer is Sona Masuri. Because this variety is grown and imported from my home state Andhra Pradesh, and is the variety that I grew up on. Grain is thin, medium sized and very lightweight. Available in almost all Indian grocery shops here in US. Little bit pricey, but the taste is worth the money and farmers in my state really can use the money. Support farmers and buy this rice.

Consistency:

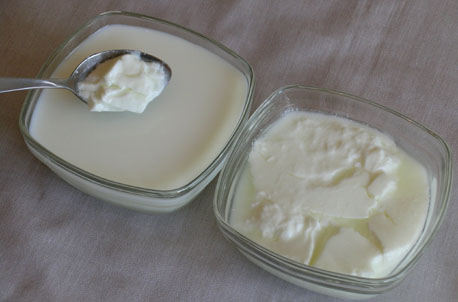
Sweet pongal is like a rice-dal porridge, consistency must be gooey thick and sticky. That means, the amount of liquid I usually add for sweet pongal recipe is more than the amount that I normally add to cook plain rice of equal measurements. Also, I always use equal amounts of water and milk for this recipe. Variations are – you can cook the rice-dal entirely in milk or in coconut milk, or if you are lactose intolerant and diet conscious, then in just plain water. Just add more liquid compared to the regular rice preparation.

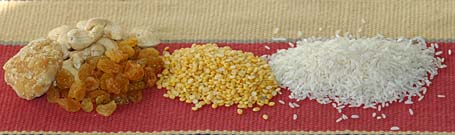
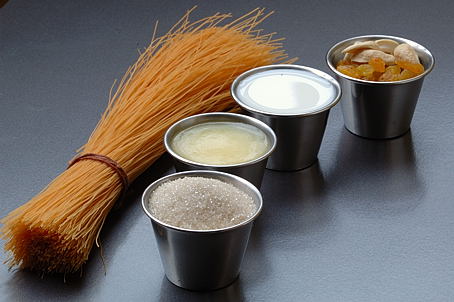
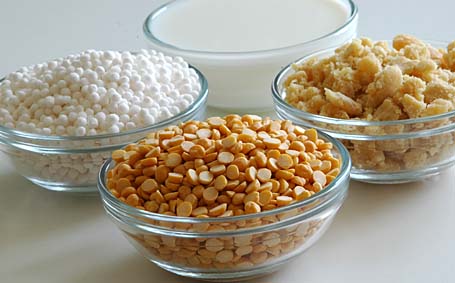
Rice, Yellow Moong Dal, Cashews, Golden Raisins, Cardamom and Jaggery

Recipe:
For two people

1 cup – Sona Masuri rice
½ cup – yellow moong dal (pesara Pappu)
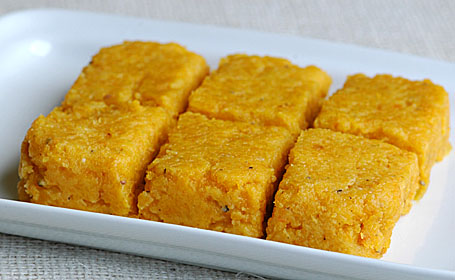
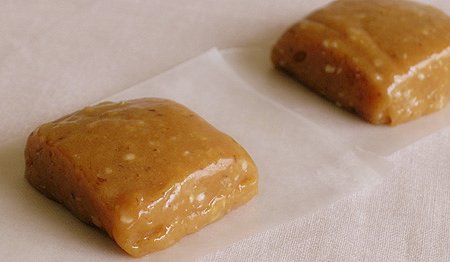
1 – 1½ cups – jaggery, crushed to fine
¼ cup each – cashews and golden raisins
¼ cup – ghee, melted
4 cardamom pods – skins removed and seeds powdered finely
3 cups each – milk and water (or 2 cups each, if you like a halwa like pongali)

Here is the 3-step method I follow to prepare sweet pongali at our home.

1.Toast and Roast:

Yellow moong dal:
Heat one teaspoon of ghee in an iron skillet. Add and roast yellow moong dal, on medium heat, until the color changes from yellow to pink. Take care not to brown. Slow-roasting freshens up and imparts a sweet smell to yellow moong dal. Remove them to a plate and keep aside.

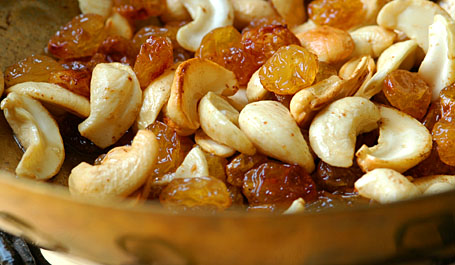
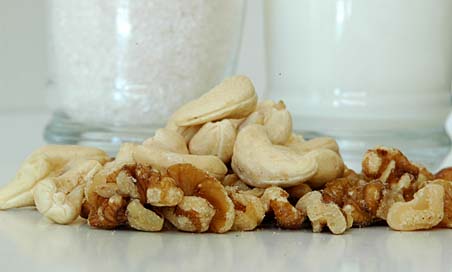
Cashews and Golden raisins:
In the same skillet, add and heat two teaspoons of ghee. Add and fry the cashews and golden raisins till they turn to light gold. Remove and keep them aside.

Jaggery Syrup Cooked Rice-Dal Mixture is added to Jaggery Syrup
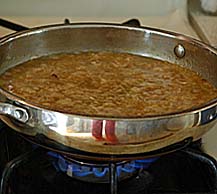
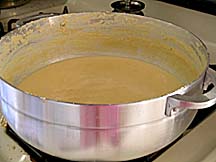
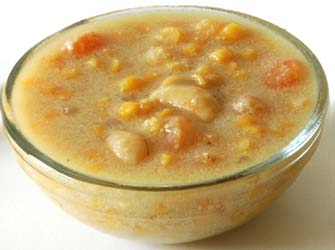
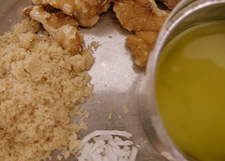
Jaggery syrup simmering…………Cooked Rice-Dal Mixture is added to Jaggery Syrup

2.Cook and melt:

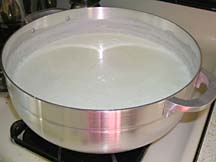
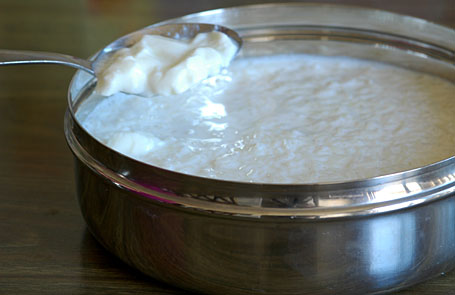
Rice, moong dal and milk:

Take rice and roasted moong dal in a pot. Add water and milk. Mix well. Partially cover the pot and cook the rice and dal to tender soft. I use a pressure cooker but an electric rice cooker also works fine. Stove-top slow simmering also produces best tasting pongali.

Jaggery and water:

While the rice is cooking, in another pot, melt jaggery. Add the powdered jaggery and one cup of water. Stir and cook till jaggery melts. Bring the solution to a rolling boil. and reduce the heat and simmer for about five minutes. Turn off the heat. Let the jaggery syrup cool a bit.(Jaggery has to be cooked separately and you can’t add it directly to uncooked rice and milk. Because it prevents the rice from cooking properly and also splits the milk. Please keep this in mind.)
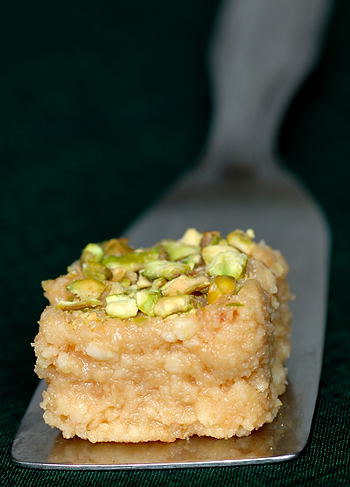
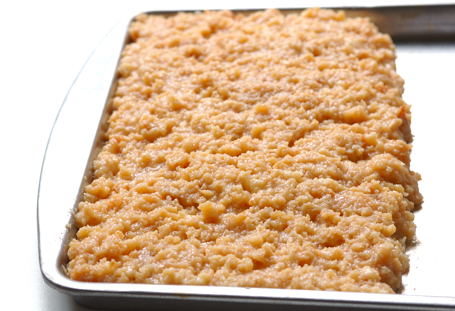
3. Stir and Simmer:

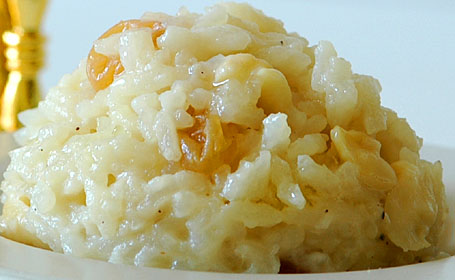
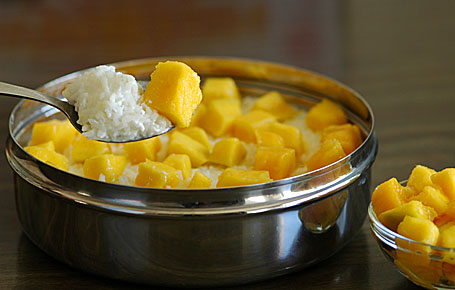
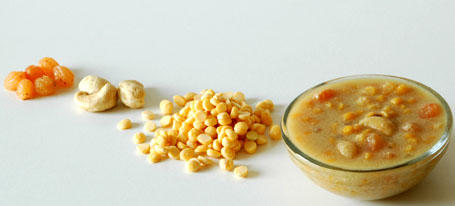
Adding the cooked rice: Add the cooked rice-dal pongal to jaggery syrup. Keep the heat on medium. Stir in the ghee, cashews, golden raisins and cardamom powder. With a strong laddle, stir well to combine all. Cover and simmer until the whole mixture comes together into a sticky, gooey mass. Turn off the heat. Cover and let it sit for 10-15 minutes. Sweet pongal thickens further on cooling.

First offer to Gods as naivedyam (if you have this tradition), then serve it your loved ones, near and dear. Don’t forget to drizzle some ghee just before serving.

Sweet Pongal (Tiyya Pongali) - The Traditional Sweet of Sankranthi
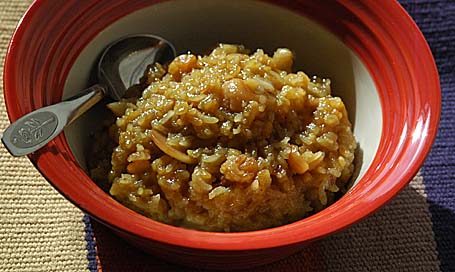
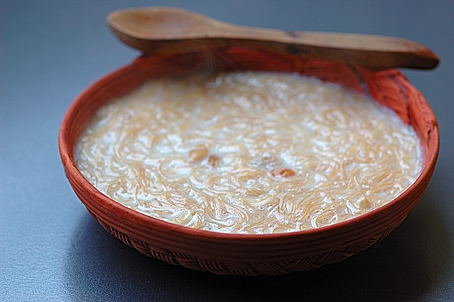
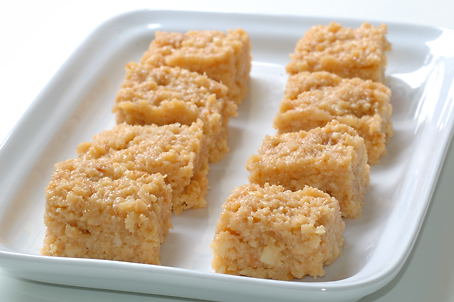
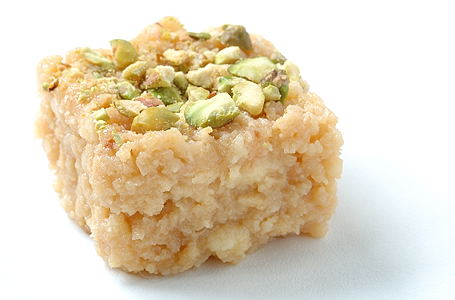
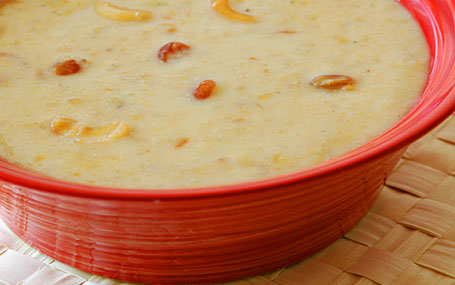
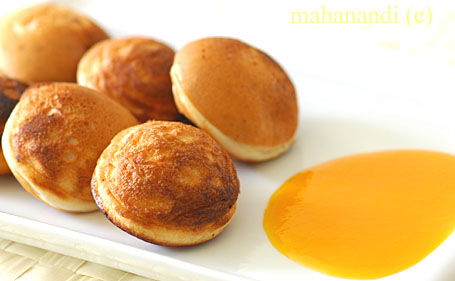
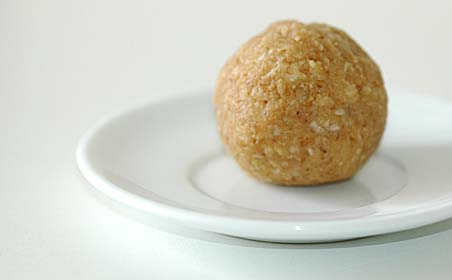
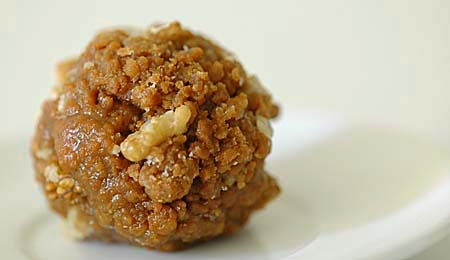
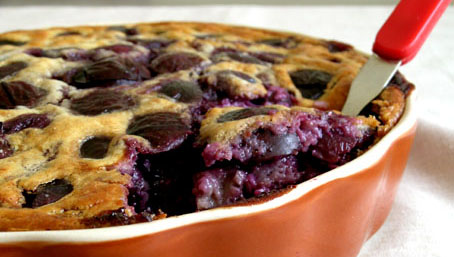
Heavenly Sweet Pongal

For people hungering for a traditional, naivedyam kind of recipe but don’t have time or energy to make puran poli (bhakshalu), sweet pongal is The one. Speaking from experience, my suggestion is, keep your reservations aside and try it. You’ll be glad and can be proud of yourself for finally making one decent kind of naivedyam. I promise! Follow the recipe and this ancient classic delivers every time. People would ask for a second serving, diet or no diet.

Posted by Indira©Copyrighted in Amma & Authentic Andhra,Cashews,Ghee,Golden Raisins,Indian Sweets 101,Milk,Moong Dal (Washed),Naivedyam(Festival Sweets),Sona Masuri Rice (Monday January 16, 2006 at 3:08 pm- permalink)
Comments (79)

The New Home of Mahanandi: www.themahanandi.org

Walnut Burfi (Akhrot Laddu)

Vijay got a good grade in this semester. He is studying for his master’s degree in software engineering, part time at Carnegie Mellon University. And the walnut burfi is for celebration. The combination of walnuts and milk-sugar is a classic. The resulting walnut burfi or laddu is a rare indulgence for us.

Milk, Sugar and Toasted Walnuts

Recipe:
(makes about 6 medium sized laddus)

2 cups of walnuts (Akhrots)
2 cups of whole milk
3/4 cup of sugar

Lightly roast walnuts in an iron skillet and let them cool down. Keep one fistful of nuts aside and grind the remaining walnuts into powder.

Boil milk and sugar until they come together into very thick mass almost like the final stages of pala kova. It takes about 30 minutes. At this stage, stir in powdered walnuts. Mix thoroughly and keep stirring until, the walnut-kova mixture leaves the sides of the pan and comes together into one big lump. Takes about 10 to 15 minutes. Sprinkle the whole walnuts and mix once and remove the mixture into a pan. Allow it to cool and make small laddus with it or press the whole mixture evenly and tightly in a greased pan to cut squares.

Walnut Burfi (Akhrot Laddu)
Walnut burfi (Akhrot laddu) – Old fashioned

Posted by Indira©Copyrighted in Indian Sweets 101,Milk,Mitai,Sugar,Walnuts (Monday December 26, 2005 at 1:07 am- permalink)
Comments (12)

The New Home of Mahanandi: www.themahanandi.org

Cherry Clafouti

What can one do with cherries, when they are purchased at $1.19 per pound. Of course, bake them with all purpose flour, the only recipe I know using cherries. Giant Eagle, the chain grocery shop, near my home is selling bing cherries for 1.19 a pound this week. No, they are not damaged. They are perfect, plump, sweet and irresistible as always and as good as the cherries I bought at farmers market last week for 3 dollars a pound.

After downing about 3 pounds, we decided to make some sort of dessert with the remaining cherries. So I baked Cherry Clafouti or more like Cherry Custard or two-inch pancake filled with cherries. This is such an easy dessert that is very simple and quick to put together.

Recipe:

Half-pound cherries- cut in half and pits removed
Half-cup pancake mix (or all purpose flour)
One-cup whole milk and one egg
2-4 tablespoons of sugar
For flavoring I added dried and powdered ginger (sonti)

Removing the pits from Cherries Cherries flaoting in flour-milk batter

Preparation:

I’ve added the pancake mix, milk, egg, sugar andsonti in a mixing bowl and whisked them by hand until all the ingredients are well combined and the batter was smooth.

This was only for us two so I used a small 6-inch oven proof-serving dish for baking. After greasing the dish, I filled it with batter and arranged the cherries, more like jam-packed. Baked this in the preheated oven at 350° F for about 40 minutes, until risen and golden. The top will be browned like a pancake and the insides will be gooey with cherry sweetness.

Cherry Clafouti

I didn’t add lot of sugar. The sweetness is all from cherries (I did the quality control by tasting half of each cherry:)). With mild sweetness and a texture falling between a custard and a pancake, cherry clafouti was such a delight. We loved this simple dessert.

Taking a bite of Cherry Clafouti
Cherry Clafouti

Posted by Indira©Copyrighted in All-Purpose Flour(Maida),Cherries,Eggs,Milk,Milk & Products,Molasses (Thursday June 30, 2005 at 3:45 pm- permalink)
Comments (13)

The New Home of Mahanandi: www.themahanandi.org

Homemade Indian Yogurt (Curd, Perugu, Dahi, Thayir)

I make yogurt at home regularly. I am not sure if I will be saving any money by making yogurt at home instead of buying in stores. But I like the taste of the homemade better than the store bought.

Perugu (Telugu), Dahi (Hindi, Gujarati, Marathi, Nepali, Punjabi, and Urdu), Doi (Bengali), Dohi (Oriya), Mosaru (Kannada), or Thayir (Tamil) is the yogurt of the India, known for its characteristic sweet-tart taste and semi solid consistency. It’s also commonly called as “Curd”. Perugu or Dahi is part of the everyday meal for us, and also I prepare raita with it.

Perugu is really quite easy to make at home. First, bring the milk to a boil, reduce the heat and simmer it for few minutes till a layer of cream forms on top of the milk. Turn off the heat and let the milk cool down to lukewarm level. Now add one tablespoon of live active culture of yogurt to this milk. Stir it once and cover the vessel with a lid. Keep the container in an oven or in a microwave (they act like incubators) undisturbed for about 8 to 12 hours. After this period, milk in liquid state will become semisolid – like yogurt. This is how you will know that the process of making yogurt is complete.

How much milk you need depends on how much yogurt you want to make. Small or large quantity, all it takes is adding one tablespoon of live active culture of yogurt. It’s that simple.

I read somewhere a list of 100 food related things one must do before they die, I don’t know about skinning and preparing the chicken but how about a taste of real yogurt.

About to add a spoon of yogurt to boiled milk and Yogurt
Adding a tablespoon of live active yogurt culture to lukewarm milk,
Homemade yogurt (Dahi, Perugu)

Where can one get active live culture of yogurt in US? This is the question I often get asked. Here is the list of sources that I can think of. Hope this helps.

• Try your Indian neighbors and colleagues. A lot of Indians prepare yogurt at home even in this day and age, particularly first generation Indians like us. But there are always exceptions to the rules so do not assume anything and be polite when you are inquiring.

• Try asking waiters at Indian restaurants. Yogurt is used to prepare raita, chutneys etc. Many Indian restaurants prepare yogurt freshly in their kitchen everyday.

• Try kitchens at Indian temples: Indian temples in US serve prasadam or food daily to the visitors. Yogurt rice is often part of the prasadam.

• Health food stores, Natural health stores etc.

Posted by Indira©Copyrighted in Milk,Milk & Products,The Essentials,Yogurt (Thursday June 23, 2005 at 7:53 pm- permalink)
Comments (109)

The New Home of Mahanandi: www.themahanandi.org

Walnut-Coconut Caramel Toffee

This weekend, I prepared a carrot cake and walnut-coconut caramel for weekend barbecue party at our friend’s house. Last month, they added a big deck to their house and also bought a new gas grill. It is a sort of opening party for the new deck and grill.

I initially started making the carrot cake, then I remembered my pregnant friend who had just passed very difficult first 3 months, when she couldn’t eat anything because of high case of nausea. I thought walnut-coconut toffee is the best in-between meals snack for her now. Just like that, I made the caramel toffee. I also used some of it as topping or dressing for the carrot cake. The cake was a big hit with the children. They loved it and one curious kid asked me why I made the caramel instead of cream cheese topping. I Knew caramel is unusual topping for carrot cake and told him that I was just trying something different. He told me that he loved caramel and he served himself a big piece. 🙂

Walnut-Coconut Caramel Toffee: Walnuts, Dry coconut flakes, Light brown sugar and Ghee

  • 1-cup light brown sugar
    1/2 cup melted ghee
    1/2 cup toasted walnuts, finely chopped
    1/2 cup dry unsweetened coconut flakes
    1/2 can of 5 oz of Nestle evaporated milk

Preparation:

Combine ghee, brown sugar and evaporated milk in a thick-bottomed vessel. Cook them stirring occasionally until they reach the softball stage. Now add walnuts and coconut flakes, stir them until well coated or for about 2 to 3 minutes. Pour them into a greased flat dish, refrigerate until set. Cut into small squares and wrap them individually in wax paper.

Walnut-Coconut Toffee

I can never make this type of sweet for us. We don’t do enough work to spend the extra calories. But for a special friend in her special condition- they are prefect treats.

Posted by Indira©Copyrighted in Milk,Sugar,Walnuts (Monday June 13, 2005 at 2:36 pm- permalink)
Comments (7)

The New Home of Mahanandi: www.themahanandi.org

Previous Page »