Mahanandi

Living in Consciousness ~ Indi(r)a’s Food and Garden Weblog

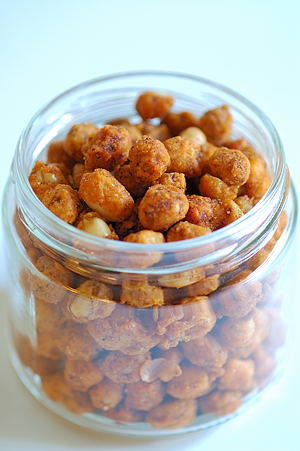
Peanut Podi (Palleela Podi)

Flavorful and spicy, peanut podi is a neat alternative to chutneys. Sprinkle few teaspoons of podi on breakfast items like upma, pongal, idly and dosa. Or, apply it on warm chapati or mix with rice. With Peanut podi ready on hand, it is easy to have decent meals during time-starved days. I used to live on jars of peanut podi during college days. Whenever busy days are ahead I make it at home too.

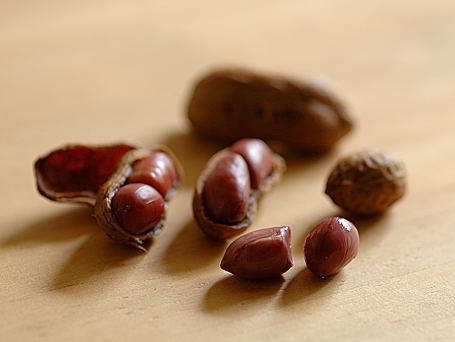
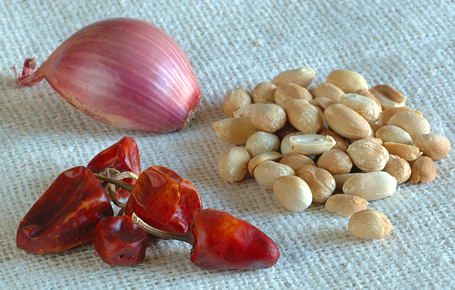
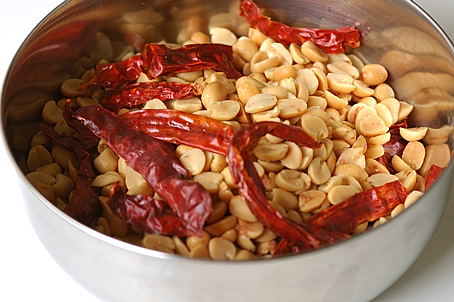
Peanuts, Chilli and Cumin

2 cups shelled peanuts
12- finger length dried red chilli (from Indian grocery)
1-teaspoon cumin
1 teaspoon salt or to taste

Roast peanuts to pale brown color. Cool. Rub to remove peanut skins.
Dry roast red chilli and cumin to fragrance. Cool.

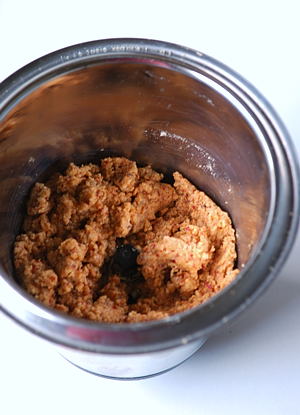
Take peanuts, red chilli and cumin in a Sumeet style mixer or in a food processor. Add salt. Pulse few times to fine sand like consistency. Store the podi in a clean, dry jar. Stays fresh for about at least a month or two.

Sometimes I also add garlic. Tastes excellent but garlic moisture reduces the shelf life of podi to a week.

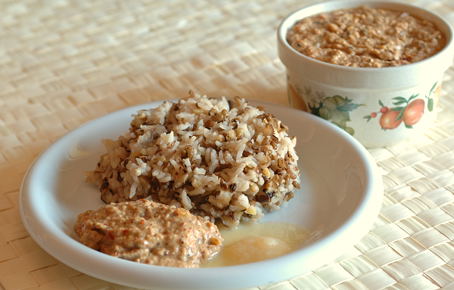
Peanut Podi
Peanut Podi

From Telugu to English:
Podi = Powder

Posted by Indira©Copyrighted in Amma & Authentic Andhra,Dried Red Chillies,Peanuts (Friday January 2, 2009 at 3:15 pm- permalink)
Comments (31)

The New Home of Mahanandi: www.themahanandi.org

Party Snacks ~ Masala Peanuts

Masala Peanuts ( Stealing is not nice. Please do not use any images or content from this site without my permission. Thanks.)
వేయించిన మసాలా వేరుశనగపప్పు(Masala Peanuts, Sing Bhujia)

Party food should be fun and something special. Masala peanuts fit the profile. This is a retro recipe resuscitated to celebrate a special occasion. Roasted peanuts are dipped in besan-masala batter and deep-fried. 15 minutes in front of the stove or a trip to favorite Indian snack shop, whatever method one prefers, the unique spice and sour glazed peanuts are worth the effort.

Masala Peanuts:

Roast: Heat a cast-iron skillet. Add shelled peanuts. On medium heat, roast the nuts until lightly colored with a distinct aroma. Remove immediately, and take them in a wide plate. Wait until they are cool. Rub and remove the skins.

Batter: In a bowl, take gram flour and rice flour in 4:1 quantity. Add amchur, cumin powder, red chilli powder and salt to taste. Also a pinch of baking soda. Whisk and prepare batter in medium thick consistency by adding water as necessary to the flour such that the batter puts a coat on peanuts that is not too thin it drips or too thick like facemask. Add the peanuts to the batter.

Prepare: Heat oil in a heavy pan for deep-frying. When oil starts smoking, lower the heat. Wait for few seconds and then drop the batter-coated peanuts. Fry until golden, drain and place them on a paper-covered plate. Once they are cool, store them in a clean container. Stays fresh for two weeks to a month.

Note:
Amchur is optional. Adds a nice tangy touch.

Posted by Indira©Copyrighted in Amma & Authentic Andhra,Peanuts (Monday June 16, 2008 at 9:51 pm- permalink)
Comments (22)

The New Home of Mahanandi: www.themahanandi.org

Pudina Pachadi with Peanuts

Pudina Pachadi with Rava-Dill Idles
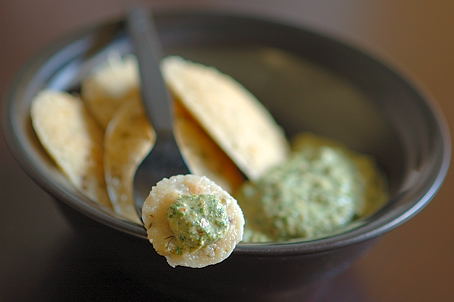
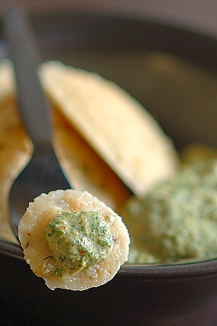
Pudina Pachadi with Dill-Rava Idlies ~ Brunch Today

This is the recipe that made a Pudina convert of me. My ammamma (grandmother) served it one fine morning many moons ago with moonlight like idlies and that was it. The same exact recipe has been followed by my mother and now by me. Combine our ages, the recipe must be at least hundred years old. Only thing that has changed is the method of grinding, from mortar and pestle to Sumeet mixer.

Recipe:

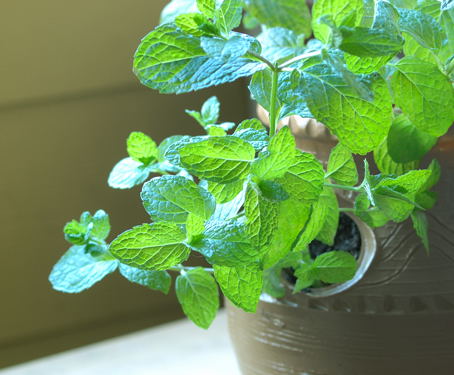
1 bunch fresh pudina (spearmint)
1 onion and 4 green chillies
Marble-sized tamarind pulp
1 tablespoon peanut oil
¼ teaspoon cumin
½ teaspoon salt, or to taste
½ cup roasted, unsalted peanuts

Soak tamarind in quarter cup of warm water for about ten minutes to soften, so that it can blend well. Meanwhile wash and pluck the pudina leaves and also tender stems. (Two cups tightly packed.) Peel and slice onion to big chunks. Cut chillies to two pieces.

Heat oil in a cast-iron skillet to a smoking point. Add and toast cumin for few seconds. Add the onion and chillies. Saute to pale brown. Remove to a plate. Then in the same skillet, add the pudina and saute until leaves collapse. Remove to a plate. Wait for the contents to reach room temperature.

Take peanuts in a Sumeet style mixer or blender. Pulse for few minutes. Then add the roasted onion, chilli, cumin and mint leaves. Also salt and the tamarind along with the water it soaked in. Puree to smooth paste. Add water if necessary, about another half cup for easy blending.

Pudina pachadi is best eaten the day it is made. It is good with a variety of savory recipes. Adds a refreshing minty sparkle when eaten with breakfast items like idly, dosa, upma and pongal, and also when applied on chapati, roti or when mixed with rice and dal.

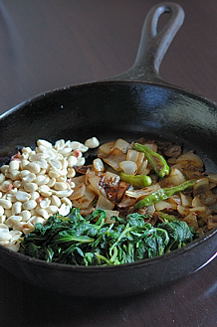
Roasted Pudina Chutney Contents in a Cast-iron Skillet Pudina Pachadi with Rava-Dill Idles
Roasted Peanuts, Mint, Onion and Chillies in a Cast-iron Skillet…
Pudina Pacchadi with Dill-Rava Idlies

Health Labels:
Traditional India-Vegan, Amma
Mint: Rich source of Iron, Vitamins. More here.
Peanuts: Good source of heart-healthy monounsaturated fats and Vit E
Cumin and Chillies: Aid digestion and well-being

Posted by Indira©Copyrighted in Amma & Authentic Andhra,Mint,Peanuts (Wednesday March 19, 2008 at 11:40 am- permalink)
Comments (2)

The New Home of Mahanandi: www.themahanandi.org

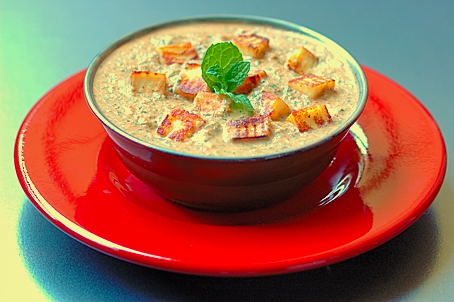
Pudina Paneer for Picnic


Pudina (Mint) from our Patio Garden

Pudina Paneer has the perfect punch to serve with pulaos and parathas on a picnic party. It’s good with grilled chicken and fish too.

Recipe is easy to execute. Involves grilling and grinding.

Grilling :
On stove-top or on a hot grill, place a slab of paneer and grill each side for a minute. Remove, cool and slice the paneer slab to bite sized cubes.
On stove-top or on a grill, place an iron skillet and heat the oil until it’s very hot. Add and saute Pudina leaves till they wilt. Remove to a plate.
In the same skillet, place onions, tomatoes, garlic and green chillies. Grill to brown.

Grinding:
In a food processor or mixer, take roasted peanuts. Grind to fine consistency.
Add the sautéed Pudina leaves, grilled onions, tomatoes, garlic and green chillies. Also tamarind, salt and two cups of water. Process the whole thing to smooth paste. Remove to a cup. Stir in grilled paneer cubes and serve with pulao or parathas.


Pudina Paneer ~ for Picnic Party

Ingredients
Palm sized, one-inch thick slab of paneer (about 15 to 20 cubes)
1 tablespoon peanut oil
2 bunches of Pudina (mint) – about 4 cups of leaves
1 big red onion
2 semi ripe tomatoes
6 to 8 green chillies
1 small garlic bulb – about 4-6 garlic cloves
1 tablespoon tamarind pulp
½ cup roasted peanuts
½ tsp salt or to taste

Recipe source: My own creation

Posted by Indira©Copyrighted in Mint,Paneer,Peanuts (Wednesday July 4, 2007 at 9:32 pm- permalink)
Comments (19)

The New Home of Mahanandi: www.themahanandi.org

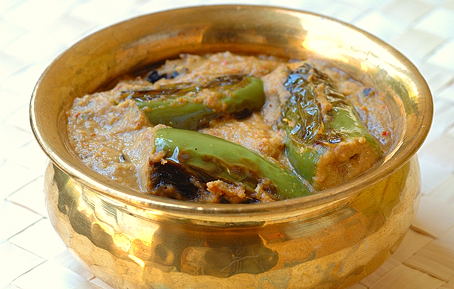
Mirchi Ka Salan from Hyderabad

Paying Salaam to Salan with Jalapenos:


Mirchi Ka Salan ~ For RCI: Andhra

Recipes with chillies are many. Pickled, stuffed, stewed, sun-dried, consumed raw or added in desserts like cakes or in ice creams – different varieties for different flavors and strengths. All of them are highly cherished by chilli enthusiasts.

One chilli recipe that stands out from the bunch is the famous Mirchi Ka Salan recipe from Hyderabad (capital city of Andhra). Whole green chillies pan-fried and simmered in sesame-peanut spicy sauce. The dish is easy to prepare and has a refreshingly pleasing taste. But if you don’t know what you are doing, the chances that it could blow your head off are high. Whether one call it pushing the limits or perspiration-inducing love affair, Mirchi ka Salan is the culinary expression of an Andhra vasi‘s adventurous spirit and fun-seeking nature. Nutritious, dangerous and deeply satisfying – that is what Mirchi ka Salan is in a nutshell.


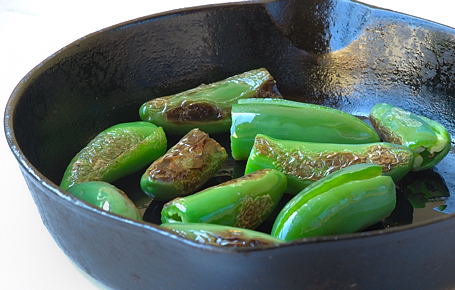
Skillet-Frying the Green Chillies

Recipe:

Mirchi (Green Chillies):

12 medium-sized jalapeno peppers
To lessen the heat: Remove the stem and slice each jalapeno lengthwise on one side, use caution not to cut into half and to keep the tail end intact. Pluck the white pitch and seeds like shown in this photo. (Wear gloves for sensitive skin.)

Salan:

½ cup peanuts – roasted and skins removed
¼ cup sesame seeds – toasted
½ cup sauteed pieces of shallots or red onion
4 dried red chillies – toasted
1 teaspoon each – coriander seeds, cumin, cinnamon and cloves, toasted lightly
Take them all in a blender and add about a teaspoon each – ginger, garlic, salt and about 4 tablespoons of tamarind juice. Pour in about a cup of water and grind to smooth paste. I usually add about 2 tablespoon of jaggery/sugar to bring a mild-sweet flavor to the dish.

Making of Mirchi ka Salan:

In a wide skillet, heat about a tablespoon of peanut oil. Bring the oil to smoking point. Add and sear mirchi (jalapenos) to sand color. Take care not to black/burn.

Add the prepared Salan paste to the seared chillies. Add about a cup of water and mix. Have a taste, adjust salt, sour(tamarind), sweet(jaggery) levels to your liking. Cover the pot and simmer for about 15 to 20 minutes on medium-low heat, stirring in-between. The color of the sesame-peanut sauce darkens and sauce thickens. Mirchi ka Salan will be ready.

Serve warm with rice/chapati/parathas. A cup of soothing saaru(chaaru/rasam), salad or yogurt on the side helps a lot. Best place to have this meal is balcony/patio’s shady spot or with windows open/fan whirring at a low speed. Cool breeze enhances the chilli experience.


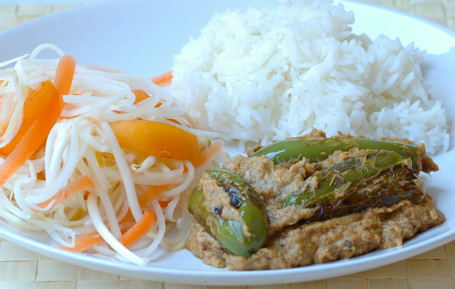
Mirchi Ka Salan with Rice and Green Papaya Salad ~ Our Meal Today

More salaam to Salan:
Mirchi ka Salan – from Past, Present and Me
Mirchi ka Salan – from Elaichi et Cetera…
Mirchi ka Salan – from Hyderabadi Kitchen
Mirchi ka Salan – from Vindu

Posted by Indira©Copyrighted in Amma & Authentic Andhra,Green Chillies,Peanuts,Peppers (Thursday May 10, 2007 at 4:23 pm- permalink)
Comments (58)

The New Home of Mahanandi: www.themahanandi.org

Salad Greens and Boiled Peanuts

Salad Synergy for Spring

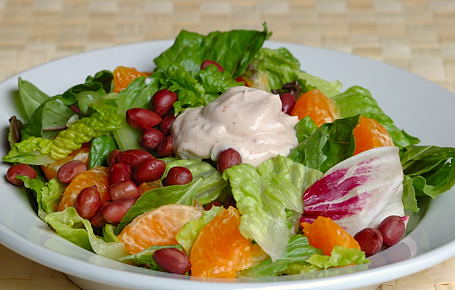
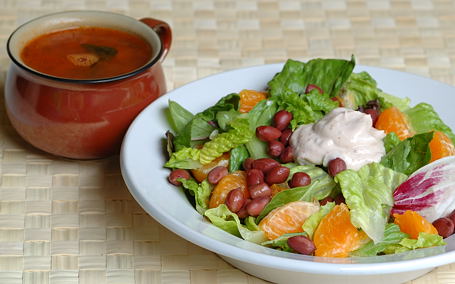
This colorful and tasty salad is Vijay’s creation. Boiled peanuts, salad greens served with homemade yogurt and black pepper dressing. A cup of tomato rasam on the side makes this a pleasant luncheon or light supper to have.

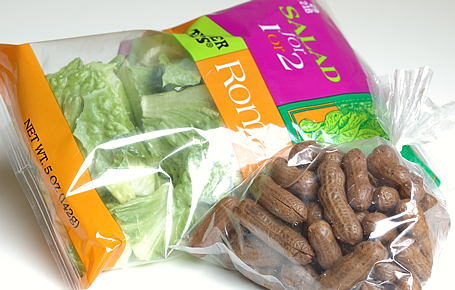
This is one of those recipes, where you buy ready to use ingredients and put together a meal at home. We bought boiled peanuts from a Vietnamese grocery shop and salad greens from another nearby grocery shop. The meal preparation went like this – opened the salad greens packet, washed and drained them. Shelled the peanuts. Coarsely crushed black pepper and added it to yogurt along with some salt and a teaspoon of gulkand. Took the salad greens and peanuts in a big bowl and mixed. Served with yogurt. (We also added orange slices.)

Salad Greens and Boiled Peanuts ~ From Packets to Plate for JFI-WBB: Greens


Our Light Luncheon Today

Notes:
Gulkand (Concentrated sugary rose petals) – available in Indian stores

Posted by Indira©Copyrighted in Lettuce greens,Peanuts (Monday April 23, 2007 at 10:16 pm- permalink)
Comments (12)

The New Home of Mahanandi: www.themahanandi.org

Beaming Beauties ~ Boiled Groundnuts

Boiled Groundnuts (Udakapettina Verusanagalu)
Boiled Peanuts Snack on a Rainy Spring Day

Posted by Indira©Copyrighted in Indian Ingredients,Peanuts (Saturday April 14, 2007 at 6:18 pm- permalink)
Comments (10)

The New Home of Mahanandi: www.themahanandi.org

Peanut ~ Jaggery Chutney

Peanut – jaggery chutney is a timeless classic. Like the comfort of the Kashmir shawl wrap on a cold day and the elegance of kumkum bottu on the forehead after a visit to the temple, it can be relied on to instantly make the meal both totally comforting and effortlessly elegant.

Stylish enough for a special elaborate meal and at the same time, casual enough for a spur of the moment put-together breakfast or light lunch – Peanut jaggery chutney is a rural Andhra classic side dish and much beloved recipe from my home. Usually prepared in a rolu (mortar) and served during Makara Sankranthi with pulagam or pongali and ghee.

 Shallot, Dried Red Chillies, Roasted Peanuts
Shallot, Dried Red Chillies and Roasted Peanuts

Recipe:

Peanuts – 1 cup
Shallots 4 or one big red onion – cut to chunks
Dried red chillies – 6 to 10. I usually add at least 8 for a cup of peanuts
Tamarind – small marbleround size
Jaggery pieces – 1 tablespoon or to your liking
Salt – 1 teaspoon

Roast peanuts to light brown color. Cool and remove the skins.

In a skillet, heat a tablespoon of peanut oil. Add and fry shallot/onion pieces and dried red chillies to brown color. Let cool to room temperature.

Soak tamarind in a quarter cup of hot water for about 10 minutes, to soften.

Take them all in a blender or in a mortar. Add jaggery and salt. Grind to smooth consistency. Remove to a cup and serve with breakfast items or with chapati/rice along with ghee.

Peanut-Jaggery Chutney with Pulagam and Ghee

Posted by Indira©Copyrighted in Amma & Authentic Andhra,Jaggery,Peanuts,Shallots (Wednesday January 17, 2007 at 8:26 pm- permalink)
Comments (11)

The New Home of Mahanandi: www.themahanandi.org

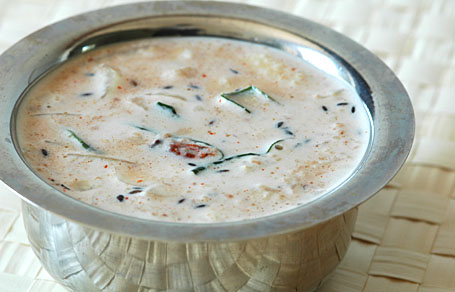
Peanut Pachhi Pulusu (Peanut Cold Rasam)

For Independence Day Food Parade on August 15th, I’ve decided to write three recipes which are near and dear to my heart. One each from – my hometown, my state and my country. Today’s one is from my hometown. Some recipes are truly local, like a needlepoint, known and popular only in few homes in a town and surrounding villages. Peanut pachhi pulusu (pachhi =raw/unboiled, pulusu=rasam/soup) is one such recipe from “land of Nandis” – Nandyala, Rayalaseema region.

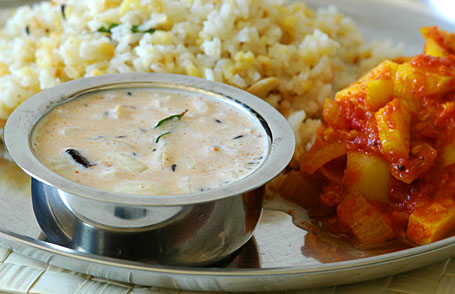
Peanuts are roasted to golden color, skins removed and then made into smooth paste along with salt, chilli powder, tamarind and jaggery. By adding water, the paste is made into rasam like consistency. Finely sliced onions are added and seasoning is done by popu/tadka. That’s it. This is sort of cold, no-boil rasam and perfect during hot summer days. Often prepared and served with pongal and potato curry, the whole combination tastes awesome and comforting.


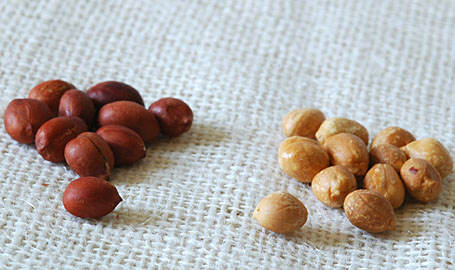
Peanuts – Roasted and Golden (Skins Removed)

Recipe:

Roast Peanuts:
Take 2 cups of peanuts in a large skillet and on medium-high heat, roast them to golden color (see photo above) mixing and turning often to prevent scorching. Allow to cool. Rub them with hands to loosen the skins and remove the skins. (Roasting peanuts to golden color is important. Spend few minutes & pay attention to roasting process. Taste of this recipe depends on this step.)

Make a paste:
2 cups of Peanuts – roasted and skins removed (from above)
½ teaspoon of chilli powder
1 teaspoon of salt or to taste
1 tablespoon tamarind juice
2 tablespoons of powdered jaggery
Take all the above in a blender or in a mortar, crush them to smooth paste by adding 1 cup of water in between.

Finely Slice:
1 big onion – lengthwise, slice thinly and wash them in water to separate the onions pieces and to remove that raw onion smell.

Do the popu/tadka:
Heat 1 tsp of oil in a big vessel. Add and toast – few pieces of curry leaves, dried chillies and half teaspoon of mustard seeds and cumin. To this popu/tadka:
Add the smooth peanut paste.
Add the onions.
Stir in about 1 to 2 cups of cold water. Mix and serve.
Make the rasam like thick buttermilk consistency. Have a taste and adjust salt, sweet and sour levels to your taste.

Serve with pongal. This pachhi pulusu (cold rasam) has all 5 essential ruchulu (flavors) and is guaranteed to make one feel cool as a cucumber on a hot day.


Peanut Pachhi Pulusu with Pongal and Potato Kurma ~ Our Fabulous Meal:) Today

Posted by Indira©Copyrighted in Amma & Authentic Andhra,Jaggery,Onions,Peanuts (Thursday August 10, 2006 at 3:39 pm- permalink)
Comments (30)

The New Home of Mahanandi: www.themahanandi.org

Stuffed Bell Peppers (Capsicums)

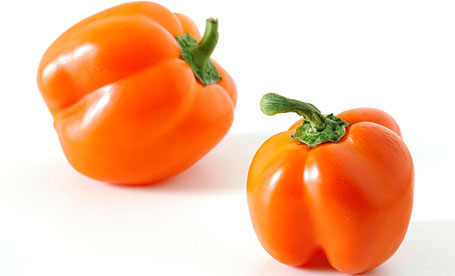
Capsicum (Bell Pepper)

Hollywood often portrays the pretty blonds as cute and dumb. The same role in vegetable world is filled by bell peppers or capsicums. I think.

Bell peppers are colorful! Look so pretty, cute and also would bring that much needed (in some eyes) color and attraction when added to a dish. They are popular mainly for that reason and they have hollow insides, giving the impression of empty pretty heads just like the blond stereotype. No wonder we are tempted to fill them up. Almost every cuisine has several stuffed recipes for bell peppers. Rice, meat, lentils, nuts and cheese, every other thing in food world is used to stuff the bell peppers. Even other vegetables,… aah, the humiliation. The bell peppers must feel mortified when we fill them up with other veggies. But graceful they are, they won’t show it. They stand our mistreat and still look pretty. Such graciousness always invites strong reaction; people would hate or love them. But few could resist their charms.

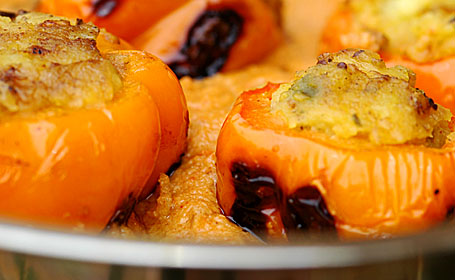
One such charming, capsicum recipe is from India. Here the bell peppers are stuffed with spiced mashed potatoes and cooked to brown and then placed in peanut-sesame sauce. Served with rice or chapati, this is a meal fit for a rani (queen). Though the recipe makes us work like kitchen helpers in a rani’s kitchen, once you wipe off the sweat from the brow, once it’s plated, you would feel like a rani. Worth the effort, that’s what I am saying.:)


Capsicums Stuffed With Potato Curry – Ready For Browning

Recipe:

Potato Stuffing:
Good quality potatoes (red or baby alu) – 3 or 6, Pressure-cook or boil them in water, until tender. Remove the skins, mash them to smooth paste.
In a pan, heat a teaspoon of oil, do the tadka (toast ¼ tsp each – mustard seeds, cumin and curry leaves). Saute finely chopped pieces of one onion, 4 green chillies and a fistful of fresh peas. Add the mashed potato. Stir in salt, turmeric and one teaspoon of clove-cinnamon-cumin-coriander seed powder (garam masala). Mix them all well. Cook covered on medium-low heat for about 10 to 15 minutes – That’s our potato stuffing for bell peppers.

Bell peppers (Capsicums):
Pick 6 small sized, fresh and firm bell peppers – any color (green, red, yellow or orange) or color combination is fine. This curry is all about appearance and size matters. Small sized capsicums are perfect for this curry. Jumbo regular grocery (US) type are too big and the curry won’t look good when prepared with them. (Local farmers markets here in US, often carry small sized ones during summer time.)

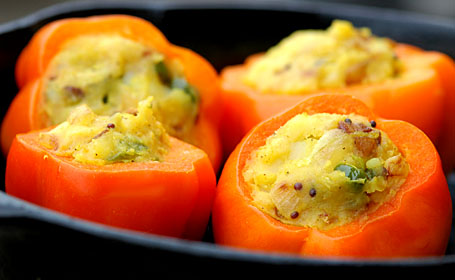
Cut the tops off. Remove the seeds and membranes inside and make a hollow. Fill them up with potato curry to the top.

In a big iron skillet, heat about 1 tablespoon of peanut oil. Place the stuffed bell peppers neatly in a circle and cook them covered on medium heat for about 15 to 20 minutes. Turn them to sides in-between so that they could get brown evenly on all sides. (You could also cook these stuffed bell peppers in oven – baking and broiling at 375 F until they are soft and tender to touch.)


Stuffed and Cooked Capsicums in Peanut-Sesame Sauce

Peanut-Sesame Sauce:
Toast quarter cup each – peanuts and sesame seeds to golden color. Take them in a grinder, add 2 cloves and 2 one-inch pieces of cinnamon, half teaspoon each – chilli powder and salt and a tablespoon of tamarind juice and powdered jaggery . Grind them to smooth paste.

Heat a teaspoon of peanut oil in a big pan. Add the peanut-sesame sauce and about a half cup to one cup of water. Mix well. Simmer on medium heat for about 10 minutes. Have a taste and adjust salt, sweet and sour levels to your liking.

Add the stuffed capsicums to the thickened sauce. Cook for another 10 minutes on medium heat, covered. Serve with rice or with chapatis.


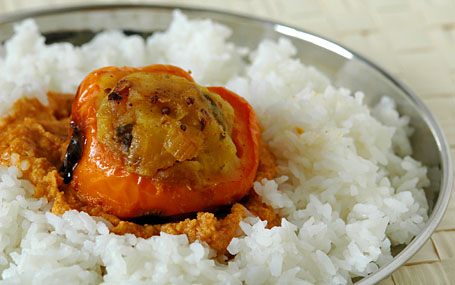
Stuffed Capsicum Curry with Rice

Notes:
Traditional North- Indian recipe does not inlclude the gravy, and cooking the stuffed peppers in peanut-sesame sauce is my version. Adding little bit Andhra touch.

Posted by Indira©Copyrighted in Bell Pepper,Peanuts,Sesame Seeds (Monday July 17, 2006 at 2:04 pm- permalink)
Comments (36)

The New Home of Mahanandi: www.themahanandi.org

Red Bell Pepper Chutney

Red Bell Pepper Chutney

Of all different colored bell peppers, I like the red ones. Red bell peppers are matured green bell peppers and when bell pepper ages, not only the color but the flavor also changes. They become sweet, which is a surprise. Usually maturing into red signals the more fierce kind of flavor in vegetables, but here they mellow.

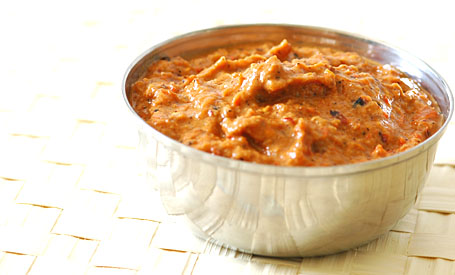
This favorite chutney of mine is prepared by roasting red bell peppers, onion and dried red chillies and by blending them including peanuts, jaggery and tamarind juice. The result is one of the flavorful and easiest Bharath-inspired chutnies you will ever try. Tastes superb with all the breakfast items, like idly, dosa, upma and also with rice, chapati or as a spread and dip for snack items.

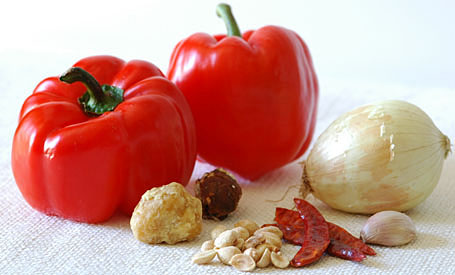
Red Bell Peppers, Onion, Garlic, Dried Red Chillies, Roasted Peanuts, Tamarind and Jaggery - Ingredients for Red Bell Pepper Chutney

Recipe:

Cut to big chunks:
2 big red bell peppers
1 medium sized onion
6-8 dried red chillies
2 garlic cloves

Roast:
Heat about 1 to 2 tablespoons of peanut oil in a skillet.
Add and roast the cut vegetables and dried red chillies on high heat. The vegetables should be very well browned and soft. Remove them from heat and allow to cool.

Meanwhile, Soak tamarind, and Roast Peanuts:
– Small Lime sized tamarind in half-cup of warm water for about 10 minutes. Or microwave for 30 seconds – This is to soften the tamarind, so it can grind well.
– Roast half-cup of peanuts until golden and remove skins. Store-bought un-salted, roasted peanuts are fine too.

Blend, in a blender or in a mortar using a pestle:
All the roasted vegetables
Tamarind, along with the water it soaked in.
Half cup of roasted peanuts
½ tablespoon of powdered jaggery
¼ tsp of salt or to taste
Grind them together to coarse puree, without adding any extra water.

Remove to a cup and serve with your favorite breakfast/lunch/supper items.

Red Bell Pepper Chutney and Besan Dosas
Besan Dosa and Red Bell Pepper Chutney

Recipe Source: My own creation

Posted by Indira©Copyrighted in Bell Pepper,Dried Red Chillies,Peanuts,Peppers (Tuesday June 20, 2006 at 9:21 am- permalink)
Comments (54)

The New Home of Mahanandi: www.themahanandi.org

Indian Broad Beans Curry (Chikkudu Kaya Kura)

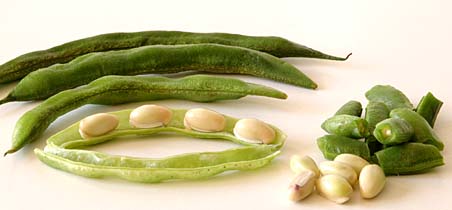
Fresh beans can be exciting, particularly Indian broad beans. Compared to green beans, they have a more prominent beany taste and the seeds inside are plump, meaty and mildly sweet like baby lima beans. Back in Andhra, it is a popular vegetable to grow. Backyards covered with these bean plants provide shelter from the hot sun; they not only enrich the soil with their roots(legumes) and also us – the plump beans are nature’s tiny capsules of proteins. Very nourishing and tasty. You can find Indian broad beans during spring and summer at local Indian grocery shops here in US.

Indian Broad Beans, Chikkudu Kayalu

Recipe:

20 to 25 Indian broad beans (pick plump ones)
2 ripe tomatoes and 1 onion – finely sliced
Make a paste
½ cup of roasted peanuts
1 tablespoon of tamarind juice
2 cloves and 1 small cinnamon stick
½ tsp of chilli powder and salt
¼ tsp of turmeric
1 tablespoon of powdered jaggery
(Take all these in a blender, add half glass of water and puree them to smooth paste)
For Popu or tadka
1 tsp of mustard seeds, cumin, minced garlic and curry leaves

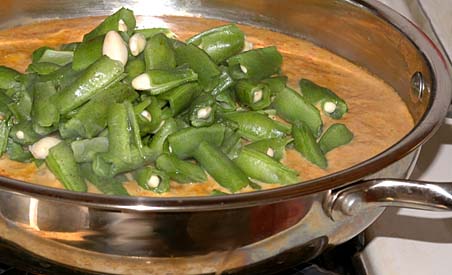
Adding the Indian Broad beans to the curry sauce

Preparation:

Wash the broad beans. Take them in a plate, remove the ends and string them. Just pluck the end of a bean with your hand, and then pull downward; if a thick thread comes away, the bean need stringing, so do the same on the other side. The beans can then be sliced either using a sharp knife or with your hands. Cut or pluck them into small pieces.

Heat one teaspoon of peanut oil in a big pan. Add and toast mustard seeds, cumin, minced garlic and curry leaves. Add and saute onions and then tomatoes. When they are softened, add the cut broad beans. Stir in peanut-tamarind paste and another half to one glass of water. Cook them covered, stirring in between, on medium heat for about 15 to 20 minutes or until the beans are properly cooked. Have a taste and add salt and jaggery if needed.

Serve warm with rice or chapati and enjoy this classic sweet and sour, nutty and beany, Andhra curry.

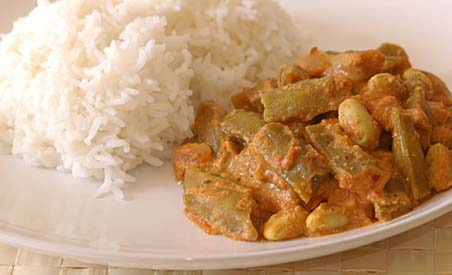
Chikkudu Kaya Kura and Annam(Indian Broadbean curry and rice) - Our lunch today
Indian Broad bean curry and rice (Chikkudu kaaya kura and Annam) ~ Our lunch

Recipe Source:Amma

Posted by Indira©Copyrighted in Amma & Authentic Andhra,Chikkudu Kaya (BroadBeans),Peanuts (Tuesday March 7, 2006 at 1:57 pm- permalink)
Comments (25)

The New Home of Mahanandi: www.themahanandi.org

Pasta in Chilli, Bell Pepper and Peanut Sauce

“What Kind of Food Are You?” – I tried the fun quiz of 5 questions. I expected Indian, but I don’t think the quiz has Indian food in its list of responses. The answer was ‘Italian food’, and I was satisfied. Like Indian, I think of Italian as another no-nonsense, honest kind of food. Though here in US, a little bit over glorified. What? Have you been watching food TV (US) lately? It should be renamed ‘Italian Food TV’ with its 24-hour Italian this and Italian that programming, and its star-cooks falling over themselves proclaiming their Italian heritage. Sometimes I wonder, why am I paying money for this channel on cable, is this a foodtv or a propaganda machine for Italian cuisine. It would be understandable if majority of Americans are Italians or Italian decent, but that is not the case and further, the minority (here the minority status is determined by the skin color) means non-whites, are climbing up to almost 40%. More and more, it looks like American Food TV has decided to disregard diversity and showcase only one cuisine at the expense of others. What a sad, sad thinking!

Well, I am glad to contribute one more recipe of pasta to IMBB #22, the mother of all events and most popular one in food blogosphere, this month hosted by lovely Amy of ‘Cooking with Amy’ fame. Even though I think of my contribution an original, I am sure there is someone, somewhere already written down this version of pasta sauce. Thousands of dedicated Italian cooks, cookbooks and hundreds of fabulous food bloggers, recipe sites – millions of pasta recipes, it got to be there, somewhere. No… then I am happy to cook up millionth one recipe of pasta.:)

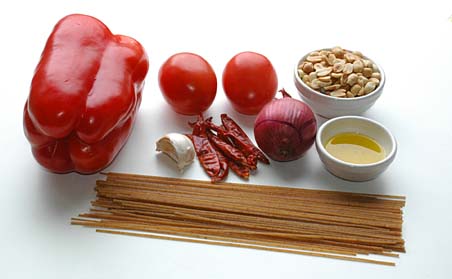
spaghetti, red bell pepper, Tomatoes, Roasted Peanuts, olive oil, Onions, Dried red chillies and garlic

Recipe:

Pasta: I used spaghetti, Hodgson Mills brand, whole wheat with flax seed and organic variety. Like pulao/pilaf taste depends on basmati rice, a good pasta dish needs quality pasta. So I do spend few extra bucks on a fine variety. Hodgson Mill brand without a doubt, quality products.
One fistful of spaghetti for one person – that is the measurement I use for spaghetti.

For Sauce:
1 cup of peanuts – roasted and skins removed
3 red bell peppers – deseeded, cut into big chunks
4 dried red chillies and 4 garlic cloves – halved
3 ripe, juicy tomatoes – chopped into big chunks
1 small red onion – chopped into big chunks
1 tablespoon of olive oil
1 tsp of each-cumin, salt and powdered jaggery/sugar
I prefer to have sauce, lots of it with my pasta, so the above quantities.

Peanut-Veggie Sauce Spaghetti in pasta sauce

Preparation:

Pasta Sauce: Roast the bell peppers, dried red chillies, tomato, onion, garlic and cumin in 1 tsp of olive oil, until they all are brown and golden. Let them cool down to room temperature.

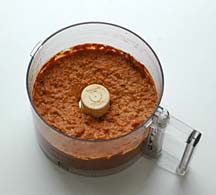
In a food processor, first add roasted peanuts and make a fine powder of them. To it, add the roasted veggies and half teaspoon of salt. Add half cup of water and grind them into smooth paste.

In a big wide pan, heat olive oil and add the peanut-veggie paste. Add one cup of water, jaggery and salt to taste. Mix and cook covered for about 10 minutes on medium-low heat.

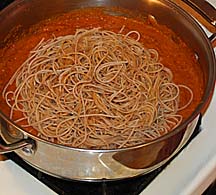
Pasta: While the sauce is simmering, bring a large pot of salted water to a boil. Cook the pasta al dente, usually for about 5 to 8 minutes. Drain the pasta into a colander, immediately add it to the sauce. Mix it thoroughly with pasta sauce. Cook, uncovered for about 2 minutes on low heat and serve.

The sauce can be made earlier and just before mealtime, pasta can be cooked and added. One thing I learned about pasta is, it has to be served hot, to get the best taste.
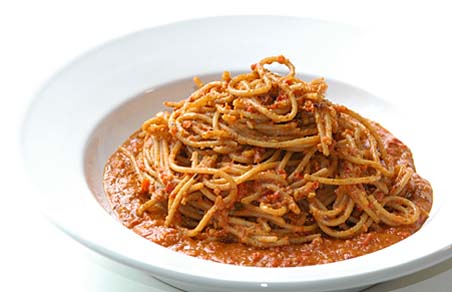
Spaghetti in Chilli-Red bell pepper- peanut sauce

Pasta in chilli-red bell pepper-peanut sauce: sweet, spicy, savory and smoky – A range of delicious flavors, all blended well together for a wholesome, hearty, filling meal ~ Our Sunday dinner and my entry to IMBB Event.

Recipe Source: My Own Creation
Tagged with: +

Posted by Indira©Copyrighted in Bell Pepper,Dried Red Chillies,Pasta,Peanuts (Monday January 30, 2006 at 8:32 am- permalink)
Comments (30)

The New Home of Mahanandi: www.themahanandi.org

Lasagna Rolls – Indian Way

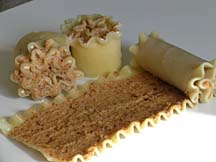
I was in the mood for something new and different. I had some goat cheese in the fridge (Steelers pizza left over), few beetroots, lot of ripe tomatoes, a printout of lasagna rolls recipe I wanted to try, and an idea of how to make it more suitable for our palate. After 45 minutes in the kitchen, the result was – tasty lasagna rolls, some with goat cheese and some with spicy sweet peanut paste as filling, baked in fresh tomato sauce and served with sautéed onions, beetroots and peas as topping.

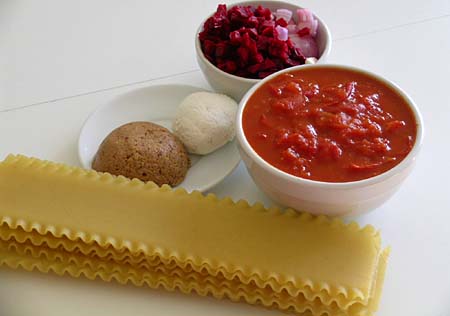
Lasagna, Home made Tomato Sauce, chopped onions and beetroots, Goat cheese and Spicy Peanut Paste for filling

Recipe:

1.Tomato Sauce: Cook finely chopped 8 ripe, juicy tomatoes, 4 garlic cloves in one tsp of oil. Also add half glass of water, half teaspoon of red chilli powder and salt to taste. Cook until the tomatoes turn mushy and sauce like.

2. Filling: I prepared two kinds of filling. One is goat cheese, that’s an easy one, buy and open the packet, true Italian way. Roasted peanuts (outer skins removed) made into paste by adding little bit of salt, jaggery, red chilli powder and few drops of water – my idea of Indian type filling.

3. Lasagna: Meanwhile, cook 5 lasagna sheets in boiling salted water according to the instruction on the packet (takes at least 15 to 20 minutes), in a big pan. Drain and keep them in cold water so that they won’t stick to each other.

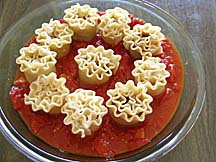
Spreading peanut paste onto a lasagna sheet, rolling and cutting into two equal parts Cut lasagna rolls in tomato sauce, ready for baking

4. Baking: All the prep work is done and our ingredients are ready for the final step. Preheat the oven to 375° F. Spread the filling (goat cheese or peanut paste) on lasagna sheet evenly. Roll the sheet to the end and cut it into two equal rolls, crosswise. Prepare all lasagna sheets in this way. Pour the tomato sauce in a baking dish, arrange the lasagna rolls (cut side down) neatly in the sauce, loosely cover the dish with an aluminum foil and bake for about 30 minutes at 375° F.

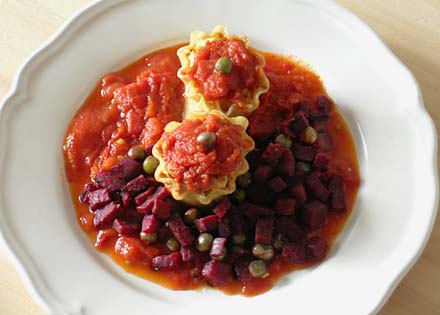
5. Sauté: Finely chop beetroots and onion. Add peas and sauté them for few minutes. Season with salt and red pepper flakes.

Serve the lasagna rolls in tomato sauce with sautéed beetroots, onion and peas as topping.

Lasagna rolls in tomato sauce with sautéed onion, beetroot and peas as topping

I have to say I liked both goat cheese and peanut paste rolls equally. Tangy tomato sauce and sweetness from sautéed beetroots, onions and peas perfectly complimented the bland, baked lasagna rolls. Little bit time consuming, but I think these beautiful flower like lasagna rolls are terrific for entertaining because they can be prepared in the morning and baked at the last minute.

Posted by Indira©Copyrighted in Cheese,Milk & Products,Pasta,Peanuts (Friday November 4, 2005 at 2:27 pm- permalink)
Comments (17)

The New Home of Mahanandi: www.themahanandi.org

Gutti Vankaaya Kura (Stuffed Brinjal Curry)

From Telugu to English, The literal translation of Gutti vankaaya is ‘bouquet of brinjals’. As its name suggests stuffed brinjal curry is not only an Andhra classic, it is also very pretty to look at and the taste is pure fiery heaven. Greenish white brinjals are perfect for this curry. I make this curry only with this particular variety of brinjal. Unlike the purple brinjals, the green ones have a very delicate skin, cook very easily and taste great.

First part of the recipe is selecting the right brinjals:
If you are going to try this recipe with green brinjals like me, for two people, buy at least 15 to 20 very fresh looking, small size, and perfectly round green brinjals. The brinjals should look shiny without any blemishes, or holes and the stem that they are attached to should be in lively green without having that dried, black look. The tender the green brinjals are, the tastier the end result is. The ones with black seeds are very mature (at least half of your pick will be like this), don’t even bother to cook them, they taste bitter. Because they mature very rapidly, cook them on the same or on next day. Trying to keep them fresh and young in the refrigerator, it’s useless.

It takes at least 30 to 45 minutes to prepare the ingredients and another 30 minutes to cook the curry so attempt this curry only when you have the freshest green brinjals.

Second part is preparing the stuffing:
Ingredients for the stuffing change from home to home. Every home has their own recipe for stuffing. I can make five different kinds stuffing. The one I am going to post today is the family recipe.
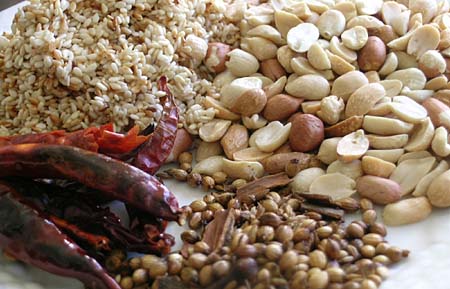
Roasted Peanuts, Sesame Seeds, Red Dry Chillies, Coriander seeds, cumin, cloves, cinnamon.

Dry roast:

1 cup peanuts – roast them, when they are cooled, rub and remove the skins
1 cup sesame seeds – dry roast them

8 to 10 dried red chillies
One tablespoon of coriander seeds
Half teaspoon of cumin
4 cloves, one small piece of cinnamon stick
5 to 6 fenugreek seeds (menthulu)(They taste bitter so limit the number)
1 teaspoon of salt
Tamarind
Soak key-lime size tamarind in half cup of water and microwave it for about 15 to 30 seconds. Let the water cool down and squeeze the tamarind to get the paste.

Make a tight paste: Grind all of the above ingredients to a fine, smooth paste. You have to stuff this paste into brinjals so while grinding, under any circumstances, do not add water. Take this paste onto a plate and divide it into two portions. One is for stuffing and the other half is for sauce/gravy.
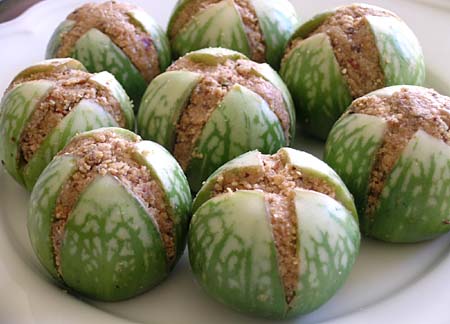
Brinjals stuffed with peanut, sesame paste

Thoroughly wash and dry the green brinjals. Even the freshest ones are not so fresh here, so I depart from the norm and remove the stems of brinjals. If you want, keep the stems. Take each green brinjal and on the end, opposite of stem, make a plus shape slit towards stem side but not all the way through (one vertical and one horizontal slit).

Fill up the plus shape slit (gap) with stuffing. Using your left hand fingers separate the quarters gently, push the stuffing inside with right hand fingers, again gently. Filling up all the slit green brinjals takes time, so have a seat, keep the stuffing and brinjals in front of you. Do it patiently and slowly without breaking the beautiful brinjals. If you do, you won’t get a bouquet but only the petals.:)- So have patience and treat them like a fragile art project.
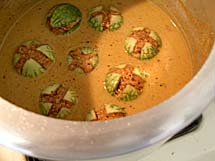
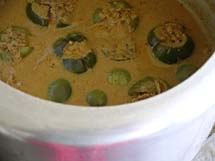
Just placed stuffed brinjals in Pressure cooker Stuffed brinjal curry in pressure cooker after one whistle

Cooking:

How I cook them again is different from that of home. Here I use a pressure cooker. What? I know.. my method may be new to you but the results are way better. Pressure cooker makes it fast with less oil and the green brinjals are cooked thoroughly, you can’t find not one hard uncooked piece of brinjal, cooked in this way.

Do the popu or tadka(toasting the black mustard seeds and cumin in one teaspoon of oil). Add half of the peanut-sesame paste that was kept aside and half to one glass of water and one teaspoon of turmeric. Mix them up thoroughly without any lumps. Make the gravy/sauce more on the thin side or watery. Taste it, add salt, red chilli powder and tamarind paste if needed. I also add jaggery, very tiny amount to the gravy (making it mildly sweet). Arrange the stuffed brinjals neatly in the gravy, slit side up. Cover and cook them until the green brinjals are very tender to touch.
I pressure-cook them until one whistle on medium low heat. After the whistle sound, I immediately and slowly release the pressure from the valve by lifting the weight. Resulting in very wholesome, thoroughly cooked stuffed green brinjals.

To serve, with a big spoon gently lift the stuffed brinjals, place them on a plate and pour the sauce around. Tastes great with rice or roti.
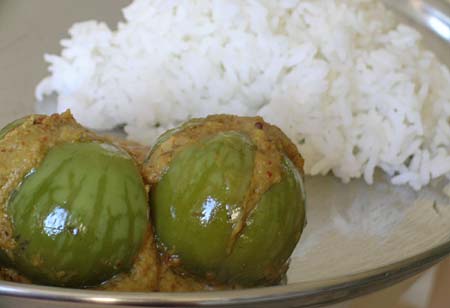
Stuffed Brinjal Curry(Gutti Vankaaya Kura) with Rice

Stuffed brinjal curry (Gutti Vankaaya Kura) with rice.

Recipe Source:Amma

-------------------------- *** *** -----------------------
I am going to write it down four other types of stuffings that I know for this cury. The proportions of the ingredients are not specified because there are no hard and fast rules and people at home add a little of this, little of that. So feel free to try various proportions as per your taste.

Type 1:
Dry red chillies + dry or fresh coconut+ chana dal & urad dal + cumin, coriander, fenugreek seeds and salt. Sauté and make a paste of them without adding water. Add cashews to make it rich.

Type2:
Besan or gram flour+onions+green chillies+ginger garlic paste+dry coconut powder+coriander powder and salt, make a paste by adding little bit of water.

Type 3:
red onions + dried red chillies roasted in oil then make a paste of them.

Type4:
Fresh coconut+ roasted peanuts+ roasted sesame seeds+dried red chillies+Coriander seeds+Cumin seeds+cloves+cinnamon stick+ chana dal+ urad dal+tamarind +jaggery and salt. This is my favorite of all.

Before me, some other Indian food bloggers also posted their recipes for this curry. More choices from three other fabulous blogs… always a good thing.
Posted by Indira©Copyrighted in Amma & Authentic Andhra,Peanuts,Sesame Seeds,Vankaya (Brinjal) (Monday October 24, 2005 at 11:31 pm- permalink)
Comments (109)

The New Home of Mahanandi: www.themahanandi.org

Previous Page »