Mahanandi

Living in Consciousness ~ Indi(r)a’s Food and Garden Weblog

Sambhar with Shallots (Baby Onions)

Last week I purchased one packet of shallots (baby onions). With them, I prepared a south Indian special ‘shallot sambhar’ i.e. tiny, baby onions are first peeled out of their dry skin/coverings, then cooked as whole, in thick lentil (toor dal) soup. Tasty and delightful! Like all babies, they are tiny bundles of joy, a gastronomic kind:) and worth the high price.

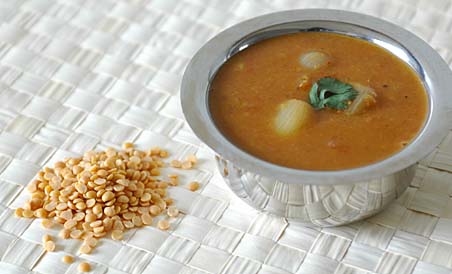
 Shallot(Baby onion) Sambhar, Toor dal
Shallot Sambhar – Light and refreshing

Recipe:

My sambhar cooking routine is a three-step process.

1. Pressure-cook the toor dal until soft, so that it can be mashed/pureed into smooth paste. Soak the tamarind in water to extract the juice.

2. In the meantime, cut and cook vegetables for sambhar- usually tomatoes and vegetables (shallots). The process I follow is like this. Heat one teaspoon of oil a big saucepan, add and toast popu ingredients. To it, I’ll add chopped tomatoes and cook them until they turn soft and mushy. Then I’ll add and cook shallots (or vegetables), one cup of water and also the seasoning (sambhar powder, turmeric, red chilli powder and salt).

3. Simmering 1 and 2 together- To the cooked tomato-shallot mixture, add the mashed toor dal paste and tamarind juice. Stirring in between, let simmer for about 15 to 30 minutes. Just before turning off the heat, garnish with finely chopped cilantro and serve.

Ingredients:
4 fistfuls of toor dal (3/4 cup)
12 to 15 shallots (baby onions)
2 ripe juicy tomatoes
Seasoning:
1 tablespoon of tamarind juice
1 tsp of sambhar powder
1/2 tsp of red chilli powder and salt
1/4 tsp of turmeric
Cilantro for garnish
Popu or tadka:
1 tsp each of mustard seeds, cumin, urad dal, curry leaves, minced garlic. Also few curry leaves and dried red chilli pieces
Variation
I prepared this sambhar for idlies and for idly sambhar, I usually add half tsp of cloves & cinnamon powder, to spice up the sambhar a little bit.

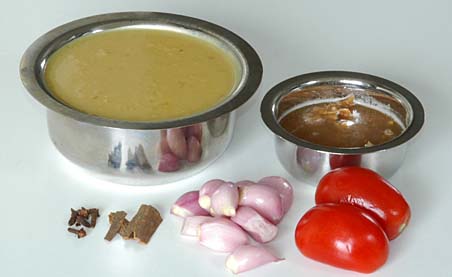
Mashed Toor dal, Tamarind juice, tomatoes, shallots (Baby onions), cloves and cinnamon
Ingredients for shallot sambhar

For more detailed sambhar recipe (like how to prepare home made sambhar powder etc.,), check out my other blogged recipes- Okra Sambhar and white radish sambhar.

Posted by Indira©Copyrighted in Amma & Authentic Andhra,Onions,Shallots,Toor Dal (Monday February 20, 2006 at 3:28 pm- permalink)
Comments (19)

The New Home of Mahanandi: www.themahanandi.org

Ballari Coconut (Ballari Kobbera)

Ballari Coconut (Ballari Kobbara)

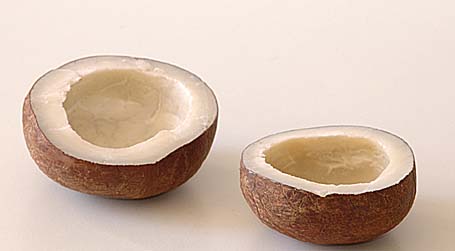
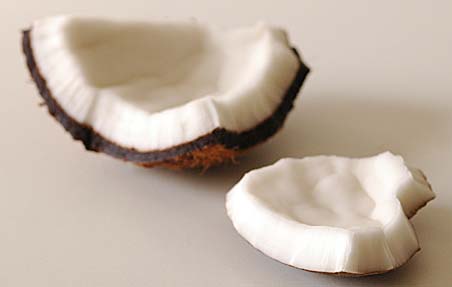
For this week’s Indian kitchen, I’m showcasing a unique Indian ingredient, “Ballari Coconut”. It’s a dried whole coconut, and the unique thing about it is how it is dried. Under hot summer sun, some selected whole coconuts are dried with coconut water inside so that the coconut meat can absorb all the coconut water while drying. This process makes the dried coconut very sweet. A completely different taste when compared to ordinary dried coconut, where the drying process is done after removing the coconut water.When cut into half (above image) and grated or powdered, Ballari coconut almost taste like sweetened, sugar added coconut flakes.

In our area, Nandyala (India), it’s called ‘Ballari coconut’. Because of the special process involved in making, it’s priced little bit high than the ordinary dried coconut. Due to high cost, it’s used mainly during special occasions like for preparing sesame laddus and as part of traditional ‘sare’ (care package) to married daughters from mothers etc.,

Are you aware of this type of dried coconut? If so, what do you call it at your place? Any feedback is much appreciated. Thanks!

it’s available in Indian grocery stores here in US. I saw it at Subji Mandi in New Jersey and also at Pittsburgh Indian grocery shop. Look for whole dried coconut instead of halved shells.

For more weekend food/herb blogging, check out Kalyn’s Kitchen.

Posted by Indira©Copyrighted in Amma & Authentic Andhra,Coconut (Dry),Indian Ingredients (Sunday February 19, 2006 at 6:11 pm- permalink)
Comments (24)

The New Home of Mahanandi: www.themahanandi.org

Coconut Chutney ~ Andhra Style Raw Cuisine

This is another type of chutney (pacchadi) that we prepare with fresh coconut. Young, fresh coconut, red onion and green chillies, little bit of salt and tamarind juice – all pounded together in a stone mortar for about 10 minutes. The result is dynamite stuff and a completely raw food item. Sweet flesh of fresh coconut mixed together with hot, tangy flavors is a taste worth 10 minutes of my time and energy.

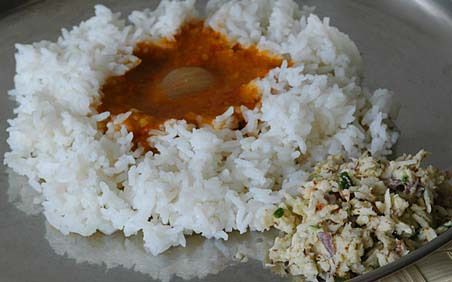
Dry Coconut Chutney and Sambhar Rice
Coconut chutney with rice and shallot sambhar ~ Our lunch today.

Recipe Source: Amma

Posted by Indira©Copyrighted in Amma & Authentic Andhra,Coconut (Fresh),Green Chillies (Friday February 17, 2006 at 1:45 pm- permalink)
Comments (10)

The New Home of Mahanandi: www.themahanandi.org

Coconut Chutney (Kobbari Pacchadi)

Coconut chutney is an example of how good a raw food can taste when prepared with right ingredients. Whoever came up with this recipe, my salute to them! People remember and replicate a good recipe; no wonder, this age old recipe continues to be popular and beloved by all who tried it.

Breakfast is not a proper breakfast without coconut chutney in Southern states of India (Andhra, Tamilnadu, Karnataka and Kerala). Perfect blend of different flavors and the ease with which it can be made – coconut chutney is a great example of traditional, health conscious South Indian food and a showcase recipe for raw cuisine. See the photo below, if you find coconut chutney looking similar in an Indian restaurant along with your dosas, idlies, that’s a sure sign that you are getting a proper south Indian food.

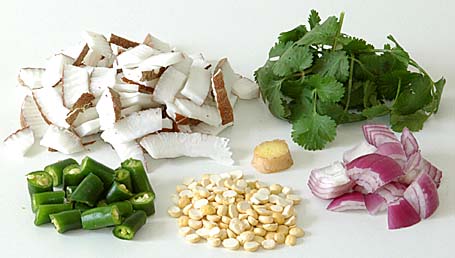
Fresh Coconut, Cilantro, Red onion, Ginger, Dalia(pappulu) and green chillies

Recipe:

1 cup of thinly sliced fresh coconut
¼ cup of pappulu(dalia, roasted chickpeas)
6 Indian small green chillies, chopped
1 tiny red onion or shallot, sliced into chunks
6 sprigs of fresh cilantro and 1/2 inch of ginger
½ tablespoon of tamarind extract
¼ tsp of salt
for popu or tadka
1 tsp each of mustard seeds, cumin, urad dal, fresh curry leaves and few pieces of dried red chilli.
extras(optional)
1 tablespoon of yogurt and one lime

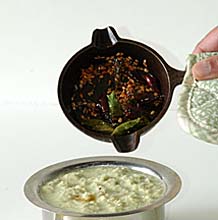
Tadka/popu is done and ready to add to the coconut chutney Final step- adding the tadka/popu to coconut chutney

Preparation:
Preparation means grinding. Taste of coconut chutney varies with grinding method. Believe it or not, different grinding tools give different taste. The best taste comes out of using a stone mortar. Closest is the machine, which grinds with a stone. Last is the food processor or the blender etc., The taste is inversely proportionate to how easily you can grind it.

In a mortar or blender, combine all the ingredients (coconut, pappulu, onion, green chillies, cilantro, ginger, tamarind extract and salt). Add half to one cup of water and grind them until the ingredients are pureed. Transfer the mixture to a cup.

In a small pan, add half teaspoon of peanut oil, add the popu ingredients, sauté them until they start to splutter. Remove the pan from heat and add this popu to the pureed coconut mixture in the cup. Stir in little bit of yogurt now (our family variation). The chutney is ready. Just before serving, squeeze few drops of limejuice.

Traditionally coconut chutney is served with dosa, idly, vada, upma, utappam, pesarattu and pongal, as a part of morning breakfast.

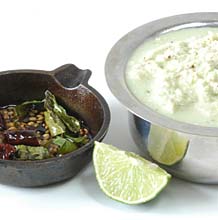
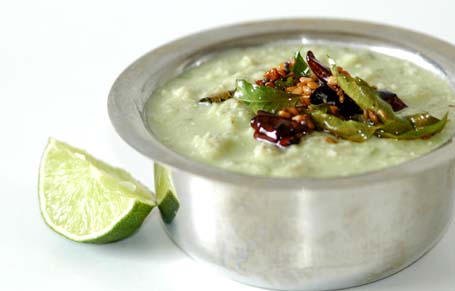
Coconut chutney with popu/tadka just added
Coconut Chutney ~ South Indian Style

Note to reader: I use, tiny red onion or shallot (Indian onion, small baby onion) for this chutney. Either one is preferable than white/yellow onions (US). Red onion/shallots are less harsh in flavor when raw and don’t overpower the chutney with their bitterness.

Recipe source: Family- Amma & Attamma(mother and mil)
For several variations of this recipe, read the comments.

Posted by Indira©Copyrighted in Amma & Authentic Andhra,Chana Dal-Roasted (Dalia),Coconut (Fresh) (Thursday February 16, 2006 at 8:13 pm- permalink)
Comments (54)

The New Home of Mahanandi: www.themahanandi.org

Homemade Coconut Milk (Kobbari Paalu)

Even after all these years living in US, still I can’t bring myself to buy or use canned stuff in metal containers. Commercial Coconut milk is available here, packed in metal tins only. So, I avoid that stuff and I make fresh coconut milk at home whenever a recipe calls for it. Very easy to do, the only things required are fresh coconut, muslin cloth (cotton cloth), a hammer and a blender. 10 minutes of work- homemade fresh coconut milk, without any additives will be ready to add in cooking.

Fresh Coconut Pieces

Method:

Hold the coconut in your hand firmly. Hit coconut hard with hammer. Show off your aggression and hit hard. Depending upon your aggression level:), it will break open in few attempts. Catch and pour the coconut water in a glass/pitcher. Hitting with hammer, break each coconut half into pieces. Do all this, over a clean, empty kitchen sink- very convenient to pick up the falling coconut pieces and also to clean the whole mess.

Using a knife, separate the coconut piece from its shell. Young coconut is easily separable from the shell, but mature ones, some with attachment issues won’t come off that easily. Then try this old time tip – soak the pieces in water for 5 minutes. Water seeps between shell and coconut, creates a thin barrier and makes it easy to separate the coconut from the shell.

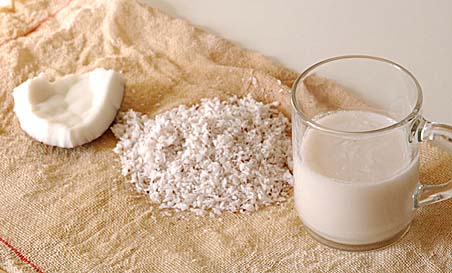
Rinse the coconut pieces with water. Slice them into very thin pieces. Place the coconut pieces in a blender, add water and grind smooth. Cover a bowl with muslin cloth (cotton cloth/gangi gudda) and pour the grinded coconut liquid-slush into the cloth. Allow it to drip for few minutes, and then squeeze handfuls of the coconut meat to extract as much liquid as possible into the bowl. Discard the squeezed pulp and use coconut milk in recipes. Stored in a glass jar, coconut milk can stay fresh for 1 or 2 days refrigerated.

Compared to store-bought concentrated stuff, homemade coconut milk tastes completely different. Fresh, tasty and watery. By playing with water quantity added to the blender and by cooking, you can control the consistency and thickness of coconut milk according to your needs.

Coconut, Finely Powdered and Squeezed Coconut Powder Using the Cheesecloth and Coconut Milk
Homemade coconut milk

Posted by Indira©Copyrighted in Amma & Authentic Andhra,Coconut (Fresh) (Monday February 13, 2006 at 10:07 am- permalink)
Comments (37)

The New Home of Mahanandi: www.themahanandi.org

Ridge Gourd Dal (Beerakaya Pappu)

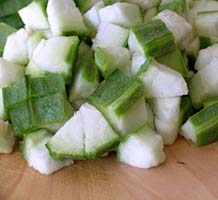
Everyone has their own food weaknesses. Mine has always been rice and dal. I loose my dietary control over this combination. I am a dal-holic.:) So, what did I do with ridge gourd purchased from ‘Lotus’ yesterday, I have ridge gourd dal. Simple yet divinely tasty when mixed with rice and ghee. Today, no portion control for me.

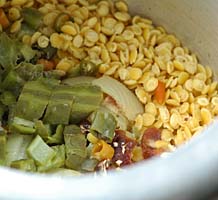
Ridge Gourd (Beera Kaya, Turai) Pressure Cooked Ridge Gourd and Toor Dal Mixture
Ridge Gourd – In bite sized pieces………….. ……………Presssure-cooked toor dal and vegetable mixture

Recipe:
for two for two meals

Toor dal – 4 fistfuls (¾ cup)
Vegetables:
One medium sized ridge gourd
outer ridges peeled first and then cut into small cubes
One medium sized onion & 6 to 10 green chilli peppers –all finely chopped
Seasoning:
1 tablespoon of tamarind extract
¼ tsp of turmeric
½ tsp of salt
For popu or tadka: 1 tsp each of mustard seeds, cumin, urad dal, minced garlic and curry leaves

Take toor dal, vegetables (listed above), tamarind and turmeric in a pressure cooker. Add about two cups of water. Pressure-cook them til 3 whistles or until they turn soft. Wait until it’s safe to open the lid, then add salt to this cooked mix. With a wood masher, make a smooth paste of the cooked dal-veggies. At this stage, for a more soup kind of dal, add water to your liking, stir and bring it to a boil. (Do this step only if you add more water to the cooked-mashed dal. Otherwise it’s not necessary to cook the dal further.)

In a steel vessel, heat one teaspoon of peanut oil. Sauté the popu or tadka ingredients until golden, then add the mashed dal-veggie paste from the cooker. Mix the dal with popu ingredients thoroughly. Serve hot with rice and ghee.

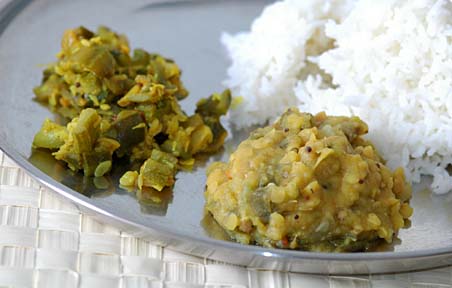
Ridge Gourd Dal with rice and curry

Ridge gourd dal and curry with rice and ghee – my weakness and indulgence.

Posted by Indira©Copyrighted in Amma & Authentic Andhra,Beera kaaya(Ridge Gourd),Toor Dal (Thursday February 9, 2006 at 2:36 pm- permalink)
Comments (23)

The New Home of Mahanandi: www.themahanandi.org

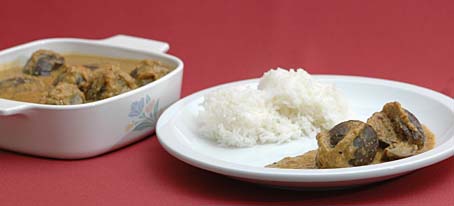
Brinjal-Ginger Curry

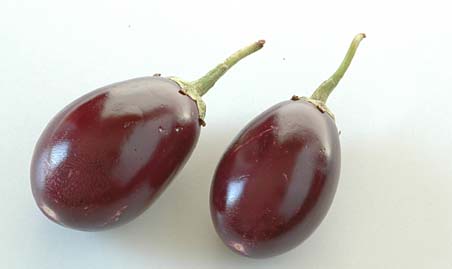
Purple Brinjal - Indian Variety

In old times, the marriage feast in our areas always included brinjal-ginger curry. Considered a classic both in taste and aroma, brinjal-ginger curry brings out the best of both ingredients.

Recipe:

10 round brinjals – (purple or greenish-white)
1×1 inch fresh ginger
4 green chillies
4 sprigs of fresh cilantro
½ tsp of salt and turmeric each
For popu: 1 tsp each – mustard seeds, cumin, urad dal, curry leaves and 2-3 pieces of dried red chillies

Preparation:

Brinjal: Wash and cut brinjal into bite sized pieces. Take water in a vessel; add 1 tsp of salt and mix. Add the cut brinjal pieces to this salted water. This is again an old-time tip, to prevent discoloration and onset of sourness in cut brinjals.

Ginger: Scrape the skin and wash. Finely chop ginger, green chillies and coriander. Add pinch of salt, make a smooth paste in a mortar or using a blender, without adding any water.

Curry: Heat one teaspoon of peanut oil in a wide pan. Add all the popu ingredients listed above and toast them till the seeds start to splutter. Take cut brinjal pieces from water, fistful each time, add them to the spluttering popu ingredients. Stir in the ginger paste and turmeric. Mix them all together, reduce the heat to medium-low. Cover with a lid and cook, stirring only once for about 10 minutes. When the curry starts to smell incredible, pieces turn to soft, sprinkle salt, mix and turn off the heat. Serve with rice and dal.

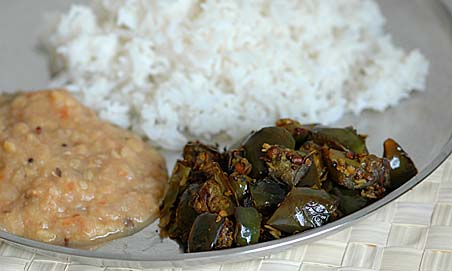
Brinjal Curry, Tomato Dal and Rice - Our Lunch

Brinjal-Ginger Curry, rice, tomato dal and little bit of ghee – savoring the tasty stroll in Andhra food heaven.

note to readers: Add salt at the end (so that brinjals can cook fast) and the recipe works only with fresh green chillies, don’t substitute with red chilli powder.

Posted by Indira©Copyrighted in Amma & Authentic Andhra,Ginger & Sonti,Vankaya (Brinjal) (Thursday January 26, 2006 at 2:36 pm- permalink)
Comments (23)

The New Home of Mahanandi: www.themahanandi.org

Dried Ginger Ale (Sonti Kashayam )

I was tagged by lovely Rosa of Yummy Yums to list my cold/flu remedies. Like her, it’s been a while, 10 years to be exact, since I got sick. I go through mental up&downs like a normal human being, but physical ailments like common cold/flu, fever etc., nothing, nada, zip. My immune system, like me, seems to be enjoying an early retirement deal. Or overworking? Anyway, the deal is not bad at all.

Home remedies for common cold & flu, that I can think of, like and often prepare-cold or no cold, are- one is tomato rasam, I blogged already and the other is ‘sonti kashayam’. This traditional remedy, an ayurvedic weapon against cold/flu is prepared with dried ginger, black peppercorns and sweetened with jaggery or honey. The resulting concoction is one strong drink that reboots the downgraded systems, starting with GI. Body on fire, is the sensation it gives at first. Then once it settled down there, ginger and peppercorn work their magical powers and make the symptoms of cold/flu disappear.

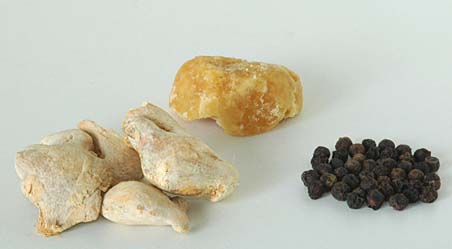
Sonti (Dried Ginger), Black peppercorns and Jaggery

Recipe:
(For two cups)

1 inch length dried ginger (Sonti) (available in Indian grocery shops)
4 peppercorns (Miriyalu)
1 tsp of powdered jaggery or honey
1 glass of water

Preparation:

First, make a powder of dried ginger and peppercorns using a mortar and pestle. Meanwhile take water in a pot, bring it to a rolling boil. Add the powdered ginger, pepper and jaggery to the water. Cover partially; boil it for at least 5 minutes. Turn off the heat, cover completely, and let it rest for 5 minutes. After 5 to 10 minutes of rest period, using a filter, pour the drink into a glass. Stir to cool and finish it off in two or three gulps.
Set the body on fire and say goodbye to cold/flu symptoms.

Variation – add tealeaves to make an extra strong tea or plain soda (carbonated water) to make ale.
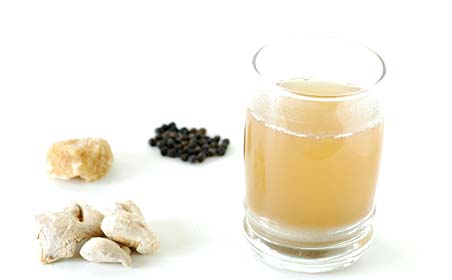
A Drink of Sonti Kashayam (Dried Ginger Ale)

A glass of Sonti Kashayam (dried ginger ale)

I like this meme (to spread) and I would love to learn other food bloggers remedies for common cold/flu. So I’m going to tag

Barbara of Tigers and Strawberries
Barrett of Too Many Chefs
Brett of In Praise of Sardines
Doc of Gluttony is no Sin
Heidi of 101 Cookbooks (Thank you Heidi, for ‘Daily Links’)
Kay of Towards a Better Tomorrow
Stephanie of Dispensing Happiness

I’m sure they have some fabulous remedies up their sleeves and I hope they share them with us
.

Posted by Indira©Copyrighted in Amma & Authentic Andhra,Ginger & Sonti (Monday January 23, 2006 at 9:11 am- permalink)
Comments (28)

The New Home of Mahanandi: www.themahanandi.org

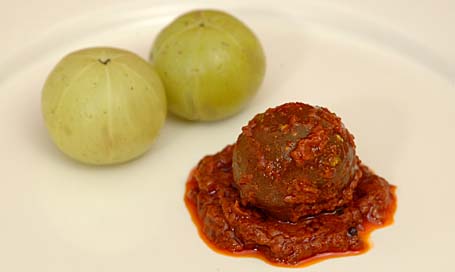
Amla Pickle (Usirikaya Uragaya)

I bought a quite few amlas (usiri kayalu, Indian Gooseberry) at Toronto and I couldn’t resist making a small batch of pickle with them, following a recipe from Malathi Chandur’s cookbook – “Vantalu-Pindi Vantalu“. The pickle turned out to be hot, spicy good.

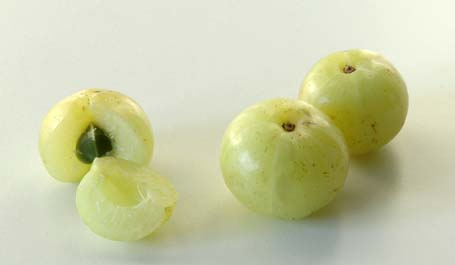
Amla, Usiri Kaya, Indian Gooseberry

Recipe:
For 15 amlas

15 clean, fresh looking, blemish free amlas (usiri kayalu)
½ cup peanut oil
¼ cup of salt and red chilli powder
¼ cup of mustard seeds – roasted & finely powdered (aava pindi)
½ tsp of asafoetida (inguva)

Preparation:

First wash the amlas and dry them using clean cloth, without any sign of moisture.

Heat up 1 tablespoon of oil in a skillet and add the amlas and sauté them till they turn light brown. Remove and let them cool down to room temperature.

Heat the remaining oil in another pan to a smoking point. Remove it from heat, let it cool down to room temperature.

Add salt, red chilli powder, mustard powder and asafoetida to the roasted amlas. Mix them all with a clean, dry spoon. Pour and stir in the heated (now at room temperature) oil. Mix them all together, again with a clean dry spoon. Cover tightly and let it stew at least for two weeks. The more you wait, the tasty the pickle becomes and the normal waiting period is one month. I couldn’t wait that long.:)

Just before serving, do the popu or tadka. Heat 1 tsp of oil in a pan, fry red chilies, cumin and mustard seeds until they splutter, then add garlic flakes and remove from the heat. Add it to the pickle, mix thoroughly and serve with rice and dal.

Usirikaya Pacchadi, Amla Pickle

Amla Pickle (Usiri kaya Uragaya) – spicy and sour like mango pickle and quite tasty in this cold winter weather.

Recipe Source: Malathi Chandur’s Cookbook “Vantalu-Pindi Vantalu

Posted by Indira©Copyrighted in Amma & Authentic Andhra,Dried Red Chillies,Usiri Kaya (Amla) (Tuesday January 17, 2006 at 9:43 pm- permalink)
Comments (38)

The New Home of Mahanandi: www.themahanandi.org

Sweet Pongal, The Sankranthi Sweet

Sankranthi:

Harvest festival Sankranthi is all about celebrating rice in our part of world. Particularly in South India, rice plays an important role as the main cultivated grain and as nourishing food that people subsist on every day of their life. It’s no wonder that there is a festival dedicated to the almighty rice. Equally worshipped are the man’s best partner, the kind-hearted cow, and the elements – sun, earth and water. They make rice cultivation a success, and also add a magic touch to the rice, making the rice a cherished, beloved food of the people.
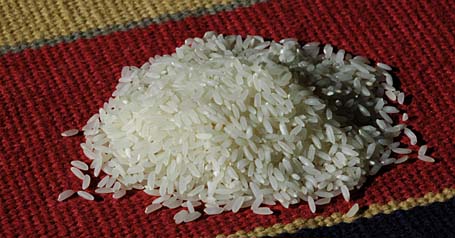
Sona Masuri Rice - Grown and Imported from Andhra, India
Sona Masuri Rice – Grown and Imported from Andhra Pradesh, India

Sweet Pongal (Tiyya Pongali):

This famous south Indian, Sankranthi sweet is traditionally made with freshly harvested rice. Very simple to make but spectacular in taste, the ordinary rice becomes mouthwateringly extraordinary in sweet pongal. The rice soaks up the milk, absorbs the jaggery, picks up the cardamom scent and takes up the generously added moong dal, cashews and golden raisins. And in this new avatar, becomes an offering to the Gods (naivedyam, we call it), and also simply irresistible to all who try it.

Some Tips:

Jaggery:

I follow the classic recipe and don’t do or like shortcuts. Method is neat and easy and the end result is always like the prasadam offering of temples. Jaggery is the traditional sweetener of sweet pongal and my choice too, simply because sweet pongal tastes better when made with jaggery and not sugar.

Rice:

The rice that I prefer is Sona Masuri. Because this variety is grown and imported from my home state Andhra Pradesh, and is the variety that I grew up on. Grain is thin, medium sized and very lightweight. Available in almost all Indian grocery shops here in US. Little bit pricey, but the taste is worth the money and farmers in my state really can use the money. Support farmers and buy this rice.

Consistency:

Sweet pongal is like a rice-dal porridge, consistency must be gooey thick and sticky. That means, the amount of liquid I usually add for sweet pongal recipe is more than the amount that I normally add to cook plain rice of equal measurements. Also, I always use equal amounts of water and milk for this recipe. Variations are – you can cook the rice-dal entirely in milk or in coconut milk, or if you are lactose intolerant and diet conscious, then in just plain water. Just add more liquid compared to the regular rice preparation.

Rice, Yellow Moong Dal, Cashews, Golden Raisins, Cardamom and Jaggery

Recipe:
For two people

1 cup – Sona Masuri rice
½ cup – yellow moong dal (pesara Pappu)
1 – 1½ cups – jaggery, crushed to fine
¼ cup each – cashews and golden raisins
¼ cup – ghee, melted
4 cardamom pods – skins removed and seeds powdered finely
3 cups each – milk and water (or 2 cups each, if you like a halwa like pongali)

Here is the 3-step method I follow to prepare sweet pongali at our home.

1.Toast and Roast:

Yellow moong dal:
Heat one teaspoon of ghee in an iron skillet. Add and roast yellow moong dal, on medium heat, until the color changes from yellow to pink. Take care not to brown. Slow-roasting freshens up and imparts a sweet smell to yellow moong dal. Remove them to a plate and keep aside.

Cashews and Golden raisins:
In the same skillet, add and heat two teaspoons of ghee. Add and fry the cashews and golden raisins till they turn to light gold. Remove and keep them aside.
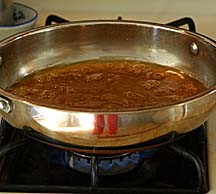
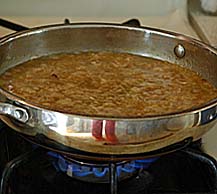
Jaggery Syrup Cooked Rice-Dal Mixture is added to Jaggery Syrup
Jaggery syrup simmering…………Cooked Rice-Dal Mixture is added to Jaggery Syrup

2.Cook and melt:

Rice, moong dal and milk:

Take rice and roasted moong dal in a pot. Add water and milk. Mix well. Partially cover the pot and cook the rice and dal to tender soft. I use a pressure cooker but an electric rice cooker also works fine. Stove-top slow simmering also produces best tasting pongali.

Jaggery and water:

While the rice is cooking, in another pot, melt jaggery. Add the powdered jaggery and one cup of water. Stir and cook till jaggery melts. Bring the solution to a rolling boil. and reduce the heat and simmer for about five minutes. Turn off the heat. Let the jaggery syrup cool a bit.(Jaggery has to be cooked separately and you can’t add it directly to uncooked rice and milk. Because it prevents the rice from cooking properly and also splits the milk. Please keep this in mind.)

3. Stir and Simmer:

Adding the cooked rice: Add the cooked rice-dal pongal to jaggery syrup. Keep the heat on medium. Stir in the ghee, cashews, golden raisins and cardamom powder. With a strong laddle, stir well to combine all. Cover and simmer until the whole mixture comes together into a sticky, gooey mass. Turn off the heat. Cover and let it sit for 10-15 minutes. Sweet pongal thickens further on cooling.

First offer to Gods as naivedyam (if you have this tradition), then serve it your loved ones, near and dear. Don’t forget to drizzle some ghee just before serving.
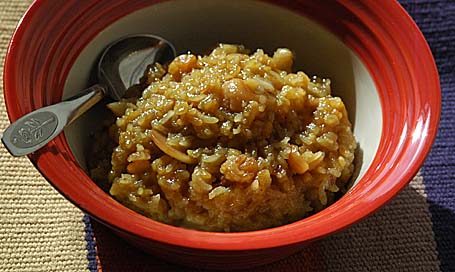
Sweet Pongal (Tiyya Pongali) - The Traditional Sweet of Sankranthi
Heavenly Sweet Pongal

For people hungering for a traditional, naivedyam kind of recipe but don’t have time or energy to make puran poli (bhakshalu), sweet pongal is The one. Speaking from experience, my suggestion is, keep your reservations aside and try it. You’ll be glad and can be proud of yourself for finally making one decent kind of naivedyam. I promise! Follow the recipe and this ancient classic delivers every time. People would ask for a second serving, diet or no diet.
Posted by Indira©Copyrighted in Amma & Authentic Andhra,Cashews,Ghee,Golden Raisins,Indian Sweets 101,Milk,Moong Dal (Washed),Naivedyam(Festival Sweets),Sona Masuri Rice (Monday January 16, 2006 at 3:08 pm- permalink)
Comments (79)

The New Home of Mahanandi: www.themahanandi.org

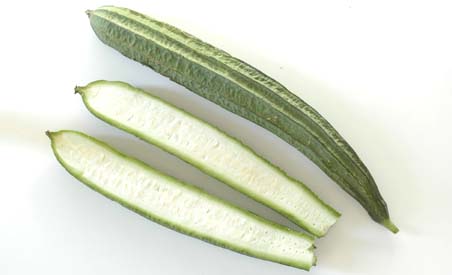
Ridge Gourd in Tomato Sauce (Beerakaya Pulusu)

Ridge Gourd, Beerakaya, Turai

Ridge gourd is often compared to zucchini, the squash. But the comparison is like saying potato and sweet potato are the same. Except for where they come from, there is no comparison at all taste wise, between those two.

Ridge gourd has a firmer, less watery texture than zucchini, and the flavor is much more intense and sweet, where as Zucchini seems to be full of water and nothing else when cooked and too bland to taste. Given a choice, ridge gourd clearly comes out as the winner, taste wise. Though I dislike character less personalities in life, I do like the bland zucchini. It took some time but it won me over. In case of ridge gourd, I may have made complaining noises about other veggies but never about ridge gourd or ‘beerakaya’ we call it in Telugu. Be as curry or chutney or in dal, I relish ridge gourd in all forms. I even tried growing it here, when we were in Houston albeit unsuccessfully, not good seeds.

Here is a recipe of ridge gourd in tomato sauce, Vijay’s favorite and My Mother-in-law’s recipe:

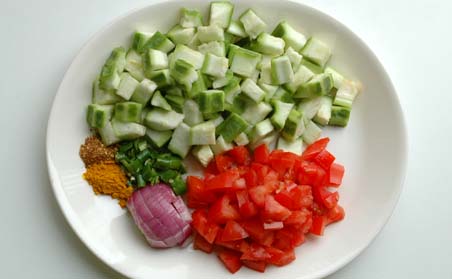
Ridge Gourd, Tomato, Onion, Dhania Powder, Green Chillies and Turmeric

Recipe:

2 young looking, fresh ridge gourds
Scrape the skin and ridges, wash, then cut into bite size pieces
4 ripe juicy tomatoes – finely chopped
1 onion – finely chopped
4 green chillies
—————-
1 tablespoon of coconut powder
½ tsp of dhania(coriander) powder & turmeric
¼ tsp of salt – or to your taste
Popu ingredients – 1tsp each of mustard seeds, cumin, curry leaves & minced garlic

Preparation:
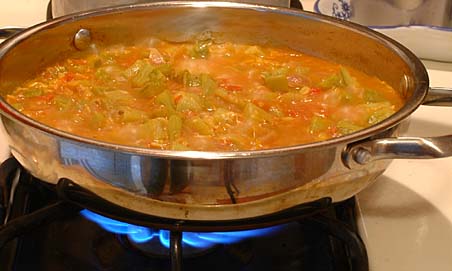
You know the drill. Heat peanut oil, do the popu, sauté onions, tomatoes and green chillies. Add chopped ridge gourd and all the seasoning. Stir to mix and cook, covered. Tomato juice and water that comes from cooked ridge gourd pieces is going to be enough to make the curry a stew/kurma type. So don’t add any extra water, unless you want a watery, thin version. Cook till ridge gourd pieces are tender and the sauce thickens. Serve it warm.

Though I have to say my favorite is always the dry curry recipe, that I posted a while back, I also make this sauced version sometimes, because Vijay likes it. Either as a sauce for pasta/with chapati/ or with rice, this curry tastes good. Sometimes, we do the dunking thing with toasted garlic bread. Good eat, any way you prefer.
Cooking Ridge gourd (Beerakaya Curry
Cooking ridge gourd (beerakaya, turai) in tomato sauce.

Recipe source: Attamma(MIL)

Posted by Indira©Copyrighted in Amma & Authentic Andhra,Beera kaaya(Ridge Gourd),Indian Vegetables,Tomato (Wednesday January 11, 2006 at 1:59 pm- permalink)
Comments (23)

The New Home of Mahanandi: www.themahanandi.org

Okra Curry (BendaKaya Kura)

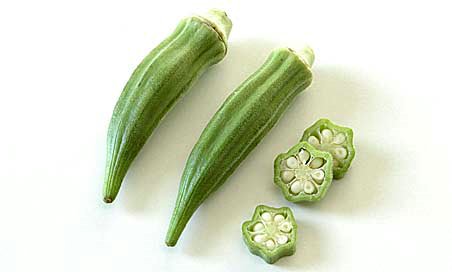
Bendakaya, Okra
Okra (Bendakaya in Telugu and Bendi in Hindi)

As a whole, okra looks handsome and wholesome.

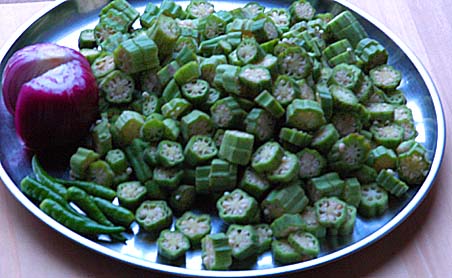
Cut it open, you realise that you are dealing with one needy veggie. Like a toddler who hangs on to mother’s saree, okra clings to everything that is in sight. To the cutting board, to the knife, to the pot and it slips in your mouth too. No wonder it elicits strong reaction from people. I like okra and I don’t mind its clinginess because I know how to deal with it. I have few tricks and tips to make it less sticky. Keep in mind, I am talking about the fresh okra and not the frozen kind, which are hopeless to reform.

Cut Okra

Recipe and some tips:
(For two, for one serving)

20 to 25 fresh, whole okra – washed thoroughly, then rubbed in a clean cloth, to remove all the moisture. This small step alone reduces the clinginess by 50%. After making sure they are clean and dry, slice each one, crosswise into half centimeter thick pieces. By now you may notice, touch of knife brings out the thick, viscous substance in okra. So in between cutting, periodically, wipe the cutting board and knife with a paper towel to remove the sticky stuff that’s accumulated.

1 medium sized onion – finely chopped
6 green chillies and 1 tbs of coconut – made into smooth paste
Turmeric and salt to your taste
And the usual ingredients of popu or tadka

Preparation:

In a wide pan or in a well-seasoned iron skillet, heat one teaspoon of peanut oil. Do the popu or tadka (toasting 1 tsp of each, mustard seeds, cumin, curry leaves and chopped garlic).

Add and saute onions till soft and brown. Then add the cut okra slices. Sprinkle in turmeric, salt, and fine paste of greenchilli-coconut. Mix them all once, allow them to cook for 5 minutes, covered on medium heat.

After 5 minutes, remove the cover and stir them once. Reduce the heat to medium-low and let them saute or cook openly. This is the time to show restraint. Do not stir and mix at all, at this stage. The more you stir and the more okra breaksdown and oozes clingy stuff. So don’t stir. Let it cook undisturbed for 15 minutes. As a result, round okra slices will be intact in shape and tender, lightly browned in the bottom and crunchy – perfection. Serve hot.

Tastes good with rice-dal combination and also with chapatis/rotis.

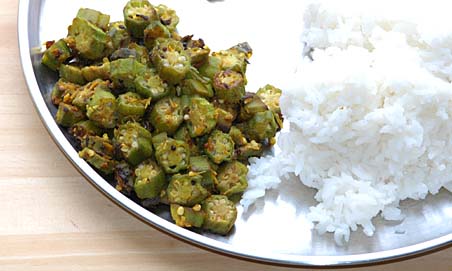
Okra Curry with Rice
Okra curry and rice ~ Our Meal Today

Posted by Indira©Copyrighted in Amma & Authentic Andhra,Benda Kaaya(Okra),Indian Vegetables (Friday January 6, 2006 at 11:25 am- permalink)
Comments (31)

The New Home of Mahanandi: www.themahanandi.org

Bottle Gourd Curry (Dudhi/Sorakaya Kura)

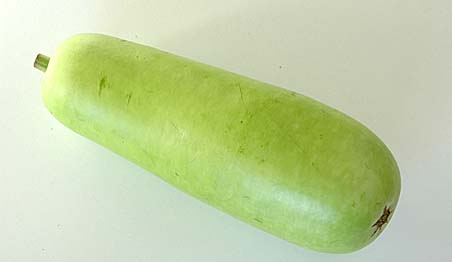
Bottle Gourd, Sorakaya, Dudhi, Lauki and Lau

I remember the mock fights with my sisters using this lengthy, stout vegetable, when we were children. This vegetable was our makeshift club in our funny fights. There are other stories that I still could remember to this day related to this vegetable. My mother used to plant this vegetable every year in our backyard and the crop was surplus to our family… in those days I dreamt of making a lot of money by selling surplus produce, which never materialized. After some time we were tired of eating this vegetable and I tried to convince my mother not to plant this vegetable in vain. One year we had a crop of more than 200 of these and needless to say, if you were our neighbor during that time, you would have received some of these from us for free, you might have begged us not to sent any more too.:)

Sorakaya in Telugu and bottle gourd, lauki, dudhi or lau in different Indian languages, here is one of my mother’s recipe with bottle gourd. Not a lot of ingredients, very simple and basic – tastes good only with chapatis and jowar roti.

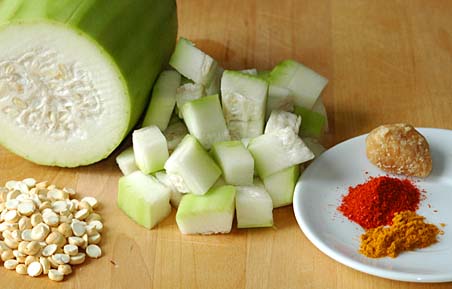
bottle gourd cubes, Dalia (roasted chana dal), red chilli powder, turmeric and jaggery

Recipe:

Bottle gourd – medium sized – outer skin peeled, then cut into cubes.
1 cup of dalia(pappulu, pottu kadalai) – finely powdered
Dalia or Pappulu is a type of dal made by roasting the chana dal or bengal gram
1 teaspoon of red chilli powder
1/2 teaspoon each of salt and turmeric
Jaggery, one tablespoon or to your liking

Heat one teaspoon of peanut oil in a big saucepan, toast mustard seeds, cumin and curry leaves. Add the bottle gourd cubes. Cover and cook them in their own moisture. When they are little bit softened, add the finely powdered dalia (pappulu), red chilli powder, salt, turmeric and jaggery. Add half glass of water and mix them all thoroughly, without any lumps. Cover and cook for about 10 minutes until the sauce thickens and bottle gourd pieces turn soft.

Serve hot with chapatis or with jowar(Sorghum) roti.

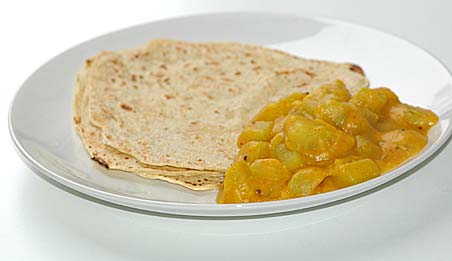
Bottle gourd curry (Sora kaya Kura) and chapatis
Bottle gourd curry and chapatis

After two days of silence in our kitchen (because of newyear celebrations at friends house), Vijay and I prepared this simple meal today.

Recipe source: Amma
Note to the reader: The sauce to this curry is mainly made of dalia powder. If you think, there is not enough sauce, powder some more dalia and add it to the curry and adjust the seasoning like salt and jaggery to your taste.

Posted by Indira©Copyrighted in Amma & Authentic Andhra,Chana Dal-Roasted (Dalia),Sorakaya(Dudhi,Lauki) (Monday January 2, 2006 at 9:39 pm- permalink)
Comments (52)

The New Home of Mahanandi: www.themahanandi.org

Bagara Baingan (Nune Vankaya Kura)

Do you remember my post about stuffed brinjal curry with peanuts and sesame seeds? In that post, I also mentioned different kinds of stuffing that I know. Here is another type of stuffed brinjal curry, I am calling it by Hindi name – ‘Bagara Baingan’ – This time with purple brinjals, stuffing made with dals and fresh coconut and cooked in a pan. The stuffing doesn’t taste very good when pressure-cooked. So for this kind, I make it in a pan, like how they do it back home.

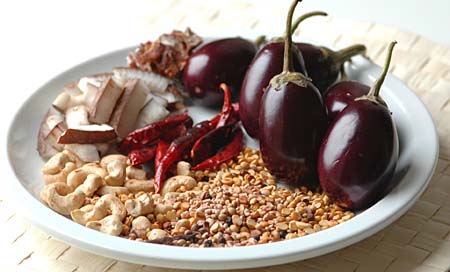
Fresh Coconut, tamarind, purple brinjals, roasted dried red chillies, cashews and mix of chana dal, urad dal, coriander seeds, fenugreek seeds, cumin  - ingredients for Bagare Baingan
Recipe:

Small, fresh, young, blemish free brinjals – 8 to 12

Roasting for stuffing and gravy:

Chana dal and urad dal – quarter cup each
Black peppercorns and cloves – 4 to 6 each
Dried red chillies – 6 to 8
Cumin, coriander seeds & methi seeds – 1 teaspoon each
Roast them in an iron skillet till golden. Mix them with
Fresh or dried coconut – 1/2 cup
Tamarind juice and powdered jaggery – 1 tablespoon each
Salt – 1/2 teaspoon
My addition: One fistful of roasted cashews
Ginger garlic paste and roasted red onions can be added to this mix.

Make a smooth paste of all the above ingredients without adding any water. Divide it into two portions. One for stuffing the brinjals and the other portion is for making the gravy.
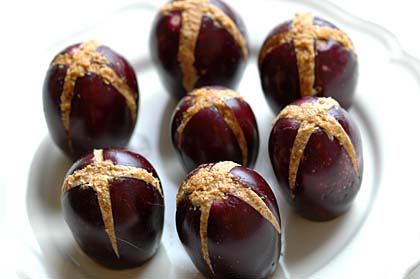
Purple brinjals stuffed with roasted dal- coconut-cashew paste
Stuffing:

1. Wash to clean up the wax coating on brinjals. Neatly cut and remove the stem of each brinjal.
2. Starting at opposite side of stem, make a plus (+) shaped cut towards the stem side, but not all the way through. (See the photo above, to get an idea)
3. Gently separating the brinjal petals, fill the narrow gap with the prepared paste.

Cooking:

1. In a big, wide, flat pan – heat one tablespoon of peanut oil, do the popu or tadka (toasting one teaspoon each of mustard seeds, cumin, curry leaves and minced garlic).
2. Arrange the brinjals – stuffing side up, neatly in rows. Cover and cook them in their own moisture for about 15 to 20 minutes on medium heat or until they soften. The younger the brinjals, the faster they cook.
3. Once you are sure that brinjals are tender and cooked, remove them carefully without disturbing shape onto a serving dish.
4. Pour the remaining paste that was kept aside to the pan. Mix it with half glass of water. Sprinkle in turmeric and adjust the salt, spice (red chilli), sour (tamarind) and sugar to your taste. Cook for another 10 to 15 minutes on low medium heat, until the gravy thickens.
5. Now put the brinjals back into the thickened gravy. Cook for another couple of minutes.

With rice or roti, this curry is a party favorite and a crowd pleaser.
 Stuffed Brinjal Curry (Bagare baingan, Nune vankaya Kura) with rice

Bagara Baingan with Rice ~ Our dinner today.

Posted by Indira©Copyrighted in Amma & Authentic Andhra,Cashews,Chana Dal,Coconut (Fresh),Urad Dal (Washed),Vankaya (Brinjal) (Thursday December 29, 2005 at 9:56 pm- permalink)
Comments (35)

The New Home of Mahanandi: www.themahanandi.org

Methi/Fenugreek Dal (Menthi Kura Pappu)

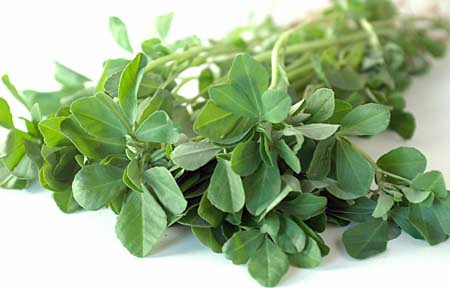
Fresh Fenugreek, Menthi Kura, Methi

First thing one notices about fresh fenugreek is how beautiful and delicate the leaves are. Then the smell, aromatherapy in truest sense, when pressure cooked with toor dal or sautéed with potatoes, any other vegetable, the leaves release wonderful fragrance. ‘Johnson and Johnson-A family company’, who makes money by beguiling the families with air fresheners and scented oils, if they get the whiff of fresh fenugreek, you bet, you’d see an ayurvedic or eastern themed fenugreek scented oil on shop shelves for sure.

Fenugreek is one of those green leafy veggies, looks innocently innocuous but when cooked, dazzles & grabs your attention by its wonderful aroma and makes you try and like it. For a dal-rice addict like me, nothing beats the taste of rice and dal made of fresh fenugreek leaves. Very tasty and nutrititous, it’s one of my favorite foods. Fenugreek and toor dal combination is a true and tested recipe, very popular in our Raayala seema region of Andhra, again one of those I learned from my mother.

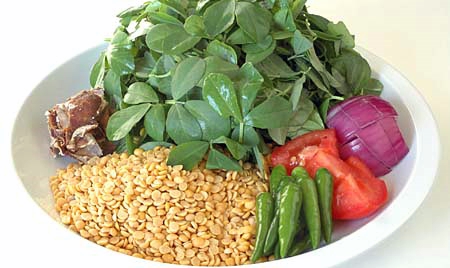
Methi leaves, onion, tomato, green chillies, toor dal and tamarind - ingredients for methi dal

Recipe:

One bunch of fresh fenugreek – washed and leaves plucked
4 fistfuls of Toor dal
1 medium sized onion and tomato – chopped
1o green chillies – finely chopped
Small lime sized tamarind
1/4 tsp of turmeric
Salt to taste

For popu or tadka :

1 tsp each of oil or ghee, mustard seeds, cumin and urad dal
1 garlic clove – finely chopped
Few curry leaves and few pieces of dry red chillies

Preparation:
Cook dal: In a pressure cooker, take toor dal, fenugreek leaves, onion, tomato, green chillies, tamarind and turmeric – add one glass of water and pressure cook them till 3 whistles. When the valve pressure is all released, remove the lid, add half teaspoon of salt and mash the dal using a wood masher to smooth paste.

Do the popu: In a deep bottomed vessel, heat one teaspoon of oil, add the remaining popu or tadka ingredients. Saute till the seeds start crackling, garlic turns red. Pour the cooked and mashed dal, stir well and cover. Tastes great with rice and chapati.

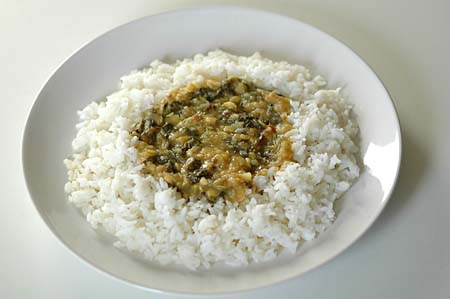
Methi dal (Fenugreek Dal, Menthi Kura Pappu) with Rice and Ghee

Fenugreek dal (Methi Dal or Menthi Kura Pappu) and rice with ghee.

Recipe Source: amma
Fenugreek is available both fresh and frozen in most of Indian grocery shops here in US

Posted by Indira©Copyrighted in Amma & Authentic Andhra,Menthi Kura(Fenugreek),Toor Dal (Tuesday December 27, 2005 at 9:54 am- permalink)
Comments (38)

The New Home of Mahanandi: www.themahanandi.org

« Next PagePrevious Page »