Mahanandi

Living in Consciousness ~ Indi(r)a’s Food and Garden Weblog

Red chilli garlic powder

Pure fire.

Garlic-Chilli Powder

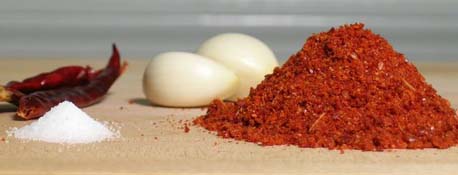
My Mother in law sent me this powder. I tried to make the powder here, but the garlic available in US markets is too moist and mild, lack the sharp burning taste of Indian variety.

Few garlic cloves, lots of dried red chillies and salt pounded in a stone mortar into fine powder, adding just one teaspoon gives a kick to bland vegetable curries. Rice, dal and ghee mixed together with this powder, that’s home and comfort food to me.

Posted by Indira©Copyrighted in Amma & Authentic Andhra,Dried Red Chillies,Peppers,The Essentials (Friday June 3, 2005 at 11:05 am- permalink)
Comments (19)

The New Home of Mahanandi: www.themahanandi.org

Chappidi Pappu (Plain Toor Dal Rasam)

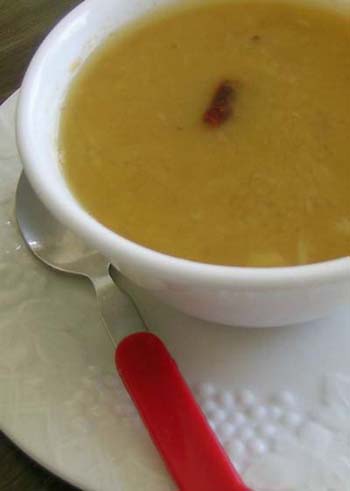
The recipe for this lentil soup comes from the kitchens of my amma and ammamma. During the summer months in Rayalaseema, when temperatures reach 100F* and above, my mother prepares this watery rasam (soup) with toor dal, to calm our stomachs from summer heat.

Recipe:
4 fistfuls of toor dal (half cup)
2 garlic cloves peeled,
½ teaspoon of red chilli powder & turmeric
Salt to taste
2 glasses of water
popu or tadka ingredients: 1 tsp each of cumin, mustard seeds, curry leaves

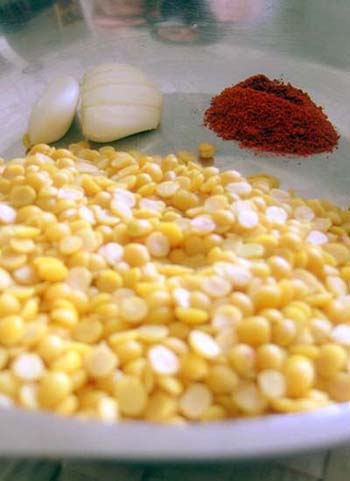
Toordal, garlic, red chilli powder

Take toor dal in a pressure cooker, add a glass of water, garlic, red chilli powder and turmeric. Close the lid and pressure cook them until 3 whistles. (Or simmer them in a saucepan until they are very tender and beginning to breakdown.) Once the valve pressure is all released, remove the lid and mash the dal to smooth paste. Add another glass of hot water and salt. Bring this diluted rasam to a boil.

Meanwhile, do the popu or tiragamata(frying mustard seeds, cumin and curry leaves in one tsp of oil) in a vessel, add this popu to the rasam. Because of extra glass of water addition, we’ve to cook the rasam for 10 more minutes on medium heat, partially covering the vessel. This simmering process brings out the richness of toor dal. Turn off the heat, let cool little bit, and serve warm.

Toordal Rasam

This cream less creamy toor dal soup is great on its own, or you can have it with rice and ghee – a light meal any day of the week.

Posted by Indira©Copyrighted in Amma & Authentic Andhra,Dals (Lentils & Legumes),Toor Dal (Thursday June 2, 2005 at 8:09 am- permalink)
Comments (14)

The New Home of Mahanandi: www.themahanandi.org

Glorious Golden Ghee (Neyyi)

To prepare authentic Indian meals, you have to make the ghee first. North, south, east and west, people all over in India know ghee is the best, and they love it. All auspicious occasions in life starts with ghee in India. Be it an offering to God, or the babies first solid food – people lavish their love with ghee.

Ghee is as easy to make as it sounds. This is how I usually make ghee here: I would buy one pound (four sticks) of unsalted butter. If you are lucky enough to find bovine-hormone free, organic butter, the ghee prepared from it would be better tasting and more like what we can get in India. Ghee from the four sticks lasts for about three to six months for us.

Take a heavy bottomed vessel. Place the butter sticks in it, and on medium heat melt them. When the butter starts to melt, there will be lot of bubbling and gurgling. Don’t panic. Reduce the flame to low; in a few minutes this action will subside. Next the butter will begin to develop foam at the top.

Simmer on low heat, uncovered and undisturbed, for 30 to 45 minutes, until milk-solids on the bottom of the vessel turn from white to beige-brown, and butter on top becomes transparent like clear water. This is the signal to turn off the heat. Please take caution not to burn the bottom part. That would lead to scalded milk smell, and it would stick. All the effort would be a waste and you have to throw everything away. So never use high-heat to make ghee.

What happening was milk-solids separating into 3 layers. Foaming milk-solids on top, clarified butter in the middle, protein milk-solids on the bottom.

After turning off the heat, do not cover with lid. Let the ghee stand for ten minutes. Remove any crust that rises to the surface with a spoon. Strain, discarding the milk solids at the bottom of the vessel, using a coffee filter or muslin cloth (gangi gudda). Or simply ladle off the clean water like ghee into a dry jar. Let it reach to room temperature. Then cover with a lid. Store at room temperature.
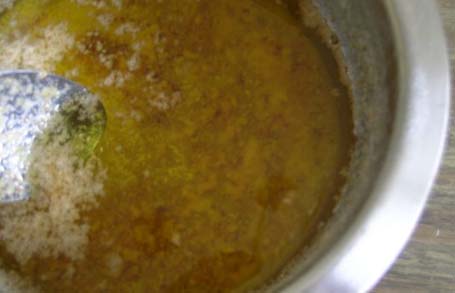
Removing the solids from the ghee with a spoon

When first made or heated, ghee will look clear, like golden oil. At room temperature it will be in kova or fudge like consistency. It would turn to solid block when exposed to extreme cold temperature. To use, take necessary amount with a dry spoon and add to the food. Moisture spoils the ghee, so never use a wet spoon when handling ghee.

What I do with ghee:

1. Drizzle one teaspoon of ghee on hot cooked rice. Anything with rice tastes so much better with ghee, particularly the dal, sambhar and rasam.
2. To prepare different types of pulaos/fried rice.
3. Saute spices for masala (garam masala, various types of masala and curry powders).
4. For popu or tadka (frying the cumin, mustard seeds and curry leaves in ghee).
5. To prepare sweets like payasams, bhakshalu (puran poli), burfis, kheers, halwas and laddus.
6. On toasted bread and on a boiled potato.
7. Garlic roasted in ghee, spread on the bread is garlic-bread at its best.

Anything with ghee is ghee-licious. It’s simply impossible to go wrong with ghee. For any culinary enthusiast, the authentic Indian food experience has to start with this ancient Indian staple. Try and Enjoy!
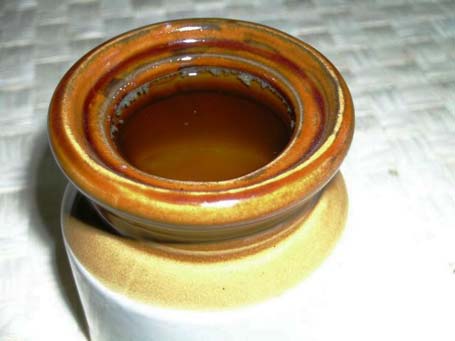
Ghee

Note:
Ghee is often equaled to clarified butter. But it’s a simple-minded simplification. The ghee making process is lengthy and the end result is more refined when compared to clarified butter. Now you know the difference, don’t you go on regurgitating same falsehoods about ghee equals to clarified butter. No, it’s not. And, for God’s sake have the decency to call it by its given name – Ghee. You can say gee, right? Add an ‘h’, and say out loud “ghee” as in geese. There you go. Thank you for indulging me about ghee.
Posted by Indira©Copyrighted in Amma & Authentic Andhra,Ghee,Milk & Products,The Essentials (Friday May 27, 2005 at 9:21 am- permalink)
Comments (72)

The New Home of Mahanandi: www.themahanandi.org

Lime Pickle

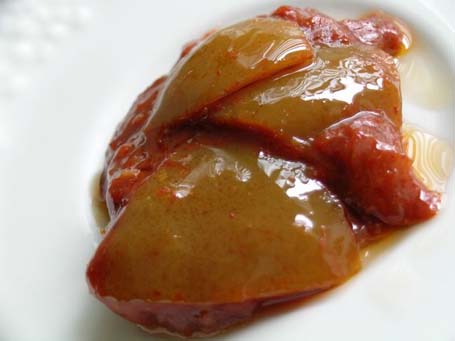
We Indians make pickle out of almost everything from mangoes to fish. “Even if we don’t have anything to eat, we can survive on pickle and rice” is the common dialogue in our Telugu movies between love struck hero and heroine. Father of the heroine always cautions her against hero, “If you marry him, you know what will happen to you, you have to live on pickles”. Pickles are that common in our household.

Lime pickle is particularly good because it is tangy and hot at the same time. Tastes good with dal, rasam and sambhar and on boiled eggs.

My version of lime pickle:

Lime Pickle

Take 12 limes. Wash and pat them dry. Take 4 out of them, cut them and squeeze the juice in a cup, keep aside. Cut the remaining 8 limes into 4 or 8 wedges depending on their size.

Mix the cut pieces with 6 teaspoons iodine free salt, and lime juice. Mix thoroughly. Take them in a clean, dry glass or porcelain jar with tight lid. Keep them tightly covered for about 4 days.

On 5th day – dry roast 1 tsp each of cumin, mustard and fenugreek (methi) seeds grind them to fine powder. Add this powder into the jar along with pinch of turmeric and 5 tsp of red chilli powder; mix thoroughly with a clean dry spoon.

Keep the lid tight for another 3 days, so that the lime wedges can absorb all the flavors and soften. (This time period depends on the thickness of lime rinds. If they are thin, they will soften up within a week and if they are thick, they would take atleast a month. My recipe is prepared with thin skinned, juicy limes and they changed from hard to firmly-soft in a short time.)

After that time period and just before serving the pickle:
Heat 4 tsp of oil, toast one teaspoon of mustard seeds in oil until they start to crackle and then turn off the heat. Bring this seasoned oil to room temperature and then add this oil to the pickle. Mix well and thouroughly. Serve and enjoy with rice, dal and ghee.

Pickling is like making jam. Take extra precaution in using the dry utensils, jar, spoons and your hands. Using the wet or damp things is a sure way to spoil the pickle.

I’d like to contribute something to SHF but I don’t know any sugary dishes with citrus except lemon juice with honey. So this is my hot not sugary citrus contribution to SHF. Thanks Stephanie for the suggestion.

To clear the confusion, Lemon in India = Lime in US.

Added on June 06:

Thin skinned and juicy limes are preferred for this type of pickle.

If you find them still firm even after 15 days – keep them undisturbed for one to two months -they will sure get softened. And you need to see that sufficient limejuice and salt is avialble for softening process. The pickle should never look dried out at any stage. Traditionally at our homes in India, minimum two months are given for pickles to soften and juiced up.

Usually finely ground pickle masala (cumin, mustard and fenugreek (methi) and red chilli powder) is added. And you can adjust the amount of this ground spice pickle masala to suit your taste.

Posted by Indira©Copyrighted in Amma & Authentic Andhra,Limes/Lemons (Friday May 20, 2005 at 10:58 am- permalink)
Comments (67)

The New Home of Mahanandi: www.themahanandi.org

Peanut Chutney (Groundnut Chutney)

Buddala Pacchadi:

Peanut chutney is the usual accompaniment to breakfast dishes like upma, pongal, pesarattu, dosa, and vada at my home so I prepare peanut chutney quite often. Also it makes a decent substitute to coconut chutney. Fresh coconut is a premium thing here at Ohio, because of that whenever a chutney recipe is called for I usually go with home classic, a crowd pleaser and an Andhra delight ~ peanut chutney (Buddala pachadi in Telugu language).

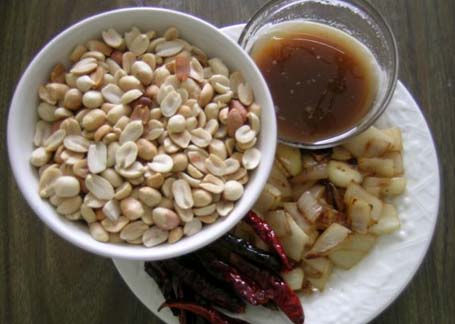
Peanut chutney ingredients
Peanut Chutney Ingredients

Recipe:

1 cup – peanuts
5 dried red chillies
1 small onion and 1 garlic clove – sliced to big chunks
2 teaspoons – tamarind pulp or to taste
½ tsp salt or to taste
For popu or tadka – 1 tsp each – cumin, mustard seeds, urad dal and six curry leaves

First step is roasting the peanuts.

If I have some time to kill, I usually go for stove-top method.
Place an iron skillet on stove top and on medium heat, slowly roast the peanuts to golden brown color. Cool and rub the skins off. I love the roasted peanut taste produced in this slow-cooking method.

In a rush, needs to prepare quickly, then I go for microwave method.
Pick a wide and big microwave safe bowl. Place peanuts and microwave them for 2-4 minutes, uncovered. How fast the roasting process is done depends on how powerful the microwave is and the quantity of peanuts. After each minute of microwaving, remove the bowl and mix or turn the peanuts with a spoon for even cooking. Microwave again for another one minute and repeat the process. Do this until the cream colored peanuts turn to light brown color. I have to warn you though, just like in any roasting process, microwave method is also a delicate one and in a split second perfectly golden peanuts could turn to charcoal black. Please be careful and pay attention to the process, if this is your first time. Once you get the hang of it, it will be really a breeze to roast peanuts in a microwave.

Step Two:
Heat a tablespoon of oil to smoking point in an iron skillet. Add and brown dried red chillies, onion and garlic.

Wait few minutes for them to cool down. This cooling process somehow increases the chutney taste tremendously and saves the motor blade of your mixer from melting.

Take roasted peanuts in a blender/food processor. Grind to fine.
Add other ingredients, plus tamarind, salt and a cup of water.
Grind to fine consistency.
Remove the chutney to a bowl.
Do the popu or tadka (toast popu ingredients listed above, in half teaspoon of oil in a vessel), add them to the chutney. This is always the final seasoning thing we do.
Mix and serve.

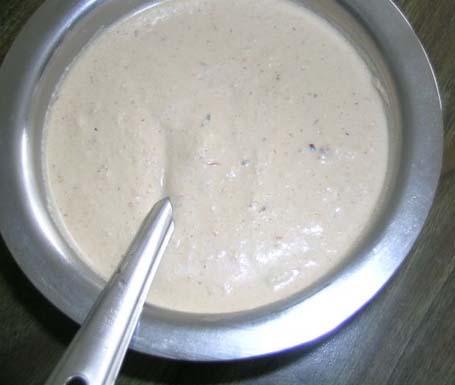
For breakfast dishes like upma, dosas, idlies etc, I always make the chutney little bit watery (see the chutney photo below). If the chutney is for rice (yes, it tastes quite good with rice also) I’d make the chutney little bit tight with as little amount of water as possible. (In the first case we have to dunk the breakfast item in chutney and in second case we have to mix it with rice and shape it into a round.)

Peanut chutney
Peanut Chutney

Posted by Indira©Copyrighted in Amma & Authentic Andhra,Dry Fruits, Nuts & Seeds,Peanuts (Friday May 13, 2005 at 1:50 pm- permalink)
Comments (54)

The New Home of Mahanandi: www.themahanandi.org

Pesarattu (Moong Dal Dosa)

Pesarattu (dosa) prepared with moong dal, is the signatory breakfast of our region(Andhra Pradesh) in India. Done to golden perfection, sprinkled with chopped onions inside, served traditionally with coconut, ginger chutneys and sambhar, have 2 or 3 pesarattus for breakfast, you will be in a food induced delirious haze all day. Type of breakfast that should be prepared on a weekend and particularly enjoyful when prepared by others, and the only thing one has to do is sit, eat and praise the cook liberally for their generous ‘annapoorna‘ heart.

Recipe:

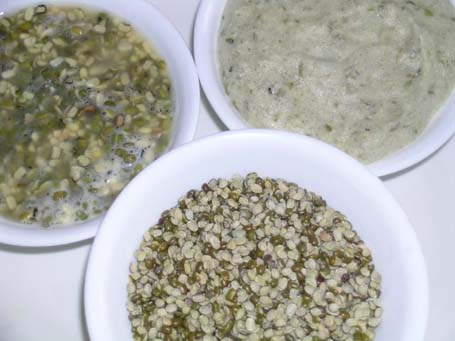
Soak 3 cups of split moong dal in water overnight (Friday night) for about 10 to 12 pesarattus. Next on Saturday morning like 10 or 11 o clock (don’t tell me that you’d enter the kitchen on a weekend earlier than that), drain water, grind the dal along with 5 to 6 green chillies, small piece of ginger and 1 tsp of salt into fine paste of medium consistency. Remove the batter, add about a teaspoon of cumin seeds and mix the batter thoroughly.

Split moong dal - Soaked in water - Grind to paste

Heat a cast iron flat pan, add 2 tsp of oil, spread it with an onion (remove the the top). This is to season the pan so that the pesarattu will comes off easily without sticking to the pan. The pan must be hot for pesarattu to come out in good shape. If you sprinkle water on the pan, it must sizzle.

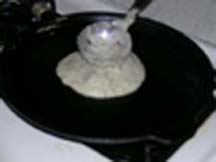
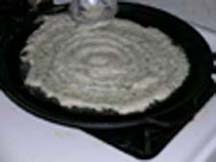
Pour one ladle full of batter into the center of pan and spread it around in a circular fashion (from inside out) shaping the batter into a thin round.

ladle full of batter Spreading the batter in a round big circle

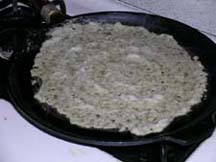
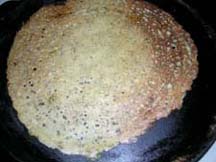
Pesarattu1 waiting for the other side to fry

Wait few seconds and sprinkle 1 tsp of oil or ghee on top and around the edges of pesarattu.

Wait for few minutes untill the bottom gets golden, then reverse it, cook the otherside now, for few seconds. Reverse it back, sprinkle finely chopped onions on the top and fold it half. Remove from the pan and serve.

First few attempts may not turn out good but don’t be discouraged. Try again. It takes time but once you get the hang of it, it’s really quite easy to prepare them, just like dosas.

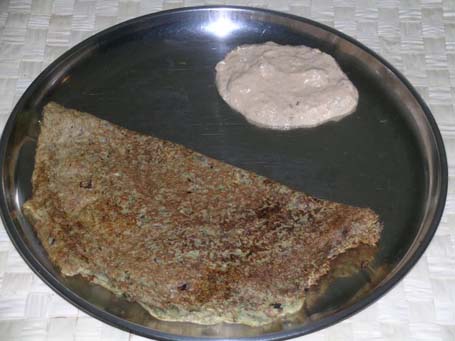
I have prepared peanut chutney instead of traditional coconut and ginger chutneys. So there it is, pesarattu with peanut chutney ~ our weekend breakfast.

Pesarattu with Peanut chutney

Posted by Indira©Copyrighted in Amma & Authentic Andhra,Moong Dal (Split) (Monday May 9, 2005 at 7:31 pm- permalink)
Comments (54)

The New Home of Mahanandi: www.themahanandi.org

Raagi Malt (Raagi Ganji)

I love Raagi malt, particularly on cold rainy days like today. It’s May, still so cold here. It is like this since last week. I am waiting for the Sun to shine again.

Raagi (Finger millet, Ragi, Kelvaragu, Muthari, Nachni) is a Sanskrit word, and it is a type of millet grain cultivated in India from ancient times. Raagi is well-known to be rich in protein, calcium, iron and it is gluten free grain. At our home in India, ragi grains are sprouted, then gently roasted on low flame and milled to fine powder. With this freshly milled ragi powder, we prepare a rejuvenating drink called ragi malt or ragi ganji.

Ragi flour, milk and water boiled together and sweetened with sugar or jaggery is ragi malt – popular as poor man’s or farmers health drink because of ready availability, low prices for the grain and nutritious, filling quality. If it is good for a farmer and to an ancient Sanskrit speaking person, then it must be good for me too, so I often prepare this drink in place of coffee and tea.

Raagi flour is available at Indian grocery shops. I brought mine from India. Freshly milled and needless to say so much better than the store bought flour. Back home, my mother and mother-in-law, both prepare this drink daily. It’s a routine for them, nothing fancy or special like for us here. And they always flavor the drink with cardamom.

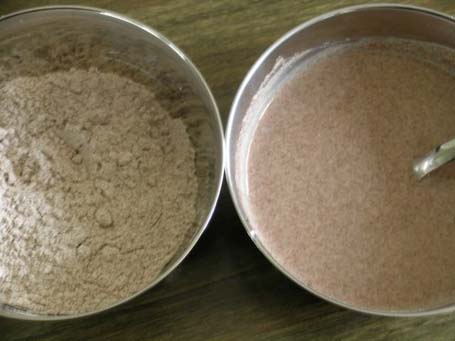
Ragi Flour and Mixing water into ragi flour

Recipe:
for two cups

1 tablespoon of ragi flour
1 glass of water or milk
2 tsp of sugar or powdered jaggery
1/2 tsp of powdered cardamom

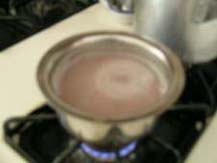
Boiling the water(milk) for Ragi malt Mixing the Ragi flour solution

Preparation:

First take the ragi flour in a cup. Add half glass water slowly. Combine to smooth, lump free paste. This is essential. Do not add the flour directly to boiling water, it will clump into lumps.

In a vessel, take one glass of water or milk. Preparing this drink with milk alone is too rich for me so I usually add few drops of milk to water.

Heat till the water reaches boiling stage. Then add the dissolved ragi flour solution slowly to the boiling water (milk), continuously stirring with a spoon. This will prevent the formation of lumps. If you add the flour mix to water before the boiling stage, the flour will separate and it won’t be suitable to drinking. You have to throw it away, so wait for water (milk) to start boiling, and then add the flour mix. This step is very important in preparing the good raagi malt.

Add sugar or jaggery per your taste and pinch of cardamom (Elachi) powder. Reduce the heat to medium level, and simmer the ragi malt for 5 minutes, stirring in-between. Turn off the heat.
Let it cool to warm, and then pour into a glass or cup.

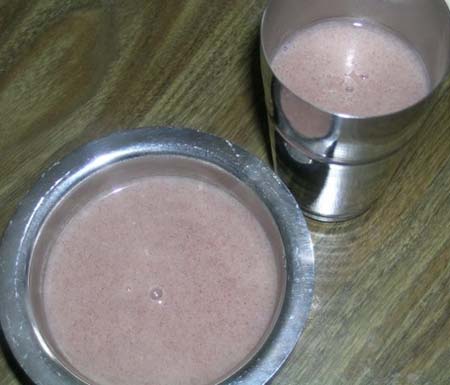
Ragi Malt

When the body needs a break from caffeinated drinks like coffee and tea, Ragi Malt is the perfect warm beverage.

Posted by Indira©Copyrighted in Amma & Authentic Andhra,Dhanyam (Grains),Jaggery,Milk,Ragi,Ragi Flour (Monday May 2, 2005 at 1:18 pm- permalink)
Comments (76)

The New Home of Mahanandi: www.themahanandi.org

Black-Eyed Pea Fritters (Alasanda Vada)

Alasanda (black-eyed peas) vada is a Raayalaseema specialty. They are prepared for special occasions and usually served with chicken curry. They are eaten usually dunked in Chicken gravy. I prefer them with vegetable gravy curries like potato kurma or with dal and rice. They taste great just as they are too.

If you already know and make vadas or fritters with other type of dals, like and enjoy the taste of them, then you must try this black-eyed pea version. You will be surprised about how good they taste. The recipe is again one of those passed from generation to generation, and also one of my all time favorites. And I am very happy to share this with you all, my readers.

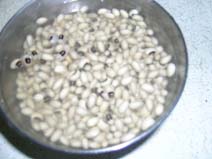
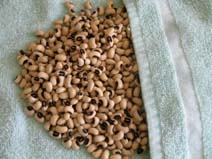
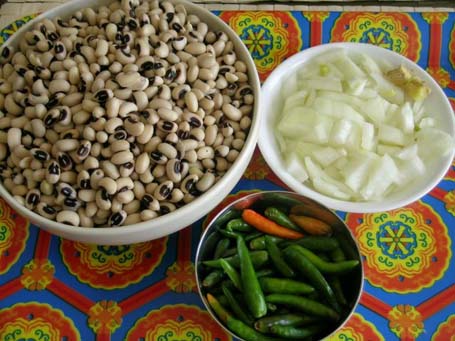
Soak 2 cups of black-eyed peas (Alasandalu) in water for overnight. They expand in water, so choose a big vessel for soaking. In the morning, drain the water and pat the rehydrated black-eye peas to dry using a cotton cloth.

Blackeye Peas, (alasandalu, bobbarlu) Soaking in Water After soaking in water - Blackeye peas

Ingredients to make vada or fritters:

1 big onion, finely chopped
5 green chillies, chopped
1×1 inch of fresh ginger, peeled and sliced
2 cloves
1 teaspoon of salt or to taste,
Peanut oil, about two to three cups to deep fry

Alasandalu, Onion, Ginger, Green Chillies, Cloves

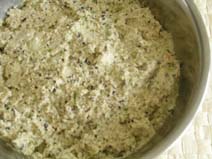
Alasanda BatterGrind the blackeye peas, ginger, cloves, salt and green chillies into coarse batter in a food processor or mixer without adding water. Just before removing the batter add the finely cut onion pieces. Grind few seconds more. The batter must be solid, and if you make a round with it, it must hold the shape without running to the edges. So do not add water while grinding the peas.
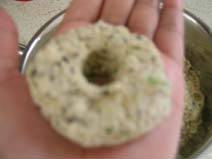
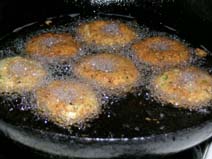
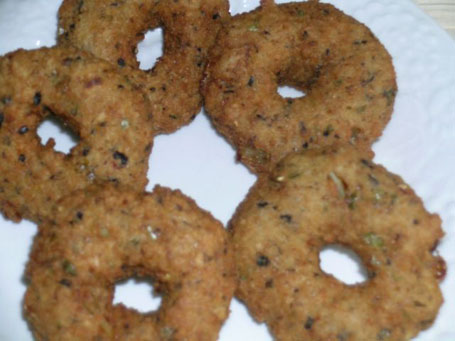
Remove the batter to a vessel. You can use your hands or small cotton cloth to make vadas. Using your left hand is very convenient. First wash and dry your hands. Take small amount of batter in a ball shape, put that ball on your left palm and flatten it lightly and make a hole in the middle. Drop gently into hot oil from the side of kadai or pan.

Giving the Alasanda batter 'vada' shape on my hand Alasanda Vadas deep frying in oil

In batches, deep fry them in hot peanut oil, turning them until they are golden-brown on both sides. Takes approximately 5 to 10 minutes, each batch.

Serve them hot with gravy curry for a genuine Raayalaseema experience or with a condiment of your choice.

Alasanda(bobbarla) Vadalu - Blackeye Pea Fritters

Black-eyed pea fritters (Alasanda/Bobbarla vada)

Recipe Source: Amma

Posted by Indira©Copyrighted in Amma & Authentic Andhra,Blackeye Beans (Sunday April 3, 2005 at 8:18 pm- permalink)
Comments (25)

The New Home of Mahanandi: www.themahanandi.org

Spinach Dal (Palakura Pappu)

Pressure-cooking with toor dal is the most common way that we consume green leafy vegetables like spinach etc., in our home. Combine all the ingredients below; mix them with one glass of water and pressure cook. Within a half an hour, you can have a tasty, nutritious dal. Mix it with steamed rice for a complete meal, or enjoy it like a light and filling soup.

Recipe:

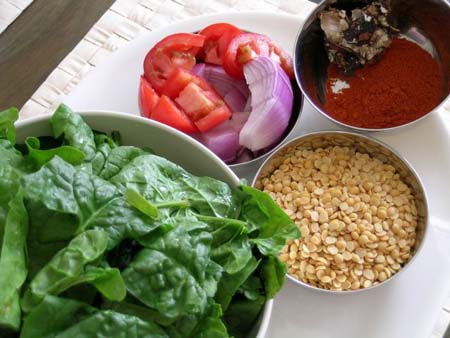
One bunch of Spinach, washed and cut or tiered into big pieces
One cup of Toor dal (Kandi Pappu)
One medium sized tomato and onion, cut into pieces
One tsp of chilli powder or 7 to 8 Indian variety green chillies
Half tsp of turmeric (pasupu)
Key-lime size tamarind (Chinta pandu)
One glass of water
For popu or tadka:
1 teaspoon of peanut oil or ghee
1 teaspoon of each – cumin, mustard seeds, minced garlic, chana dal, urad dal and few pieces of curry leaves and dried red chilli pieces

Spinach, Onions, Tomato and Tamarind, Red Chilli Powder and Toor dal

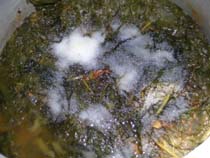
After pressure-cooking all of the above ingredients, add 1 tsp of salt and with a whisk or a wood masher make a paste of spinach dal.

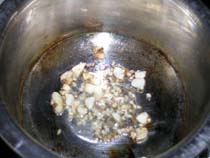
In a saucepan, add one tsp of oil or ghee and lightly fry the minced garlic, urad dal, chana dal, cumin and mustard seeds, red chilli pieces and curry leaves. This is called “Popu” or “Tiragamata”in Telugu. Without the Popu the dal is not ‘dal’, so don’t even think about skipping this step. Popu not only adds wonderful fragrance to dal, hot oil or ghee with all other toasted ingredients makes the dal more palatable, sort of like dressing it up.

Add the spinach dal to the popu and combine them together. Serve the dal with rice or with chapati/roti.

 Spinach Dal pressure cooked and salt just added before making the dal into a pasteDoing the popu or tiragamata
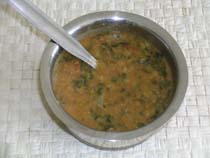
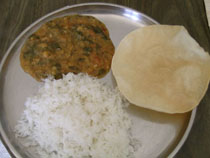
Spinach DalSpinach dal, Rice and Papad

Our meal:
Spinach dal with rice, ghee and papad and of course a cup of yogurt on the side.

Recipe Source: Amma

Posted by Indira©Copyrighted in Amma & Authentic Andhra,Spinach,Toor Dal (Tuesday March 29, 2005 at 6:05 pm- permalink)
Comments (53)

The New Home of Mahanandi: www.themahanandi.org

« Next Page