Mahanandi

Living in Consciousness ~ Indi(r)a’s Food and Garden Weblog

Janthikalu (Murukulu)

I have seen cookbooks on lentils, rice and on vegetables but never a cookbook dedicated to flours. I am glad that Santhi of Me and My Kitchen, the host of Jihva for Ingredients for August chose a topic covering all types of grain flours to feature for Jihva.

Like Linda, I also had several ideas for JFI, but decided to go with old classic crunchy snack – Janthikalu (murukulu). For us, the best snack foods are made at home, so for our vacation trip last week and to munch during our travel, I had prepared janthikalu (murukulu), using rice flour, gram flour (besan) and moong dal flour. For seasoning I have added salt, chilli powder, cumin, ajwan (carom seeds), sesame seeds and mashed potato. Deep-fried in peanut oil (I find that peanut oil works best for deep-frying and tastes delicious) in batches, janthikalu are our favorite snack item and my entry to JFI~Flour.

Thanks Santhi for hosting JFI and looking forward to reading the recap.

Recipe in detail – Here.


Ingredients for janthikalu and cookie press with different discs to prepare janthikalu


Dough is ready for placing in cookie press and for deep frying


Deep frying janthikalu in peanut oil


Janthikalu – for JFI~Flour

Posted by Indira©Copyrighted in Amma & Authentic Andhra,Gram Flour (Besan),Jihva For Ingredients,Moong Flour,Rice Flour (Tuesday August 1, 2006 at 7:44 pm- permalink)
Comments (25)

The New Home of Mahanandi: www.themahanandi.org

Mirchi Bajji ~ Hyderabadi Style

Some foods I cook for healthy body and some for mental health. Mirchi bajji belongs to later category for me. Cravings and nostalgia motivate me to cook this deliciously hot recipe. Hyderabad, the capital city of my home state Andhra Pradesh has a unique recipe for stuffed bajjis. I have already blogged about mirchi bajjis with different stuffing’s from different regions in India but thought this famous Hyderabadi style mirchi bajji deserves one more post dedicated to it.

Chilli bajjis, the popular street food are incredibly easy to prepare at home and make an excellent way to begin almost any special meal or they can be served as a light meal/snack on busy days. Because we remove the middle thick white vein that carries the seeds, these chilli bajjis are surprisingly mild and not that hot at all.


Reducing the spice kick of chillies by removing the white vein with seeds.

Recipe:
(for 20 chillies)

Preparing the filling to stuff the chillies:
Sesame seeds – 3 tablespoons
Dried coconut powder – 3 tablespoons
Coriander seeds (dhania) – 1 teaspoon (dry roast these 3 to pale gold color)
Salt – ¼ teaspoon
Tamarind juice – 1 tablespoon
Take them all in a blender or spice mill – make a smooth paste without adding water. Remove to a cup.

Mirchi (Chillies) Preparation:
Pick 20 straight, plump, healthy looking chillies. Wash and dry them in a kitchen towel. With a sharp knife make a vertical slit in the middle of chilli on one side. Keep the ends intact (see the photo above). Insert the knife tip and pluck the thick white vein in the middle along with the seeds. Usually it will come off nicely with a sharp knife. After preparing all chillies in this way, start stuffing. Fill the gap with the sesame filling nice and evenly one by one and keep them aside on a plate.

Preparing the batter to dip stuffed chillies:
Besan (gram flour) – 2 cups, sieved
Rice flour – ¼ cup, sieved
Salt, cumin and ajwan (vaamu) – ½ tsp each
Take them all in a vessel, mix to combine. Adding water, prepare medium thick batter of thick buttermilk consistency.

Deep-frying:
Take about 3 to 4 cups of peanut oil in a deep bottomed skillet or kadai. Heat the oil on medium-high. One by one dip the bajjis in batter and gently drop from the sides of kadai into hot oil and deep fry until golden. Remove to a paper towel covered plate and let cool a minute or two. Serve with some limejuice sprinkled and finely sliced onions and tomatoes on the side.
(I’ve dipped the bajjis in batter again and double fried them for that true taste.)


Mirchi Bajjis with Chickpea Guggullu and Watermelon Granita (Ice) with Cherries
Our Comforting Meal and My Entries to
Santhi’s JFI~Flour and also to Revathi’s FMR~Comfort Foods

Watermelon Granita with Cherries
Watermelon juice, limejuice mixed and frozen for about 4 hours. The ice is crushed (gently with a hammer) and cut cherries are added before serving

Posted by Indira©Copyrighted in Amma & Authentic Andhra,Cherries,Flour(Pindi),Gram Flour (Besan),Green Chillies,Jihva For Ingredients,Peppers,Rice Flour (Monday July 31, 2006 at 3:18 pm- permalink)
Comments (46)

The New Home of Mahanandi: www.themahanandi.org

Chickpea Guggullu ~ Black and White

Black Chickpea Guggullu
Black Chickpea (Kala Chana, Sanaga) Guggullu with Tomatoes and Fresh Coconut

Temple prasadam, beach fare and yogi diet – guggullu (sundal) is a comforting, quick snack item and quite easy to prepare at home also.

Soak the chickpeas overnight in water; cook them until tender and prepare ‘guggullu’ by quickly sauteeing them in few drops of oil, with lot of curry leaves, finely chopped red and green chillies. Sprinkle turmeric and salt to taste. Fresh coconut gratings, sometimes finely chopped tomatoes, onions and green mango are also added just before serving.

Chickpea, (Dubba Sanagala) Guggullu
Chickpea Guggullu with Fresh Coconut

Posted by Indira©Copyrighted in Amma & Authentic Andhra,Chickpeas,Chickpeas-Black (Monday July 24, 2006 at 7:56 am- permalink)
Comments (26)

The New Home of Mahanandi: www.themahanandi.org

Sunnundalu(Urad Dal Laddu)~Indian Sweets 101

Sunniundalu

When Sailaja of Sailu’s Food selected dals to feature this month’s Jihva For Ingredients, I was ecstatic. The one and only ingredient that truly represents India is the variety of dals, in my opinion. There are rice states and there are wheat states, but common to all 28 states in India are dals. Each state has dazzling array of dal dishes both sweet and savory. Menus always include dal dishes for everyday, for celebrations and as well as for festivals. Even in a foreign land, our meals always would include dals in one way or other. It’s not stretching the truth, when I say dal dishes are the true heart and soul food of India.

By the way, if you haven’t been to Sailaja’s blog already, please go visit now. She blogs from calm, coastal city of Vishakapatnam by the Bay of Bengal, from my home state Andhra Pradesh. Her recipes are visual delight and pure gold. Whenever I visit her blog, I feel happy to see her creations and also feel nostalgic about what I am missing being away from home.

As an entry to JFI~Dals, I have prepared Sunniundalu, a traditional Andhra sweet. Roasted urad dal is ground with sugar into super fine sand like powder, mixed with pure ghee, and the mixture is shaped into round balls. This sweet is much beloved because of its unique taste and nutritional value. These are often prepared for special occasions like baby showers (srimantham) etc., I am so happy that I am able to recreate this favorite sweet of mine for JFI, an event created to celebrate the natural ingredients.

Recipe:
(for 15 medium-sized laddus)

3 cups of whole urad dal – roasted to golden color slowly and on low heat, continuously stirring in a big iron skillet
1½ cups of sugar
1 cup of melted ghee at room temperature
For grinding – esirayyi (grain mill) or Food processor
How this sweet tastes, 50 percent, depends on grinding method. Old world stone grain-grinder is the traditional method of choice. High powered, sharp bladed, food processor comes close. Whatever machine/method you use, the end product must be like fine sand.

Whole urad dal - Roasted to light gold color
Whole urad dal – Roasted to light gold color

Grinding urad dal and sugar to superfine sand like powder using a grain mill

Adding melted ghee to the urad dal-sugar powder

Urad dal-sugar powder and ghee mixture being made into laddus
Urad dal-sugar powder and ghee mixture being made into laddus.

Sunnundalu
Indian Sweets 101 ~ Sunnundalu for JFI-Dals

Many thanks to Sailaja for hosting this month’s Jihva For Ingredients. I am sure the roundup of this event is going to be spectacular. The entries that I have seen so far – Munthirikkotthu (Sweet Moong Dal Balls), Dal Podi Sushi Roll (Indianized Sushi roll), Mid-Eastern Mujadarah (rice-lentil dish) and Azuki paste ravioli in caramel sauce make this obvious. Have a fun and happy dal day on this July 4th weekend, everyone!

Notes:
Grain mill brand Name: PORKERT’s Kitchen Grinding Mill, Type 150
Purchased at a clearance sale from Tuesday Morning.
Sailu’s Sunnundalu – Link

Posted by Indira©Copyrighted in Amma & Authentic Andhra,Ghee,Indian Sweets 101,Jihva For Ingredients,Mitai,Sugar,Urad Dal (Washed) (Saturday July 1, 2006 at 12:02 am- permalink)
Comments (53)

The New Home of Mahanandi: www.themahanandi.org

Pongal (Pongali)

Rice, Roasted Yellow Moong Dal, Roasted Cashews, Cumin and Peppercorn
Sona Masuri Rice, Roasted Yellow Moong Dal, Roasted Cashews, Cumin and Peppercorn

Some foods are simply divine, pongal belongs to that category. There isn’t anything quite like pongal! Creamy and luxurious rice dish that you get by cooking rice with toasted moong dal in little bit of ghee. Lots of water, sometimes milk is added and seasoned with cumin, black peppercorn and salt. The whole mix is cooked in a big pot until the rice and dal are soft. Roasted cashews are sprinkled at the end. This simple dish is so fragrant, the whole house will be filled with wonderful aroma. And the taste, I won’t gush but I will say this; it’s often prepared and offered to Gods in temples. Can we, mere mortals resist the pongal temptation? I don’t think so!

Pittsburgh’s Sri Venkateswara Temple serves the best pongal I have ever tasted out side India. At the temple’s kitchen, the chef prepares pongal in a big caldron following the traditional method. The secret is not only quality ingredients but also the method of cooking, no pressure-cookers there. I think that’s why temple pongal tastes so good. Since last year I have been preparing pongal in a big pot and stopped cooking it in pressure cooker. The difference in taste is tremendous and surprisingly the preparation is also easy.

Here is my recipe:
(for two)

1½ cup rice (preferably Sona Masuri)
1 cup yellow moong dal
2 tablespoon of ghee
1 tsp of cumin
½ tsp of black peppercorn
1 tsp of salt
½ cup of cashews
7 cups of water and
I also add 2 cups of milk (my preference and optional)
A big sturdy pot (Big sauce pan)


Pongal – Starting Point


Pongal – After 15 minutes of cooking


Pongal – at 20 minutes of cooking

1. Heat a teaspoon of ghee in an iron skillet on medium heat. Add and roast moong dal to golden color, constantly mixing. Take care not to black. Remove them to a plate. In the same skillet heat another teaspoon of ghee. Add and roast cashews to golden.

2. In a big sturdy pot, heat a tablespoon of ghee. Add and toast cumin and black peppercorn for few minutes. Stir in the toasted moong dal and rice. Mix them with ghee for few minutes. Pour water and milk and stir in salt. Cover the pot with lid and cook on high heat. Within 10 to 15 minutes, you will see the water gurgling and trying to lift the pot lid. At this stage, remove the lid. Mix the cooking mixture once and partially cover the pot with lid, leaving little bit of gap for water vapor to escape.

3. Within 5 minutes, you will see whole thing coming together. Rice-dal mixture will be doubled in volume. Each grain will be plumped but not broken open. Turn off the heat, and stir in roasted cashews. Close the lid fully and let the rice sit for about 10 minutes. At this stage, you can stir in more ghee if you want to and also add salt to suit your taste.

Rice-dal mixture absorbs the remaining water-milk liquid and becomes little bit tight. Pongal’s consistency can vary from something resembling a thick soup to a creamy porridge, but never like a tight hard ball. Resist the temptation to overcook and turn off heat early.

Usually we will have this pongal with chutney, potato kurma or with a cup of yogurt depending on the time of the day.


Pongal with Coconut Chutney ~ Traditional Indian breakfast
My first entry to JFI – Dal hosted by Sailu of Sailu’s Food and also to Paz’s For the Love of Rice


Along with cumin and black peppercorn, curry leaves are also added to the ghee. I didn’t have any curry leaves when I prepared this recipe so the omission.

Posted by Indira©Copyrighted in Amma & Authentic Andhra,Biyyamu (Rice),Cashews,Moong Dal (Washed),Sona Masuri Rice (Thursday June 29, 2006 at 1:46 pm- permalink)
Comments (41)

The New Home of Mahanandi: www.themahanandi.org

Fresh Peas of Summer & Guggullu

Fresh Green Peas of Summer

Though I enjoy vegetable shopping, I rarely get excited about it. Squeals and mile length smiles – I reserve them for rare finds like fresh plump pea pods. Late June is fresh pea time here in Ohio. Though peas are always found in frozen grocery section, I miss the taste and experience of shelling the fresh peas out of pods. This was one of those cherished practices from my Indian days.

We often hear that frozen veggies are same as fresh ones. Freshly shelled peas prove in a bite that it’s not true. Frozen peas do start out as fresh but all that freezing temperature and the ugly plastic wrap, bumping from one warehouse to another, finally when we open the packet – they would come out all shriveled up and lie there listless, looking at us ‘daya karo’ (merci). At that stage, I guess they are like us at the end of our lives – spent up but full of saccharine wisdom. In contrast the peas that are freshly shelled from fat pods are like cherubic faced babies, all plump and round, bouncing and rolling around. Full of energy and life force, tempting us to get hold of them. For that unforgettable sweet pea taste we would do just that.

Here in US, the capital of all things frozen, finding these green gems fresh is almost like buying emerald Cabs. So precious, so few and so pricey! Last Sunday I got lucky and bought 3 pounds of fresh peas for about 5 dollars, from the local farmers market. After the indulgence, what left was a cup of shelled peas and I have prepared Guggullu with them. Just a simple 5-minute saut? of green peas with finely chopped red onions pieces. Touch of black pepper, salt and fresh grated coconut, they are done. Quick and great tasting traditional Indian recipe to enjoy fresh green peas.

Batani Guggullu (Fresh Peas Summer Salad)

Posted by Indira©Copyrighted in Amma & Authentic Andhra,Peas (Bataani) (Tuesday June 27, 2006 at 11:44 pm- permalink)
Comments (23)

The New Home of Mahanandi: www.themahanandi.org

Spinach ~ Garlic Dal (Palakura~Vellulli Pappu)

Toor dal and spinach – no onions but lots of roasted garlic makes this dal unique. You may already know, spinach and garlic make a great combination. In this recipe, garlic is finely chopped and roasted to gold color. Cooking in this manner completely changes the character of the garlic. The garlicy smell disappears and what standouts is the mellow sweet and cashew nut like taste, giving the spinach dal a flavorful boost.

Preparation is 3-step process. (1) Cook toor dal until it falls apart (2) saute garlic and spinach (3) mix cooked toor dal and spinach-garlic. Add seasoning and simmer the whole combination for few minutes.

Recipe:

Pressure-Cook:
½ cup of toor dal and half teaspoon of turmeric in 1 cup of water
Cook the dal until it falls apart
Mash the dal to smooth paste using a wood masher and keep it aside

Meanwhile Prep Work:
1 bunch of spinach – cut into small pieces
1 small whole bulb of garlic – peel and chop garlic into small pieces
4 dried red chillies – cut them into small pieces
Soak marble-sized tamarind in half-cup of water for juice

Do the Tadka:
Heat a tablespoon of peanut oil in a big saucepan. Add and toast:
Dried red chilli pieces
Few pieces of curry leaves
One teaspoon of each – cumin and mustard seeds

Saute:
Stir in garlic. Saute to until golden. Take care not to burn.
Add the finely chopped spinach and saute until the leaves wilt and come together

Stir in and Simmer:
Stir in smoothly mashed toor dal to this sauteed spinach-garlic mixture
Add a tablespoon of tamarind juice, also half teaspoon each of – chilli powder and salt or to taste.
Stir to combine. If the dal is too tight, add about half cup of water.
Mix; close the lid and simmer for about 15 minutes on low heat.

Serve hot with ghee and rice for a great satisfying meal.

Spinach-Garlic Dal with Rice
Pickle, Rice, Spinach-Garlic Dal and Ghee – Meal Today

Recipe Source: Amma, Nandyala

Posted by Indira©Copyrighted in Amma & Authentic Andhra,Garlic (Vellulli),Spinach,Toor Dal (Monday June 26, 2006 at 1:34 pm- permalink)
Comments (41)

The New Home of Mahanandi: www.themahanandi.org

Toor Dal (Kandi Pappu)

Toor Dal (Kandi Pappu)
Dal For Life ~ Toor Dal (Kandi Pappu)
Preparing For JFI ~ Dal on July 1st and For This Week’s Indian Kitchen

Dal with lots of ghee, simple plain dal, dal in rasam and sambhar – homesick or tired of home, feeling indulgent or not feeling well – for every mood and for every occasion, Toor dal is ‘the dal’ for us at least 300 days out of 365 days of a year.

After rice, toor dal is the most important food ingredient we, Andhra log would have in our homes. Our parents, their parents, for all of us, the building bone is toor dal protein. We may move to different countries, talk or think in different language, one thing that’s going to be a constant in our lives foodwise is toor dal.

The light golden color, the way they cook easily, their taste – smooth and unique, the way they would fill us up without making us sweat and make us feel satisfied without being overwhelming. I love everything about toor dal. I confess I am a dal fiend and a toor dal addict. I am sure millions of other Bharat vaasi are also passionate about this dal just like me.

Posted by Indira©Copyrighted in Amma & Authentic Andhra,Indian Ingredients,Indian Kitchen,The Essentials,Toor Dal (Sunday June 25, 2006 at 6:42 pm- permalink)
Comments (9)

The New Home of Mahanandi: www.themahanandi.org

Sonti Coffee & Sonti Tea (Dried Ginger Coffee&Tea)

Not feeling hungry today?
I will make a cup of sonti coffee for the appetite.

Ate too much food at the party?
Would you want me to prepare sonti kashayam for better digestion.

Food was not good yesterday at the restaurant. My stomach is upset
Have a cup of sonti tea to calm the over working stomach.

I am tired and feeling little bit nauseous after the long day of shopping.
You sit there and rest. I will bring a hot cup of sonti coffee for you.

My head is hurting with this cold and cough.
There, there, have this cup of hot sonti tea. By tomorrow, you will be like a daisy.

Sonti Powder and Sonti

For everything and anything, sonti is the treatment at my home. Sonti tea, Sonti coffee and Sonti kashayam are prescribed to cure and to relieve almost all types small ailments from stomach upsets to cold and cough. Most of the time, they work fine.

Sonti, the dried form of ginger root is equally given importance along with fresh ginger in Ayurveda for its healing properties. Though sonti looks mild and all dried out, it is some potent stuff. The strong flavor and aroma are really energetic in small doses. At our home, if you go back to one generation before us, they’d start and end their day with a cup of sonti drink. For small ailments, whether one believes in capsules pushed on by multimillion dollar ad blitzes or in age old medicine, what matters is the trust that the stuff we would put in our bodies could comfort and relieve the symptoms. For us, the magic cure-all potion still hasn’t lost its magic.

Recipe :

From just a pinch to a tablespoon of sonti powder is added to a cup. Amount varies on individual preference and tolerance. We like to add a teaspoon of powder to a cup. Not too much, not too little, you would definitely notice the sonti taste.

To powder sonti, take sonti pieces in a mortar and pound them to smooth powder. We usually prepare powder for one month’s worth and store it in a tight lid box.

To prepare sonti tea and coffee: start the coffee/tea preparation like you normally do. And at the end add the sonti powder. Simmer few seconds. Strain. Pour to a cup and enjoy the tea enriched with sonti powder.

Sonti Tea and Sonti Coffee
Sonti Tea and Sonti Coffee – Perfect for Mistress of Spices

Caution: Highly acquired taste
More about Sonti Coffee – here
Sonti Kashayam (Dried Ginger Ale) – Recipe

Posted by Indira©Copyrighted in Amma & Authentic Andhra,Coffee,Ginger & Sonti,Tea,The Essentials (Monday June 12, 2006 at 10:58 am- permalink)
Comments (22)

The New Home of Mahanandi: www.themahanandi.org

Moong Dal Payasam (Pesara Pappu Payasam)

A Cup of Moong dal Payasam
A Cup of Moong dal Payasam for Indian Sweets~101

If I have to choose between a cup of payasam and a slice of cake, I’d always go for the cup. Here, mothers prepare cakes lovingly; back in India, payasams are the norm. Every Saturday my mother would prepare payasam for puja naivedyam. I believe she prepared payasam mainly because of us, four little darlings:), who would come home from school hungry for something sweet. We had half-day school on Saturdays and afternoon meals at my mother’s home always included a type of payasam. Creamy rich with full of cashews and golden raisins, it was like spoonful of heaven on a warm afternoon.

Together between my mom and mother-in-law, there are recipes for at least a dozen different payasams. Who would really need a cook book when you have this type of rich resource right a phone call away? Because they all follow a basic method, it’s not that difficult to remember the procedure. Moong dal payasam is one such easy recipe I picked up from the family.

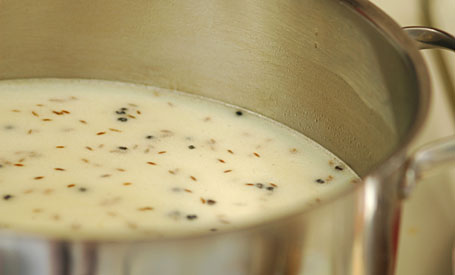
Moong dal is cooked in sweetened and thickened, rich poppy seed milk. Light golden hue, incredible, inviting aroma and delight to the senses – this is how I would describe this payasam.


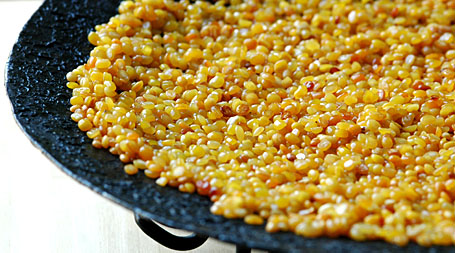
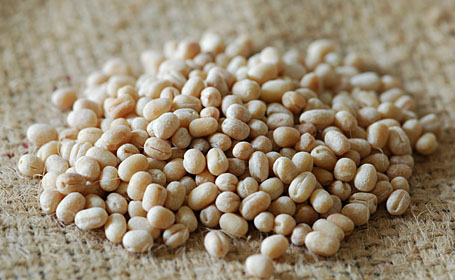
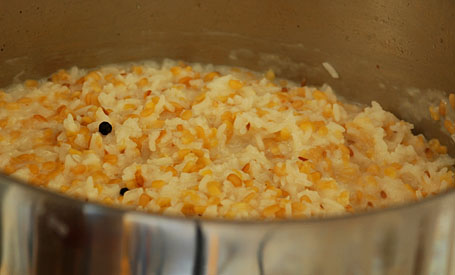
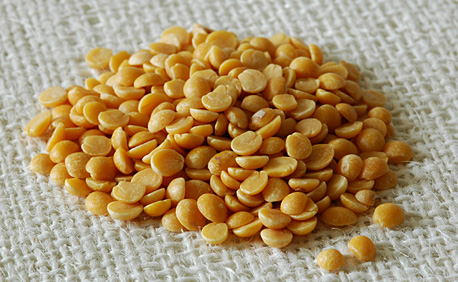
Roasted in Ghee – Yellow Moong Dal

Recipe:

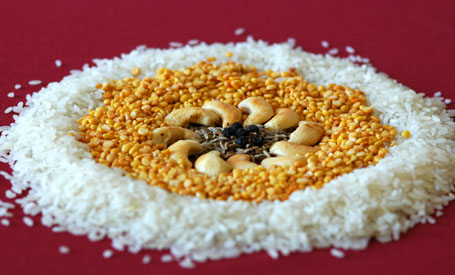
Moong dal, yellow (pesara pappu) – 1 cup
Sugar – 1 cup
Milk – 5 cups
Poppy seeds (Khus-khus, gasa gasalu) – ¼ cup
(Soaked in ½ cup of warm water for at least half an hour, to soften them)
Cashews and Golden Raisins, each – ¼ cup
Cardamom (Elachi, aluka) – 6
Ghee (neyyi) – 2 tablespoons

Prep Work:

1 In an iron skillet or tava, heat a teaspoon of ghee on medium heat. Add and roast, yellow moong dal until the color changes from yellow to light red and releases the wonderful fragrance. Remove them to a plate. Aromatherapy starts with this first step.

2 In the same iron skillet or tava, heat a tablespoon of ghee on medium heat. When it is hot, add and toast first golden raisins and then cashews. Golden Raisins puff up like little gold balloons and cashews turn from creamy white to light gold. Take care not to burn. Remove them to a plate.

3 Powder cardamom seeds to smooth powder in a mortar using the pestle or in a spice grinder.

Toasted in Ghee - Cashews and Golden Raisins
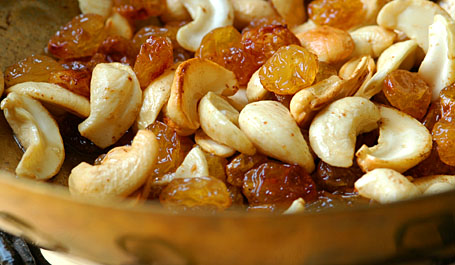
Toasted in Ghee – Cashews and Golden Raisins

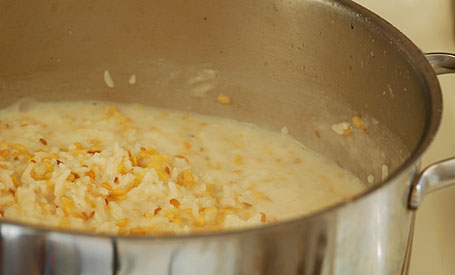
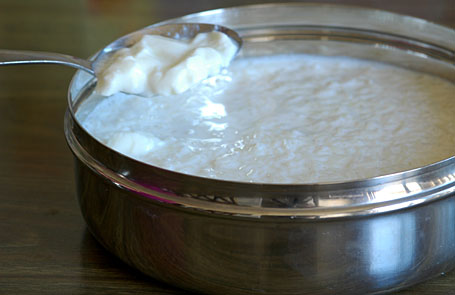
In a pressure cooker, take roasted moong dal, sugar, milk and soaked poppy seeds along with the water it’s soaked in. Mix and close the lid. Pressure cook until two whistles. Once all the valve pressure is released, remove the lid and with a wood-masher or immersion blender lightly mash the dal. Pressure-cooking is my method; I follow it mainly for the convenience of not stirring and for the speed. In actual recipe, they would take all the ingredients in a wide, thick-bottomed vessel and cook until the dal reaches fall-apart stage. If you don’t have a pressure cooker at home, then follow the second method. It may take little bit more time, but the end result will be worth the trouble, I promise.

Add the toasted cashews and golden raisins along with the ghee they toasted in. Also stir in the cardamom powder to the cooked payasam. Have a taste and add sugar and milk, if needed. Simmer the payasam on medium-low heat about 20 to 30 minutes, until it reaches thick, creamy consistency. Serve warm or cold.


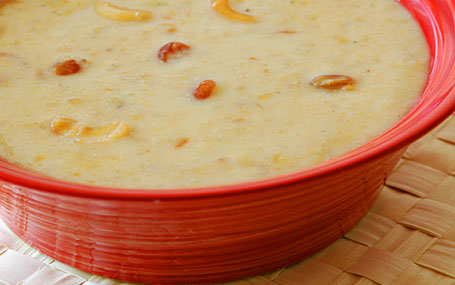
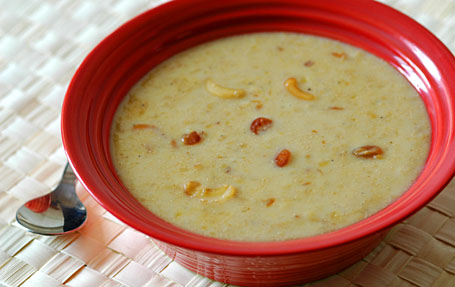
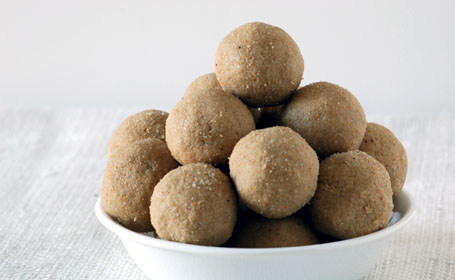
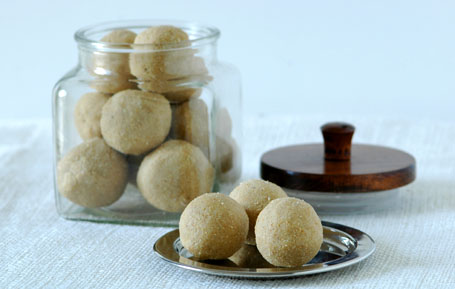
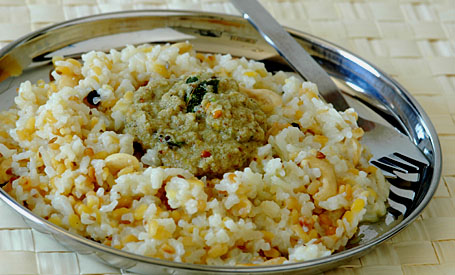
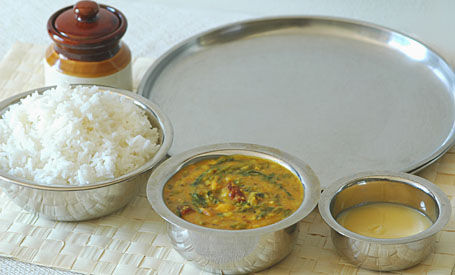
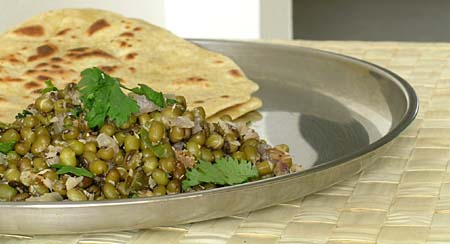
A Cup of Moong Dal Payasam with Poppy Seeds, Cashews and Golden Raisins

Poppy seeds can block the cooker nozzle and that may create a mess, if they not soaked in warm water beforehand. Soak poppy seeds in water first, if you are to cook this in a pressure cooker.
Chana Dal Payasam – Link

Posted by Indira©Copyrighted in Amma & Authentic Andhra,Indian Sweets 101,Milk,Moong Dal (Washed),Naivedyam(Festival Sweets),Poppy Seeds,Sugar (Friday June 9, 2006 at 8:31 pm- permalink)
Comments (45)

The New Home of Mahanandi: www.themahanandi.org

Moong Bean Salad (Pesara Guggullu)

Moong bean Salad (Pesara Guggullu)

Moong bean guggullu or salad was our after-school snack at least once a week when we were children. One cup of this guggullu (salad) and one cup of tea, we would be set until dinnertime 8pm.

And now, I often prepare them at home for light lunch. This traditional Indian salad is filling, nutritious (good protein and Folate content), and can be prepared within 10 minutes, with some preplanning.

Moong Beans, Onion, Green Chilli and Freshly Grated Coconut

Ingredients:
1 cup of moong beans
(Soaked in water for 2 hours and simmered in salted water until tender)
1 onion and 2 green chillies – finely chopped
1 tablespoon of freshly grated coconut
1 teaspoon of ghee or peanut oil
Salt, turmeric and cilantro to taste
Saut? finely chopped onions and green chillies for few minutes, stir in simmered moong beans and seasoning- fresh grated coconut, salt and turmeric. Mix and cook covered for about 5 minutes. Sprinkle some fresh cilantro and serve.

Posted by Indira©Copyrighted in Amma & Authentic Andhra,Moong Dal (whole) (Thursday June 8, 2006 at 9:21 am- permalink)
Comments (20)

The New Home of Mahanandi: www.themahanandi.org

Ridgegourd Chutney (Beerakaya Pacchadi)

It’s been raining hard for the past one week here. I’d have grown a sprout from my head if I were a seed. It’s been so much and non-stop drizzle. With all this wet rainy weather, I wasn’t doing much cooking for the past couple of days and yesterday, ridge gourd came to my rescue.

I have never tasted a ridge gourd dish that I didn’t like. Be it a simple homely dal with toordal, or cooked in coconut, milk or in tomato sauce… I like all versions of ridge gourd preparations. “Superlative” says SH of Saffron Hut and I totally agree with her. It is like potato, easily likable and adaptable to any type of recipe. This chutney I am writing about today is one such recipe.

Some vegetables suit for chutneys and some don’t. Of all the vegetable based chutneys, ridge gourd chutney is the best in my view. The sweetness of the ridge gourd perfectly complements the hot and sour flavors of onion, chillies and tamarind. The chutney will be a perfect side dish with hot rice and dal, or for tortilla chips dip. If you like the taste of ridge gourd and if you haven’t tried chutney with it, then you have to try this recipe. This is A+, I tell you!

Ridge gourd, Onion, Green chillies and Tamarind

Recipe:

1 Ridge gourd (beerakaya) – Peel the outer ridges, wash and cut into big chunks
1 medium sized onion – cut into big chunks
6-8 small green chillies – each cut into two or three pieces
1 garlic clove – peeled and halved
½ tablespoon of freshly squeezed tamarind juice
¼ teaspoon of salt or to taste
1 teaspoon of peanut oil
A skillet and a mortal and pestle or a blender

1 Heat peanut oil in an iron skillet on medium-high heat.

2 Add and sauté the ridge gourd, onion, green chillies and garlic until light brown. Turn off the heat and wait for 10 minutes to cool.

3 Take them in mortar, add tamarind and salt. Using the pestle make a coarse paste or you could do that in a blender, but use ‘pulse’ button few times.

4 Remove into a cup and serve with rice/chapatis or as a veggie dip for chips.


Ridge gourd chutney, Dal and Rice (Beera kaya pacchadi mariyu pappu annam) ~ My Comfort Food

Posted by Indira©Copyrighted in Amma & Authentic Andhra,Beera kaaya(Ridge Gourd) (Friday May 19, 2006 at 11:15 am- permalink)
Comments (26)

The New Home of Mahanandi: www.themahanandi.org

Indian Broad Bean Stir-fry (Chikkudukaya Kura)

My next-door neighbor often complains, “We don’t eat enough greens like you guys do.” Some of my friends often complain, “We are not having enough protein in our diet.”

Usually they turn the blame on to their native culture and say that their American or Indian food doesn’t have enough of something or the other. See, for them, the fault is not with their eating habits; rather it is of the culture/cuisine. It’s always a surprise to me, when I hear that Indian food (particularly vegetarian) doesn’t have sufficient protein content. It is a big myth for me. People often have a mental picture in their minds, which shows only meat products when they think of protein. Since in our Indian food we don’t consume as much meat as our American counterparts do, we tend to think that we are not getting sufficient protein.

Different types of lentils, legumes, some fresh vegetables (like the one below) contain high quality protein and so do chicken, egg and milk. Poor cooking/eating habits or lack of nutritional information about the ingredients that we use might be the main reason for complaining I think. Though we studied about these nutritional values in our school days, we tend to forget them very easily, it seems.

As I am writing these posts in my blog, I am learning a lot more about the nutritional values of the vegetables. One very important vegetable that is rich in minerals and protein is ‘Indian Broad bean’ or ‘Chikkudu‘. This is one of the very tasty vegetables available for us, here in US and the recipe shown below is a simple and traditional way of making a stir-fry curry with it.

Indian Broad beans (Chikkudu kaya)
Indian Broad Beans, Chikkudu Kaya

Recipe:
15 to 20 Indian Broad beans – ends trimmed and cut or teared into 1 inch pieces.
1 medium sized onion – finely sliced
4 green chillies and 1 teaspoon of coconut – made into smooth paste
¼ teaspoon of turmeric
½ teaspoon of salt or to taste
For popu or tadka:
1 tsp of peanut oil
1 tsp each of – mustard seeds, cumin, minced garlic and few curry leaves

Bring a pot half filled with water to a boil. When the water is at dancing stage with bubbles and everything, add and cook the cut broad beans pieces for two minutes. That’s it, don’t overcook and drain them into a colander. If the broad beans are very tender, then you can skip this step and proceed like below.

Heat peanut oil in a sauté pan. Add and toast the popu ingredients. Add and sauté the finely chopped onion for few minutes until they soften. Stir in green chilli-coconut paste and turmeric. Sauté for another 2 minutes. Add the broad bean pieces, stir in salt. Cover and cook the curry on medium-low for about 5 minutes or until the pieces are tender. Serve hot with rice or with chapati.

Chikkudu kaya Podi Kura with Chapatis
Indian Broad Bean Stir-fry with Chapati ~ Our simple Meal Today

Recipe source:Amma
Indian broad beans are avialable in Indian grocery shops here in US, almost year round.
Indian broad beans in Peanut Sauce – Recipe

Posted by Indira©Copyrighted in Amma & Authentic Andhra,Chikkudu Kaya (BroadBeans) (Thursday May 11, 2006 at 4:54 pm- permalink)
Comments (29)

The New Home of Mahanandi: www.themahanandi.org

Yogurt Rice With Mango ~ For Jihva

Yogurt Rice with Mangoes

Yogurt rice with mango is a nostalgic meal for me. Usually, after dinner, the leftover rice is mixed with warm milk, a spoon of yogurt culture is added, mixed and kept covered overnight in a tiffin box. By next morning, milk would turn into yogurt and is already mixed with rice – school lunch box would be ready. My mother used to prepare yogurt rice in this way and would also add small cubes of mango for mid-day meal, during our hot summer school days.

The quote, ‘Looks can be deceiving’ applies to this one. Even though, the whole thing looks homely and common, the taste is simply unique and very satisfying. Rice soaks up milk and when milk turns into yogurt, the rice also changes. It looses its biting kind of inner resistance, turns into soft, supple kind of grain. Addition of fruit, like mango, as a topping makes it even better. The meal is not only nutritional, also follows the ayurvedic principle of balancing the food ingredients, hot ones with cold one. Mango is famous for its heat generation where as yogurt is known for its cooling properties on human body. Combination of them together, makes this, a well-balanced, simple meal/dessert kind of food.

Adding yogurt culture to warm rice-milk mixture

Recipe:
1 cup of cooked rice
2 cups of warm milk
¼ teaspoon of salt or to taste
Fruit Topping
I ripe mango – peeled and cut into small cubes

Mix the rice with milk. Add a tablespoon of yogurt culture and mix lightly; cover the vessel with lid and keep it in a warm area overnight. By next morning, the milk will be turned into yogurt. Stir in salt to taste. Sprinkle the mango cubes on top. With each spoon, take a small portion of yogurt rice and one cube of mango. Enjoy the sweet mango with creamy rich yogurt rice.

This is my contribution to the event “Jihvā For Mangoes”. I am very excited to host this event and thank you all for your enthusiastic participation with wonderful mango recipes. I am planning to do a recap of all the entries that I received, by tomorrow.

Posted by Indira©Copyrighted in Amma & Authentic Andhra,Jihva For Ingredients,Mango,Milk,Sona Masuri Rice,Yogurt (Monday May 1, 2006 at 5:36 am- permalink)
Comments (29)

The New Home of Mahanandi: www.themahanandi.org

Dried Mango Pulp (Maamidi Tandra)

Dried Mango Pulp
Marvels of Mouth-Filling Pleasure ~ Maamidi Tandra or Dried Mango Pulp Bar

Posted by Indira©Copyrighted in Amma & Authentic Andhra,Indian Ingredients,Indian Kitchen,Mango (Saturday April 29, 2006 at 9:22 am- permalink)
Comments (18)

The New Home of Mahanandi: www.themahanandi.org

« Next PagePrevious Page »