Mahanandi

Living in Consciousness ~ Indi(r)a’s Food and Garden Weblog

Wheat Flour Dosa (Godhuma Dosa)

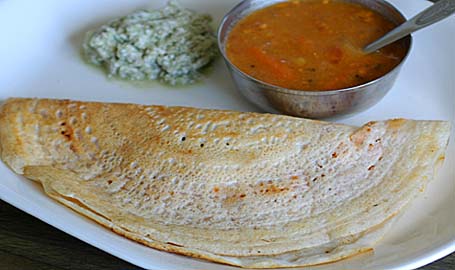
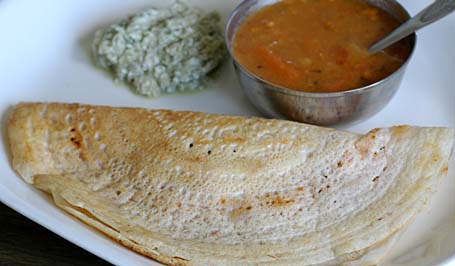
Goduma Dosa with Peanut Chutney
Wheat flour dosa (Godhuma Dosa) with Peanut Chutney

Easy, breezy and lacy – that’s how I’d describe wheat flour dosa. I prepare this traditional, lace like, instant dosa when I am low in appetite, ya that happens sometimes, or short on time, aren’t we always?

Recipe is really simple. Mix a cup of wheat flour (atta/chapati flour) with 2 to 3 cups of water. Stir in a teaspoon of black pepper powder and salt. Thoroughly mix the batter without any lumps. The consistency of batter must be like thick buttermilk, not too watery or not too tight. Don’t let the batter sit for long time, it will become gooey mass, and resulting dosas won’t be pretty.

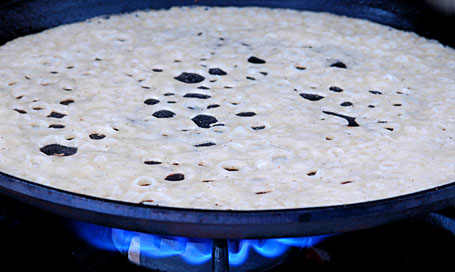
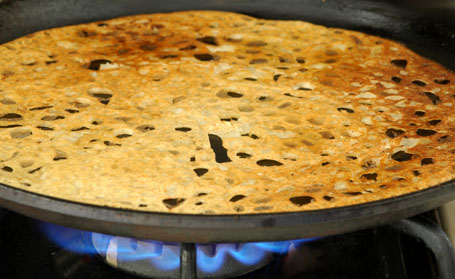
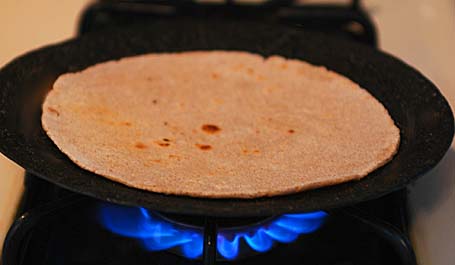
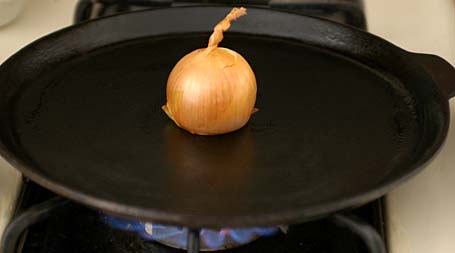
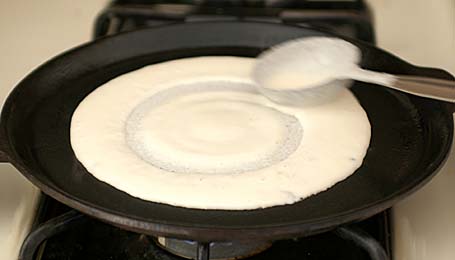
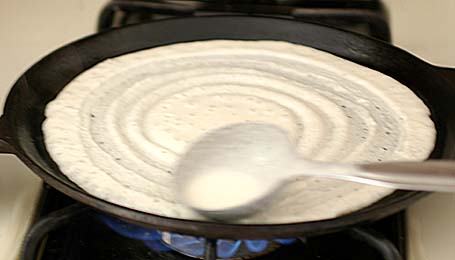
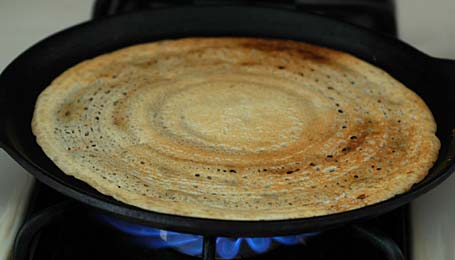
To prepare dosas, lightly oil the dosa tava and rub it with a cut onion. Heat over medium-high. When the tava is hot, pour a ladleful of batter steadily from a height of 3 to 5 inches onto the tava. Allow it spread on its own in a thin lace like layer. Because wheat flour batter is very sticky, trying to shape the dosa with back of the spoon like we do for regular dosa won’t work. Please resist the temptation to shape and allow it to spread on its own. Sprinkle a half teaspoon of ghee or peanut oil and on high heat, cook. Within a minute or two, bubbles start to appear on the surface. Wait until the underside of dosa turns golden and then gently turn it to the other side. Cook for another minute or two. Remove and serve hot with peanut or coconut chutney.

Wheat flour batter spead thin in a lace like fashion on hot tava. Bubbles are appearing.
Wheat flour batter spread in a thin lace like fashion

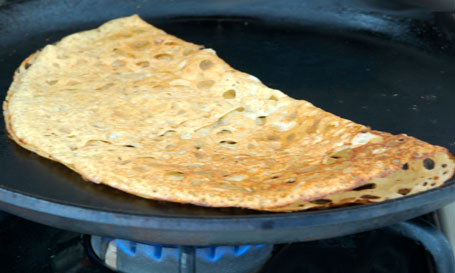
 Turning to the other side to cook

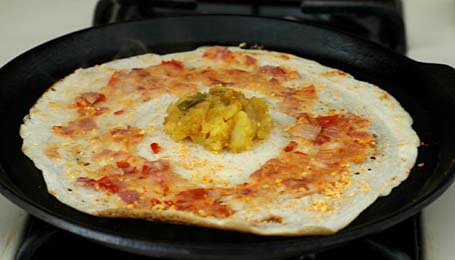
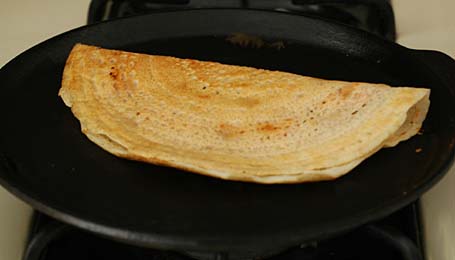
Folding it into half to remove the dosa
With 4 plate-sized dosas like these, expect to get stuffed royally.

Posted by Indira©Copyrighted in Amma & Authentic Andhra,Wheat Flour (Durum Atta) (Tuesday April 18, 2006 at 3:24 pm- permalink)
Comments (44)

The New Home of Mahanandi: www.themahanandi.org

Baby Aloo in Tamarind-Chilli Sauce (Aloo Pulusu)

We lose by generalizing everything. Unity and showing strong front is important but preserving the diversity and maintaining our own uniqueness is also equally important, I think. Indian cuisine is such a broad term. Can anyone say they know all the regional food varieties of India? I guess not. If we don’t talk about our regional cuisine, who will and how would anyone know about the difference in our cooking. I see lot of new Indian food blogs coming up everyday. Generalize to your heart’s content, but don’t be shy to highlight your regional specialties. That would make the recipe more attractive to the readers and give them the feeling they are trying out something unique, in my view.

See, for example, from India – we go to Andhra Pradesh, my home state in India. Though the general term is Andhra cuisine, there are 3 regions (Rayalaseema, Kosta and Telengana) and each region has its own specialties. Lot of diversity out there, even in one state. Example is this recipe. Cooking vegetables like potatoes etc., in tamarind-chilli sauce is the specialty of Kosta (Coastal region) of Andhra. They call this Tamarind-chilli sauce “Pulusu“. It is the base sauce for all kinds of vegetables, in that region. The saying is, “give something to kosta people, particularly the Nellore district, they would find a way to add tamarind to it”.

The ‘pulusu‘ tastes like as if ‘old western’ kind of faction war happened between tamarind and dried red chillies. To compensate the sourness of tamarind, more hot chillies are added. Unbridled war wages on between these two strong tastes and there is no mediator to calm it down. Thickening agents like coconut or peanut paste are big no or rarely used. The pacifier of course is the poor vegetable that is added. How high this war can go on, which one dominates the taste of ‘pulusu‘ – it all depends on housewife’s mood that day. Imagine sucking on a lime wedge and simultaneously eating a dried red chillie – that’s how this pulusu tastes. You are alerted so prepare it at your own risk.

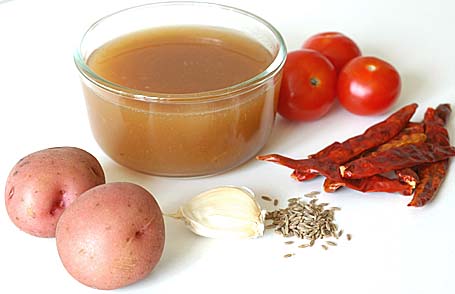
Boiled Baby red potatoes, Tamarind juice, tomatoes, dried red chillies, cumin and garlic

Recipe:

8 to 10 baby potatoes
1 medium sized onion and 10 to 12 cherry tomatoes – finely chopped
For sauce:
1 cup of tamarind juice – (medium thick – home made version)
6 dried red chillies+3 garlic cloves+1 teaspoon of cumin – Make a smooth paste of them.
1/4 teaspoon of turmeric and salt to taste
Popu or tadka ingredients:(1tsp of each, cumin, mustard seeds and few curry leaves)

Boil potatoes in water, just until tender. Remove them and strip the outer skin. Prick the potatoes in multiple sites with a fork so that they can absorb the sauce.

In a big pan or kadai – heat one teaspoon of peanut oil. Do the popu or tadka (toast mustard seeds, cumin, curry leaves). Saute onions and tomatoes for few minutes until they soften. Stir in red chilli paste; saute it for few minutes until it leaves the raw smell. Add the tamarind juice and another cup of water. Stir in salt and turmeric and also the pricked potatoes. Cover and simmer them for about 15 to 20 minutes on medium heat, stirring in between. Wait until the sauce reaches the consistency of thick lava. Turn off the heat, and serve the pulusu with chapatis or with rice and ghee.

Baby Potatoes in Tamarind-Chilli Sauce (urla gadda pulusu
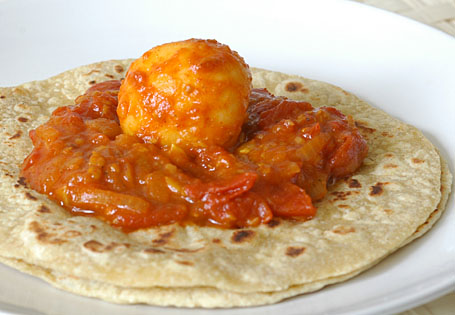
Baby potatoes in tamarind-chilli sauce and chapatis

I’ve added a tablespoon of powdered jaggery to this curry, forgive me my dear Nellore friends and readers. I know you will sneer at me, I know it is a big no-no, adding any kind of sweetener to the curry. But my poor body won’t tolerate that kind of slow burning heat.

This is my entry to “The Spice is Right – Ancient Spices” food blog event, started and hosted by my favorite food blogger, very talented chef Barbara of Tigers and Strawberries.

Posted by Indira©Copyrighted in Amma & Authentic Andhra,Baby Potatoes,Dried Red Chillies (Wednesday April 12, 2006 at 1:25 pm- permalink)
Comments (23)

The New Home of Mahanandi: www.themahanandi.org

Sorghum Roti (Jonna Rotte, Jowar Roti)

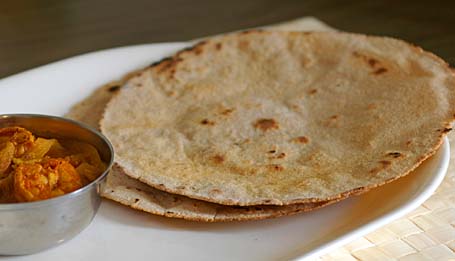
 Jonna rotte with curry (Sorghum roti with curry)

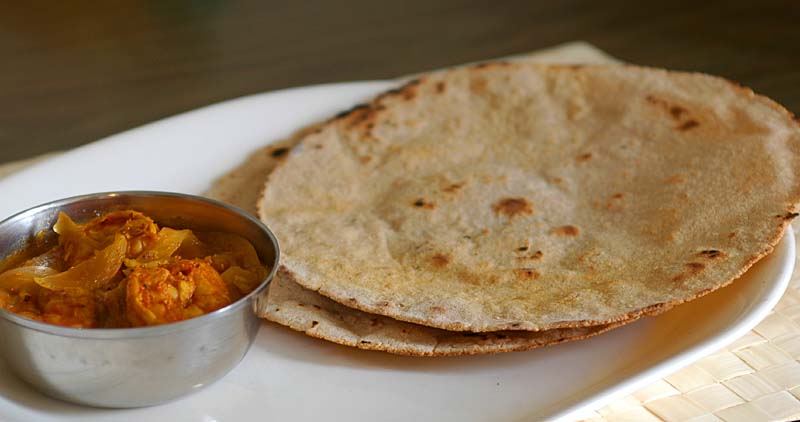
Very popular in villages and small towns as an accompaniment to meat and vegetable gravy curries, sorghum roti is one of the traditional recipes of India. As the name suggests, the rotis are prepared from sorghum flour. Instead of rolling pin, hands are used to shape the sorghum dough into a round, flat, thin circle. Because sorghum flour is gluten-free flour, it’s very tough to spread the dough without breaking the shape, and one really needs hands-on experience and many failed attempts to get the skill.

I am very sad to say that it is becoming one of those ‘dying’ kind of recipes. My mother and grandmother generations perfected the sorghum roti preparation. But coming to my generation, the ‘educated’, the ‘sophisticated’ ones, who can talk about baguettes and brie’s for hours and goes to great lengths to prepare and showoff knowledge of foreign cuisines, have no interest and can’t give the time of the day to learn or master the technique of this classic Indian recipe. It is not that we don’t like the taste. We love it! Imagine the warm paratha taste, multiply by 10 times, that’s how a good, well made sorghum roti tastes. In artisan hands, it puffs like puri – all on its own. No leavening agents and oil or ghee are added. Just fresh sorghum flour, warm water and touch of fire – pure grain power in its glory.

Making a prefect sorghum roti is a skill that I wanted to master with all my heart. For me, it is not just a recipe, but an Indian tradition that I wished to be a part of. The process is difficult to explain in written words and pretty much useless. Again this is one of those recipes, where one must be in the kitchen next to the cook, to know what they are talking about. One really needs a visual experience to understand the recipe. Well that’s how I feel anyway, so I’m going to keep the recipe directions simple for a change, and instead show the process in images.

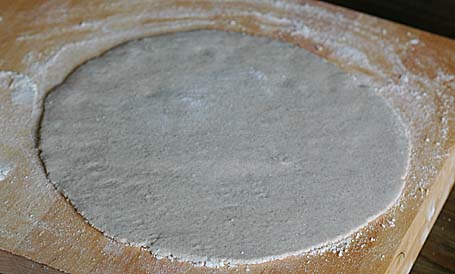
Spreading the dough into thin round shape using hands

Prepare dough by gradually adding and mixing hot water. After a rest period of 10 to 15 minutes, the dough is kneaded and divided into lemon sized balls. Then, using palm of the right hand, on a flat board, the dough is spread into flat, thin round.

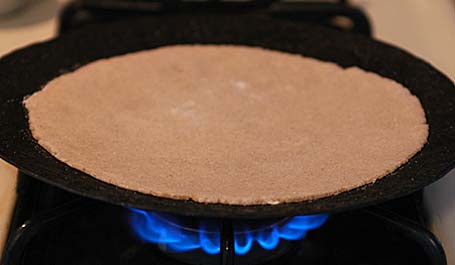
Cooking the roti

The doughspread is carefully lifted and placed on a hot iron tava (griddle). We use a separate tava just for making these rotis. On medium-high heat, roti is roasted slowly. Water is applied with a cotton cloth on the surface of roti, before turning it to the other side.

Roti is turned to otherside

After two to three minutes of cooking, roti is turned to the other side and cooked until done.


Sorghum roti (Jonna Rotte, Jowar roti) with curry
Jonna Rotte (Sorghum Roti) with curry ~ our meal today.

Recipe origin and source: Rayalaseema(Andhra, India) and Amma.

Posted by Indira©Copyrighted in Amma & Authentic Andhra,Bajri/Jowar Flour,Jowar (Jonnalu),Millet (Tuesday April 4, 2006 at 10:49 pm- permalink)
Comments (72)

The New Home of Mahanandi: www.themahanandi.org

13. Chana Dal Payasam (Sanaga Pappu Payasam)

Yesterday, on Ugadi, the weather was perfect with temperatures around 70 F. It felt like spring and Andhra weather. To celebrate this perfect day on Ugadi, I prepared chana dal payasam (sanaga pappu payasam) for puja.

Payasam is the most common type of dessert served in homes across south India. Prepared with basic ingredients and following a simple method, Payasam– the liquidy dessert, is a people pleaser. Usually the base is a thickened milk and sugar or jaggery syrup. The solid component varies – protein in the form of chana dal or moong dal are added. Or by adding carbos like rice, vermicelli, sabudana and nuts like almonds; different types of payasams are prepared. Real easy and the outcome is always sweet mouthfuls, it is a favorite among children and adults all alike. Here is the recipe for one of my favorite payasams:

Recipe:
(For two)

1 cup chana dal
¼ cup sabudana (Sago, Saggu Biyyam)
separately, soak them in water for at least two hours. Presoaking both chana dal and sabudana (sago) reduces the cooking time, considerably.
For sweet syrup
1 cup of powdered jaggery or sugar
3 cups of milk
Flavoring
1 tablespoon of ghee
¼ cup of cashews and golden raisins
4 cardamom pods – seeds finely powdered

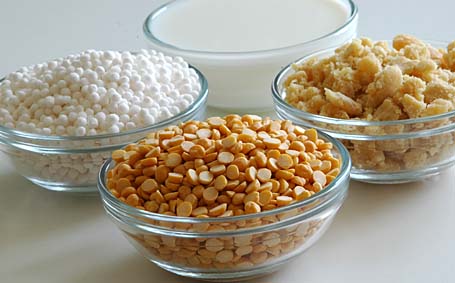
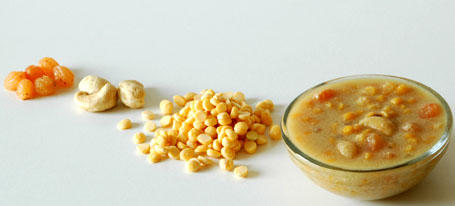
Chana dal, Sabudana (Sago), Milk and Jaggery - Ingredients for Payasam

1. Take chana dal and one cup each of milk and water in a pressure-cooker. Pressure-cook the dal until one whistle, just to soften the chana dal. Do not disintegrate the dal; take care not to over cook.

2. Meanwhile in a thick bottomed, big vessel, take half cup of water. Add sugar or powdered jaggery. Stir and cook, until the sugar/jaggery melts. When the syrup starts to thicken, add the soaked sabudana, and 2 cups of milk. Cook them on medium heat for at least 15 minutes, stirring in between. To this milk-sugar-sabudana syrup, add the contents of the pressure cooker – chana dal and the milky liquid it is cooked. Stir and check the sweetness level, add sugar if needed. Simmer on medium heat, Uncovered, stirring occasionally for another 15 minutes or until it reaches consistency/thickness, you desire. Keep in mind payasam further thickens on cooling.

3. When all this is happening, heat a spoonful of ghee in a small pan. Add and toast – first cashews, then golden raisins until light brown. Add these toasted things along with ghee, to the simmering payasam.

4. Finally stir in powdered cardamom, simmer another 5 minutes. Switch off the heat, cover the pot with a lid and let it sit for at least half an hour. Serve warm or cold.

Golden Raisins fried in ghee, Cashews, Soaked Chana dal, Payasam (Sanaga pappu Payasam)
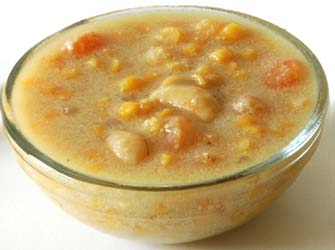
Chana dal payasam (Sanaga Pappu Payasam) ~ For this week’s Indian sweets 101

Variations:
I also prepare the same payasam with chana dal(bengal gram) without adding the sabudana(sago).
Sometimes, I also add fine semolina instead of sabudana to chana dal payasam.
Toasted fresh coconut gratings are also added along with cashews and golden raisins for that rich nutty sweetness.

Posted by Indira©Copyrighted in Amma & Authentic Andhra,Chana Dal,Indian Sweets 101,Milk,Naivedyam(Festival Sweets) (Friday March 31, 2006 at 1:15 pm- permalink)
Comments (31)

The New Home of Mahanandi: www.themahanandi.org

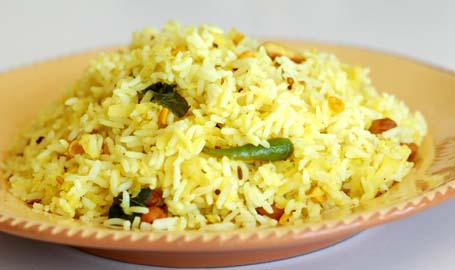
Maamidikaya pulihora (Mango Rice)

Rice mixed with grated unripe mango is a festival rice that is specifically prepared on “Ugadi” – The Telugu New Year celebration, in our homes.

Here is the simple, 4-step preparation process of festival rice – in images:

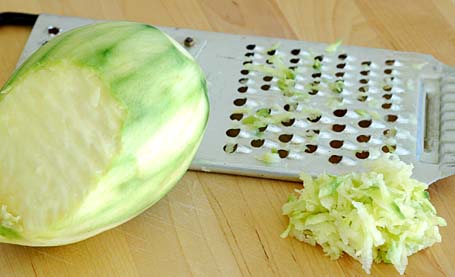
Grating the unripe mango

Step 1:
Peel the skin and grate the unripe mango. Measurement is: for 1 cup raw rice – 1½ cups grated mango to 2 cups. (Adjust the quantity to suit your tart/tangy preference.)

Cook the rice (preferably ‘Sona Masuri’). Maintain the grain integrity, don’t cook to mush.


Step 2:
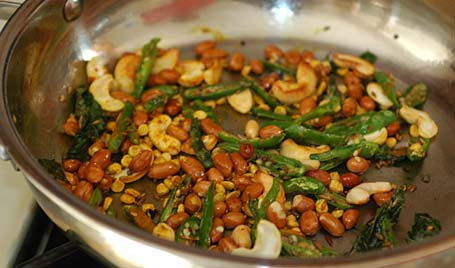
In a skillet, heat peanut oil or ghee. Add and toast the listed ingredients below. One by one, until pale gold, in this order:

Cashews
Peanuts
Chana dal (presoaked in water for about 30 minutes beforehand)
Slit green chillies -brown them for better taste
Curry leaves and few pieces of dried red chillies
Mustard seeds and cumin

At the end, bring all these toasted ingredients, sprinkle turmeric and asafetida. Stir to mix and saute for another two minutes. (See the photo above)


Step 3:
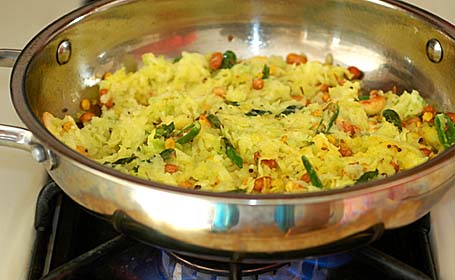
Add the grated mango to the pan. Stir to mix with other toasted contents in the pan. Cook it on medium-high just for two minutes and switch off the heat. (This is done to remove the raw smell of grated mango. Do not cook the mango gratings more than two minutes, that would kill the precious mango flavor.)

Step 4:
Add salt and mix this toasted mango-peanut mixture with cooked rice thoroughly with a big spoon or with your right hand. Serve hot.


Celebrating Ugadi Festival with Maamidikaya Pulihora

Ingredients:
(For two)
1 cup rice (uncooked, raw)
1 to 2 cups grated green mango (quantity needed depends on how sour the green mango is)
6 to 8 Indian or Thai variety small-sized green chillies – Cut into 2or4 pieces lengthwise
¼ cup of cashews and peanuts combined
1 tablespoon of chana dal (soaked in water for ½ hour)
1 teaspoon each – cumin and mustard seeds
10 curry leaves, and 4-6 small pieces of dried red chilli
½ teaspoon of turmeric
Pinch of asafetida
Salt to taste or ½ teaspoon

Posted by Indira©Copyrighted in Amma & Authentic Andhra,Mamidikaya (Green Mango),Sona Masuri Rice (Tuesday March 28, 2006 at 10:07 am- permalink)
Comments (49)

The New Home of Mahanandi: www.themahanandi.org

Maamidikaya Pappu (Mango Dal)

We celebrate Ugadi (New Year) festival on 30th of March this year, and Ugadi is all about mangoes traditionally. Back in India, we decorate our houses with mango leave garlands; at home we prepare recipes with unripe mangoes. You see, by March and April, the bazars are usually flooded with mangoes. First the unripe mangoes in a beautiful shade of pure green, then golden yellow colored ripe mangoes make an appearance at local ‘ritu bazars’ tantalizing the senses. No wonder, we celebrate mango season with a festival.

But here, where I live, green mangoes are hard to come by. I had to travel 100 miles, paid humungous amounts, just because I couldn’t resist a beautiful tradition and I’m very lucky to get them. With the green mangoes I purchased, here is one, an original Andhra recipe – ‘Mango dal’. Green mango cooked with toordal. Little bit tart, fruity with a hint of caramel undertones from mango and earthy nutty smoothness because of toor dal – is a taste that one will never forget.

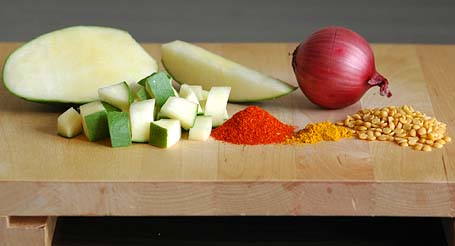
Green mango, Chilli Powder, Turmeric, Toordal and Onion - Ingredients for Mango dal (Click on the image to get a closer look)

Green mango, Chilli Powder, Turmeric, Toordal and onion – Ingredients for Mango dal

Recipe:

1 green mango
1 medium sized red onion – sliced into big chunks
4 fistfuls of toor dal (¾ cup)
1 teaspoon of chilli powder
¼ teaspoon of turmeric
½ teaspoon of salt or to taste

Popu/Tadka
1 tsp of peanut oil or ghee
1 tsp of each – mustard seeds, cumin, urad dal, chana dal
4 to 6 dried red chilli pieces and curry leaves
2 garlic cloves – finely chopped

1.Wash green mango thoroughly to remove any pesticide sprayings. Dry it with a towel then cut it into small cubes. I don’t like to peel the mango skin for this recipe. The tough outer skin of mango, imparts kind of tarty flavor to the dal, so following the tradition, I keep the skin. Scrape any white flesh attached to the seed with a peeler and then only discard the seed. (see this photo for the stripped seed.)

2. Take toordal, mango, onion, chilli powder and turmeric in a pressure cooker. Add one and half cups of water. Close the lid and pressure cook until 3 whistles or until you are sure the dal is soft and mushy. Turn off the heat and wait for the pressure to go off.

3. After all the valve pressure is released, remove the lid. The contents usually are cooked soft by now, add salt and with a wood masher or whisker, mash the dal, until all the toordal turns into fine mush.

4. In a vessel, heat peanut oil or ghee, Toast the popu ingredients in this order. First add dried red chilli pieces, garlic and chana dal. Then urad dal and curry leaves, finally add and toast cumin and mustard seeds.

5. Remove the mashed mango dal from pressure cooker and add it to the popu in the vessel. Stir to mix and cover the vessel with a lid so that the dal could absorb the flavors of popu

Serve with rice and ghee, a dry sauté curry by the side and some papads for a memorable meal.
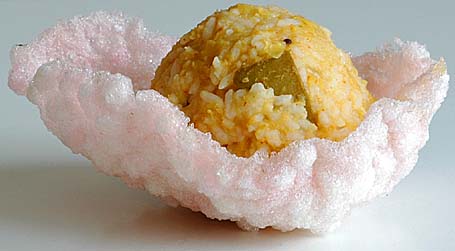
My preference: Mix mango dal with rice and ghee thoroughly. Shape the mixture into small rounds and have them with papads preferably sago (sabudana) papad.

Mango dal and rice mudda in a sabudana papad
(Maamidikaya pappannam mudda on a saggubiyyam vadiyam)
Mango dal mixed with rice&ghee. Shaped into round ball & placed on a deep fried sago(sabudana) papad.

For mango dal, we in our homes, use only chilli powder. Do not substitute it with green chillies.
Sago (sabudana) papads are available in Indian grocery shops and green unripe mangoes- during spring and summer seasons.

Posted by Indira©Copyrighted in Amma & Authentic Andhra,Mamidikaya (Green Mango),Toor Dal (Monday March 27, 2006 at 10:45 am- permalink)
Comments (51)

The New Home of Mahanandi: www.themahanandi.org

12.Mango Halwa (Mango Flavored Ravva Kesari)

“Heavenly” – that’s how I remember Indian mangoes. “Damn…” That�s what comes out of my mouth, whenever I buy mangoes here. Mangoes available here look big and bulky and if you cut them open, there won’t be rich yellow color, there won’t be any heavenly aroma, and the less said the better about the taste. The product of poor soil and excessive fertilizer use. Well, that’s what we get here. At first, the taste was a shock, then over the time we began to ‘appreciate’ the poor taste of mangoes, of course we don’t have a choice.

Whenever I crave Indian mangoes, out comes the treasured family recipe, mango halwa. Preparing like halwa intensifies the mango flavor. In this recipe, mango puree is cooked with toasted semolina in sugar syrup. The result – rich yellow color is back, heavenly taste and aroma of mangoes that we remember from India is there. Also milk free and relatively low calorie. A little bit different than how the regular halwa is prepared, this favorite of mine is more like – mango flavored ravva kesari.

Mango Halwa
A delight to the senses – mango halwa

Recipe:

3 ripe mangoes or 6 cups of cut mango (3 Costco/Samsclub kind of mangoes)
½ cup fine semolina (Suji ravva works fine too)
¼ to ½ cup sugar (add less or more according to the mango sweetness)
1 tablespoon of melted ghee
3 cardamom pods – seeds finely powdered
1 cup of water

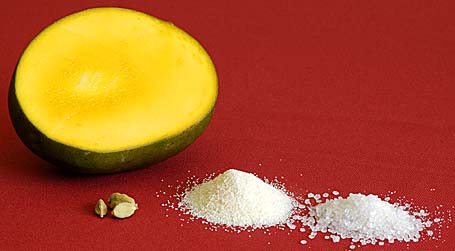
Ripe Mango, Cardamom, Semolina and Sugar - Ingredients for Mango Halwa

1. Peel the mangoes, cut them into cubes. Keep a quarter-cup of finely cubed mango aside. Take the remaining mango in a mixer, blend into fine, smooth puree, without adding water.

2. Heat a half tablespoon of ghee in a skillet, add and lightly toast semolina, just until it leaves raw smell. Remove and keep it aside.

3. In a thick bottomed, wide pan, take water and sugar. Heat them slowly until the sugar melts. Then increase the heat to bring the mixture to a boil. Wait for sugar syrup to thicken a bit and stir in blended mango puree and toasted semolina. Cook the mixture, on medium heat, stirring in-between to prevent sticking, until the mixture reduces by one third. It takes at least 20 minutes. At this stage, sprinkle the cardamom powder and finely cubed mango pieces that were kept aside. Stir, stir…for 2 to 3 minutes and then turn off the heat.

4. Coat a pan or tray with melted ghee and spoon the cooked halwa into the pan. Allow it to cool (halwa thickens further as it cools) and cut into squares. Remove and serve.

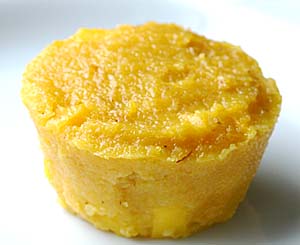
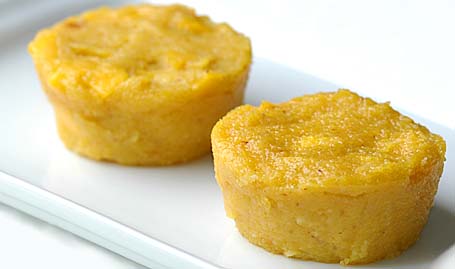
Mango halwa tastes great warm or cold. This time, I spooned it into muffin cups for individual sized servings and kept the muffin pan in the refrigerator for about one hour.

Mango Halwa - in Muffin size
Celebrating spring with mango halwa ~ For this week’s Indian Sweets 101.

Makes about 6 regular sized muffin cup portions.
Recipe Source: family
Kitchen Notes: Prepare it with fresh ripe mangoes. Fresh mango puree tastes better and the fiber etc., when cooked contributes to faster thickening of halwa. For this reason avoid store bought watery and preservatives added mango concentrate to prepare this sweet.

Posted by Indira©Copyrighted in Amma & Authentic Andhra,Indian Sweets 101,Mango,Mitai,Suji/Semolina (Thursday March 23, 2006 at 2:20 pm- permalink)
Comments (54)

The New Home of Mahanandi: www.themahanandi.org

Masala Dosa

Masala Dosa with Coconut chutney and a cup of sambhar
Masala dosa with coconut chutney and a cup of shallot and carrot sambhar

How can anyone not like dosas? Just one bite, that’s all it takes to fall in love with them. They are such a knockout mini meal any time of the day. I often dream of starting my own franchise here, 🙂 to cater freshly cooked dosas with all kinds of filling inside them. There is one already in New York, New Jersey area, called ‘Dosa Express’, which boasts about 50 different types of dosas – all kinds, from just plain dosa to dosas with variety of fillings, like cheese-potato curry combo etc.,

But if you ask me, nothing can beat the old classic, ‘Masala Dosa’. Crisp dosas filled with spicy powders, onion-red chilli paste and potato curry, if that’s not enough they are served with coconut chutney and a cup of sambhar. Can’t stand on your feet kind of knockout combo. Preparing this type of restaurant dosa at home is really easy, only thing you need is time and some planning.

Recipe:

A thick bottomed, flat, seasoned cast-iron pan
1 cup of rice
½ cup urad dal

Wash and soak rice and dal together in 2 to 3 cups of water for at least 6 hours. Drain and grind them in a blender or wet grinder into a smooth batter. Add little water in-between for smooth grinding, if necessary. The consistency of batter must be like that of evaporated milk (commercial kind). Not too watery or not too thick.

Pour the batter into a big vessel, cover it with a lid and keep it in a warm place for overnight fermentation. By morning the batter will be doubled, usually. Add half teaspoon of salt to the batter and stir thoroughly and the batter is ready for dosas. Place and heat the dosa skillet on the stove and follow the procedure shown in the pictures below.


Season the Dosa skillet with a teaspoon of oil and rub it with a cut onion. Onion not only gives nice flavor to dosa, also seasons the skillet.(this is an oldtime tip)


Pour a ladleful of batter on the skillet. Spread it around with the ladle.


With the ladle, shape and move the batter outwards in concentric circles – until it shapes in a circular, thin round. Sprinkle half teaspoon of peanut oil around the batter. Increase the heat high and cook it for few minutes.


Flip it to other side to cook for few seconds.


Reverse it again and quickly sprinkle some pappula podi(spicy dalia powder), apply red onion-dried red chilli paste around the dosa and then place a general portion of potato curry in the middle.


Fold the dosa in middle, remove and serve it immediately. This whole process must be done in maximum two to three minutes. Hot skillet and fast hand action is necessary and do not keep dosa on skillet for long, it’ll turnout hard and brittle, instead of soft and chewy.

Masala Dosa with Coconut chutney and a cup of sambhar
Masala dosa with coconut chutney & a cup of sambhar ~ Our weekend brunch

Prepared in a style of Udipi restaurant dosa, Nandyala, India.
Potato Curry: Pressure cook/boil potaotoes until tender. Remove the skin, cut or crumble them into bite-sized pieces. Sauté finely chopped onions, green chillies and crumbled potatoes together. Season to taste – potato curry for dosa is ready.
Onion -red chilli paste: Cut one big red onion or 4 to 6 shallots into chunks. Add 6 dried red chillies and quarter teaspoon of salt or to taste, and grind into coarse mixture.
Pappula podi – recipe.
Coconut chutney – recipe.
Sambhar – recipe.

Posted by Indira©Copyrighted in Amma & Authentic Andhra,Sona Masuri Rice,Urad Dal (Washed) (Tuesday March 21, 2006 at 4:53 pm- permalink)
Comments (69)

The New Home of Mahanandi: www.themahanandi.org

Ponganalu (Gunta Pongadalu)

Raayalaseema, Konaseema and Telengaana, these are the three regions in Andhra Pradesh, my home state.

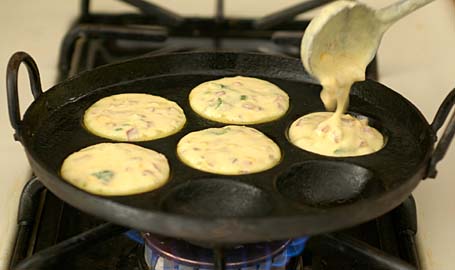
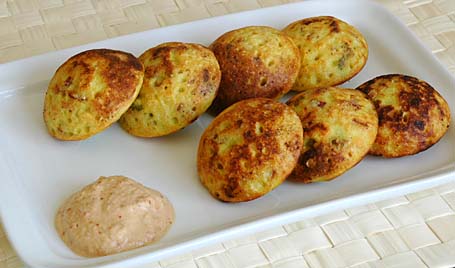
Each region has its own way of cooking things and special recipes. In case of breakfast/brunch worth getting up early for, ‘Konaseema’ is famous for their ‘Pesarattuupmacombination (beautifully put together by Sailu). I’m not that familiar with ‘Telengaana’ cuisine and ‘Raayalaseema’, where I’m from, has few special breakfast dishes unique to our region. One is “buggani” – prepared with puffed rice(murmura), I blogged already, and the other is “ponganalu” – rice lentil batter is seasoned with shallots, green chillies etc., then cooked in round impressions in an iron skillet until golden. These small pretty, dome shaped rounds are usually served with peanut chutney or coconut chutney.

In our homes, whenever relatives from other regions of Andhra or from other states visit us for holidays, out comes the “ponganala Pennam”(ponganala skillet). Round, golden colored ponganalu, hot off from the skillet, always elicits oohh… aahh… from our relatives and from their weird offspring (are there any other kind? :)). Because they are unique to our region, preparing them is our showoff kind of thing, to out of staters who were related to us by marriages etc.,:)

Preparing ponganalu, it’s all in the skillet. Right kind of skillet delivers or breaks a ‘ponganam’. Nothing can beat an old world style, well seasoned iron skillet. They are the best and the place where you can buy is of course India. I’ve seen some non-stick skillets here in US in some Indian shops lately. They are also fine, if you don’t mind the non-stick coating.

Recipe:
For 3 to 4 batches of Ponganalu

Ponganala batter:
1 cup rice
½ cup urad dal

Soak them in water for about 6 hours. Drain (reserve the water) and grind them into smooth batter adding just enough water (add the reserve one, we kept aside). The consistency of the batter must be thick like idli batter or like condensed milk (commercial kind). Take the batter into a big vessel, cover and let it sit overnight for fermentation.
Sour and leftover dosa batter is perfect to prepare ponganalu. If you have some, try ponganalu with it, for a change.

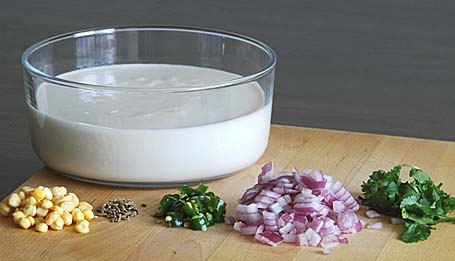
Ingredients to prepare ponganalu

Seasoning (Add to the overnight fermented batter):
1 big red onion or 6 shallots – finely chopped
(Because we mix them in the batter raw, avoid yellow onion for its smell & awful rawtaste)
4 green chillies – finely chopped
Few springs of cilantro – finely chopped
A fistful of chana dal (soaked overnight)
1 teaspoon of cumin
½ teaspoon of turmeric and salt
Add all these ingredients to the batter and mix thoroughly.
Also prepare peanut or coconut chutney.

Cooking: Place the ponganala skillet on medium heat. Add few drops of peanut oil into each impression. With a spoon or with a piece of paper towel, rub oil around, to season the skillet. When the skillet is hot and ready, proceed like this, following the images.


Pour a ladleful of batter into each impression.


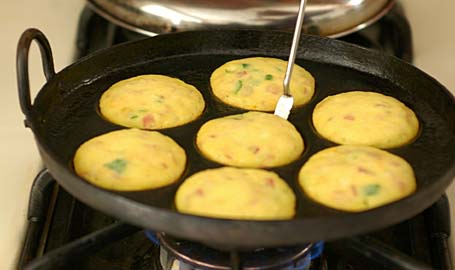
Once all impressions are filled, cover the skillet with a lid and cook on medium heat for about 5 minutes undisturbed.


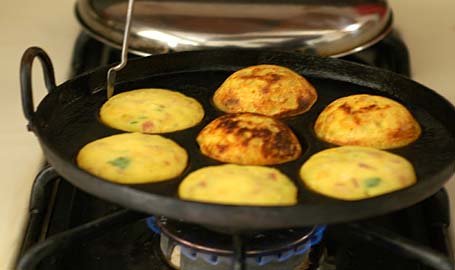
Remove the lid; The batter will be set by now. Gently lift the ponganalu with a “ponganala lifter” or with a spoon. If properly cooked, they should come out easily without sticking to the skillet. If not, cook them for few more minutes.


Turn each one to opposite side to cook.


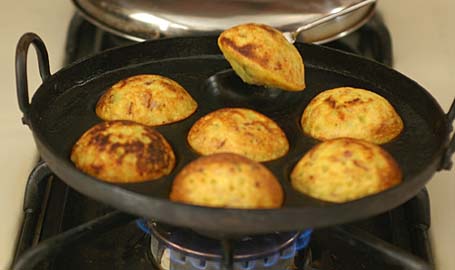
Cook them another 5 minutes on medium heat undisturbed. Gently lift them from out of the skillet. When properly cooked they should come out easily without sticking to the skillet. If not, cook them for few more minutes. Remove them all onto a plate. Season the skillet with oil, again repeat the steps to cook another batch. Medium heat is the key.(Cooking them on high heat in a hurry or on too low heat won’t work- usually the outcome will be messy ponganalu.)


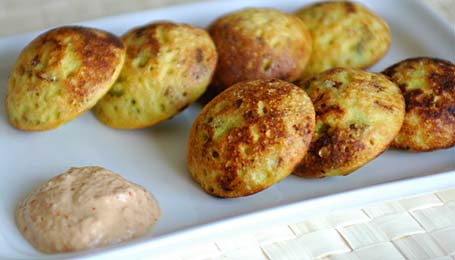
Ponganalu with peanut chutney – Breakfast worth getting up early for.

Recipe Source & Origin: Amma and Rayalaseema (Andhra, India)
Also checkout ‘Ponganalu’ by Santhi, friendly, fellow Raayalaseema vaasi.

Posted by Indira©Copyrighted in Amma & Authentic Andhra,Sona Masuri Rice,Urad Dal (Washed) (Monday March 20, 2006 at 9:08 am- permalink)
Comments (81)

The New Home of Mahanandi: www.themahanandi.org

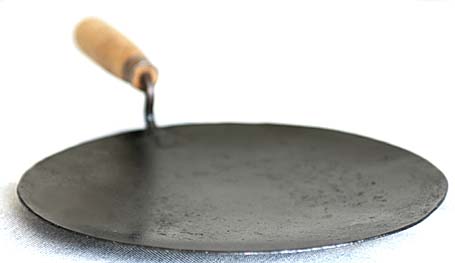
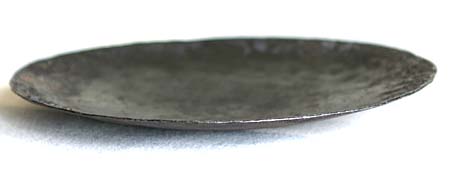
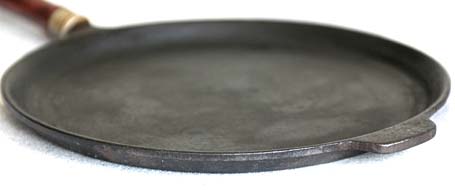
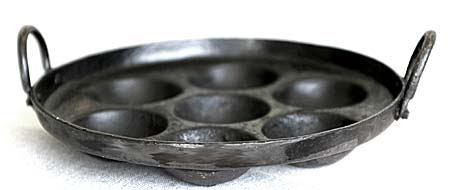
Traditional Indian Iron Flat Pans and Skillet (To Cook Chapati, Roti, Dosa & Ponganalu)

For this week’s “Indian Kitchen” and in response to requests about my cast iron cookware – here are some my very well seasoned cast iron flat pans and skillet that I use regularly and specifically to prepare chapatis, sorghum roti, dosa and ponganalu.

Chapati pennam
Traditional iron pan with thin bottom to prepare chapatis(parathas, wheat rotis) – brought it from Nandyala (my hometown in India).

Roti Pennam to prepare Sorghum Roti
Traditional iron pan with round bottom to prepare Jonna rotte(Sorghum roti) – Brought it from Nandyala

Dosa Pennam
Thick bottomed, flat cast iron pan to prepare dosa, utappam, pesarattu etc – bought this at ‘Target’.

Ponganala Pennam
Traditional iron skillet with round impressions to hold the batter, to cook a South Indian breakfast called “ponganalu” – brought it from Nandyala.

Posted by Indira©Copyrighted in Amma & Authentic Andhra,Indian Kitchen,Indian Utensils (Sunday March 19, 2006 at 3:24 pm- permalink)
Comments (67)

The New Home of Mahanandi: www.themahanandi.org

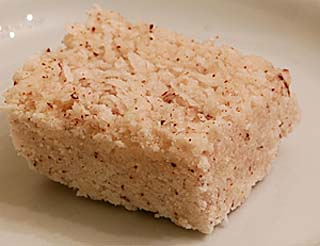
Coconut Burfi (Kobbari Paakam, Kobbari Lauju)

Coconut Burfi

Sweet, flavorful and chewy, coconut burfi is one of my favorite sweets. Fresh coconut meat cooked in cardamom flavored sugar syrup – recipe is so simple, method is very easy and the taste is heavenly. We, in our family prepare it without adding milk in contrast to some other versions, where milk and ghee are also added along with fresh coconut to sugar syrup.

Last weekend, weather was so perfect and spring like. We felt like having some sweet. So we went to neighborhood Rulli Brothers grocery shop and purchased two coconuts, each for about 79 cents. Came home, prepared the sweet and enjoyed it. We still have some pieces of burfi left but the spring like weather – gayab ho gaya (disappeared). It’s snowing here today!

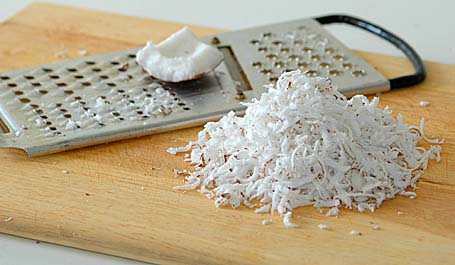
Grating the Coconut

Recipe:
(For 12 medium sized squares)

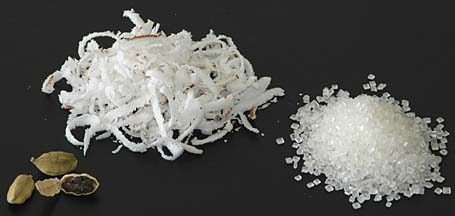
2 cups of fresh grated coconut
1½ cups of sugar (or 2 cups – your choice)
Half glass of water
2 cardamom pods, seeds finely powdered
A tray greased with ghee (for pouring the cooked mixture)

Freshly grated coconut, Indian sugar, Cardamom pods

Method:
In a big sturdy vessel take water and sugar. Keep the heat on medium-low allowing the sugar to melt completely to prepare the sugar syrup. Cook it until the sugar syrup reaches softball like consistency. To know the right consistency – do the cold water candy test. Take few tablespoons of water in a cup, add a drop of sugar syrup to water. If it holds its shape (softball) doesn’t dissolve into water then it’s at the right consistency.

Fresh Grated Coconut Plain sugar syrup
Fresh Grated Coconut ………………Sugar Syrup on the way to softball stage

Grated fresh coconut is added to sugar syrup Coconut Burfi cooling
Fresh coconut is added to the thickened sugar syrup…… Coconut burfi – pressed into a squarepan to cool

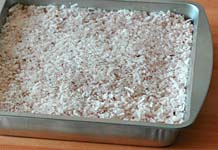
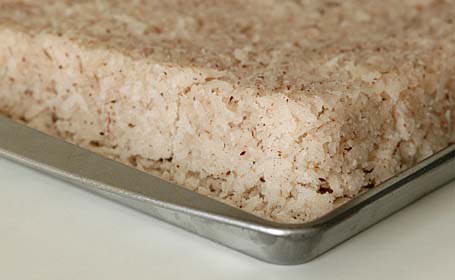
Add the grated coconut and cardamom powder to the sugar syrup. Keep the heat on medium and cook, stirring frequently to prevent the mixture from sticking to the pan. In 10 to 15 minutes, the mixture will be reduced to half, becomes very thick and comes away easily from the sides of pan – this is the signal to turnoff the heat. (At this stage, you’ve to be fast and alert, otherwise, the mixture will be overcooked and turns into dry sweetened coconut flakes – commercial kind of mixture.) Immediately pour this mixture into the greased tray. Level it evenly with a spatula, and cut into squares. Let cool.

To serve or store, reverse the tray onto a big plate, separate the squares and store them in an airtight container. Because it doesn’t have any milk products, this sweet can stay fresh up to two weeks.

Kitchen notes:
Authentic South Indian coconut burfi is prepared only with fresh grated coconut. Grating the coconut takes little bit effort but I think of it as an exercise, mainly upperarm workout.
Checkout this site for clear photo and video demonstration of sugarsyrup stages.

Tray of Coconut Burfi
Indian Sweets 101 – Celebrating Holi with Coconut Burfi

Recipe Source:Amma

Posted by Indira©Copyrighted in Amma & Authentic Andhra,Coconut (Fresh),Indian Sweets 101,Mitai,Sugar (Tuesday March 14, 2006 at 11:07 pm- permalink)
Comments (57)

The New Home of Mahanandi: www.themahanandi.org

Indian Sweets 101 ~ (a series by Indira)

As much as we, Indians are famous for our spicy food, we also love and prepare lots of sweets for every occasion. You wouldn’t notice this if your Indian culinary knowledge were gained from reading Indian cookbooks or eating out at Indian restaurants. Even the seasoned chefs, cookbook authors of Indian descent also shy away from detailing the Indian sweets recipes.

For preparing Indian sweets, though some are very easy, you really need to know the technique and must have experience. The levels can be novice, good and expert…. I can say I’m ‘good’ – both in the number of sweets I know to prepare and the method I follow. This series is my E-notebook of 101 Indian sweets, in a nutshell a 101 on Indian sweets; My attempt to chronicle (explain and learn) the Indian sweets, following the traditional way, both in preparation and in ingredients.

Link to the page and recipes of Indian Sweets that I blogged sofar: Here

Posted by Indira©Copyrighted in Amma & Authentic Andhra,Mitai,Naivedyam(Festival Sweets) (Tuesday March 14, 2006 at 10:47 pm- permalink)
Comments (19)

The New Home of Mahanandi: www.themahanandi.org

Popu (Tadka, Tiragamata)

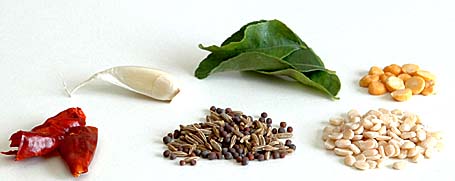
Ingredients of Popu or Tadka -

Popu rescues the dals and the curries from ‘bland’ hell. Simple technique, but it saves and uplifts them to spicy heaven. Almost all types of curries, chutneys, lentil preparations like dals, sambhars and rasams are enhanced by the addition of popu at the start or just before serving. The most common ingredients of popu or tadka are

1. Dried red chilli pieces (Endu Mirchi)
2. Garlic (Vellulli)
3. Curry leaves (Karivepaku)
4. Chana dal (Bengal gram, Sanaga pappu)
5. Urad dal (Black gram, Minapa pappu)
6. Mixture of Mustard seeds and Cumin (Avaalu+jeelakarra)
(listed according to arrangement in the photo above)

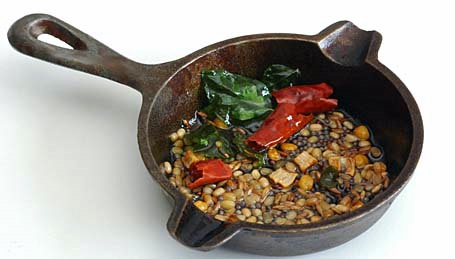
Tadka or popu in one teaspoon of oil

Popu or tadka (tiragamata) is toasting the listed ingredients in oil or ghee. Take oil or ghee in a small pan. The quantity ranges from a teaspoon to tablespoon for dals, sambars and curries. Heat to warm. Quickly add and toast curry leaves, dried red chilli pieces, garlic, chana dal and urad dal to red color. At the end add cumin and mustard seeds. When seeds start to pop, turn off the heat. Add the contents of the pan to the preparation. The quantity of above ingredients are usually a pinch, a dash, just few pieces and not much. All of them have excellent health benefits and popu or tadka provides a neat way to have them regularly through our meals. Multi vitamin pill everyday.

There are certain foods and occasions, where we avoid adding garlic. Examples are chitrannam (lemon rice),pulihora (tamarind rice) and daddojanam (yogurt rice) etc.

Fenugreek seeds (menthi),
hing or asafetida,
black peppercorn (miriyalu)

are also part of popu or tadka, but they are only added in a few, specific recipes.

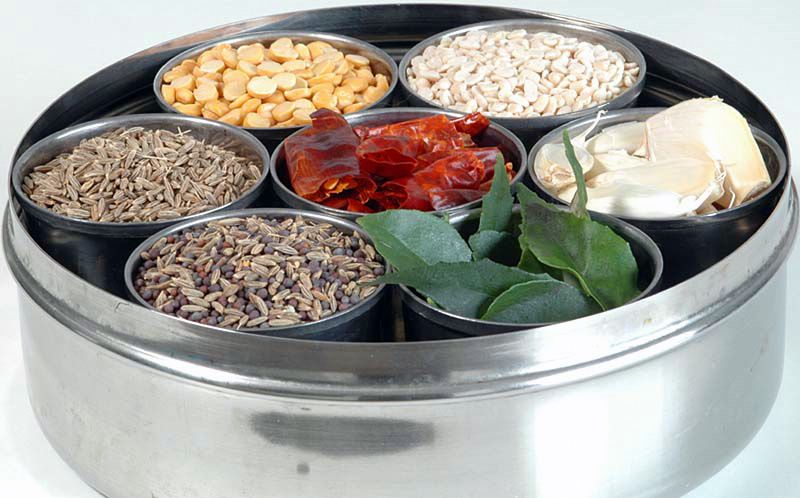
To store all the ingredients of popu or tadka, every Indian kitchen has a spice box conveniently placed at hands reach in a kitchen drawer. And every Indian cook has her own way of arranging the ingredients in Popu dabba (spice box). Placing them all in separate little containers in one big box is not only convenient, but also saves lot of time by making the cooking little bit easy.

This is how I arrange my spice box:

Popu or Tiragamata Dabba (Spice Box)

Popu or Tadka Dabba (Spice Box) – click on the image to enlarge

So, do you own a spice box? How do you arrange your spice box?

Many Indian grocery stores carry ‘Spice Box’ or ‘Masala Dabba’. Depending on the box and containers size, the price varies from 10 to 20 dollars.

Posted by Indira©Copyrighted in Amma & Authentic Andhra,Indian Ingredients,Indian Kitchen,The Essentials (Monday March 13, 2006 at 10:11 am- permalink)
Comments (28)

The New Home of Mahanandi: www.themahanandi.org

Indian Broad Beans Curry (Chikkudu Kaya Kura)

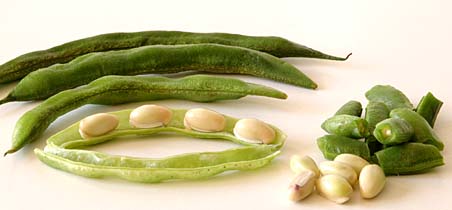
Fresh beans can be exciting, particularly Indian broad beans. Compared to green beans, they have a more prominent beany taste and the seeds inside are plump, meaty and mildly sweet like baby lima beans. Back in Andhra, it is a popular vegetable to grow. Backyards covered with these bean plants provide shelter from the hot sun; they not only enrich the soil with their roots(legumes) and also us – the plump beans are nature’s tiny capsules of proteins. Very nourishing and tasty. You can find Indian broad beans during spring and summer at local Indian grocery shops here in US.

Indian Broad Beans, Chikkudu Kayalu

Recipe:

20 to 25 Indian broad beans (pick plump ones)
2 ripe tomatoes and 1 onion – finely sliced
Make a paste
½ cup of roasted peanuts
1 tablespoon of tamarind juice
2 cloves and 1 small cinnamon stick
½ tsp of chilli powder and salt
¼ tsp of turmeric
1 tablespoon of powdered jaggery
(Take all these in a blender, add half glass of water and puree them to smooth paste)
For Popu or tadka
1 tsp of mustard seeds, cumin, minced garlic and curry leaves

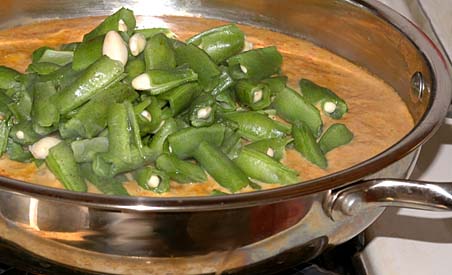
Adding the Indian Broad beans to the curry sauce

Preparation:

Wash the broad beans. Take them in a plate, remove the ends and string them. Just pluck the end of a bean with your hand, and then pull downward; if a thick thread comes away, the bean need stringing, so do the same on the other side. The beans can then be sliced either using a sharp knife or with your hands. Cut or pluck them into small pieces.

Heat one teaspoon of peanut oil in a big pan. Add and toast mustard seeds, cumin, minced garlic and curry leaves. Add and saute onions and then tomatoes. When they are softened, add the cut broad beans. Stir in peanut-tamarind paste and another half to one glass of water. Cook them covered, stirring in between, on medium heat for about 15 to 20 minutes or until the beans are properly cooked. Have a taste and add salt and jaggery if needed.

Serve warm with rice or chapati and enjoy this classic sweet and sour, nutty and beany, Andhra curry.

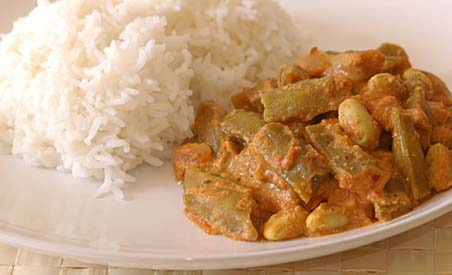
Chikkudu Kaya Kura and Annam(Indian Broadbean curry and rice) - Our lunch today
Indian Broad bean curry and rice (Chikkudu kaaya kura and Annam) ~ Our lunch

Recipe Source:Amma

Posted by Indira©Copyrighted in Amma & Authentic Andhra,Chikkudu Kaya (BroadBeans),Peanuts (Tuesday March 7, 2006 at 1:57 pm- permalink)
Comments (25)

The New Home of Mahanandi: www.themahanandi.org

Idly (Idli, Iddenlu)

Our love for idlis, the soft, fluffy white, round discs made of rice and lentil batter, began when we were children. Two, three year old babies with tiny idlis in their hand, playing around mom, is a common scene you see in many Indian households. As we grow up, the role of idlis also changes – first as toddlers’ teething food, to childhoods play, fun kind of food. Then in teenage years, the kind of breakfast we really enjoy eating without complaining much. Later In twenties and thirties – we try, struggle and wonder how folks back home make those fluffy cloud like visions of idlis so effortlessly. Try as we may, we can’t recreate those beauties here, because the weather, the grain and even the water is different here.

Method of making idlis is very simple yet little bit time consuming, only in the sense that you have to plan ahead. Whether idlies turn out like cotton soft or solid, white round bricks – it all depends on fermentation (that means where you live and how you grind the batter etc.,). Most of the times, the recipe I follow gives good, decent idlis, considering I live in a very cold climate area. See, if my recipe works for you.
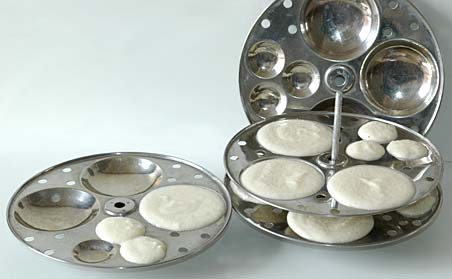
Idly stand and idly plates
Idly stand and idly plates, some filled with urad dal– rice ravva batter

Recipe:

Urad dal and rice ravva (cream of rice, rice suji) in a ratio of 1:2
1 tsp of fenugreek seeds
Pinch of baking powder
Utensils
Blender/wet grinder
Idly stand with idly plates (see the photo above)
And a vessel with tight lid (suitable to fit idly stand)

Soak urad dal in just enough water overnight or for at least 4 to 6 hours.
Drain the water and keep the drained water aside.
Grind the dal into silky smooth batter. To get the medium tight consistency, add the drained water kept aside, as needed to the batter,while grinding. Remove the batter in a vessel.
Add rice ravva and mix thoroughly without any lumps.
Keep it covered, for overnight fermentation (at least 6hours) in a warm place. By morning, the batter will be doubled in volume. Stir in salt and baking powder. Consistency of batter must be medium (like condensed milk), not too tight or too watery. Add water if necessary.
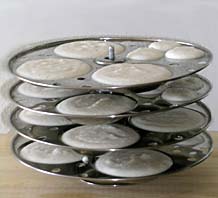
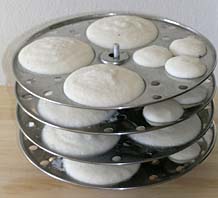
Idli plates filled with rice-lentil batter just before cooking Steamed idlies just out of the vessel
Idly plates filled with rice ravva-urad dal batter all ready for steam cooking***Idlies after steam cooking

In a big vessel (fit to idly stand) with tight lid, add about half to one glass of water and bring to a boil.

Separate the plates in idly stand; pour spoonfuls of batter in round impressions (see the photo above). Fill all the plates with idly batter and place these filled idly plates, back on the stand. Place this idly stand with filled plates in the vessel with boiling water. Cover it tightly and cook them on steam. The plates are perforated and allow the idlis to be steam-cooked evenly.

After about 15 to 20 minutes, the batter will be hardened and when touched, won’t stick to your fingers like a wet batter does. Turn off the heat and remove the idly stand from the vessel. Run a spoon under each impression to separate steamed idlies from the plate. Remove them all like this and get ready to steam the next batch of idlis.

Serve idlis piping hot with sambhar, coconut chutney and idly karam podi ~ for a traditional, proper south Indian breakfast.
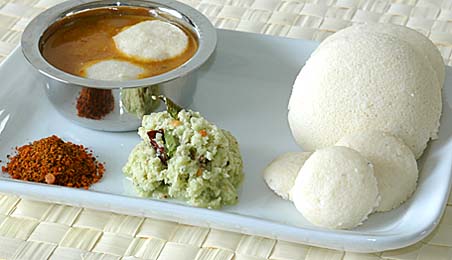
Idlies with coconut chutney, idli karam podi and shallot sambhar
Idlis with coconut chutney, idli karam podi and shallot sambhar ~ Our weekend brunch

double_curve.gif

Answering questions about my Idly routine:

I usually prepare idlis for our weekend brunch. My prep work for Saturday’s brunch of idli starts like this. I soak the urad dal on Friday morning, around 7-9 AM. It takes at least 4 to 6 hours for them to soften. Around 6-8 PM evening, I grind them into smooth, silky smooth batter. I remove the batter into a big vessel and mix up with store bought idli rava. Then I keep it covered overnight for fermentation. By morning, the batter will be fermented and changed in looks and consistency. After stirring in salt and little bit of baking powder, I pour ladleful of batter into the impressions on idly plates and steam cook them.

The tips I follow:
1. I use round urad dal(whole and white). Somehow they are better than the broken ones for idlis.
2. I soak the urad dal in just enough water and while grinding I add this drained water. This tip works only in cold climate to aid the fermentation.
3. While grinding I also add one or two teaspoons of soaked fenugreek seeds. This is an old tip, to improve the taste and fermentation.
4. Urad dal batter- the smooth the batter, the fluffy and silky, the idlis will be. Grind, grind and grind, run that blender motor until it gets hot.:)
4. Rice ravva- I use store bought kind.
5. Fermentation- I set the oven on to minimum (lowest setting/warm) for about 5 minutes, then I’ll turn it off. By the time I’m ready with batter, the oven will be warm. During bitter cold wintertime, keeping the batter in this cozy, warm oven aids fermentation process.
6. In the morning, I usually add a pinch of baking powder to the batter (old time tip).
For more tips, check out this wiki article on Idlis.

Recipe source: Amma
Posted by Indira©Copyrighted in Amma & Authentic Andhra,Rice Ravva (Cream of Rice),Urad Dal (Washed) (Tuesday February 21, 2006 at 4:50 pm- permalink)
Comments (119)

The New Home of Mahanandi: www.themahanandi.org

« Next PagePrevious Page »