Mahanandi

Living in Consciousness ~ Indi(r)a’s Food and Garden Weblog

How to Food Blog? ~ Live and Let Live philosophy & Methi-Nariyal Pulao (Fenugreek-Coconut Pilaf)

The holiday season is here in US!

Food blogging community is abuzz with calls for donations and charity drives, to show that we are not some greedy gluttons always in search of next best exotic ingredient, and we have a compassionate heart. Good things we are doing. Also without some family ‘discussions’, where is the joy in holidays? In last few weeks, we’ve seen amateur gourmets to who spits wine, issuing ultimatums to the community. One blogger writes stop being mediocre, stop writing about what you had for lunch and urges us to strive for the foodie exhibitionist avatar, him in a nutshell. And one wants to name and shame the bloggers who don’t provide – ha… the terminal crime, RSS feeds. Imagine the audacity of some food bloggers, who wish for people to spend some time visiting their page and recipes they laid out neatly, instead of being treated like ‘grab and gulp’ fast food road stops. Imagine, for all their hard work, some food bloggers want people visit their actual web page, instead of being one more bland white page in a RSS feed hell.

Just few lunches with corporate promoted celebrity chefs and few sponsored dinner reservations at 300 dollars a meal – French Laundry, is all one needs these days to act like all-knowing, bloggity wisdom dispensers. Like utterly corrupted evangelical leaders that issue bully ultimatums of one has to follow only their religion to enter the heaven, these food bloggers who tasted the fame, suddenly forgot their beginner days of blogging and thunder on us, to write like them and do what they do, to enter the golden greedy gates of mainstream fame. What if the ‘mediocre’ home cooks start writing what’s on their minds about such things? These sermon serving, self-proclaimed soul savers, will they be ready to hear how shallow they sound in their daily posts.

What happened to “live and let live” philosophy?

They may join forces with few food magazine columnists in demeaning the home cooks who blog about cheese sandwiches – the everyday food. But they keep forgetting that home cooking and bloggers who write about lunch meal recipes have been the building bones of food blogging community. Home cooks in general are compassionate, understanding and gentle. Rarely narcissistic and flashy. Not only towards the ingredients and the recipes they blog, but also in their writing style and in interaction with readers. This approach is considered boring and mediocre by advice dispensers. Really? If we want to read glorified, glibbery accounts of restaurant food or doltish gibberish of kitchen mishaps, or how micro plane zester or some latest kitchen gizmo saved their cooking – we already have puffed up Frank Bruni and his kind’s writings in newspapers and food magazines, all available free at the local libraries. These ‘wannabe’ food bloggers may think they are being original, but who are they kidding?

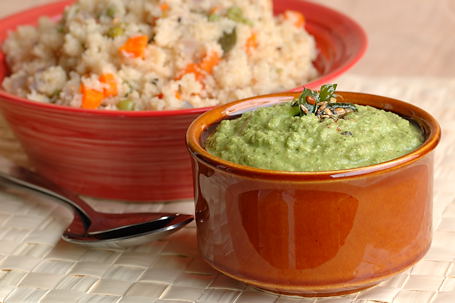
I blame the current tide in food blogging world on holiday pressures. I do hope that this drive to conform foodbloggers to their thinking passes once the holiday season is over. There are many ways and many reasons to blog. Live and Let Live. With that said, here is today’s recipe – what I had for lunch, very much homemade, not RSS fed – coconut and fenugreek pulao.

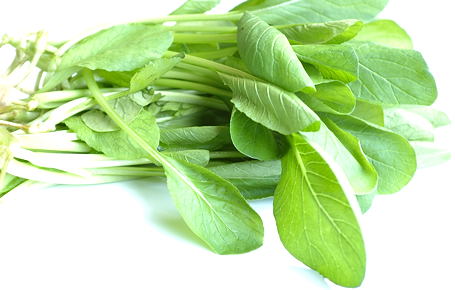
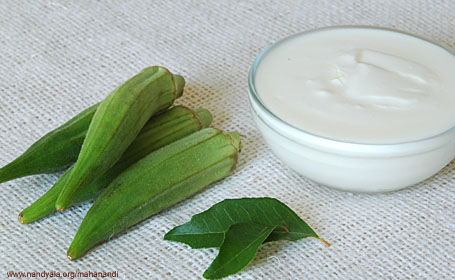
Aromatic basmati rice, sweet homemade coconut milk and potent fresh fenugreek leaves – cooked together is a recipe that I have learnt from my mother and very much illustrates the ingenuity and wisdom of home cook. Nutritious, wholesome and a one-pot meal, give it a try.


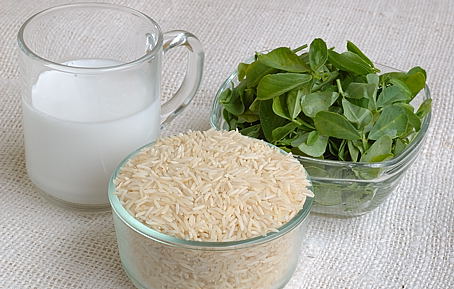
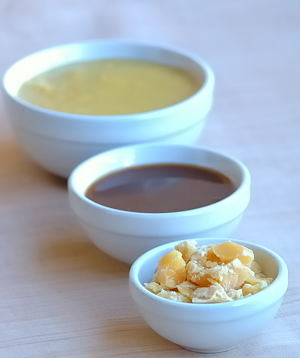
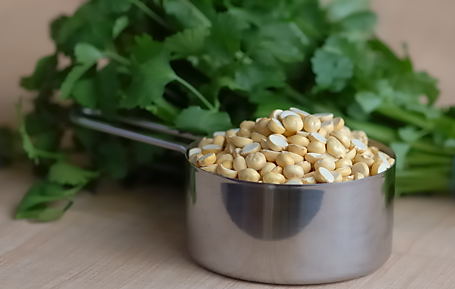
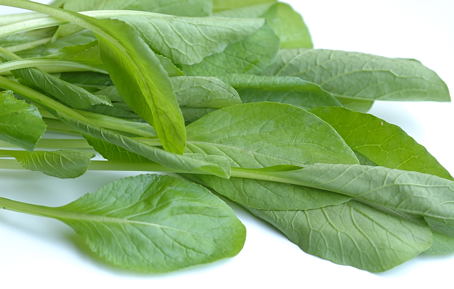
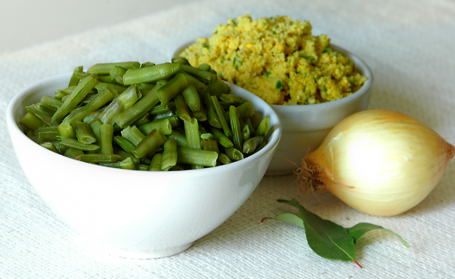
Homemade Coconut Milk, Basmati Rice, Fresh Fenugreek Leaves

Recipe:

2 cups basmati rice
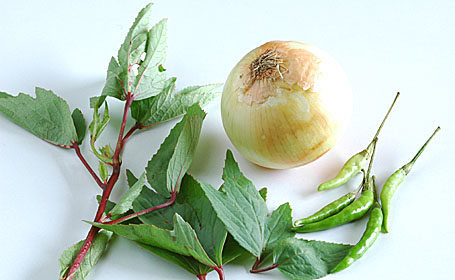
2 cups fresh methi (fresh fenugreek) leaves
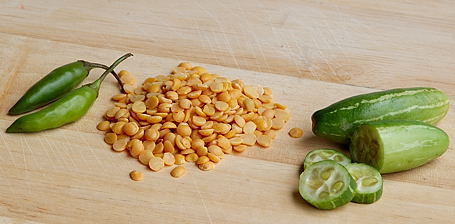
6 chillies – sliced thin lengthwise
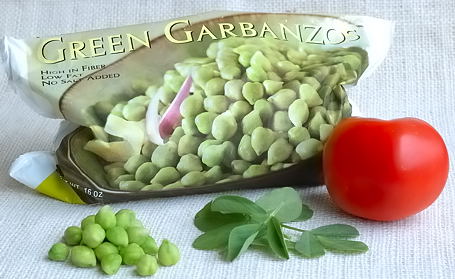
1 cup fresh peas
1 cup finely sliced onion – lengthwise
½ cup homemade coconut milk or ¼ cup of store-bought type
½ cup roasted cashews (optional)
1 teaspoon each – ghee or peanut oil and salt or to taste
¼ teaspoon each – black peppercorns, cloves and fresh ginger pieces
coarsely grind using a spice mill or in a mortar with pestle

Wash and soak basmati rice in 3 cups of water for about 15 – 30 minutes.

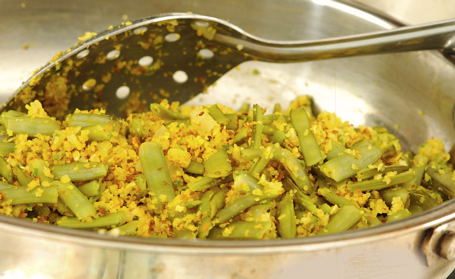
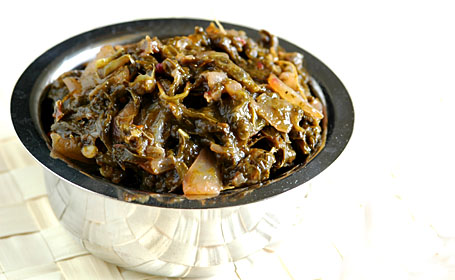
Meanwhile, in a thick-bottomed wide pot, heat ghee or oil on high heat. Add and fry the onions first and then the peppercorn-clove-ginger paste and chillies. Add the fresh peas and fresh methi leaves. Stir-fry until the leaves wilt.

Add the basmati rice and along with the water it soaked in. Stir in coconut milk and salt. Mix thoroughly. Reduce the heat to medium and cook, covered for about 15 to 20 minutes. By the end of 20 minutes, the water will be absorbed and rice will be cooked to perfection. At this time, add and gently mix roasted cashews. Close the lid and let the rice sit for another 5 to 10 minutes.

Serve hot. Sprinkle in some lime/lemon juice just before serving.

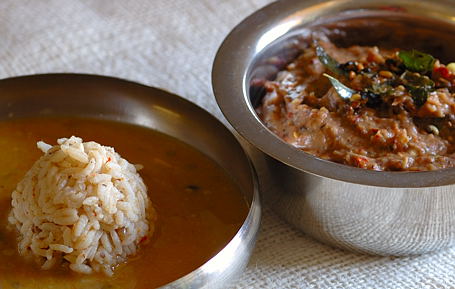
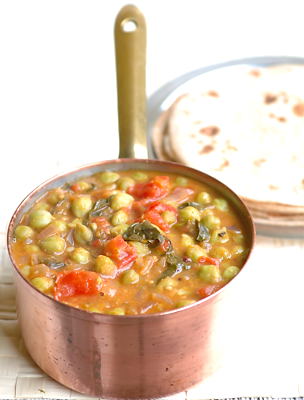
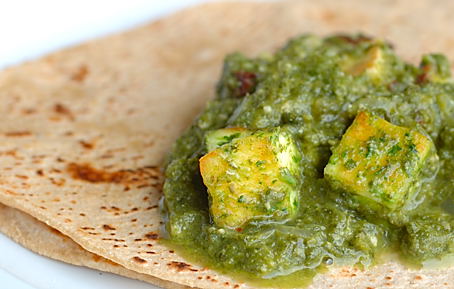
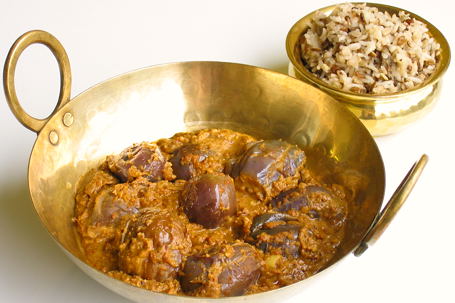
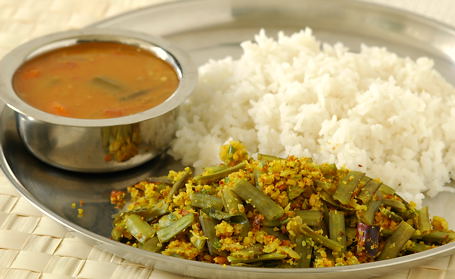
Coconut milk and fresh peas balance methi ruchi (flavor). Basmati and roasted cashews addition makes it even more pleasant. Good meal when combined with a kurma/kofta curry or just plain yogurt/raita.


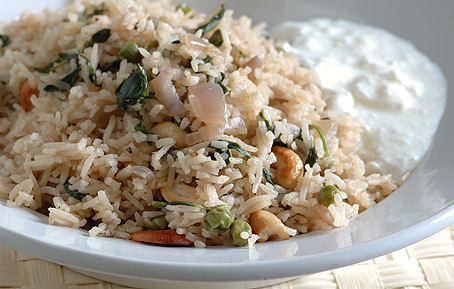
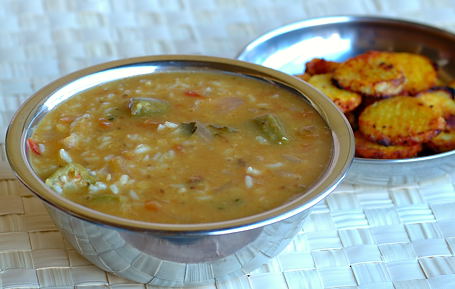
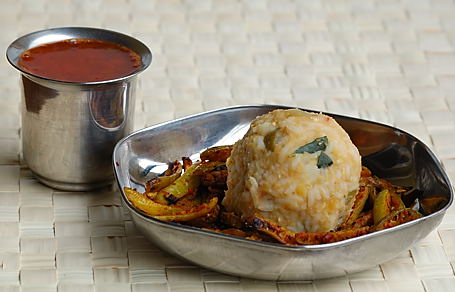
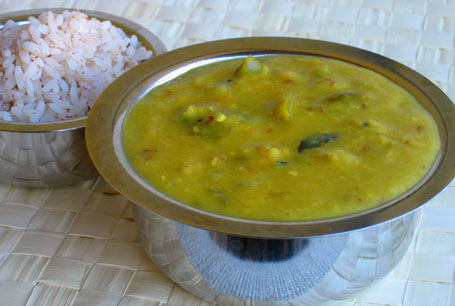
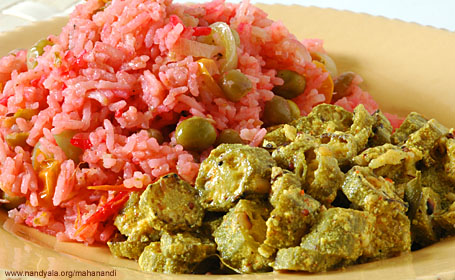
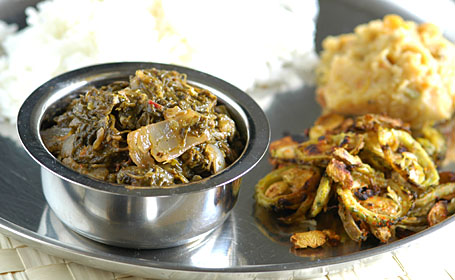
Methi-Nariyal Pulao with Yogurt ~ Our lunch today

Added on Dec 7:
Thanks for all your responses. It has been a lively discussion. Glad to see this topic has given all of us a chance to express our ideas about food blogging and how to do it. I had to scrub four comments because of the rude and soliciting nature of the content.
Also, thanks very much for trying out the recipe and letting me know. I greatly appreciate it!
– Indira

Posted by Indira©Copyrighted in Amma & Authentic Andhra,Basmati Rice,Biyyamu (Rice),Coconut (Fresh),Menthi Kura(Fenugreek) (Wednesday December 6, 2006 at 7:46 pm- permalink)
Comments (37)

The New Home of Mahanandi: www.themahanandi.org

Brinjal~Jaggery Chutney (Vankaya Bellam Pacchadi)

Cooking is an ultimate balance act, isn’t it? Take time to learn and practice to achieve that balance, the rewards are high. Not only good health, but also a balanced mood. Some ingredients and recipes are easy to balance and master. But for some, one needs yogi’s kind of patience and sadhana. Jaggery, particularly in savory recipes, is one such ingredient that I needed to practice a lot to achieve the balance. Consistency and quantity are difficult to explain and I had to rely on my flavor senses for guidance in my beginner days of cooking. I hope you do the same when you cook with jaggery in savory recipes, like the one I am posting today, as part of my weeklong Jihva jaggery journey.

Brinjal-Jaggery chutney (Vankaya-Bellam pacchadi) is a classic Andhra (Nandyala) recipe where young brinjals, dried red chillies and ginger are first roasted and then grinded together with jaggery, tamarind and salt. The result is a mouthwatering side dish with all 5 flavors and some extra smoky flavor, usually eaten with rice, ghee and dal or sambar. If you like baingan burtha, baba ghanouj style brinjal preparations, where brinjal is grilled and mashed, then this chutney is also your style.


Brinjals, Jaggery and Dried Red Chillies

Recipe:

8 young brinjals – ends removed and sliced lengthwise
8 dried red chillies
1 rupee coin sized ginger
1 red onion or shallot – sliced lengthwise
1 tablespoon each of powdered jaggery and tamarind juice
¼ teaspoon of salt or to taste

Heat two tablespoons of peanut oil in an iron skillet. Bring the oil to smoking point. Now add brinjal, onion and ginger. On high heat, grill them. Do not cook and soften but brown them -secret to tasty chutney. If you are one of those ‘gifted’ with charring or blackening all things you cook, then you need to use that gift here, my friend. Leave the care to the world and char the brinjals’ white flesh to your hearts content. Remove them to a plate. Add and grill dried red chillies for few seconds.

In a food processor or blender, take grilled brinjals, onion, ginger and dried red chillies. Add salt, tamarind juice and jaggery. Hit pulse button and coarsely puree. Remove to a cup. Traditionally popu or tadka (toasting cumin, mustard seeds and curry leaves in one teaspoon of oil) is added to the chutney at the end but this step is entirely optional. Sometimes I do it, sometimes I don’t, depends on my time and patience.

Serve with rice, ghee and dal or with pappu chaaru/sambhar.


Brinjal-Jaggery chutney mixed with Rice in Pappu chaaru – Savory Jaggery Entry to Kay’s JFI

Posted by Indira©Copyrighted in Amma & Authentic Andhra,Jaggery,Vankaya (Brinjal) (Wednesday November 29, 2006 at 9:40 pm- permalink)
Comments (33)

The New Home of Mahanandi: www.themahanandi.org

Penne Marinara With Fresh Goat Cheese

Penne in Tomato-Basil Sauce with Goat Cheese

Penne pasta tossed in tomato-basil sauce and garnished with red chilli flavored goat cheese – this classic pasta recipe is easy to prepare and deeply satisfying on a basic, no-nonsense way. Good food to have on a rainy day like today.

I am under the impression that goat cheese is the purest cheese available in the market right now. I am hoping that I won’t find any information that would shatter my belief and prove how naive I am. Again and again, from sugar to table salt to enriched flour, everything I thought decent were proved otherwise here in US. More and more, the ingredient shopping here is becoming like a sightseeing trip to Las Vegas. (I see gondola ride, is this Venice? Nope, it’s not.) Which is genuine and which is maya (fake) – one has to dig deep to discern the difference.

For now, I am going to enjoy goat cheese – my all time favorite cheese.

Goat cheese with red chilli flakes and Penne
Goat cheese with red chilli flakes and Penne Pasta

Recipe:

Penne (a type of pasta) – 2 cups
Tomato-basil sauce (marinara) – Homemade or storebought – 3 cups
Goat cheese – ½ cup
Fresh garbanzo beans – ½ cup
Red onion and red bell pepper, 1 each – thinly sliced lengthwise
Red chilli powder, salt and turmeric – ½ tsp each or to taste.

Cook pasta to tender following instructions on the packet. Meanwhile, in a large skillet, heat a tablespoon of oil. Add and saut? red onions and red bell pepper to soft. Add the fresh garbanzo beans and tomato-basil sauce. Stir in red chilli powder, salt, turmeric and about a cup of water. On medium-high heat, cook for about 10 to 15 minutes stirring in-between. When the sauce starts to come together, switch off the heat. Add the cooked pasta to the sauce. Toss to mix and sprinkle in crumbled goat cheese. Serve hot.

Kitchen Notes:
Fresh Goat Cheese type and source: Peppadew Chevre from ‘Trader Joe’s’ (US grocery shop)

Posted by Indira©Copyrighted in Cheese,Goduma (Wheat),Hara Chana(Green Chickpeas),Pasta (Tuesday November 21, 2006 at 3:01 pm- permalink)
Comments (25)

The New Home of Mahanandi: www.themahanandi.org

Pappu Chaaru with Bendakaya (bendi, Okra)

Cooked and Mashed Toor dal, Tamarind Extract, Jaggery

If toor dal, the mother of all dals, has offspring, it would have three. They would be the pappu (dal), the pappu chaaru and the sambhar. Our regular pappu (tadka dal) is like big sister, always there to feed us when we are short on time and out of meal ideas. Sambhar is the darling little one, so naturally show stopper and attention grabber. Needs all spice bling in the world (sambhar powder) to shine and of course would bring much joy to the party. Imagine a party without sambar. No way, right? Then there is the pappu chaaru, typical middle child. Some of us don’t even know it exists and some of us compare and confuse it with the first and last ones.

Pappu chaaru has same ingredients of dal (pappu) but the cooking method is different and we add jaggery to it. And looks like sambhar but doesn’t have the several special spices typical for sambhar in it. It may not be as regular or as flashy like pappu and sambhar in our homes, but pappu chaaru has many admirers and die-hard fans, sort of like underground following. When you get to know pappu chaaru, you would immediately grasp why millions of Andhra households adore this darling dish.

Typical Pappu chaaru has a consistency of fresh honey, not too watery or not too thick. Main ingredient is of course toor dal. Distinct nature comes from the addition of good quality jaggery and tamarind. In case of vegetables, constant are onions and ripe tomatoes – sometimes bendi or drumsticks are also added. Regulars – salt, red chilli powder and turmeric are added along with aqua. Curry leaves touch, that’s about it. Together they are cooked to a honey consistency and the end result does have an addictive quality like honey.

Pappu chaaru, dal and sambar, this is the order how my mother introduced us to toor dal. For that reason, pappu chaaru has always holds a special place in my heart.

Recipe:

Pressure cook:
4 fistfuls (1 cup) of toor dal in one glass of water to tender. Mash the dal to smooth.

Cut:
1 onion – finely sliced lengthwise
1 ripe tomato – finely chopped
1-inch pieces – optional and to taste – Bendakaya (okra) or drumsticks (munagakaya), about 8 to 10 cut pieces

Do the popu and cook:
In a pot, heat a teaspoon of oil. Do the popu or tadka (toast curry leaves, dried red chilli pieces, cumin and mustard seeds in one teaspoon of peanut oil).
Add onions. Saute to soft. Add tomatoes and vegetables. Cook to tender, stirring often.
Add the cooked and mashed toordal.
Stir in salt, red chilli powder and turmeric to taste or ½ tsp each.
Add 2 tablespoons each – freshly prepared tamarind juice and jaggery pieces.
Add about a big glass of water. Mix and bring to a boil on high heat.
Reduce the heat to medium-low and let simmer the whole thing for about 10 to 15 minutes. Just before turning off the heat, sprinkle some finely chopped fresh cilantro leaves.

Let the pappu chaaru sit covered for at least 10 minutes and then serve warm with rice. Tastes extra good when it’s cold.


Okra Pappu Chaaru with Rice and Taro (Chaama Dumpa) Chips

Recipe source: Amma

Posted by Indira©Copyrighted in Amma & Authentic Andhra,Benda Kaaya(Okra),Toor Dal (Monday November 20, 2006 at 2:22 pm- permalink)
Comments (17)

The New Home of Mahanandi: www.themahanandi.org

Dondakaya Pappu (Tindora Dal)

I have postponed blogging about this recipe as long as I could. A dal with Tindora (Dondakaya) and toordal – it may sound preposterous and audacious, but people do prepare it in Andhra (Nandyala), and there are some who like it. In case of me, I like it mainly because everything Indian is precious to me now.:)

If you are one of those who would cook tindoras in a pressure cooker or by adding water to the curry, then you might like this traditional Andhra tindora dal recipe as well. Tomato dal with tindora touch is what this tindora (dondakaya) pappu is.

Green Chillies, Toor dal, Tindora (dondakaya)
Green Chillies, Toor Dal, Tindora (dondakaya)

Recipe:

Cut:
10 tindoras (dondakayalu), cut thinly crosswise, like coin shape
(Discard red colored, ripe flesh ones)
10 to 12 green chillies – finely chopped
1 medium sized onion – cut into chunks
1 medium sized tomato – cut into small pieces

Pressure Cook:
In a pressure cooker, take 4 fistfuls of toor dal and wash them first. Add the cut vegetables, ¼ teaspoon of turmeric, tablespoon of tamarind pieces and 2 cups of water. Cover and pressure-cook till two or three whistles. Turn off the heat and wait for the pressure to go off. When all the valve pressure is released, open the lid. Add about ½ teaspoon of salt. With a wood masher, mash the dal to smooth consistency.

Do the popu or tadka:
In a dal-pot, heat a teaspoon of peanut oil. Add and toast 6 each-curry leaves and dried red chilli pieces, one teaspoon each of- minced garlic, urad dal, cumin and mustard seeds – in the order mentioned. When mustard seeds start to dance, quickly add the mashed dal from pressure cooker and mix. Cover with a lid and let it sit for few minutes for flavors to mingle well.

Serve:
Serve a big serving spoon size rice on a plate. With similar kind of spoon, serve dal. Sprinkle one teaspoon of ghee. Mix rice, dal and ghee with hand. Shape into small ping-pong shaped rounds. Like a truffle, savor each round. A curry, pickle or papadam on the side not only enhances this experience a lot, this is how the rice-dal combo is eaten in many Andhra households.


Tindora (Dondakaya) dal mixed with rice and on the side tindora curry. A glass of tomato rasam and a glass of buttermilk (not in the picture) – Our meal today

Posted by Indira©Copyrighted in Amma & Authentic Andhra,Dondakaya(Tindora),Toor Dal (Tuesday November 14, 2006 at 3:06 pm- permalink)
Comments (27)

The New Home of Mahanandi: www.themahanandi.org

Methi Chole (Fenugreek~Chickpeas Curry)

“One remarkable thing about Rajasthani recipes is, without the usage of Onions and Garlic, the dishes that are prepared are remarkably tasty. One such dish which stole my heart is Methiwale Kabuli Chhole (Chick peas with fenugreek leaves). This curry is prepared both in dry and gravy version. But my suggestion is to prepare semi gravy version. If you taste this once, you would love to try this out again and again.”

– Writes cooking guru Sri Hemant Trivedi in his introduction to chickpea-fenugreek curry. As weather turned to cold and gray, kitchen and food have become my source of warmth and comfort, among other things. Chickpeas are one of my favorite winter comfort foods and I am always on the lookout for new recipes to try with this wonder legume. The methi chole recipe from Trivedi’s fabulous website sounded interesting and I gave it a try last weekend.

Of course I had to alter the recipe to suit my tastes. I have added onions, omitted ginger-garlic, and I prepared the curry with fresh green chickpeas. Trader Joe’s, the nearby grocery shop carries fresh green chickpeas in frozen section. One-pound packet was available for $1.99. Like freshly shelled peas, fresh green chickpeas taste good, and when combined with potent fenugreek, they made a great combination. Chana masala infused with fenugreek magic is methi chole. Give it a try.

 Fresh Green Chickpeas, Fresh Fenugreek (methi) Leaves, Ripe Tomato
Fresh Green Chickpeas, Fresh Fenugreek (methi) Leaves, Ripe Tomato

Recipe:

2¼ cups of green chickpeas (chana, green garbanzos)
(of which ¼ cup removed and pureed to smooth paste – to thicken the sauce)
2 cups of fresh methi leaves (fenugreek leaves)
4 big, ripe, juicy tomatoes – cut to small pieces
1 onion – finely chopped
Seasoning:
1 tablespoon of chana masala powder
Salt, chilli powder, turmeric, jaggery (or sugar) and amchur powder – to taste or ½ teaspoon each
1 teaspoon of ghee

In a big saucepan, heat ghee on medium heat.
Add and saute onions to soft.
Add fresh methi leaves and cook for about two minutes, until leaves collapse.
Add the green chickpeas and tomatoes. Stir in the pureed chickpea paste, and all the seasoning. Add about 2 cups of water.
Cover and cook for about 20 to 30 minutes, stirring in-between, on medium heat, until the chickpeas become tender. Serve the methi-chole warm with chapatis.

This recipe can also be prepared with dried chickpeas (soak and cook them to tender first and follow the recipe steps mentioned above).

Pot of Methi Chole and Chapatis on the Side
Pot of methi chole and chapatis on the side ~ Our Weekend Meal

Green Garbanzo Beans – purchased at Trader Joe’s, frozen section.
Fresh Methi (fenugreek leaves) – purchased at Indian grocery shops
Recipe source and adapted from – Sri Hemant Trivedi and from ‘Spice is Right’

Posted by Indira©Copyrighted in Chickpeas,Hara Chana(Green Chickpeas),Menthi Kura(Fenugreek) (Monday November 13, 2006 at 12:42 pm- permalink)
Comments (35)

The New Home of Mahanandi: www.themahanandi.org

Coriander ~ Pappula(Bhuna Chana) Chutney


Coriander~Pappula Chutney with Upma

Just like dear Supriya (Tweety) of Bengaluru, I also prepare upma often, at least once a week for lunch or dinner. Rice and roti are good but sometimes I feel like taking a break from those two and upma usually comes to my rescue.

Upma recipe is very forgiving. We can make it as elaborate, nutritious (by adding lot of vegetables, nuts etc) or simple (just plain water and some salt) as we like. One thing the recipe does need is a pickle or chutney on the side. A meal is healthy when it’s homecooked and upma is pleasing when it’s served with chutney on the side. One such simple and easy chutney recipe that taste terrific with upma or for that matter all varieties of breakfast items is coriander-pappula (roasted chana dal) chutney.

Pappulu or putnala pappulu (Telugu) are sold as ‘dalia’ in US. See this label here. I always thought the name dalia is a North Indian one, but not so says Anita of ‘A Mad Tea Party”. So now the question is who calls pappulu or bhuna chana ‘dalia’? Which Indian language is it from? Or unknown to us mere mortals, Indian grocery wholesalers have a separate language to confuse us more?:)

Edited to add:
Thank you Darshana and Madhuli for clearing the confusion. Dalia is a Gujarati word for pappulu or bhuna chana.


Pappulu (Putnala Pappulu, Dalia, Bhuna Chana, Roasted Chana Dal) and Fresh Coriander

Recipe:

1 cup of roasted chana dal (Pappulu, dalia, bhuna chana)
1 bunch of fresh coriander (cilantro, Kottimera)
8 green chillies – short, Indian variety
1 T of tamarind juice or limejuice or to taste
1 T of coconut fresh or dried (optional)
1 teaspoon of cumin
½ teaspoon of salt

Take them all in a blender, add about half glass of water and grind to smooth paste. Remove to a cup.

Do the popu or tadka:
Heat a teaspoon of peanut oil in a tadka pan. Add and toast in this order – 5 curry leaves, half teaspoon each of urad dal, then cumin and mustard seeds. When seeds start to splutter immediately add the popu to chutney. Mix and serve with breakfast items.

Posted by Indira©Copyrighted in Amma & Authentic Andhra,Chana Dal-Roasted (Dalia),Kottimera(Cilantro) (Thursday November 9, 2006 at 1:28 pm- permalink)
Comments (37)

The New Home of Mahanandi: www.themahanandi.org

Sarson da Saag (Mustard greens, Spinach & Paneer)

Baby Sarson (Baby Mustard Greens)
Baby Sarson (Baby Mustard Greens ~ Japanese Variety)

“Mustard greens originated in the Himalayan region of India and have been grown and consumed for more than 5,000 years. Mustard greens are a notable vegetable in many different cuisines, ranging from Chinese to Southern American. Like turnip greens, they may have become an integral part of Southern cuisine during the times of slavery, serving as a substitute for the greens that were an essential part of Western African foodways. While India, Nepal, China and Japan are among the leading producers of mustard greens, a significant amount of mustard greens are grown in the United States as well.”

– Says the WHFoods, a website which provides unbiased scientific information on nutrient-rich World’s Healthiest Foods. If you think history of this green leafy vegetable is impressive, check out the detailed nutritional information listed. It has antioxidants like Vitamins A, C, E to mineral – Magnesium, that would help to deal with lung problems (asthma) etc, – almost everything that a health(label) conscious person desires in a vegetable. Not only that mustard seeds (aavaalu) that we use regularly in our tadka and mustard oil comes from this vegetable.

When it comes to cooking mustard greens, the famous Punjabi’s ‘Sarson da Saag’, is THE recipe. Mustard Greens (Sarson Patta in Hindi), spinach and paneer along with traditional Indian seasoning are all cooked together. Like Punjabis, the end result is attractive and vibrant – in a nutshell, wholesome food experience. Give it a try!


Fresh Baby Mustard Greens, Spinach, Onion, Ginger, Garlic, Cashews, Paneer, Green Chilli

Recipe:

1 bunch fresh, baby Sarson (mustard greens)- chopped
1 bunch fresh spinach – chopped
10 green chillies – small Indian variety
1 small onion – finely chopped
1 tsp of ginger-garlic paste
1 tsp of cccc powder (cumin-coriander-clove-cinnamon) or garam masala
15 cashews – roasted and powdered
15 paneer cubes – grilled or pan-fried to light gold
Limejuice to taste or 2 tablespoons
Turmeric and salt to taste or ½ tsp each

1. In a big skillet, heat a teaspoon of ghee. Add and saute the sarson, spinach and green chillies. Within 2 to 3 minutes, the leaves start to wilt and come together. Turn off the heat and remove them to a plate. Let cool and then take them in a blender or food processor. Grind to coarse paste by adding a pinch of salt.

2. In the same skillet, add and heat a teaspoon of ghee. Add and saute onions to gold color. Add and fry ginger-garlic paste for few seconds. Add pureed sarson-spinach-green chilli and half cup of water. Stir in cashew powder, garam masala, turmeric and salt. Mix thoroughly. Cover and simmer for about 10 minutes on medium-low heat. Before turning off the heat, add paneer cubes and sprinkle in limejuice.

Serve hot. Tastes great with rice and roti or chapatis.

Sarson Da Saag with Chapatis
Sarson da Saag with Chapatis.

I purchased these fresh, baby mustard greens from an Asian grocery shop (Uwajimaya).
Recipe adapted from: Basant. I have added cashews to bring some nutty sweetness to the curry.

Posted by Indira©Copyrighted in Cashews,Paneer,Sarson (Mustard Greens),Spinach (Monday November 6, 2006 at 4:29 pm- permalink)
Comments (32)

The New Home of Mahanandi: www.themahanandi.org

Mustard Greens (Sarson Patta or Sarshapa)

Baby Mustard Greens
Young, tender Sarson Patta or Mustard Greens ~ For this Week’s Indian Kitchen

Posted by Indira©Copyrighted in Indian Ingredients,Indian Kitchen,Sarson (Mustard Greens) (Sunday November 5, 2006 at 5:13 pm- permalink)
Comments (14)

The New Home of Mahanandi: www.themahanandi.org

Baby Brinjals in Masala Sauce (Gutti Vankaya)

Gutti Vankaya Kura (Stuffed Brinjal Curry or Baby Brinjals in Masala Sauce)

Once upon a time, like many of us in present time, a housewife was struggling with the question, “what’s for lunch?”

Adding to the stress, it was almost month end, everything in her kitchen cupboard needed refilled. To do that she had to wait until the salary comes home. What she had was few young brinjals from her backyard garden. Even the pleasant pale purple color of brinjals couldn’t lift her spirits up. Nonchalantly she plucked the brinjals and dragged herself into the kitchen to prepare something. She opened the cupboard, added everything that was available there to the skillet to roast. Wonderful aroma from roasting lifted her spirits a little. She had to powder them so pounded away her frustrations. In exercise induced endorphin daze, she thought of a novel way to cook brinjals and made a plus shaped cut in brinjals. In a big skillet, added the brinjals along with powdered ingredients and a glass of water. Covered the vessel and let it simmer while she went to freshen up. When she came back what she had in the pot was a delicious stew of brinjals. So fragrant and so pretty to look at. Her face glowed like a warm sapphire and at last she smiled at her ingenuity. Thus, a new recipe was born! Saving housewives everywhere, whenever they are low in spirits or things in kitchen cupboards.

I am sure this must be the story behind the ever-popular stuffed brinjal curry of India. Like the designers to dress stars at Oscar night, all the famous spices and ingredients in Indian kitchen come out, but here to dress the already gorgeous shiny starlets – the fresh, young brinjals. Needless to say the recipe rocks!


Ingredients for Gutti Vankaya Kura

Recipe:

Roast or toast in an iron skillet:
Needed: quarter cup, tablespoon, teaspoon, ¼ teaspoon and a hot iron skillet. One by one or all together, however it’s convenient for you, roast the following items listed below. Take care not to black or burn them. Ingredients quantity is for 12 brinjals.


– Quarter cup each of:
Chana dal, urad dal, sesame seeds, grated coconut and peanuts
– Tablespoon each of:
Coriander seeds and cumin
– Quarter teaspoon each of:
Cloves, cinnamon, black peppercorn and fenugreek(methi) seeds
– 15 dried red chillies (for 12 brinjals)

Once they are cool enough to touch, take them all in a mixer. Add a tablespoon each of – jaggery, tamarind juice and a teaspoon of salt. Blend them to smooth consistency.

Baby Brinjals:
12 young fresh looking brinjals. Make two cuts in each brinjal, one horizontal and one vertical Like plus (+) shape. Keep one end intact. Check this photo for reference.
(The brinjals I’ve used for this recipe are young and tender, too small to stuff. So I directly added them to the skillet after making a plus shaped cut. If these were somewhat medium size, I’d have stuffed them like I did in this method.)

Cooking:
Heat a tablespoon of oil in a big skillet. Do the popu (add and toast few curry leaves and a teaspoon each of cumin and mustard seeds).

Add the cut brinjals to the skillet and also the masala powder you have grinded earlier. Add about a glass of water. Stir in turmeric and salt-½ tsp of each. Cover and cook on medium-low heat for about 20 to 30 minutes, stirring in-between. When brinjals are cooked to tender and masala sauce thickens up a bit – time to turn off the heat. Let the curry sit on stove for another 10 minutes like that, giving more time for the flavors to mingle well.

Serve warm with rice or roti.

This recipe is my mother-in-law’s. Even without ginger-garlic and tomatoes, it tastes great and she usually prepares this curry with pulagam (rice+split moong dal+salt) or jonna rotte (sorghum roti) combination.

Gutti Vankaya Kura mariyu pulagam (Stuffed Brinjal Curry with Split Moong dal Rice)

Stuffed Brinjal:
Gutti Vankaya Kura (Stuffed Brinjal Curry I)
Nune Vankaya kura (Stuffed Brinjal Curry II)

Posted by Indira©Copyrighted in Amma & Authentic Andhra,Indian Vegetables,Vankaya (Brinjal) (Friday November 3, 2006 at 3:27 pm- permalink)
Comments (30)

The New Home of Mahanandi: www.themahanandi.org

Ridgegourd~Moongdal (Beerakaya Pesara Pappu)

Precious things in nature often have some protective mechanisms to guard themselves. A pineapple or a rose, by the looks or touch, they strongly give signals to not to touch. But remove those sharp things and you know there will be a sensory explosion awaiting you. Same thing with the vegetable, ‘ridge gourd’ (beerakaya, turai). Just at the first look a person with any veg sense or nature sense would immediately know that this vegetable has something special going on.

Nature has showed a special interest on this veggie. Unlike any other gourds, ridge gourd has some sharp vertical ridges along its body. The younger the vegetable the sharper the ridges are. Once you peel the ridges and cut it open, sweet tender taste awaits you. Mature, old ones have ridges like far end of knife, dulled and raised – signaling that they are not good for consumption. Like dried rose petal potpourri, they are also destined for bathrooms as loofas. But young ones, they taste tenderly sweet and here in this traditional Bharath recipe they are paired with moong dal. Lightly roasted moong dal and tender ridge gourd cooked together with green chillies. And tadka is added at the end to bring life to the dish. Easy comfort food that tastes good, particularly on a cold day like today.


Ridge Gourd and Roasted Yellow Moong Dal

Recipe:

Yellow Moong dal: Roast 1 cup of yellow moong dal in an iron skillet to light golden-brown color. I prefer moong dal always roasted, this is a habit I got from my mother. It takes few minutes to do the roasting but I do think they taste so much better as a result.

Ride gourd and green chillies: Peel the ridges of one medium sized young ridge gourd and scrape the skin lightly. Cut the vegetable to small pieces. Comes about 3 cups. Also finely chop 8 green chillies.

Cook: Take roasted moong dal, ridge gourd pieces and green chillies. Add a tablespoon of tamarind juice, half teaspoon of turmeric and one glass of water. Pressure-cook or cook covered until they are tender. Remove the lid, add about half teaspoon of salt and mash the dal to smooth consistency.

Do the popu or tadka: Heat a teaspoon of peanut oil in a vessel. Add and toast few curry leaves, a tablespoon of minced garlic and one teaspoon of cumin and mustard seeds, in that order. When seeds start to dance, immediately add the mashed dal to the popu.

Serve warm. Tastes good with rice and with chapatis.


Ridge Gourd~Moong Dal with Rosematta Rice

Turai curry with fresh dill – recipe

Posted by Indira©Copyrighted in Beera kaaya(Ridge Gourd),Indian Vegetables,Moong Dal (Washed) (Thursday November 2, 2006 at 2:34 pm- permalink)
Comments (26)

The New Home of Mahanandi: www.themahanandi.org

Paruppu Usli with Gawar Beans

As winter approaches, the weather is turning to cool but the political scene here in Seattle is warming up to hot.

Midterm elections, where the locals would elect members to both Senate and House of Congress are in November and the candidates of both parties are in full campaign mode. It’s not only war of words and but this is also a gender war. On one side, that is on Democratic Party side, two pretty ladies. One is who looks like a confident, capable person for the Senate and for the House, the candidate name is Darcy Burner. She looks like someone from a stupor of mind numbing desk job one day got real mad at the current state of affairs and decided to run for the office. I really like her; she looks very professional, intelligent face and cute nerdy haircut. On the other side for Republican Party, two guys. For Senate, a guy who looks like a used car sales man trying to make a quick lemony sale, that kind of cunning personality and for the House – this guy looks like someone who took steroids in teenage years, off-putting, muscle/no brain kind of type.

There is an ad war going on between these candidates on local TV programs including cable. From what I have noticed so far, Democratic Party ads usually mention what they are going to do for the people of Washington state and country. Where as Republican Party ads are mostly about how “illegals” and Mexicans are going to take away the money, benefits from US or bad people are coming to our shores, boo… be very afraid and hide in your closet always, but vote for us in November. Sickening to watch that kind of sick, hate crime inducing ads from this party. That’s what going on in Seattle airwaves currently, thought some of you politics buffs would like to know.

When it comes to my kitchen, what’s going on is, I have prepared Paruppu usli with some leftover gawar beans of last week. This is another way I like to prepare these beans and the recipe inspiration is from this paruppu usli curry I have prepared last year adapting Shammy’s recipe. Gawar beans (from party of vegetables) and chana dal (protein party) are steamed and then stir-fried with onions and seasoning. End result is a pleasant, nutty taste that would be great with rice and sambhar/rasam/majjiga pulusu combination.


Steam-cooked Gawar Beans, Grinded Chana dal- Green Chilli Mixture, Onion and Curry Leaves

Recipe:

Gawar Beans (Mattikayalu): Washed, ends stringed and cut into one-inch pieces. Steam-cooked or blanched for few minutes to tender – about 2 cups

Chana dal: 1 cup, soaked in 2 cups of water (to soften the dal) for about 2 hours. Water drained and the chana dal is grinded to coarse mixture along with 10 green chillies, one-inch fresh ginger and one teaspoon of salt in a food processor.

Onion: Big one, finely chopped to small pieces

Popu or tadka ingredients along with two teaspoons of peanut oil


Sauteing the Curry

In a big, wide skillet, heat peanut oil. Do the popu or tadka (toasting curry leaves, dried red chilli pieces, cumin and mustard seeds – in that order).

To this tadka, add and saute onions and also the grinded chana dal-chilli mixture. On medium heat, constantly stirring, saute the mixture for about 10 to 15 minutes, until the raw smell of chana dal goes.

At this stage, add the steam-cooked gawar beans. Add turmeric and salt to taste also a pinch of asafoetida. Mix and cook by covering the pan for about another 10 minutes, occasionally stirring.

This curry tastes great when served hot and I have been preparing it as a side dish to rice and sambhar. Good combination.


Paruppu Usli with Gawar Beans, Okra Sambhar and Rice

Posted by Indira©Copyrighted in Chana Dal,Indian Vegetables,Matti Kaayalu(clusterbeans) (Monday October 23, 2006 at 11:48 am- permalink)
Comments (24)

The New Home of Mahanandi: www.themahanandi.org

Mattikayala Kura (Gawar Beans Curry)

Mattikayalu (Gawar)
Mattikayalu or Gawar Beans

Gawar or Mattikayalu, the beautiful pale green colored beans, they may not be as popular as regular green beans, but they have a serious following among Indians. Nutty, delicate, mellow ruchi (flavor) of gawar beans has an addictive quality and when seasoned with Indian ingredients, they literally shine and become quite irresistible. No wonder this old-world vegetable continues to be popular and available in Indian grocery shops even here in US. Guar gum, an extract of gawar is also a popular additive in frozen dairy products like icecreams, custards etc, it seems. Labels of these commercial products often list guar gum as an ingredient. Using secret ingredients like these may be the reason why we could never recreate the store-bought icecream taste at home and why we love to shop for these products, I think.

These gawar beans with their somewhat thick skin are best when steamed or blanched, which allows to retain their characteristic crunchiness and maximum ruchi by preserving vitamins, minerals that would be lost with plain boiling. String the ends, cut the beans and steam cook them. Saute them with masala powder of your choice for few minutes. A delicious curry for white rice/chapati would be ready.


Steam-Cooked Gawar Beans, Dalia, Dried Red Chilli and Cumin ~ Ingredients for Gawar Bean Curry

Recipe:

Gawar beans, ends stringed and cut into one inch pieces – 3cups
Medium sized onion -1, cut into small pieces
For Masala Powder:
¼ cup of pappulu (dalia or roasted chana dal)
6 to 8 dried red chillies
2 garlic cloves
1 teaspoon of each – cumin, dry coconut powder
¼ teaspoon of salt or to taste –
Grind them all to smooth powder without adding water
For popu or tadka:
1 tsp of peanut oil
1 tsp of each – cumin, mustard seeds, minced garlic and few curry leaves

Take cut gawar beans into a steamer basket and steam over a pot of boiling water, covered, until they reach the softness you desire or for about 5 minutes. Or drop them in hot boiling water, keep them covered for about 2 to 3 minutes and quickly drain them in a colander. Do not overcook, they become flabby and tasteless.

In a wide skillet, heat peanut oil. Add and saute popu or tadka ingredients, onions and steam-cooked gawar beans, in that order for few minutes. Sprinkle in the masala powder and also quarter teaspoon of each – turmeric and salt. Mix and cook them covered for about 10 minutes, on medium-low heat, occasionally stirring in-between.

Tastes great with rice and with chapati.


Gawar Bean Curry with Red Onions and Spicy Dalia Powder

Posted by Indira©Copyrighted in Amma & Authentic Andhra,Matti Kaayalu(clusterbeans) (Wednesday October 18, 2006 at 11:11 am- permalink)
Comments (33)

The New Home of Mahanandi: www.themahanandi.org

Okra in Yogurt Sauce (Bendakaya~Perugu Kura)


Okra in Yogurt Sauce (Dahi Bhindi)

This north Indian style curry is not a regular preparation at my home but a guest.

Though curry is quite easy to prepare and tastes soothingly smooth, I rarely make it mainly because this is not the dish that I grew up on. Okra-coconut curry and okra sambhar are what I am used to. Once in a while, like a visit from a cultural-exchange student, I do enjoy treating okra and myself in this special way.


Okra, Curry Leaves, Home-made Indian Yogurt

Recipe:

Prep the okra:
Pick 15 to 20 fresh, young looking okra (Bendakaya): Wash and wipe them dry with a clean kitchen cloth. Cut off both ends. Slice the middle portion into half-inch circular rings. (Follow the tips outlined here for clean, gum-free okra curry.)

Prep the yogurt:
1 cup of plain yogurt (I used traditional Indian home-made yogurt for this recipe). Take it in a cup and churn it for smooth consistency without any lumps.

Cook in a skillet:
Heat a teaspoon of peanut oil.
Add and toast 4 to 6 curry leaves, pinch of each – cumin and mustard seeds in that order.
When seeds start to dance around, add the okra rings.
On medium heat, cook the okra for the about 5 to 10 minutes covered until they soften little bit. Stir once or twice, more like shake the skillet and toss the okra. Leave the okra alone for spectacular crunchy results.

Final touch:
Add the silky~smooth yogurt.
Stir in turmeric, salt and red chilli powder to taste or ½ teaspoon each.
Sprinkle ½ teaspoon of each – Indian(garam) masala powder and dry coconut powder
Mix and cook for another 5 to 10 minutes on low heat.
Serve hot with rice or with roti. My personal preference is having it just plain in a cup with some more yogurt added.

Okra in Yogurt Sauce and Beetroot-Tomato Pulao

Posted by Indira©Copyrighted in Benda Kaaya(Okra),Yogurt (Monday October 16, 2006 at 12:07 pm- permalink)
Comments (35)

The New Home of Mahanandi: www.themahanandi.org

Gongura Chutney


Gongura Chutney

We may be almost broke because of self-paid move and college expenses, but we sure are enjoying food like Andhra maharajas. It’s tough to feel depressed when we are able to buy a bunch of gongura leaves for a dollar and could prepare gongura chutney to our heart’s content. Good food does make a difference in one’s mood, doesn’t it?

If you are wondering what’s all this hungama about gongura, well, gongura is Andhra’s tradition. You know you are treated well and can be assured that your Andhra friend really likes you, when you see a gongura preparation on the menu. Gongura dal, chutney, dalcha and meat preparations are to name a few, that can be prepared with these wonderful leafy vegetable.

Gongura leaves are famous for their rich iron content and they taste sour like diluted tamarind pulp. When cooked and made into chutney with caramelized (browned) onions, hot chillies and salt, they turn to marvelous side dish with little effort. This super side dish is a great luxury for me mainly because of lack of gongura leaves availability in US. They usually appear for short period of time during summer months at Indian grocery shops and will get sold out quickly. The demand motivated by severe nostalgia is high. I am very proud to be able to blog about this chutney here on “Mahanandi”, finally from Seattle.


Gongura Leaves (to id: red stems and green leaves like marijuana leaves:)), Onion and Green Chillies

Recipe:

I bunch of gongura – Leaves plucked and washed
1 big onion – cut into big chunks
8 green chillies
¼ tsp of salt
2 teaspoons of peanut oil

In an iron skillet, heat peanut oil. Add and saut? the onion chunks and green chillies to light brown color on medium-high heat. Remove to a plate.

In the same skillet, add gongura leaves and stir-fry them on medium-high for few minutes until they come together and lose their bright green color. Remove to a plate and let cool.

Take them all in a mortar, add salt and with a pestle grind them to a coarse consistency.

Serve with rice, dal and a curry with little bit of ghee sprinkled on, for a traditional Andhra meal.


Gongura Chutney, Bitter Gourd Chips, Tomato Dal and Rice

Recipe source: Amma
Gongura ( or sour greens) is available in Indian grocery shops here in US.
Ga ga over Gongura (article)

Posted by Indira©Copyrighted in Amma & Authentic Andhra,Gongura(Sour Greens) (Tuesday October 10, 2006 at 3:34 pm- permalink)
Comments (30)

The New Home of Mahanandi: www.themahanandi.org

« Next PagePrevious Page »