Nimmakaya Pulihora:
Prasadam in temples, part of festival feast, or simple lunch – Chitrannam or lemon rice plays an important part of South Indian meal. Our celebratory feasts are not complete without this particular dish. The tangy rice prepared with lemon juice refreshes the palate after the sweet beginnings, as you may already know it is an Indian tradition to serve the sweet first. I think serving these two, traditional Indian sweet and chitrannam together, is our elders way of reminding us to appreciate life moments, both sweet and sour. That is why, I think the temple prasadam or the celebratory food in all moments of our lives includes chitrannam.
People, who know the taste, crave this lemony rice. Even though the recipe is so simple to make, there is always one expert in the family who prepares the best chitrannam. In my home, I can manage an edible one, but Vijay prepares the ‘can’t get enough’ version. We do use the same ingredients and methods; still I don’t know how his version always turns out so exceptional. I am sure it is true in every other south Indian family too. Only chosen few are blessed by Annapurna, the Goddess of Food, to prepare this favorite food of Gods. It is one of those recipes, where either you have it or you don’t. And I am sorry to say that even though I know the authentic recipe, follow all the tricks and tips still the end result in my case always turns out mediocre. There is no magic in my hand.:)
What about you, are you the chosen one? Try it out, if you have not already done so.
Recipe:
(Serves two)
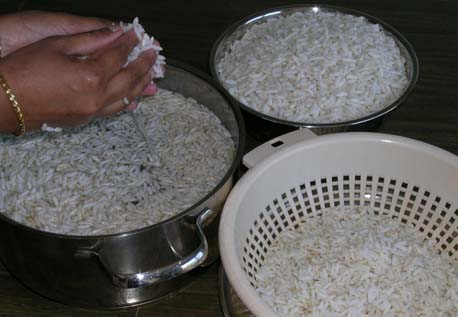
Rice:
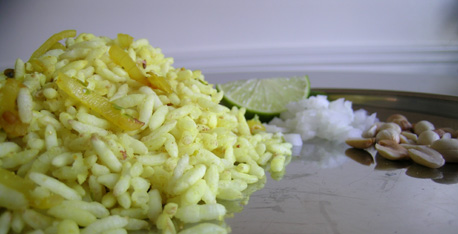
4 cups of freshly cooked rice. (Any kind of white rice is ok for this recipe, but I prefer ‘Sona Masuri’. Cook it like for pulao or fried rice but not like pongal or risotto.
Limes and Chillies
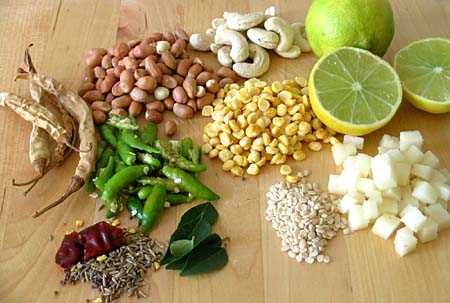
2 to 3 juicy limes – cut and juice to a cup
6 to 8 green chillies, Indian or Thai variety – slit vertically
(Chitrannam needs spicy punch from chillies. So, add one or two chillies (of any variety) more than your normal tolerance of chillies. Otherwise the dish falls apart, and lime juice dominates the taste.)
Seasoning
¼ cup – Chana dal (senaga pappu), pre-soaked in water at least half an hour before.
2 tablespoons – urad dal (minapa pappu)
1 teaspoon each – salt and turmeric
2 tablespoons –ghee, Or oil for calorie-consicous.
For popu or tadka
1/2 tsp each – mustard seeds, cumin, and red dry chilli pieces.
12- 15 fresh curry leaves. Don’t forget to add the fresh curry leaves. Chitrannam is not authentic or complete without the curry leaves.
You can prepare decent, basic version of chitrannam with the above items. But for special occasions, and if you want to impress guests or family, then you need the following items too.
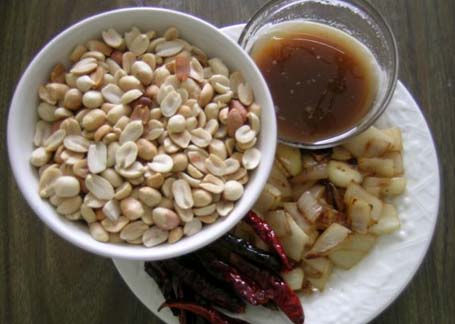
Nuts
Quarter cup – cashews
Quarter cup – peanuts
Veggies
Quarter cup vegetables – I usually add potato, finely cubed, sometimes Indian type brinjal and shredded carrot too.
5 to 6 majjiga mirapa kaayalu (Green chillies soaked in buttermilk and completely dried in sun, a specialty of Andhra), deep fried in oil.
Method:
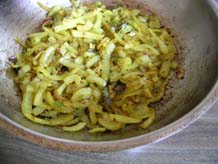
In a skillet, heat one tablespoon of ghee. First add peanuts, fry them until they turn light brown. Remove. Add and fry cashews next. Remove from the pan to a plate, keep them aside.
Now in the same skillet, add another tablespoon of ghee. Heat. Add and fry the curry leaves first. Then cumin and mustard seeds. When seeds start to splutter, add the split green chillies, chana dal, urad dal, and cubed potatoes. Saute them till golden and crisp. In the end, sprinkle half teaspoon turmeric for that golden yellow color. Mix and then saute for another one to two minutes.
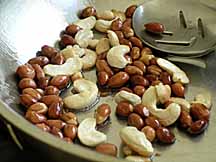
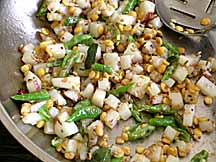
Sauteing the cashews and Peanuts…… Sauteing the veggies and dals
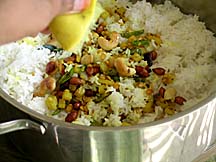
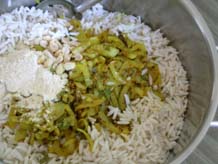
Stirring in turmeric………. Squeezing some lime juice over rice and sauteed ingredients
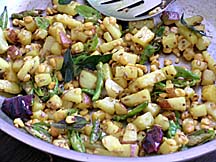
Add the sauteed ingredients of skillet, and also the toasted peanuts and cashews to the cooked rice. Stir in salt and sprinkle the limejuice. Combine thoroughly and delicately (without breaking the rice grains) with your hand or using a big slotted spoon.
Have a taste, it should zing or shock your taste buds like sucking on a fresh lime wedge. If not, add some more limejuice and salt. Mix again. And keep in mind that rice absorbs the limejuice, and the tanginess you feel during the preparation reduces in intensity after sometime.
Serve with fried majjiga mirapakaayalu (buttermilk soaked, dried green chillies) and a cup of yogurt for a nice meal.
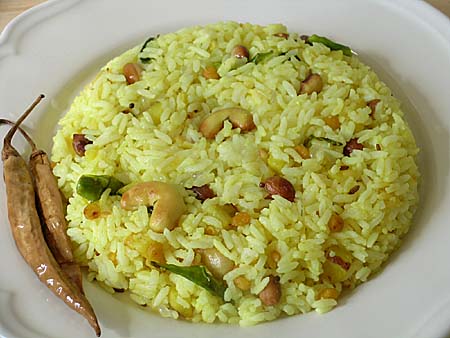
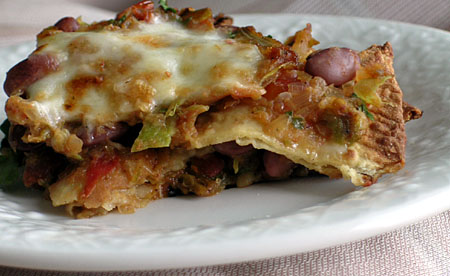
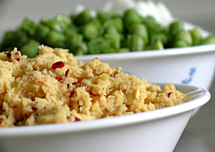
chitrannam(Lemon Rice) with majjiga mirapa kaayalu.
Chitrannam, the English translation of this Telugu word is chitra= wonderful, magical, Annam= rice. This Refreshing lemony rice is all that and more, and tastes great when served hot or cold.
Recipe Source:Attamma(MIL)


 Buggani, the name itself makes my mouth water. A simple and common dish, prepared with
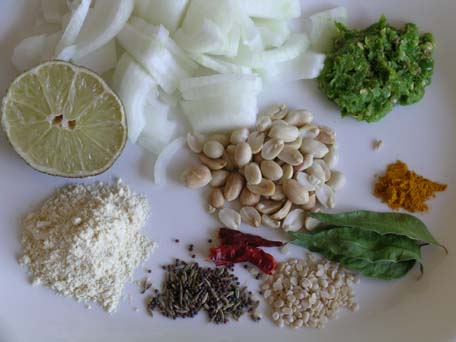


