Mahanandi

Living in Consciousness ~ Indi(r)a’s Food and Garden Weblog

Pasta in Chilli, Bell Pepper and Peanut Sauce

“What Kind of Food Are You?” – I tried the fun quiz of 5 questions. I expected Indian, but I don’t think the quiz has Indian food in its list of responses. The answer was ‘Italian food’, and I was satisfied. Like Indian, I think of Italian as another no-nonsense, honest kind of food. Though here in US, a little bit over glorified. What? Have you been watching food TV (US) lately? It should be renamed ‘Italian Food TV’ with its 24-hour Italian this and Italian that programming, and its star-cooks falling over themselves proclaiming their Italian heritage. Sometimes I wonder, why am I paying money for this channel on cable, is this a foodtv or a propaganda machine for Italian cuisine. It would be understandable if majority of Americans are Italians or Italian decent, but that is not the case and further, the minority (here the minority status is determined by the skin color) means non-whites, are climbing up to almost 40%. More and more, it looks like American Food TV has decided to disregard diversity and showcase only one cuisine at the expense of others. What a sad, sad thinking!

Well, I am glad to contribute one more recipe of pasta to IMBB #22, the mother of all events and most popular one in food blogosphere, this month hosted by lovely Amy of ‘Cooking with Amy’ fame. Even though I think of my contribution an original, I am sure there is someone, somewhere already written down this version of pasta sauce. Thousands of dedicated Italian cooks, cookbooks and hundreds of fabulous food bloggers, recipe sites – millions of pasta recipes, it got to be there, somewhere. No… then I am happy to cook up millionth one recipe of pasta.:)

spaghetti, red bell pepper, Tomatoes, Roasted Peanuts, olive oil, Onions, Dried red chillies and garlic

Recipe:

Pasta: I used spaghetti, Hodgson Mills brand, whole wheat with flax seed and organic variety. Like pulao/pilaf taste depends on basmati rice, a good pasta dish needs quality pasta. So I do spend few extra bucks on a fine variety. Hodgson Mill brand without a doubt, quality products.
One fistful of spaghetti for one person – that is the measurement I use for spaghetti.
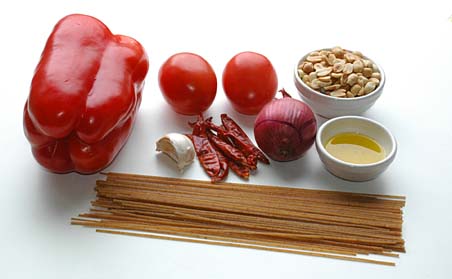
For Sauce:
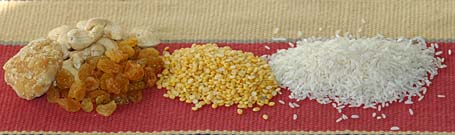
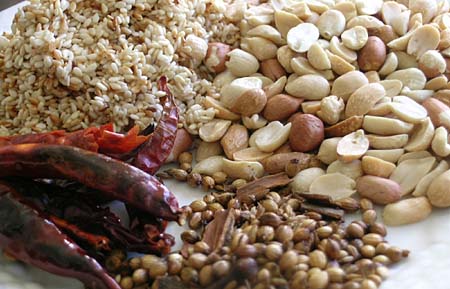
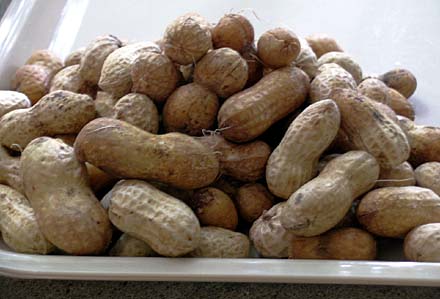
1 cup of peanuts – roasted and skins removed
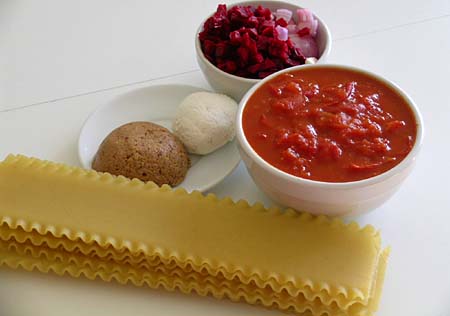
3 red bell peppers – deseeded, cut into big chunks
4 dried red chillies and 4 garlic cloves – halved
3 ripe, juicy tomatoes – chopped into big chunks
1 small red onion – chopped into big chunks
1 tablespoon of olive oil
1 tsp of each-cumin, salt and powdered jaggery/sugar
I prefer to have sauce, lots of it with my pasta, so the above quantities.

Peanut-Veggie Sauce Spaghetti in pasta sauce

Preparation:

Pasta Sauce: Roast the bell peppers, dried red chillies, tomato, onion, garlic and cumin in 1 tsp of olive oil, until they all are brown and golden. Let them cool down to room temperature.

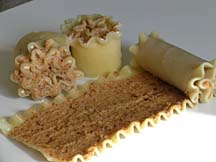
In a food processor, first add roasted peanuts and make a fine powder of them. To it, add the roasted veggies and half teaspoon of salt. Add half cup of water and grind them into smooth paste.

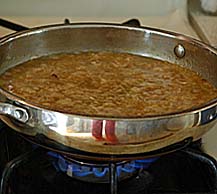
In a big wide pan, heat olive oil and add the peanut-veggie paste. Add one cup of water, jaggery and salt to taste. Mix and cook covered for about 10 minutes on medium-low heat.

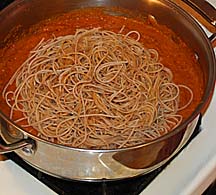
Pasta: While the sauce is simmering, bring a large pot of salted water to a boil. Cook the pasta al dente, usually for about 5 to 8 minutes. Drain the pasta into a colander, immediately add it to the sauce. Mix it thoroughly with pasta sauce. Cook, uncovered for about 2 minutes on low heat and serve.

The sauce can be made earlier and just before mealtime, pasta can be cooked and added. One thing I learned about pasta is, it has to be served hot, to get the best taste.
Spaghetti in Chilli-Red bell pepper- peanut sauce

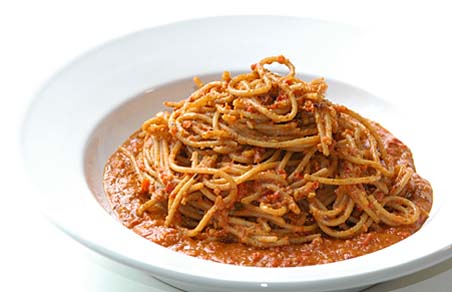
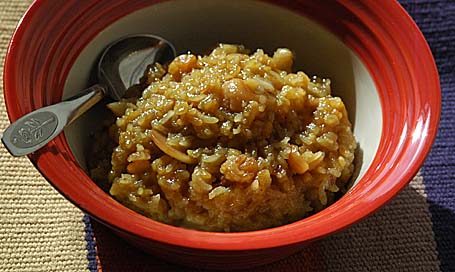
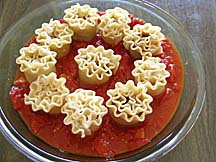
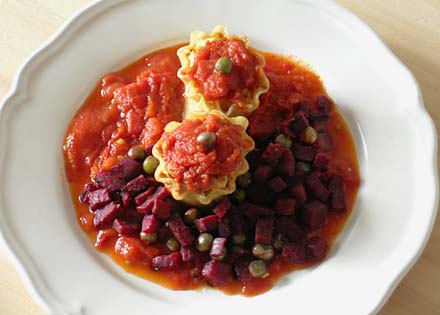
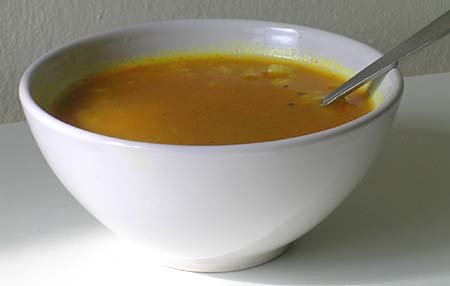
Pasta in chilli-red bell pepper-peanut sauce: sweet, spicy, savory and smoky – A range of delicious flavors, all blended well together for a wholesome, hearty, filling meal ~ Our Sunday dinner and my entry to IMBB Event.

Recipe Source: My Own Creation
Tagged with: +

Posted by Indira©Copyrighted in Bell Pepper,Dried Red Chillies,Pasta,Peanuts (Monday January 30, 2006 at 8:32 am- permalink)
Comments (30)

The New Home of Mahanandi: www.themahanandi.org

Sweet Pongal, The Sankranthi Sweet

Sankranthi:

Harvest festival Sankranthi is all about celebrating rice in our part of world. Particularly in South India, rice plays an important role as the main cultivated grain and as nourishing food that people subsist on every day of their life. It’s no wonder that there is a festival dedicated to the almighty rice. Equally worshipped are the man’s best partner, the kind-hearted cow, and the elements – sun, earth and water. They make rice cultivation a success, and also add a magic touch to the rice, making the rice a cherished, beloved food of the people.

Sona Masuri Rice - Grown and Imported from Andhra, India
Sona Masuri Rice – Grown and Imported from Andhra Pradesh, India

Sweet Pongal (Tiyya Pongali):

This famous south Indian, Sankranthi sweet is traditionally made with freshly harvested rice. Very simple to make but spectacular in taste, the ordinary rice becomes mouthwateringly extraordinary in sweet pongal. The rice soaks up the milk, absorbs the jaggery, picks up the cardamom scent and takes up the generously added moong dal, cashews and golden raisins. And in this new avatar, becomes an offering to the Gods (naivedyam, we call it), and also simply irresistible to all who try it.

Some Tips:

Jaggery:

I follow the classic recipe and don’t do or like shortcuts. Method is neat and easy and the end result is always like the prasadam offering of temples. Jaggery is the traditional sweetener of sweet pongal and my choice too, simply because sweet pongal tastes better when made with jaggery and not sugar.

Rice:

The rice that I prefer is Sona Masuri. Because this variety is grown and imported from my home state Andhra Pradesh, and is the variety that I grew up on. Grain is thin, medium sized and very lightweight. Available in almost all Indian grocery shops here in US. Little bit pricey, but the taste is worth the money and farmers in my state really can use the money. Support farmers and buy this rice.

Consistency:

Sweet pongal is like a rice-dal porridge, consistency must be gooey thick and sticky. That means, the amount of liquid I usually add for sweet pongal recipe is more than the amount that I normally add to cook plain rice of equal measurements. Also, I always use equal amounts of water and milk for this recipe. Variations are – you can cook the rice-dal entirely in milk or in coconut milk, or if you are lactose intolerant and diet conscious, then in just plain water. Just add more liquid compared to the regular rice preparation.

Rice, Yellow Moong Dal, Cashews, Golden Raisins, Cardamom and Jaggery

Recipe:
For two people

1 cup – Sona Masuri rice
½ cup – yellow moong dal (pesara Pappu)
1 – 1½ cups – jaggery, crushed to fine
¼ cup each – cashews and golden raisins
¼ cup – ghee, melted
4 cardamom pods – skins removed and seeds powdered finely
3 cups each – milk and water (or 2 cups each, if you like a halwa like pongali)

Here is the 3-step method I follow to prepare sweet pongali at our home.

1.Toast and Roast:

Yellow moong dal:
Heat one teaspoon of ghee in an iron skillet. Add and roast yellow moong dal, on medium heat, until the color changes from yellow to pink. Take care not to brown. Slow-roasting freshens up and imparts a sweet smell to yellow moong dal. Remove them to a plate and keep aside.

Cashews and Golden raisins:
In the same skillet, add and heat two teaspoons of ghee. Add and fry the cashews and golden raisins till they turn to light gold. Remove and keep them aside.

Jaggery Syrup Cooked Rice-Dal Mixture is added to Jaggery Syrup
Jaggery syrup simmering…………Cooked Rice-Dal Mixture is added to Jaggery Syrup

2.Cook and melt:

Rice, moong dal and milk:

Take rice and roasted moong dal in a pot. Add water and milk. Mix well. Partially cover the pot and cook the rice and dal to tender soft. I use a pressure cooker but an electric rice cooker also works fine. Stove-top slow simmering also produces best tasting pongali.

Jaggery and water:

While the rice is cooking, in another pot, melt jaggery. Add the powdered jaggery and one cup of water. Stir and cook till jaggery melts. Bring the solution to a rolling boil. and reduce the heat and simmer for about five minutes. Turn off the heat. Let the jaggery syrup cool a bit.(Jaggery has to be cooked separately and you can’t add it directly to uncooked rice and milk. Because it prevents the rice from cooking properly and also splits the milk. Please keep this in mind.)

3. Stir and Simmer:

Adding the cooked rice: Add the cooked rice-dal pongal to jaggery syrup. Keep the heat on medium. Stir in the ghee, cashews, golden raisins and cardamom powder. With a strong laddle, stir well to combine all. Cover and simmer until the whole mixture comes together into a sticky, gooey mass. Turn off the heat. Cover and let it sit for 10-15 minutes. Sweet pongal thickens further on cooling.

First offer to Gods as naivedyam (if you have this tradition), then serve it your loved ones, near and dear. Don’t forget to drizzle some ghee just before serving.

Sweet Pongal (Tiyya Pongali) - The Traditional Sweet of Sankranthi
Heavenly Sweet Pongal

For people hungering for a traditional, naivedyam kind of recipe but don’t have time or energy to make puran poli (bhakshalu), sweet pongal is The one. Speaking from experience, my suggestion is, keep your reservations aside and try it. You’ll be glad and can be proud of yourself for finally making one decent kind of naivedyam. I promise! Follow the recipe and this ancient classic delivers every time. People would ask for a second serving, diet or no diet.

Posted by Indira©Copyrighted in Amma & Authentic Andhra,Cashews,Ghee,Golden Raisins,Indian Sweets 101,Milk,Moong Dal (Washed),Naivedyam(Festival Sweets),Sona Masuri Rice (Monday January 16, 2006 at 3:08 pm- permalink)
Comments (79)

The New Home of Mahanandi: www.themahanandi.org

Bottle Gourd Curry (Dudhi/Sorakaya Kura)

Bottle Gourd, Sorakaya, Dudhi, Lauki and Lau

I remember the mock fights with my sisters using this lengthy, stout vegetable, when we were children. This vegetable was our makeshift club in our funny fights. There are other stories that I still could remember to this day related to this vegetable. My mother used to plant this vegetable every year in our backyard and the crop was surplus to our family… in those days I dreamt of making a lot of money by selling surplus produce, which never materialized. After some time we were tired of eating this vegetable and I tried to convince my mother not to plant this vegetable in vain. One year we had a crop of more than 200 of these and needless to say, if you were our neighbor during that time, you would have received some of these from us for free, you might have begged us not to sent any more too.:)

Sorakaya in Telugu and bottle gourd, lauki, dudhi or lau in different Indian languages, here is one of my mother’s recipe with bottle gourd. Not a lot of ingredients, very simple and basic – tastes good only with chapatis and jowar roti.

bottle gourd cubes, Dalia (roasted chana dal), red chilli powder, turmeric and jaggery

Recipe:

Bottle gourd – medium sized – outer skin peeled, then cut into cubes.
1 cup of dalia(pappulu, pottu kadalai) – finely powdered
Dalia or Pappulu is a type of dal made by roasting the chana dal or bengal gram
1 teaspoon of red chilli powder
1/2 teaspoon each of salt and turmeric
Jaggery, one tablespoon or to your liking

Heat one teaspoon of peanut oil in a big saucepan, toast mustard seeds, cumin and curry leaves. Add the bottle gourd cubes. Cover and cook them in their own moisture. When they are little bit softened, add the finely powdered dalia (pappulu), red chilli powder, salt, turmeric and jaggery. Add half glass of water and mix them all thoroughly, without any lumps. Cover and cook for about 10 minutes until the sauce thickens and bottle gourd pieces turn soft.

Serve hot with chapatis or with jowar(Sorghum) roti.

Bottle gourd curry (Sora kaya Kura) and chapatis
Bottle gourd curry and chapatis

After two days of silence in our kitchen (because of newyear celebrations at friends house), Vijay and I prepared this simple meal today.

Recipe source: Amma
Note to the reader: The sauce to this curry is mainly made of dalia powder. If you think, there is not enough sauce, powder some more dalia and add it to the curry and adjust the seasoning like salt and jaggery to your taste.

Posted by Indira©Copyrighted in Amma & Authentic Andhra,Chana Dal-Roasted (Dalia),Sorakaya(Dudhi,Lauki) (Monday January 2, 2006 at 9:39 pm- permalink)
Comments (52)

The New Home of Mahanandi: www.themahanandi.org

Bagara Baingan (Nune Vankaya Kura)

Do you remember my post about stuffed brinjal curry with peanuts and sesame seeds? In that post, I also mentioned different kinds of stuffing that I know. Here is another type of stuffed brinjal curry, I am calling it by Hindi name – ‘Bagara Baingan’ – This time with purple brinjals, stuffing made with dals and fresh coconut and cooked in a pan. The stuffing doesn’t taste very good when pressure-cooked. So for this kind, I make it in a pan, like how they do it back home.

Fresh Coconut, tamarind, purple brinjals, roasted dried red chillies, cashews and mix of chana dal, urad dal, coriander seeds, fenugreek seeds, cumin  - ingredients for Bagare Baingan
Recipe:

Small, fresh, young, blemish free brinjals – 8 to 12

Roasting for stuffing and gravy:

Chana dal and urad dal – quarter cup each
Black peppercorns and cloves – 4 to 6 each
Dried red chillies – 6 to 8
Cumin, coriander seeds & methi seeds – 1 teaspoon each
Roast them in an iron skillet till golden. Mix them with
Fresh or dried coconut – 1/2 cup
Tamarind juice and powdered jaggery – 1 tablespoon each
Salt – 1/2 teaspoon
My addition: One fistful of roasted cashews
Ginger garlic paste and roasted red onions can be added to this mix.

Make a smooth paste of all the above ingredients without adding any water. Divide it into two portions. One for stuffing the brinjals and the other portion is for making the gravy.
Purple brinjals stuffed with roasted dal- coconut-cashew paste
Stuffing:

1. Wash to clean up the wax coating on brinjals. Neatly cut and remove the stem of each brinjal.
2. Starting at opposite side of stem, make a plus (+) shaped cut towards the stem side, but not all the way through. (See the photo above, to get an idea)
3. Gently separating the brinjal petals, fill the narrow gap with the prepared paste.

Cooking:

1. In a big, wide, flat pan – heat one tablespoon of peanut oil, do the popu or tadka (toasting one teaspoon each of mustard seeds, cumin, curry leaves and minced garlic).
2. Arrange the brinjals – stuffing side up, neatly in rows. Cover and cook them in their own moisture for about 15 to 20 minutes on medium heat or until they soften. The younger the brinjals, the faster they cook.
3. Once you are sure that brinjals are tender and cooked, remove them carefully without disturbing shape onto a serving dish.
4. Pour the remaining paste that was kept aside to the pan. Mix it with half glass of water. Sprinkle in turmeric and adjust the salt, spice (red chilli), sour (tamarind) and sugar to your taste. Cook for another 10 to 15 minutes on low medium heat, until the gravy thickens.
5. Now put the brinjals back into the thickened gravy. Cook for another couple of minutes.

With rice or roti, this curry is a party favorite and a crowd pleaser.
 Stuffed Brinjal Curry (Bagare baingan, Nune vankaya Kura) with rice

Bagara Baingan with Rice ~ Our dinner today.

Posted by Indira©Copyrighted in Amma & Authentic Andhra,Cashews,Chana Dal,Coconut (Fresh),Urad Dal (Washed),Vankaya (Brinjal) (Thursday December 29, 2005 at 9:56 pm- permalink)
Comments (35)

The New Home of Mahanandi: www.themahanandi.org

Methi/Fenugreek Dal (Menthi Kura Pappu)

Fresh Fenugreek, Menthi Kura, Methi

First thing one notices about fresh fenugreek is how beautiful and delicate the leaves are. Then the smell, aromatherapy in truest sense, when pressure cooked with toor dal or sautéed with potatoes, any other vegetable, the leaves release wonderful fragrance. ‘Johnson and Johnson-A family company’, who makes money by beguiling the families with air fresheners and scented oils, if they get the whiff of fresh fenugreek, you bet, you’d see an ayurvedic or eastern themed fenugreek scented oil on shop shelves for sure.

Fenugreek is one of those green leafy veggies, looks innocently innocuous but when cooked, dazzles & grabs your attention by its wonderful aroma and makes you try and like it. For a dal-rice addict like me, nothing beats the taste of rice and dal made of fresh fenugreek leaves. Very tasty and nutrititous, it’s one of my favorite foods. Fenugreek and toor dal combination is a true and tested recipe, very popular in our Raayala seema region of Andhra, again one of those I learned from my mother.

Methi leaves, onion, tomato, green chillies, toor dal and tamarind - ingredients for methi dal

Recipe:

One bunch of fresh fenugreek – washed and leaves plucked
4 fistfuls of Toor dal
1 medium sized onion and tomato – chopped
1o green chillies – finely chopped
Small lime sized tamarind
1/4 tsp of turmeric
Salt to taste

For popu or tadka :

1 tsp each of oil or ghee, mustard seeds, cumin and urad dal
1 garlic clove – finely chopped
Few curry leaves and few pieces of dry red chillies

Preparation:
Cook dal: In a pressure cooker, take toor dal, fenugreek leaves, onion, tomato, green chillies, tamarind and turmeric – add one glass of water and pressure cook them till 3 whistles. When the valve pressure is all released, remove the lid, add half teaspoon of salt and mash the dal using a wood masher to smooth paste.

Do the popu: In a deep bottomed vessel, heat one teaspoon of oil, add the remaining popu or tadka ingredients. Saute till the seeds start crackling, garlic turns red. Pour the cooked and mashed dal, stir well and cover. Tastes great with rice and chapati.

Methi dal (Fenugreek Dal, Menthi Kura Pappu) with Rice and Ghee

Fenugreek dal (Methi Dal or Menthi Kura Pappu) and rice with ghee.

Recipe Source: amma
Fenugreek is available both fresh and frozen in most of Indian grocery shops here in US

Posted by Indira©Copyrighted in Amma & Authentic Andhra,Menthi Kura(Fenugreek),Toor Dal (Tuesday December 27, 2005 at 9:54 am- permalink)
Comments (38)

The New Home of Mahanandi: www.themahanandi.org

Brussels Sprouts Curry

“Brussels sprouts taste almost like cabbage and they have a pronounced and sweet nutty flavor”, said Martha, in one of the episodes on Martha Stewart Living daily show, back in the days. That’s all I needed to know before trying out this winter vegetable.

As a new immigrant to this country, unfamiliar with most of the vegetables available here, no friends or relatives to learn from, Martha is like a mother figure to me. Calm, collected, intelligent and informative, it seemed she actually knew, what she was talking about unlike the current crop of food TV stars. No bam bam.. No unnecessary giggles and no artificial mile-length smiles. What she has is dignity and love of her craft and it reflected on her shows. Back then, I watched her show almost daily and learned so many things too.

I wish she would go back to the old format, because her new shows these days are not like the shows two, three years ago. Don’t they already have enough talk shows to promote movies and TV sitcoms?

Brussels Sprouts

I prepare brussels sprouts just like cabbage curry: sliced thin, sautéed with onion and seasoned with green chillis and coconut. I also add some sort of beans, pre soaked in water, like kala chana, chickpeas or dried green peas. If you have not already tried this vegetable, try it this way. I am sure, you are going to like it very much and thank me with a Christmas gift for this wonderful recipe. 🙂

Recipe:

12 to 15 fresh brussels sprouts
1 big onion, sliced thin lengthwise
2 fistfuls of kala chana(black chickpeas), soaked in water overnight
(Dried green peas, chickpeas work too)
4 green chillies and 1 tablespoon of coconut – made into paste
Salt to taste and pinch of turmeric
1 tsp of cumin and mustard seeds, curry leaves etc., for tadka or popu

Brussels Sprouts sliced then, Kala Chana, Onions and Green Chilli-Coconut Paste

Preparation:

Wash and Remove outer leaves and trim the bases of brussels sprouts. Check atleast two layers of leaves and remove them too if you find any black spots etc., . Cut each one into half and slice them thin lengthwise.

In a big pan, heat one teaspoon of peanut oil, do the popu or tadka (toasting mustard seeds, cumin and curry leaves). Add and stir fry the onions and kala chana for few minutes. Stir in the brussels sprouts. Add all the seasoning (green chilli-coconut paste, salt, turmeric), mix them together. Cover and cook on low medium heat for about 10 minutes. Leave it like that, don’t open the lid and allow them to cook in their own steam. After 10 minutes, remove the lid, stir them once and add salt if necessary. By now, the sprouts will be tender and done. Switch off the heat and serve immediately.

Brussels sprouts prepared in this way, taste great with chapatis and naans.

Brussels Sprouts Curry with Chapatis
Brussels Sprouts Curry and Chapatis ~ Our lunch today.

Recipe source: My own creation

Posted by Indira©Copyrighted in Brussels Sprouts,Chickpeas-Black (Thursday December 8, 2005 at 3:00 pm- permalink)
Comments (45)

The New Home of Mahanandi: www.themahanandi.org

Moong Dal Rasam (Pesara Pappu Charu)

Like bitter gourd curry and chappidi pappu, this moong dal rasam is again one of the recipes, only my mom prepares and very special to me. When I am out of ideas/vegetables or tired of too much food, I make this rasam. A small bowl of rasam with little bit of hot rice and ghee, on the side, a small piece of juicy lime pickle… just enough!

 Roasted Moong beans, Red Chilli Powder, Tamarind and Onion

Recipe:

1 cup yellow moong dal (pesara bedalu)
Onion, one – cut into chunks
½ tsp each- red chilli powder and turmeric
Small marble size tamarind pieces
Salt to taste

Preparation of Moong dal rasam(soup) is very simple. Roast moong dal lightly in an iron skillet to light brown color first. Let cool. Take the roasted dal in a pressure cooker, wash and then add onion, red chilli powder, turmeric, tamarind along with about a glass of water. Pressure cook to three whistles and turn off the heat. Once all the valve pressure is released, remove the lid. Add salt and mash the dal to smooth consistency.

In a seperate vessel, do the popu or tadka (toasting the mustard seeds, cumin, curry leaves etc, in one teaspoon of oil/ghee). Add the smoothly mashed dal and two glasses of water. Have a taste and adjust the seasoning (salt, chilli and tamarind) to your liking. Bring to a boil and let simmer for about 10 to 15 minutes on medium heat, strring in-between. My mothers comforting rasam will be ready.

Mung dal Rasam (Pesara Pappy Chaaru)
Moong dal rasam, ghee and rice ~ Giving a break to stomachs ~ Our simple Sunday meal.

Recipe Source: Amma

Posted by Indira©Copyrighted in Amma & Authentic Andhra,Moong Dal (Washed) (Monday November 28, 2005 at 9:28 am- permalink)
Comments (19)

The New Home of Mahanandi: www.themahanandi.org

Chole with Potatoes (Aloo Chole)

I think in availability, price, food value, versatility and taste, chickpeas are without any match. There is no better way to prove this to the uninitiated than by sampling a few dishes that make use of this tasty and nourishing legume.

For people who are always searching for a new dish to add variety to their meals, one day, they will discover the hearty Punjabi fare, chana masala or this aloo chole; and when they do, I am sure they’ll turn into ‘Choleacs‘ like us. We Love Chole!

Chickpeas(Channa, Garbanzo Beans, Ceci, Hummus) and Red Potato for Chole

Recipe:

3 cups of dried chickpeas
(soaked in water beforehand then pressure cooked to tender)
A fistful of cooked chickpeas made into smooth paste

2 potatoes, peeled and cut into cubes
1 large onion and 4 ripe tomatoes finely chopped
1 tablespoon – readymade chana masala powder(any brand will do)
1 teaspoon – garlic-ginger-cilantro paste
½ teaspoon each – red chilli powder, salt and turmeric
For garnish – finely chopped cilantro and lime wedges

cooked chickpeas, chickpea paste, onion, tomatoes, chana masala powder, red chilli powder, turmeric, salt and fresh cilantro
Ingredients for Aloo Chole

Heat one teaspoon of ghee or peanut oil in a saucepan over medium heat. Add and toast quarter teaspoon each – mustard seeds and cumin, wait till they start to dance; then add ginger-garlic-cilantro paste and onions, saute for few minutes until onions soften.

Add the ingredients – potatoes, tomatoes, chickpea paste, chana masala powder, red chilli powder, salt and turmeric, along with 2 to 3 cups of water. Cook them covered for about 15 minutes, until potatoes are slightly tender.

At this stage, stir in chickpeas. Turn the heat to medium-low, and simmer for about 10-15 minutes or until the curry thickens. (When curry served on a plate, it shouldn’t spread like flodding river.) Garnish with finely chopped fresh cilantro and serve.

My favorite way to have this curry is with limejuice squeezed and few finely chopped onions (washed beforehand in water) on the side with parathas.

Paratha, Chole with Potatoes (aloo Chole), Lime wedge and finely chopped onions
Aloo Chole with Parathas – Creating Indian restaurant kind of meal at our home ~ Our weekend brunch.

Posted by Indira©Copyrighted in Chickpeas,Potato (Tuesday November 22, 2005 at 6:44 am- permalink)
Comments (37)

The New Home of Mahanandi: www.themahanandi.org

Cauliflower-Potato Curry (Aloo Gobhi)

I ran out of excuses. I avoided cooking cauliflower till now this year. But when priced at one dollar, I couldn’t think of any more excuses and bought the fresh, big, Lilly white cauliflower from the local farmers market. Even though, it is available year round, Autumn is the season for cauliflower here in US, so the low price.

On my short list of vegetables, I am reluctant to cook, cauliflower occupies the number one spot. It’s unfortunate, but my brain, it doesn’t heart the brain-like cauliflower. Only way I can eat this vegetable is when combined and cooked with other vegetables and some sort of beans following my mother’s recipe. The only thing I did different this time from the original was, instead of dried peas, I used small red beans. Clean, colorful and full of flavor, this hearty stew is extra good with rice or chapatis.

Cauliflower, Onion, Red Potato, Carrot, Red Beans, Dried Coconut, Poppy seeds, Cilantro, Ginger, Garlic, Cinnamon, Cloves, Red Chilli Powder, Turmeric and Salt

Recipe:

Vegetables
1 fresh, small-sized cauliflower, trimmed and florets cut/separated
1 potato, and one carrot – peeled, and cut into bite sized cubes
1 onion – finely sliced lengthwise
6 ripe, juicy tomatoes – chopped
2 fistfuls of soaked red beans
(Peas, chickpeas or other types of beans also work)

For Masala:
4 tablespoons of coconut powder (dry or fresh)
1 tablespoon of poppy seeds
Small pieces of cinnamon and two cloves
Few sprigs of cilantro, small piece of ginger and two garlic cloves
1 teaspoon of red chilli powder
½ teaspoon of salt and turmeric
Take all the above in a blender, add half cup of water and puree them into smooth paste.

cauliflower, potatoes, carrots, tomatoes and onions, Red Beans, turmeric, red chilli powder and the green ball is the paste of ginger, garlic, cilantro, coconut, poppy seeds, cinnamon and cloves

Heat one tablespoon of peanut oil in a large, wide pot over medium heat. Do the popu or tadka (toasting mustard seeds, cumin and minced garlic). Add the onion, fry it till golden. Add the cut tomatoes, increase the heat, cover and cook for about 5 to 10 minutes, until the tomatoes soften when pressed with the back of a spoon.

Because cauliflower can cook easily and when overcooked gives out unpleasant Sulfur smell, first add the cut potatoes, carrots and red beans to the tomato gravy. Cook them until they are almost tender fork, and then add the cauliflower florets to this mix. Add the masala paste and half cup of water. Stir to combine. Reduce the heat to medium low, cover and simmer for about 20 minutes. Finally stir in the finely chopped cilantro and serve, either warm or at room temperature.

Cauliflower-Potato Curry with Chapatis (Aloo Gobi with Roti)
Cauliflower-Potato Curry (Aloo Gobi) with Chapaties ~ Our meal today.

Posted by Indira©Copyrighted in Cauliflower,Potato,Red Beans (Chori) (Thursday November 10, 2005 at 5:07 pm- permalink)
Comments (32)

The New Home of Mahanandi: www.themahanandi.org

Chana Masala (Chole Batura, Chickpeas Curry)

November, when weather changes from colorful and crispy to dark and gloomy is the month of comfort food at my house. Comfort food of India almost inevitably call for some type of lentils/legumes. Among all, my favorite is the famous “Chana Masala or Chole” – this homey and hearty Punjabi fare will make even the most doubtful person worship Indian food. No wonder, it continues to be the most popular food item in Indian restaurants worldwide.

Recipe:

Chickpeas
Soak 4 cups of chickpeas in water overnight or atleast 6 hours. Take them in a pressure cooker, add salt, one teabag(optional) and water and pressure cook them until they are just tender. Take care not to overcook. Drain the water and separate one cup of cooked chickpeas. Blend these separated ones into into thick, smooth paste with little water.
Veggies
2 cups of finely chopped ripe, juicy tomatoes
1 onion, finely chopped lengthwise
Seasoning
1 tablespoon of premade Chana masala powder (Badshah or any other brand from an Indian store)
½ teaspoon of red chilli powder and salt
¼ teaspoon of turmeric
Fresh cilantro and lime juice – for garnish

Cooked Chickpeas, tomatoes, pureed chickpea paste, cilantro, onion, red chilli powder, salt, chana masala powder(Badshah brand) and turmeric

Preparation:

1. Heat one teaspoon of peanut oil or ghee in a large pot over medium heat.
2. Add and toast ¼ teaspoon each- cumin and mustard seeds.
3. When seeds start to pop, add the onion, and cook until translucent.
4. Add the tomatoes and cook on high heat until the tomatoes turn to soft. Press with a spatula and mush them.
5. To this tomato sauce, add the cooked chickpeas, pureed chickpea paste, chana masala powder, salt, red chilli powder, turmeric and one to two cups of water. Stir to combine.
6. Have a taste and adjust the spice levels to your liking. Keep the heat on medium and cook for about 20 to 30 minutes, until the curry thickened. (The curry should not spread like a flooding river when served on a plate.)
7. Just before turning off the heat, stir in finely chopped fresh cilantro and lime or lemon juice to taste.

Enjoy the chana masala with rice/roti (chapati) or with puris. Keep the leftovers refrigerated. The curry tastes very good next day.

Chole Batura - Chana Masala with Puris
Chole Batura – Chana masala with Puris.


How to prepare Puris : Recipe

Posted by Indira©Copyrighted in Chickpeas,Tomato (Monday November 7, 2005 at 10:33 am- permalink)
Comments (50)

The New Home of Mahanandi: www.themahanandi.org

Lasagna Rolls – Indian Way

I was in the mood for something new and different. I had some goat cheese in the fridge (Steelers pizza left over), few beetroots, lot of ripe tomatoes, a printout of lasagna rolls recipe I wanted to try, and an idea of how to make it more suitable for our palate. After 45 minutes in the kitchen, the result was – tasty lasagna rolls, some with goat cheese and some with spicy sweet peanut paste as filling, baked in fresh tomato sauce and served with sautéed onions, beetroots and peas as topping.

Lasagna, Home made Tomato Sauce, chopped onions and beetroots, Goat cheese and Spicy Peanut Paste for filling

Recipe:

1.Tomato Sauce: Cook finely chopped 8 ripe, juicy tomatoes, 4 garlic cloves in one tsp of oil. Also add half glass of water, half teaspoon of red chilli powder and salt to taste. Cook until the tomatoes turn mushy and sauce like.

2. Filling: I prepared two kinds of filling. One is goat cheese, that’s an easy one, buy and open the packet, true Italian way. Roasted peanuts (outer skins removed) made into paste by adding little bit of salt, jaggery, red chilli powder and few drops of water – my idea of Indian type filling.

3. Lasagna: Meanwhile, cook 5 lasagna sheets in boiling salted water according to the instruction on the packet (takes at least 15 to 20 minutes), in a big pan. Drain and keep them in cold water so that they won’t stick to each other.

Spreading peanut paste onto a lasagna sheet, rolling and cutting into two equal parts Cut lasagna rolls in tomato sauce, ready for baking

4. Baking: All the prep work is done and our ingredients are ready for the final step. Preheat the oven to 375° F. Spread the filling (goat cheese or peanut paste) on lasagna sheet evenly. Roll the sheet to the end and cut it into two equal rolls, crosswise. Prepare all lasagna sheets in this way. Pour the tomato sauce in a baking dish, arrange the lasagna rolls (cut side down) neatly in the sauce, loosely cover the dish with an aluminum foil and bake for about 30 minutes at 375° F.

5. Sauté: Finely chop beetroots and onion. Add peas and sauté them for few minutes. Season with salt and red pepper flakes.

Serve the lasagna rolls in tomato sauce with sautéed beetroots, onion and peas as topping.

Lasagna rolls in tomato sauce with sautéed onion, beetroot and peas as topping

I have to say I liked both goat cheese and peanut paste rolls equally. Tangy tomato sauce and sweetness from sautéed beetroots, onions and peas perfectly complimented the bland, baked lasagna rolls. Little bit time consuming, but I think these beautiful flower like lasagna rolls are terrific for entertaining because they can be prepared in the morning and baked at the last minute.

Posted by Indira©Copyrighted in Cheese,Milk & Products,Pasta,Peanuts (Friday November 4, 2005 at 2:27 pm- permalink)
Comments (17)

The New Home of Mahanandi: www.themahanandi.org

Gutti Vankaaya Kura (Stuffed Brinjal Curry)

From Telugu to English, The literal translation of Gutti vankaaya is ‘bouquet of brinjals’. As its name suggests stuffed brinjal curry is not only an Andhra classic, it is also very pretty to look at and the taste is pure fiery heaven. Greenish white brinjals are perfect for this curry. I make this curry only with this particular variety of brinjal. Unlike the purple brinjals, the green ones have a very delicate skin, cook very easily and taste great.

First part of the recipe is selecting the right brinjals:
If you are going to try this recipe with green brinjals like me, for two people, buy at least 15 to 20 very fresh looking, small size, and perfectly round green brinjals. The brinjals should look shiny without any blemishes, or holes and the stem that they are attached to should be in lively green without having that dried, black look. The tender the green brinjals are, the tastier the end result is. The ones with black seeds are very mature (at least half of your pick will be like this), don’t even bother to cook them, they taste bitter. Because they mature very rapidly, cook them on the same or on next day. Trying to keep them fresh and young in the refrigerator, it’s useless.

It takes at least 30 to 45 minutes to prepare the ingredients and another 30 minutes to cook the curry so attempt this curry only when you have the freshest green brinjals.

Second part is preparing the stuffing:
Ingredients for the stuffing change from home to home. Every home has their own recipe for stuffing. I can make five different kinds stuffing. The one I am going to post today is the family recipe.

Roasted Peanuts, Sesame Seeds, Red Dry Chillies, Coriander seeds, cumin, cloves, cinnamon.

Dry roast:

1 cup peanuts – roast them, when they are cooled, rub and remove the skins
1 cup sesame seeds – dry roast them

8 to 10 dried red chillies
One tablespoon of coriander seeds
Half teaspoon of cumin
4 cloves, one small piece of cinnamon stick
5 to 6 fenugreek seeds (menthulu)(They taste bitter so limit the number)
1 teaspoon of salt
Tamarind
Soak key-lime size tamarind in half cup of water and microwave it for about 15 to 30 seconds. Let the water cool down and squeeze the tamarind to get the paste.

Make a tight paste: Grind all of the above ingredients to a fine, smooth paste. You have to stuff this paste into brinjals so while grinding, under any circumstances, do not add water. Take this paste onto a plate and divide it into two portions. One is for stuffing and the other half is for sauce/gravy.

Brinjals stuffed with peanut, sesame paste

Thoroughly wash and dry the green brinjals. Even the freshest ones are not so fresh here, so I depart from the norm and remove the stems of brinjals. If you want, keep the stems. Take each green brinjal and on the end, opposite of stem, make a plus shape slit towards stem side but not all the way through (one vertical and one horizontal slit).

Fill up the plus shape slit (gap) with stuffing. Using your left hand fingers separate the quarters gently, push the stuffing inside with right hand fingers, again gently. Filling up all the slit green brinjals takes time, so have a seat, keep the stuffing and brinjals in front of you. Do it patiently and slowly without breaking the beautiful brinjals. If you do, you won’t get a bouquet but only the petals.:)- So have patience and treat them like a fragile art project.

Just placed stuffed brinjals in Pressure cooker Stuffed brinjal curry in pressure cooker after one whistle

Cooking:

How I cook them again is different from that of home. Here I use a pressure cooker. What? I know.. my method may be new to you but the results are way better. Pressure cooker makes it fast with less oil and the green brinjals are cooked thoroughly, you can’t find not one hard uncooked piece of brinjal, cooked in this way.

Do the popu or tadka(toasting the black mustard seeds and cumin in one teaspoon of oil). Add half of the peanut-sesame paste that was kept aside and half to one glass of water and one teaspoon of turmeric. Mix them up thoroughly without any lumps. Make the gravy/sauce more on the thin side or watery. Taste it, add salt, red chilli powder and tamarind paste if needed. I also add jaggery, very tiny amount to the gravy (making it mildly sweet). Arrange the stuffed brinjals neatly in the gravy, slit side up. Cover and cook them until the green brinjals are very tender to touch.
I pressure-cook them until one whistle on medium low heat. After the whistle sound, I immediately and slowly release the pressure from the valve by lifting the weight. Resulting in very wholesome, thoroughly cooked stuffed green brinjals.

To serve, with a big spoon gently lift the stuffed brinjals, place them on a plate and pour the sauce around. Tastes great with rice or roti.

Stuffed Brinjal Curry(Gutti Vankaaya Kura) with Rice

Stuffed brinjal curry (Gutti Vankaaya Kura) with rice.

Recipe Source:Amma

-------------------------- *** *** -----------------------
I am going to write it down four other types of stuffings that I know for this cury. The proportions of the ingredients are not specified because there are no hard and fast rules and people at home add a little of this, little of that. So feel free to try various proportions as per your taste.

Type 1:
Dry red chillies + dry or fresh coconut+ chana dal & urad dal + cumin, coriander, fenugreek seeds and salt. Sauté and make a paste of them without adding water. Add cashews to make it rich.

Type2:
Besan or gram flour+onions+green chillies+ginger garlic paste+dry coconut powder+coriander powder and salt, make a paste by adding little bit of water.

Type 3:
red onions + dried red chillies roasted in oil then make a paste of them.

Type4:
Fresh coconut+ roasted peanuts+ roasted sesame seeds+dried red chillies+Coriander seeds+Cumin seeds+cloves+cinnamon stick+ chana dal+ urad dal+tamarind +jaggery and salt. This is my favorite of all.

Before me, some other Indian food bloggers also posted their recipes for this curry. More choices from three other fabulous blogs… always a good thing.

Posted by Indira©Copyrighted in Amma & Authentic Andhra,Peanuts,Sesame Seeds,Vankaya (Brinjal) (Monday October 24, 2005 at 11:31 pm- permalink)
Comments (109)

The New Home of Mahanandi: www.themahanandi.org

Bhakshala Rasam (Bobbatla Chaaru)

As much as we like bhakshalu/puran poli on festival days, what we always look forward to is the tasty rasam, called bhakshala chaaru.

Bhakshala Chaaru is prepared with drained water from boiled chana dal of bhakshalu (Bobbatlu/puran poli). This leftover, rich in taste, chana dal water is simmered with tamarind juice and jaggery. A seasoning of tadka. That’s it. Prepared in small quantity on festival days, this tasty and nutritious bhakshala rasam is to die for. Saying this is a cliche, but I miss my mother whenever I make this recipe, because she prepares the best, the tastiest rasam I have ever had.

Water Drained from Boiled Chana Dal for Bhakshalu/Puran Poli
Drained Water from Chana dal of Bhakshalu

Recipe:

2 cups-drained water of boiled chanadal
Half onion, thinly sliced lengthwise (Optional)
2 tablespoons of tamarind juice
2 tablespoons of jaggery – powdered
¼ tsp of red chilli powder
¼ tsp of salt, or to taste
Pinch of turmeric
1 cup of water

For popu or tadka
1 teaspoon oil or ghee
¼ tsp of mustard seeds, cumin, hing & curry leaves

Preparation:

Heat one teaspoon of oil in a heavy pot to medium high. Add the mustard, cumin seeds, hing and curry leaves. When the seeds begin to pop, add thinly sliced onions and saute them for few minutes to soft. This rasam is also prepared without onions.

Add the chana dal water, tamarind juice, jaggery, red chilli powder, turmeric and salt. Add water and stir. Bring this mixture to boil. Reduce the heat and let it simmer, uncovered for about 10 to 15 minutes.

Serve hot or cold with rice.

Bhakshala Rasam/chaaru with rice
Bhakshala Rasam with Rice – a Raayalaseema Sweet and Spicy Special Chaaru.

Posted by Indira©Copyrighted in Amma & Authentic Andhra,Chana Dal,Jaggery (Wednesday October 19, 2005 at 10:28 pm- permalink)
Comments (6)

The New Home of Mahanandi: www.themahanandi.org

Boiled Peanuts

Freshly harvested raw peanuts, boiled in salted water – we grew up eating them and we both love them. They are one of the popular street foods in India. But they are hard to find here in US, particularly in the northeastern states. Imagine my surprise when I saw them at Subji Mandi, NJ during our recent trip.

Raw Peanuts

We bought 5 pounds, we couldn’t wait, ate half of them raw on our return trip. We cooked the remaining half in salted water. They are wonderfully tasty and we couldn’t get enough of them. We should have bought lot more. Perhaps next time, whenever that’s going to be.

For more weekend herb/food ingredient blogging, checkout Kalyn’s Kitchen.

Posted by Indira©Copyrighted in Amma & Authentic Andhra,Indian Ingredients,Peanuts (Sunday October 16, 2005 at 6:12 pm- permalink)
Comments (6)

The New Home of Mahanandi: www.themahanandi.org

Bhakshalu (Bobbatlu, Puran Poli)

Chana Dal (Sanaga pappu), Jaggery, Ghee, Gasa Gasaalu (Poppy Seeds, Kash Kash), and Cardamom

Ingredients:

For Purnam
One cup chana dal(sanaga pappu)
One to one and half cups of jaggery– powdered
One tablespoon of poppy seeds(gasa gasaalu)
Two cardamom pods, seeds powdered
Purnam Wrap
One cup all purpose flour (maida)
Quarter cup of ghee
Half cup of water

Dough made with All purpose flour(Maida) and ghee Cooked Chanadal on a towel

Preparation:

Step 1:(Two hours before)

Prepare soft, pliable dough with all purpose flour, water and ghee(1 or 2 tablespoons).

Pressure cook chana dal in plenty of water until one whistle. Do not Overcook the dal. The cooked dal must be rigidly soft and not broken. Drain using a colander. (We make a tasty rasam with this dal water called bhakshala rasam.) Spread out the cooked chana dal on a clean cotton cloth or on paper towels, for atleast one hour, so that all the moisture is absorbed from them.

Purnam - Chanadal, Jaggery, Cardamom paste Purnam on maida wrap on a aluminium sheet

Step 2:(one hour before)

Purnam: Using a food processor/blender make a paste of cooked and now completely dried chana dal and powdered jaggery, cardamom powder. Do not add water. The purnam should come out as firm ball. In case if it is more on the runny side or soggy, cook it on stove top on medium-low heat for about 5 to 10 minutes, continuously stirring and let it cool. This will definitely make the purnam firmer and that is what we want consistency-wise for this recipe.

Take the dough on a flat surface, add ghee and knead it for few minutes then punch with your fist few times. Pour ghee knead and punch, do these steps for at least 5 to 10 minutes. All this is to make the dough more pliable and when pulled, it should stretch without breaking.

Making Bobbatlu/Puran Poli Making Bobbatlu/PuranPoli on Iron griddle

Step 3:(Show time)

Divide the dough into marble sized balls.

On aluminum foil or on the back of a steel plate (traditionally banana leaf is used), apply liberal amounts ghee and roll out each ball into a small round using a rolling pin or with your hand. Keep a lime sized Purnam in the middle and cover it by bringing the edges together. Dip your fingers in oil and using them, flatten the ball, starting at the edges, gradually pressing towards the center, into a thin, flat, circular shape.

Lay the foil on the griddle and carefully using a spatula, separate the bhaksham from the foil onto the warm(not hot) iron griddle. Fry or cook it on medium-low heat, applying liberal amounts of ghee, till golden (14 carat gold), on both sides. Sprinkle some poppy seeds on each side, keep on the griddle for few more minutes and remove.

Naivedyam is ready.

Bhakshalu / Bobbatlu / Puran Poli / Holige

Serve them with ghee, chitrannam and some bajjis. Festival Feast is ready!

Recipe Source: Family – Amma & Attamma

Posted by Indira©Copyrighted in All-Purpose Flour(Maida),Amma & Authentic Andhra,Chana Dal,Indian Sweets 101,Jaggery,Naivedyam(Festival Sweets) (Thursday October 13, 2005 at 4:58 pm- permalink)
Comments (40)

The New Home of Mahanandi: www.themahanandi.org

« Next PagePrevious Page »