Mahanandi

Living in Consciousness ~ Indi(r)a’s Food and Garden Weblog

Ponganalu with Spinach and Sara Pappu

Somehow, I’ve been missing participating in Nandita’s Weekend Breakfast Blogging, an event celebrating the much neglected, overnight fasting breakers – the morning mini meals (breakfast/tiffin). “A twist in the plate” is the theme for this month’s WBB. Taking an old recipe and adding our own touch and improving it a little bit is the idea behind the theme.

Ponganalu, the classic Rayalaseema breakfast, the recipe is fine on its own. Leftover dosa batter, onions, chana dal, green chillies and cilantro, mixed and cooked in a special ponganalu pan. The result is small goblets or space saucer shaped rounds – fun and tasty on their own. My twist to this old classic is adding a bunch of finely chopped spinach and few tablespoons of sara pappu (chironji) and watermelon seeds. Mixed with dosa batter and cooked to crispy, crunchy perfection in ponganalu pan. Less batter, more ingredients and better ponganalu, that’s papa johns pizza, sorry:), that’s my “twist in the plate” ponganalu and my contribution to Weekend Breakfast Blogging.


Spinach, Sara Pappu and Watermelon Seeds in Ponganala Batter


Cooking Spinach Ponganalu in a Special Ponganala Skillet


Spinach Ponganalu with Peanut Chutney ~ For Nandita’s WBB-“Twist in The Plate” Event

Detailed Recipe and images of traditional Ponganalu – Here
To purchase a skillet similar to Ponganala Pennam – Click Here

Posted by Indira©Copyrighted in Amma & Authentic Andhra,Biyyamu (Rice),Charoli (Sara Pappu),Spinach,Urad Dal (Washed) (Tuesday October 31, 2006 at 3:13 pm- permalink)
Comments (33)

The New Home of Mahanandi: www.themahanandi.org

Paneer Pad Thai with Bok Choy


Paneer Pad Thai with Pistachios and Bok Choy

This is an eggless version of pad thai and prepared in response to this comment. Dear Terri, this recipe is for you.

Paneer is prepared in bhurji style and has been added to rice noodles. When all done, it almost looks like fried eggs of padthai but with paneer taste and smell. I have also added pistachios in place of peanuts and lots of bok choy, a green leafy vegetable of Chinese. I am able to purchase all the ingredients listed for this recipe at affordable prices, that means at the prices I am willing to spend:) here in Seattle, and because of that I could experiment however I like.

So here it is, with paneer, pistachios and bok choy ~ My version of pad thai.


Ingredients for Paneer Pad Thai

Recipe:
(for two, for one meal)

Flat rice noodles (two bundles)
(Soaked in hot water for about 15 minutes, drained just before the start of stir-fry.)
Paneer – cubed and crumbled – about 1 cup
Baby Bok Choy – 8 bunches – finely chopped
Pistachios – ½ cup
Shallot (Indian onion) – 1, and green onions – 1 bunch, finely chopped
Fresh bean sprouts – 2 cups
Fresh Cilantro – few sprigs, finely chopped
Soy Sauce – 1 tablespoon
Padthai Sauce:
10 fresh red chillies (pandu mirapa kayalu)
1 T of jaggery
1 T of tamarind juice
½ tsp of salt
Take them all in blender, add half cup of water, grind them to smooth paste

Keep all the ingredients ready by the counter.

Place a big skillet or wok on stovetop. On high heat, add and heat about 2 teaspoons of peanut oil.

When it is hot, one by one add the ingredients listed below in that order.
shallots, green onions, crumbled paneer, bok choy, bean sprouts, pistachios, soy sauce and pad thai sauce. Do the quick stir-fry and add the rice noodles. Sprinkle in a quarter teaspoon of salt, mix and saut? briefly and serve with some limejuice sprinkled.

That’s it, a very quick meal to prepare and to have. And this time, I applied the traditional Thai advice and soaked the rice noodles in hot water instead of cooking them in boiling water. They tasted much better this way.

Recipe adopted from Thai food and travel.com

Posted by Indira©Copyrighted in Bok Choy,Paneer,Pistachios,Rice Noodles (Friday October 27, 2006 at 5:53 pm- permalink)
Comments (22)

The New Home of Mahanandi: www.themahanandi.org

Red Cabbage, Beetroot and Redbeans Curry

Beetroot is one vegetable that I am trying to incorporate into my diet more often. I need iron and beetroot is famous for its folate and iron content, with added bonus of some natural sugar.

Along with steamed and plain stir-fry, one other way I prepare a beetroot curry is by cooking in combination of red cabbage and red beans. Beetroot stains everything it touches and perfect to cook with red cabbage. When it comes to red cabbage, the vegetable may sound fancy but it is almost similar to regular cabbage in taste and texture. When red cabbage cut to half, the color is more purple than red, sometimes solid, sometimes combined with delicate streaks of white. Looks beautiful but it can’t escape the typical cabbage smell and taste. Together with, beetroot and red beans, this ruby red curry is a good, decent one to have on a rainy day with gray skies like the one we are having today.


Soaked Red Beans (Adzuki), Grated Beetroot, Shredded Red Cabbage

Recipe:

1 red cabbage – Shredded using a mandoline
4 small beetroots – peeled and finely chopped lengthwise
½ cup of red beans (chori, Adzuki)
soaked in warm water for about 3 hours to rehydrate and drained.
1 red onion – finely sliced lengthwise
6 dried red chillies+2 garlic+½ tsp of salt – grinded to fine paste
½ tsp of turmeric and salt (or to taste)
Popu or tadka ingredients along with 1 tsp of peanut oil

In a big skillet, heat peanut oil. Do the popu or tadka (toast curry leaves, cumin and mustard seeds). Add and saute onions and red beans for about five minutes.

Add the beetroot pieces. Sprinkle two tablespoon of water. Cover the skillet, and cook beetroot and red beans until they reach the tenderness you desire. At this stage, add the shredded red cabbage. Because cabbage cooks fast, we add it only after beetroots are cooked properly.

Add the red chilli-garlic paste that we have prepared along with turmeric and salt. Mix thoroughly. Cover and cook for another five minutes.

Serve hot with chapatis or tortillas with a cup of yogurt on the side.
(I have also added few teaspoons of toasted fresh coconut (Deepavali Puja) to the curry at the end.)


Red Cabbage~Beetroot and Red Beans Curry with Chapatis ~ Our Meal Today

Posted by Indira©Copyrighted in Beetroot,Cabbage,Red Beans (Chori) (Tuesday October 24, 2006 at 6:42 pm- permalink)
Comments (40)

The New Home of Mahanandi: www.themahanandi.org

Pumpkin Halwa with Butternut Squash


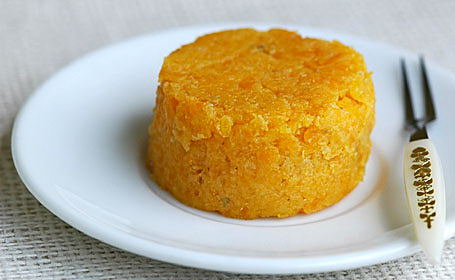
Pumpkin Halwa with Butternut Squash and Almonds ~ For JFI:Deepavali Treats

When talented food writer, photographer and blogger Vee of Past, Present and Me announced special edition of Jihva to celebrate Diwali festival, I was really elated and thought it was an appropriate idea. “Jihva for Ingredients” (JFI), is an online food blogging event, created to celebrate the natural ingredients and what they can do for our Jihva.

The ingredients that we use in our cooking may not be constant but love, family and tradition, the natural, real ingredients that we share to celebrate the Deepavali festival are going to be constant and would always be there to sustain us through our life journey. Also if there is one festival that truly unites India, it is Deepavali~the festival of lights. All ages and religions joyously participate – Lighting the divas, sharing sweets, presents or enjoying firework displays. The festival has something for everyone. Even the grinch among us would shine and smile during this time.

Deepavali is also about giving and receiving a second chance in life and I am glad to share with you my second chance with pumpkin.:) To tell you the truth, I am not a big fan of pumpkin, I never was. My dislike of this vegetable started in my childhood, continued through upto now. But after seeing several of my fellow food bloggers’ fabulous creations with this vegetable, I too wanted to join the fun. But would the pumpkin accept me, I was skeptical. So I took the help of almonds, milk kova and of course our true friend that would instantly bring joy to any occasion, ‘the sugar’. With the help of all these ingredients I have prepared pumpkin halwa with butternut squash. Boy, oh boy, what a delight that was. I was astounded by how generous the pumpkin was with its gentle sweetness and its ready mixing with other ingredients. It may look all bulky and intimidating, but the vegetable has a sweet taste of a kind giant.

Many thanks to my fellow food bloggers (dear InjiPennu , where are you?), to my new friend pumpkin for inspring me to take this second chance and also to lovely Vee for hosting this special edition of Jihva. If it’s not for you guys, I would have never tried pumpkin again, I think. And this pumpkin halwa sweet truly is a special Diwali treat for us, and is going to be a tradition from now on in my family.


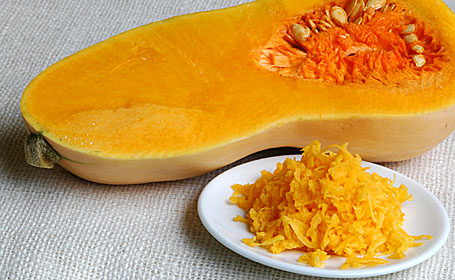
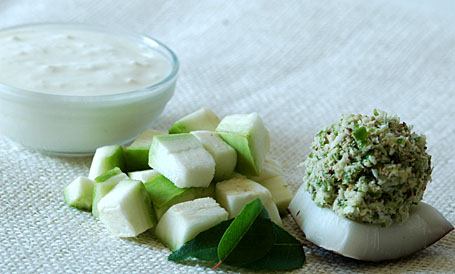
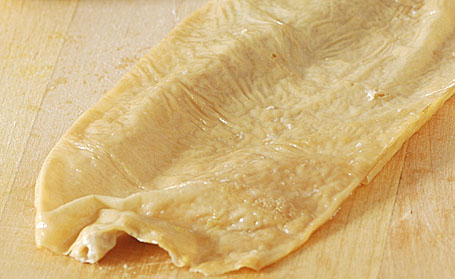
Butternut Squash ~ Cut in Half and Grated

Recipe:

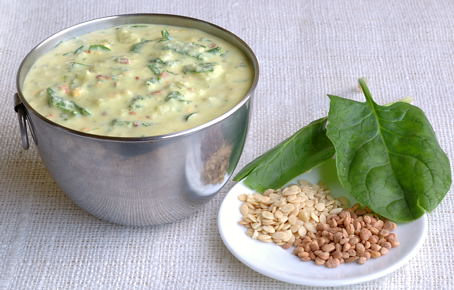
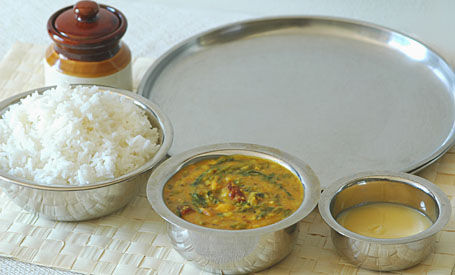
Butternut Squash, almonds, milk and sugar
Ghee, rose water and cardamom

Prep work:

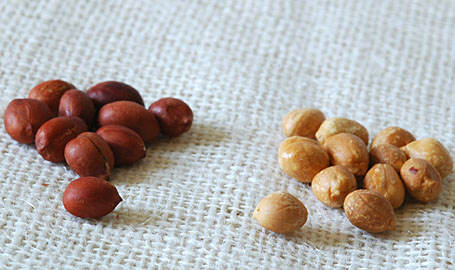
1. Almonds – Soak half-cup almonds in warm water for about 2 hours. Remove the skins and make a smooth powder in a food processor.

2. Butternut squash (2 pounder) – Peel the skin and cut into half lengthwise. Remove the seeds and finely grate using a mandoline. Comes about 3 cups of tightly packed grated squash.

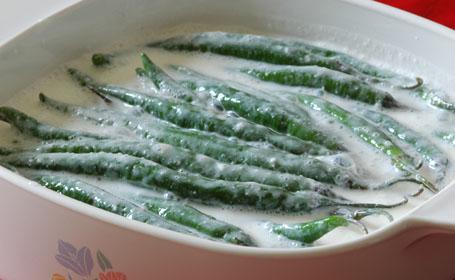
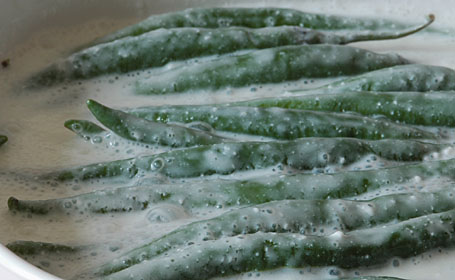
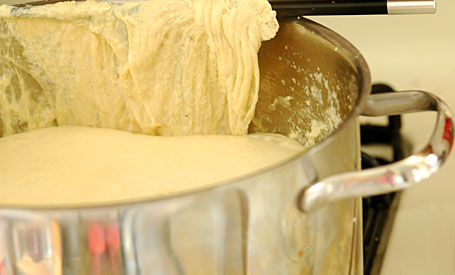
3. Meanwhile prepare milk-sugar syrup: take 5 cups of whole milk and 2 cups of sugar in a big, thick-bottomed vessel. Cook the mixture until is gets thick and is reduced to about one fourths of the original quantity. Takes about 30 to 45 minutes.

4. Take 8 cardamoms, remove the skins and in a mortar pound the seeds into fine powder with a pestle.

Showtime:

1. In a big sturdy, wide bottomed vessel, heat about 2 tablespoons of ghee on medium heat.

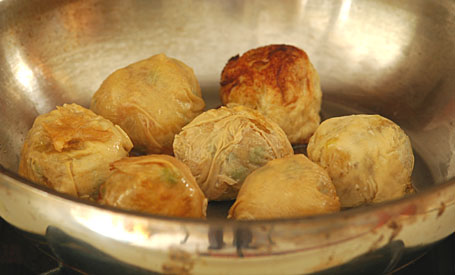
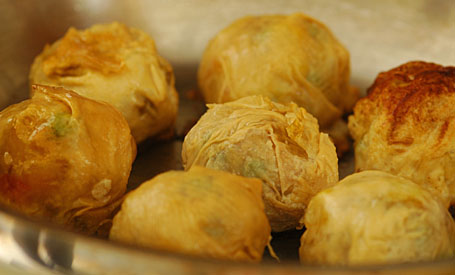
2. Add the grated pumpkin to the melted ghee. And with a big slotted spoon, gently mix and cook the pumpkin. Cook for about 20 minutes, stirring in between, until the raw smell of pumpkin disappears and color changes from yellow to orange-yellow.

3. Add the almond powder and condensed milk-sugar kova. Add cardamom powder and two teaspoons of rose water. Gently mix and constantly stirring, cook the whole mixture until it comes together into a solid firm mass. Takes about 10 to 15 minutes.

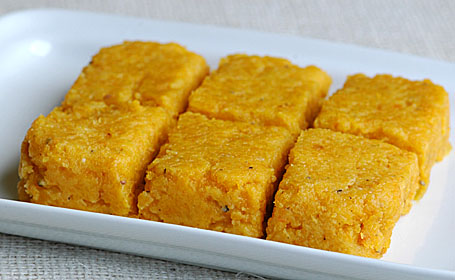
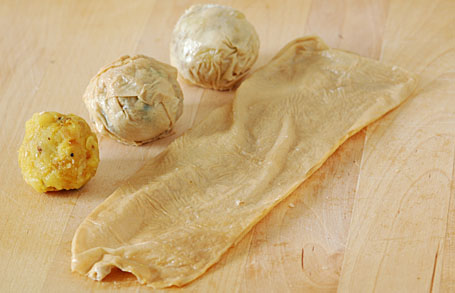
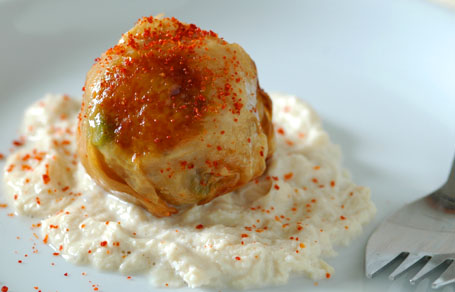
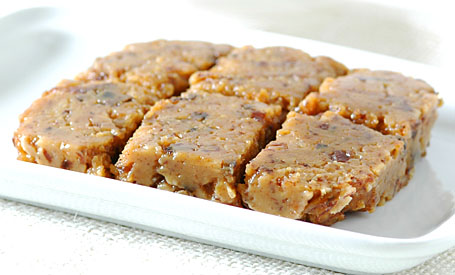
4. Remove the halwa to a pan. Level it even and let cool. Keep it in the freezer for about one hour to firm it up even more. Remove and cut into squares or use a cookie cutter to cut round shape discs.

5. Serve chilled.

I think this halwa can stay fresh upto one week, when refrigerated.


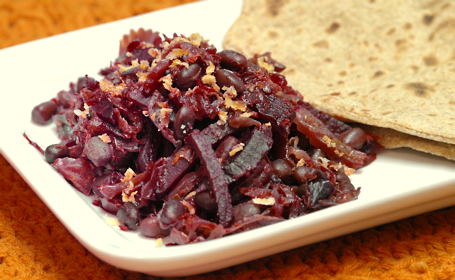
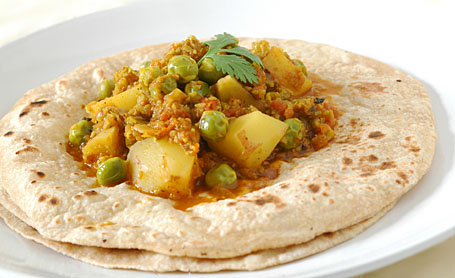
Pumpkin Halwa ~ Our Diwali Treat ~ For 101 Indian Sweets
and My Entry to VKN’s “Festival Foods” Event

Recipe source: My own creation
I have prepared this halwa on less sweet side. My preference. Increase the sugar quantity if you like more sugary sweet taste.

Posted by Indira©Copyrighted in Almonds,Indian Sweets 101,Milk,Mitai,Pumpkin,Sugar (Thursday October 19, 2006 at 2:08 pm- permalink)
Comments (57)

The New Home of Mahanandi: www.themahanandi.org

Majjiga Mirapa (Dahi Mirchi, Yogurt Chillies)

Chilli, Mirchi, mirapa kaayalu

Chillies are a religion in India! And in my home state Andhra Pradesh, the leading producer of chillies in the world, the chilli religion has a cult like following. The almighty, all-powerful chillies dictate and dominate almost every food item we consume. Our tongues are trained to accept and enjoy the fiery ruchi(flavor) of chillies from early on and the non-believers in chilli power and taste are considered wimps and babies by the believers. I tried to break away from this chilli cult, but it’s tough to do and the cravings haunted me. My taste buds cried saliva for a decent flavorful meal. They couldn’t tolerate the bland, tasteless food I was consuming in the name of suave and sophistication. “We are not babies, we are not wimps. Have mercy and have a chilli”, they salivated. I bowed and accepted the chilli power with my whole heart and now at my home, there won?t be a meal without having at least one dish where chilli – dry or fresh is added. Needless to say my taste buds are now one happy bunch.

Like us, humans, chillies also have a variety. There are lean, short, tall and stout chillies. There is mildly hot variety and there is super hot variety. Names of chillies vary from state to state and from country to country, with growers making up new names all the time. For that reason, I usually write either green chillies for fresh ones and dried red chillies for dried chillies. Using fancy, foreign sounding names for chillies is not my thing.

There are also preserved chillies – Dried chilli powder is the best-known method of preserving chillis. There is one more popular way of preserving chillies, from my home state, called “majjiga mirapa? in Telugu and ‘dahi mirchi’ in Hindi. Here fresh green chillies are slit vertically keeping the ends intact and soaked in salty, sour yogurt for about 4 to 6 days, giving time for the acid in both yogurt and chillies to work its magic of preservation. As a result, the color of chillies changes from green to light-green to creamy yellow with green tinge. At this stage, they are removed and sun dried until completely moisture free. The end result is creamy-white chillies that taste mildly hot, tangy (because of soaking in yogurt) and delicious. Usually we deep-fry these mirchis and have them as ‘middle of the meal’ kind of snack along with rice and dal. Combine rice and dal and have a small round, while eating it, in-between take a bite of majjiga mirapa. That’s how we enjoy this version of chilli.

I always hear people saying how much they would like to prepare the real deal, the ultra-authentic, home-style cuisine. Well, this is your chance to do just that. If you like chillies and if you live in an area of at least one week of super hot temperatures, then this recipe is for you.

Recipe:

Chillies:
20 fresh chillies
(Long, firm body with medium-thick skin ones are perfect for this recipe)
Yogurt:
4 cups of day-old Indian homemade yogurt, add
4 teaspoons of salt and mix
Weather:
Hot weather suitable for sun-drying the chillies


Day1: Green chillies washed and slit in the middle (keep the ends intact)


Day 1: Slit green chillies are soaked in yogurt-salt mixture. Keep them like that open(without lid cover) for at least 4 days.


Day 2: Closeup of slit green chillis soaking in yogurt-salt mixture


Day 5: Remove the chillies from yogurt and arrange them neatly in rows with space in-between on a big sheet/plate/pan suitable for sun-drying. (Notice the change in green chilli color.)


Day 8: Sun-dried Majjiga Mirapa. It took 3 days here in Ohio, for them to get completely moisture free and dry. When stored in tight lid box, they can stay fresh from 6 months to a year. To cook – deepfry them in oil until they turn to golden and serve immediately.


Golden colored Majjiga Mirapa (deep-fried) with Rice and Dal – Traditional Andhra Meal for Independence Day Food Parade

Dahi Mirchi is avialable in small packets at Indian grocery shops here in US.

Posted by Indira©Copyrighted in Amma & Authentic Andhra,Green Chillies,Peppers,Yogurt (Friday August 11, 2006 at 3:33 pm- permalink)
Comments (43)

The New Home of Mahanandi: www.themahanandi.org

Peanut Pachhi Pulusu (Peanut Cold Rasam)

For Independence Day Food Parade on August 15th, I’ve decided to write three recipes which are near and dear to my heart. One each from – my hometown, my state and my country. Today’s one is from my hometown. Some recipes are truly local, like a needlepoint, known and popular only in few homes in a town and surrounding villages. Peanut pachhi pulusu (pachhi =raw/unboiled, pulusu=rasam/soup) is one such recipe from “land of Nandis” – Nandyala, Rayalaseema region.

Peanuts are roasted to golden color, skins removed and then made into smooth paste along with salt, chilli powder, tamarind and jaggery. By adding water, the paste is made into rasam like consistency. Finely sliced onions are added and seasoning is done by popu/tadka. That’s it. This is sort of cold, no-boil rasam and perfect during hot summer days. Often prepared and served with pongal and potato curry, the whole combination tastes awesome and comforting.


Peanuts – Roasted and Golden (Skins Removed)

Recipe:

Roast Peanuts:
Take 2 cups of peanuts in a large skillet and on medium-high heat, roast them to golden color (see photo above) mixing and turning often to prevent scorching. Allow to cool. Rub them with hands to loosen the skins and remove the skins. (Roasting peanuts to golden color is important. Spend few minutes & pay attention to roasting process. Taste of this recipe depends on this step.)

Make a paste:
2 cups of Peanuts – roasted and skins removed (from above)
½ teaspoon of chilli powder
1 teaspoon of salt or to taste
1 tablespoon tamarind juice
2 tablespoons of powdered jaggery
Take all the above in a blender or in a mortar, crush them to smooth paste by adding 1 cup of water in between.

Finely Slice:
1 big onion – lengthwise, slice thinly and wash them in water to separate the onions pieces and to remove that raw onion smell.

Do the popu/tadka:
Heat 1 tsp of oil in a big vessel. Add and toast – few pieces of curry leaves, dried chillies and half teaspoon of mustard seeds and cumin. To this popu/tadka:
Add the smooth peanut paste.
Add the onions.
Stir in about 1 to 2 cups of cold water. Mix and serve.
Make the rasam like thick buttermilk consistency. Have a taste and adjust salt, sweet and sour levels to your taste.

Serve with pongal. This pachhi pulusu (cold rasam) has all 5 essential ruchulu (flavors) and is guaranteed to make one feel cool as a cucumber on a hot day.


Peanut Pachhi Pulusu with Pongal and Potato Kurma ~ Our Fabulous Meal:) Today

Posted by Indira©Copyrighted in Amma & Authentic Andhra,Jaggery,Onions,Peanuts (Thursday August 10, 2006 at 3:39 pm- permalink)
Comments (30)

The New Home of Mahanandi: www.themahanandi.org

Cherry Tomato ~ Basmati Pulao


Tomatoes from My Container Garden

The past week before going on a weeklong working vacation to DC with Vijay, one thing I did was picking the cherry tomatoes from my container garden. There were almost two pounds of tomatoes from 4 plants. I picked even the unripe ones, thinking the plants were not going to survive this hot weather without getting water daily. By the time we returned, we were like fried puris all red and puffed up, whereas our plants were all shriveled up and looking tired because of extremely hot weather. I think there is one more crop in them, that’s all.

Cherry tomatoes have thin skin, filled with juice without lot of thick flesh, just like the tomatoes that I would find in India. That’s why I prefer them for planting for my container garden every year. They are perfect for curries, rasams, salads and for rice. And one of the best recipes that truly do justice to the incredible flavor of summer tomatoes is tomato pulao. I often prepare it during this season. Quite easy, a one-pot meal and always a crowd favorite, if you haven’t tried tomato pulao yet, trust me and give it a try. Juicy tomatoes and fragrant basmati rice cooked together is a taste that would make you whistle summer tunes.:)


Summer’s Tomato Bounty

Recipe:

Tomatoes and Veggies:
15 to 20 cherry tomatoes or 1 pound ripe tomatoes of any variety – chopped
1 onion and 6 green chillies – finely chopped lengthwise
½ cup of finely chopped fresh cilantro
1 cup of frozen fresh chickpeas
(available as ‘Choleye’ in Indian grocery shops-frozen section. Green peas fresh or dried, or roasted cashews – they all taste good with this rice. Your choice.)

Basmati Rice:
1 cup of basmati rice and 2½ cups of water

For Masala:
2 each – cardamom pods and cloves
1 inch piece of cinnamon stick
½ teaspoon of black peppercorn
Coarsely grind these together.
Salt, bay leaf and ghee or oil to taste

1 In a large saucepan, heat ghee/oil. Add and saute the onions until soft and red.

2 Add the green chillies, masala powder, bay leaf and chickpeas, saute for few minutes.

3 Stir in the cut tomatoes, juice, seeds everything. Increase the heat to high, cook them covered until the tomatoes when pressed with a spatula turn to soft, concentrated mush.

4 Stir in the basmati rice and salt. Add water and mix. On high heat, bring the water to boil. Reduce the heat to medium. Cover and cook for about 10 to 15 minutes or until all the water is absorbed. Mix only once and resist the temptation to stir frequently (frequent stirring breaks the rice and makes a soggy mess.) Turn off the heat and leave it to rest for about 5 minutes. Just before serving, sprinkle fresh cilantro, gently mix taking care not to brake the basmati rice.

Serve with kurma and/or raita (yogurt is mixed with salt, finely chopped onions, green chillies and grated carrot, cucumber).


From Pot to Plate ~ Tomato : Basmati Pulao with Raita ~ For Green Blog Project”

Posted by Indira©Copyrighted in Amma & Authentic Andhra,Basmati Rice,Biyyamu (Rice),Chickpeas-Black,Tomato (Thursday August 3, 2006 at 2:04 pm- permalink)
Comments (36)

The New Home of Mahanandi: www.themahanandi.org

Mirchi Bajji ~ Hyderabadi Style

Some foods I cook for healthy body and some for mental health. Mirchi bajji belongs to later category for me. Cravings and nostalgia motivate me to cook this deliciously hot recipe. Hyderabad, the capital city of my home state Andhra Pradesh has a unique recipe for stuffed bajjis. I have already blogged about mirchi bajjis with different stuffing’s from different regions in India but thought this famous Hyderabadi style mirchi bajji deserves one more post dedicated to it.

Chilli bajjis, the popular street food are incredibly easy to prepare at home and make an excellent way to begin almost any special meal or they can be served as a light meal/snack on busy days. Because we remove the middle thick white vein that carries the seeds, these chilli bajjis are surprisingly mild and not that hot at all.


Reducing the spice kick of chillies by removing the white vein with seeds.

Recipe:
(for 20 chillies)

Preparing the filling to stuff the chillies:
Sesame seeds – 3 tablespoons
Dried coconut powder – 3 tablespoons
Coriander seeds (dhania) – 1 teaspoon (dry roast these 3 to pale gold color)
Salt – ¼ teaspoon
Tamarind juice – 1 tablespoon
Take them all in a blender or spice mill – make a smooth paste without adding water. Remove to a cup.

Mirchi (Chillies) Preparation:
Pick 20 straight, plump, healthy looking chillies. Wash and dry them in a kitchen towel. With a sharp knife make a vertical slit in the middle of chilli on one side. Keep the ends intact (see the photo above). Insert the knife tip and pluck the thick white vein in the middle along with the seeds. Usually it will come off nicely with a sharp knife. After preparing all chillies in this way, start stuffing. Fill the gap with the sesame filling nice and evenly one by one and keep them aside on a plate.

Preparing the batter to dip stuffed chillies:
Besan (gram flour) – 2 cups, sieved
Rice flour – ¼ cup, sieved
Salt, cumin and ajwan (vaamu) – ½ tsp each
Take them all in a vessel, mix to combine. Adding water, prepare medium thick batter of thick buttermilk consistency.

Deep-frying:
Take about 3 to 4 cups of peanut oil in a deep bottomed skillet or kadai. Heat the oil on medium-high. One by one dip the bajjis in batter and gently drop from the sides of kadai into hot oil and deep fry until golden. Remove to a paper towel covered plate and let cool a minute or two. Serve with some limejuice sprinkled and finely sliced onions and tomatoes on the side.
(I’ve dipped the bajjis in batter again and double fried them for that true taste.)


Mirchi Bajjis with Chickpea Guggullu and Watermelon Granita (Ice) with Cherries
Our Comforting Meal and My Entries to
Santhi’s JFI~Flour and also to Revathi’s FMR~Comfort Foods

Watermelon Granita with Cherries
Watermelon juice, limejuice mixed and frozen for about 4 hours. The ice is crushed (gently with a hammer) and cut cherries are added before serving

Posted by Indira©Copyrighted in Amma & Authentic Andhra,Cherries,Flour(Pindi),Gram Flour (Besan),Green Chillies,Jihva For Ingredients,Peppers,Rice Flour (Monday July 31, 2006 at 3:18 pm- permalink)
Comments (46)

The New Home of Mahanandi: www.themahanandi.org

Bottle Gourd in Yogurt

Dear L.G, before writing at her fabulous food blog Ginger and Mango, used to comment on ‘Mahanandi’ occasionally. Her comments were delightful and informative just like her current blog posts. In one of her comments in response to my mother’s recipe of sorakaya, she detailed a Kerala recipe of yogurt based bottle gourd curry and asked me to give it a try.

I have always wanted to visit God’s Own Country – “Kerala”. I don’t know when I am going to do that, but for now I am content to try at least Kerala cuisine. Yogurt and coconut based curries are hallmarks of Kerala cuisine and they call them “kaalan“. Here is my first attempt at bottle gourd kaalan, I hope I did justice to this traditional recipe and will be allowed to enter the God’s own country.:)


Yogurt, Bottle Gourd Cubes, Curry Leaves, Coconut-Chilli Paste

Recipe:
1 cup of cubed bottle gourd pieces
1 cup of day old, homemade Indian yogurt (sour curd)
6 green chillies and 1 tablespoon of fresh grated coconut (made into smooth paste)
½ teaspoon of each – turmeric and salt
For popu or tadka:
1 tsp of oil
1 tsp of cumin and mustard seeds, few pieces of dried red chillies and curry leaves

In a saucepan, heat oil on medium heat. Add and toast the tadka ingredients. Add the bottle gourd cubes and also green chilli-coconut paste. Stir in turmeric, salt and about quarter cup of water. Close the lid and cook on medium-low heat, until the bottle gourd pieces are tender. Reduce the heat to low and stir in the yogurt. Turn off the heat and remove the saucepan from the stove. Cover the pot with a lid and let the curry sit for about 15 minutes, for the flavors to mingle well. Serve warm with rice.

The curry tasted superb! Vijay more than me couldn’t get enough of this curry and we finished all in one setting. Thanks L.G for sharing this wonderful, traditional recipe.


Bottle Gourd in Yogurt Curry with Rice ~ Our Simple Meal Today

Posted by Indira©Copyrighted in Coconut (Fresh),Green Chillies,Sorakaya(Dudhi,Lauki),Yogurt (Wednesday July 19, 2006 at 3:07 pm- permalink)
Comments (41)

The New Home of Mahanandi: www.themahanandi.org

Stuffed Bell Peppers (Capsicums)

Capsicum (Bell Pepper)

Hollywood often portrays the pretty blonds as cute and dumb. The same role in vegetable world is filled by bell peppers or capsicums. I think.

Bell peppers are colorful! Look so pretty, cute and also would bring that much needed (in some eyes) color and attraction when added to a dish. They are popular mainly for that reason and they have hollow insides, giving the impression of empty pretty heads just like the blond stereotype. No wonder we are tempted to fill them up. Almost every cuisine has several stuffed recipes for bell peppers. Rice, meat, lentils, nuts and cheese, every other thing in food world is used to stuff the bell peppers. Even other vegetables,… aah, the humiliation. The bell peppers must feel mortified when we fill them up with other veggies. But graceful they are, they won’t show it. They stand our mistreat and still look pretty. Such graciousness always invites strong reaction; people would hate or love them. But few could resist their charms.

One such charming, capsicum recipe is from India. Here the bell peppers are stuffed with spiced mashed potatoes and cooked to brown and then placed in peanut-sesame sauce. Served with rice or chapati, this is a meal fit for a rani (queen). Though the recipe makes us work like kitchen helpers in a rani’s kitchen, once you wipe off the sweat from the brow, once it’s plated, you would feel like a rani. Worth the effort, that’s what I am saying.:)


Capsicums Stuffed With Potato Curry – Ready For Browning

Recipe:

Potato Stuffing:
Good quality potatoes (red or baby alu) – 3 or 6, Pressure-cook or boil them in water, until tender. Remove the skins, mash them to smooth paste.
In a pan, heat a teaspoon of oil, do the tadka (toast ¼ tsp each – mustard seeds, cumin and curry leaves). Saute finely chopped pieces of one onion, 4 green chillies and a fistful of fresh peas. Add the mashed potato. Stir in salt, turmeric and one teaspoon of clove-cinnamon-cumin-coriander seed powder (garam masala). Mix them all well. Cook covered on medium-low heat for about 10 to 15 minutes – That’s our potato stuffing for bell peppers.

Bell peppers (Capsicums):
Pick 6 small sized, fresh and firm bell peppers – any color (green, red, yellow or orange) or color combination is fine. This curry is all about appearance and size matters. Small sized capsicums are perfect for this curry. Jumbo regular grocery (US) type are too big and the curry won’t look good when prepared with them. (Local farmers markets here in US, often carry small sized ones during summer time.)

Cut the tops off. Remove the seeds and membranes inside and make a hollow. Fill them up with potato curry to the top.

In a big iron skillet, heat about 1 tablespoon of peanut oil. Place the stuffed bell peppers neatly in a circle and cook them covered on medium heat for about 15 to 20 minutes. Turn them to sides in-between so that they could get brown evenly on all sides. (You could also cook these stuffed bell peppers in oven – baking and broiling at 375 F until they are soft and tender to touch.)


Stuffed and Cooked Capsicums in Peanut-Sesame Sauce

Peanut-Sesame Sauce:
Toast quarter cup each – peanuts and sesame seeds to golden color. Take them in a grinder, add 2 cloves and 2 one-inch pieces of cinnamon, half teaspoon each – chilli powder and salt and a tablespoon of tamarind juice and powdered jaggery . Grind them to smooth paste.

Heat a teaspoon of peanut oil in a big pan. Add the peanut-sesame sauce and about a half cup to one cup of water. Mix well. Simmer on medium heat for about 10 minutes. Have a taste and adjust salt, sweet and sour levels to your liking.

Add the stuffed capsicums to the thickened sauce. Cook for another 10 minutes on medium heat, covered. Serve with rice or with chapatis.


Stuffed Capsicum Curry with Rice

Notes:
Traditional North- Indian recipe does not inlclude the gravy, and cooking the stuffed peppers in peanut-sesame sauce is my version. Adding little bit Andhra touch.

Posted by Indira©Copyrighted in Bell Pepper,Peanuts,Sesame Seeds (Monday July 17, 2006 at 2:04 pm- permalink)
Comments (36)

The New Home of Mahanandi: www.themahanandi.org

Coriander~Tomato Chutney

Coriander-Tomato Chutney and Fresh Coriander

We had my dear friends comeover for weekend visit. They brought ThumsUp, lots of laughter and fun stories to share and we on the other hand fed them until they said no more. All and all we both filled up each other to our heart’s content.

What’s good company without good food so I tried some new recipes for them. One is dear Karthi Kannan’s (writes at Kitchenmate and proud mother of cutest toddler ever) coriander chutney. She mentioned in her fabulous food blog, that this chutney is her favorite recipe and got it from her mom. What I liked about her recipe is – no prep work is needed like roasting peanuts or cracking a coconut open as with peanut and coconut chutneys. Also it uses one whole bunch of cilantro. During summer, the sky-high prices of cilantro come to earth level at Boardman. 2 bunches for 1 dollar here at local farmers market. Not bad, right? Perfect recipe to finish off lot of cilantro in one setting, I thought, so prepared the chutney for utappams and it was indeed tasted super. Sometimes cilantro can be overwhelming, but here in this chutney roasted tomato and onion addition, balanced out the intense cilantro flavor, making it pleasant chutney to have.

I followed Karthi’s recipe mostly. First chopped one red onion, 8 dried red chillies and 3 tomatoes to big pieces and roasted them in an iron skillet until they are golden brown and wilted. Meanwhile I washed and chopped a big bunch of fresh cilantro (leaves and branches included), added them to the skillet for few minutes of saute. Took them all in a blender, added a small piece of tamarind and a pinch of sugar and quarter teaspoon of salt – blended them to coarse puree. Removed the chutney to cup and added the tadka (toasted cumin, mustard seeds and urad dal in 1 tsp of oil) to the chutney.

We had the chutney with utappams. My friends who are very much interested in our food blogging wanted to play food stylists. Grated carrots and red radishes for the chutney, was their contribution, which made it look more attractive, I think. Thanks my dear friends for the stylish touch and thanks Karthi for this wonderful recipe.

Coriander-Tomato Chutney with Utappams

Coriander~Tomato Chutney Ingredients:
1 big bunch of fresh coriander
1 red onion
3 tomatoes
6-8 dried red chillies
1 inch piece of tamarind
A pinch of sugar
Salt to taste or ¼ tsp
For Popu or Tadka:
1 tsp of peanut oil
¼ tsp each – cumin, mustard seeds, urad dal and few curry leaves

Recipe adapted from:
Food blog: Kitchenmate

Posted by Indira©Copyrighted in Kottimera(Cilantro),Tomato (Monday July 10, 2006 at 2:01 pm- permalink)
Comments (13)

The New Home of Mahanandi: www.themahanandi.org

Nimona

Fresh Green Peas of Summer

Sometime back while surfing the web, I came across a recipe with fresh green peas and I couldn’t get it out of my mind. I had book-marked the site and also printed a copy, just incase the website disappeard. What attracted me to this recipe were the introductory words – “fresh green peas, strictly home-fare, and Awadh”. Also, more than anything, I loved the recipe name-“Nimona”. How pretty!

The recipe is from this website, dedicated to Awadh (The cuisine of Lucknow, India). I am not sure who wrote this particular recipe, but this unknown author’s description of nimona captivated me. Here is the author’s introduction to Nimona.

“The cuisine of any region is incomplete unless the contribution of the housewife or home-cooking is mentioned. So it is with Awadh. Besides the contribution of bawarchis and halwais there are recipes handed down through generations by grannies which lend that special something to the food. Regional cuisine lives in the home kitchens, and Nimona is one such example of strictly home-fare. Cooked in winters with fresh green peas, spring onions and mungories or wadis which are spiced and dehydrated lentil dumplings, it is a delectable dish. Some people like to substitute green peas with green chick-peas which are available in spring and are equally tasty.”

June and July are fresh pea season here in Ohio and I bought few pounds of fresh peas keeping this recipe in mind. I tried to get ‘mungories‘ or wadis from local Indian store, but they never even heard of them. So I replaced them with new crop potatoes. The recipe is multistep, little bit time consuming and the end result is – Fresh green peas and potato cubes in pureed green pea-onion-tomato sauce. Fantastic!

Here is my version of Nimona:

Step 1 – Prep Work:
(Things needed: skillet, oil/ghee and a blender/mortar)

Peas:
2 cups of freshly shelled peas. Separate one cup of peas and keep them aside. Puree the second cup of peas into coarse mixture by adding a pinch of asafetida. Saute this coarse mixture of peas for few minutes, (to remove the raw smell).

Onions, ginger, garlic and cilantro:
Finely chop 2 onions length-wise, saute them in oil until golden and brown. Add 3 garlic cloves, one inch of ginger and few sprigs of cilantro and together make a paste.

Tomatoes:
Chop 4 tomatoes into chunks; saute them on high heat for few minutes. Make a smooth paste.

Potatoes:
3 potatoes – peel, cube and saute them for few minutes and keep aside.

Masala Powder:
2 cloves, 2 cardamom pods and one small cinnamon stick – powdered together

Step 2: Cooking them all together

Heat a teaspoon of oil in a big pan. Add the following items listed below in that order and Saute:
2 bay leaves
Onion-ginger-garlic paste
Tomato paste
Coarsely ground green peas
One cup of fresh peas that were kept aside
Potato cubes
Cloves- cinnamon- cardamom powder
½ tsp each, or to taste – turmeric, salt and red chilli powder
Add about 1 cup of water. Mix and close the lid. Simmer for about 15 minutes on medium heat, until the curry thickens. Switch off the heat and let the curry sit for half an hour to absorb the flavors. Serve warm with chapati or rice.

Nimona with Chapatis

More about Awadh (Cuisine of Lucknow): Here
Recipes from Awadh Cuisine: Here
Photo of ‘mungories’ or ‘wadi’ – from Green Jackfruit

Posted by Indira©Copyrighted in Onions,Peas (Bataani) (Wednesday July 5, 2006 at 2:55 pm- permalink)
Comments (44)

The New Home of Mahanandi: www.themahanandi.org

Fresh Peas of Summer & Guggullu

Fresh Green Peas of Summer

Though I enjoy vegetable shopping, I rarely get excited about it. Squeals and mile length smiles – I reserve them for rare finds like fresh plump pea pods. Late June is fresh pea time here in Ohio. Though peas are always found in frozen grocery section, I miss the taste and experience of shelling the fresh peas out of pods. This was one of those cherished practices from my Indian days.

We often hear that frozen veggies are same as fresh ones. Freshly shelled peas prove in a bite that it’s not true. Frozen peas do start out as fresh but all that freezing temperature and the ugly plastic wrap, bumping from one warehouse to another, finally when we open the packet – they would come out all shriveled up and lie there listless, looking at us ‘daya karo’ (merci). At that stage, I guess they are like us at the end of our lives – spent up but full of saccharine wisdom. In contrast the peas that are freshly shelled from fat pods are like cherubic faced babies, all plump and round, bouncing and rolling around. Full of energy and life force, tempting us to get hold of them. For that unforgettable sweet pea taste we would do just that.

Here in US, the capital of all things frozen, finding these green gems fresh is almost like buying emerald Cabs. So precious, so few and so pricey! Last Sunday I got lucky and bought 3 pounds of fresh peas for about 5 dollars, from the local farmers market. After the indulgence, what left was a cup of shelled peas and I have prepared Guggullu with them. Just a simple 5-minute saut? of green peas with finely chopped red onions pieces. Touch of black pepper, salt and fresh grated coconut, they are done. Quick and great tasting traditional Indian recipe to enjoy fresh green peas.

Batani Guggullu (Fresh Peas Summer Salad)

Posted by Indira©Copyrighted in Amma & Authentic Andhra,Peas (Bataani) (Tuesday June 27, 2006 at 11:44 pm- permalink)
Comments (23)

The New Home of Mahanandi: www.themahanandi.org

Spinach ~ Garlic Dal (Palakura~Vellulli Pappu)

Toor dal and spinach – no onions but lots of roasted garlic makes this dal unique. You may already know, spinach and garlic make a great combination. In this recipe, garlic is finely chopped and roasted to gold color. Cooking in this manner completely changes the character of the garlic. The garlicy smell disappears and what standouts is the mellow sweet and cashew nut like taste, giving the spinach dal a flavorful boost.

Preparation is 3-step process. (1) Cook toor dal until it falls apart (2) saute garlic and spinach (3) mix cooked toor dal and spinach-garlic. Add seasoning and simmer the whole combination for few minutes.

Recipe:

Pressure-Cook:
½ cup of toor dal and half teaspoon of turmeric in 1 cup of water
Cook the dal until it falls apart
Mash the dal to smooth paste using a wood masher and keep it aside

Meanwhile Prep Work:
1 bunch of spinach – cut into small pieces
1 small whole bulb of garlic – peel and chop garlic into small pieces
4 dried red chillies – cut them into small pieces
Soak marble-sized tamarind in half-cup of water for juice

Do the Tadka:
Heat a tablespoon of peanut oil in a big saucepan. Add and toast:
Dried red chilli pieces
Few pieces of curry leaves
One teaspoon of each – cumin and mustard seeds

Saute:
Stir in garlic. Saute to until golden. Take care not to burn.
Add the finely chopped spinach and saute until the leaves wilt and come together

Stir in and Simmer:
Stir in smoothly mashed toor dal to this sauteed spinach-garlic mixture
Add a tablespoon of tamarind juice, also half teaspoon each of – chilli powder and salt or to taste.
Stir to combine. If the dal is too tight, add about half cup of water.
Mix; close the lid and simmer for about 15 minutes on low heat.

Serve hot with ghee and rice for a great satisfying meal.

Spinach-Garlic Dal with Rice
Pickle, Rice, Spinach-Garlic Dal and Ghee – Meal Today

Recipe Source: Amma, Nandyala

Posted by Indira©Copyrighted in Amma & Authentic Andhra,Garlic (Vellulli),Spinach,Toor Dal (Monday June 26, 2006 at 1:34 pm- permalink)
Comments (41)

The New Home of Mahanandi: www.themahanandi.org

Soymilk Skin (Fresh Yuba) ~ Savory & Sweet


Fresh Soymilk Skin (Fresh Yuba, Uba, Bean Curd Skin, Fuzhu, Foo Pi)

Few months ago, after much hesitation I dared and prepared soy milk at home. The milk was alright, but what I liked most was the skins that would form while boiling soymilk. Do you remember from India, when you boil cows/buffalo’s milk, a thick layer of skin would form on top of boiled milk. You can just lift the layer and eat – Milk meegada or malai, do you remember the taste? Mildly sweet and irresistible because of limited amount. Same thing here with soymilk.

Soymilk skins are much thicker, almost like samosa/wonton wraps. They taste sweet and have a distinct soy smell. What I gathered from the web is that Japanese call this soymilk skin “Yuba” and they are an expensive delicacy. Famously and religiously prepared by Buddhist Monks and used in several Buddhist recipes for its protein richness.

I wanted to try an Indianised yuba recipes and prepared two entries with soymilk skins. A savory and a sweet – Yuba:Potato Curry Rounds and Soymilk Halwa. As entries to IMBB+SHF ~ Soy, hosted by Reid of Ono Kine Grindz. Started the whole process first by preparing fresh soymilk. And then boiled the milk for about an hour. Constantly picking up the milk skins with a chopstick. I wrapped these milk skins around the potato curry and sauteed them for few minutes. With leftover soymilk skins and soymilk, I prepared halwa by adding sugar, finely chopped dates and freshly grated coconut. Simmered the whole thing until it came together like pala kova. Removed to a box and kept it in the freezer to make the halwa little bit firm.

Both the yuba-potato rounds and soymilk halwa tasted superb. Time consuming but worth my effort and I am glad that I tried this ancient classic Buddhist delicacy.

Here is the whole process in images. Enjoy!


Boiling homemade soymilk to pickup soymilk skins (Yuba, Milk Meegada)


Wrapping Potato curry in soymilk skins (Yuba, Milk Meegada)


Sauteing the Soymilk skin (yuba) wrapped potato curry rounds on low heat


Golden colored yuba-potato curry rounds – in closeup


Yuba-Potato Curry Round in fresh soymilk skin (soy paala meegada) with red chilli-garlic powder as garnish


Soymilk Halwa with dates and fresh coconut


More about YubaHere and from Egullet
Yuba making – in images
Tags: +

Posted by Indira©Copyrighted in Dates (kharjuram),Potato,Soy (Tofu, Yuba),Sugar (Friday June 23, 2006 at 9:33 am- permalink)
Comments (49)

The New Home of Mahanandi: www.themahanandi.org

« Next PagePrevious Page »