Mahanandi

Living in Consciousness ~ Indi(r)a’s Food and Garden Weblog

Dazzling Dals ~ Chard with Masoor Dal

There is nothing like a green leafy vegetable and dal combination. Otherwise difficult to like fibrous green leafy veggies magically render to mellow texture when combined and cooked with Indian dals.

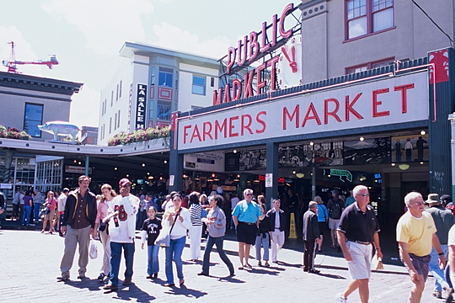
Last Sunday, in addition to fresh amaranth, I also bought chard at local farmers market. 5 chard leaves for a dollar and thirty cents. Chard leaves are almost the size of young banana leaves. That big but they are delicate like spinach. They also taste similar to spinach. Makes a good meal when combined and cooked with masoor dal or toor dal.

Chard and Masoor Dal
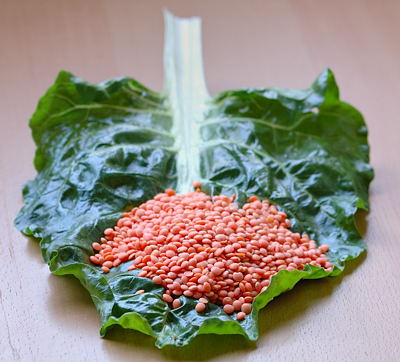
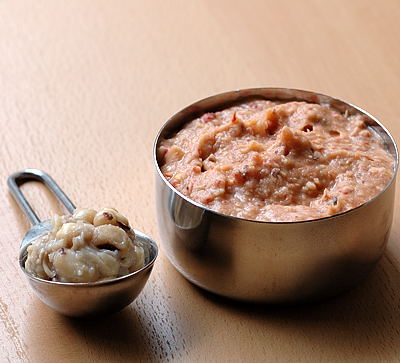
Fresh Chard Leaf and Masoor Dal

Recipe:

1 cup – masoor dal (red lentils)
5 – fresh chard leaves, coarsely chopped
1 each – onion and tomato, cut to big chunks
8 to 10 – finely chopped Indian variety green chillies
Cherry fruit sized, raw tamarind
½ teaspoon each – turmeric and salt

For popu or tadka:
1 tablespoon ghee or oil
¼ teaspoon each – cumin, mustard seeds, and minced garlic
6-8 curry leaves

Take masoor dal in a pressure-cooker. Rinse with water and drain the water.
Add the chard, onion, tomato, chillies, tamarind and turmeric, along with three cups of water.
Mix and pressure-cook for about 10-15 minutes on high heat and then allow the pressure to come down naturally. Remove the lid, usually the dal will be cooked to tender. Add salt and lightly mash the ingredients. The dal is now ready for the final “Popu or tadka” touch.

In a skillet, heat the ghee until a curry leaf tossed in it sizzles. Keep the heat to medium. Add the curry leaves and garlic. Toast to pale gold color. Then, toss in cumin and mustard seeds. When seeds start to pop, add the whole thing to mashed dal. Mix and serve.

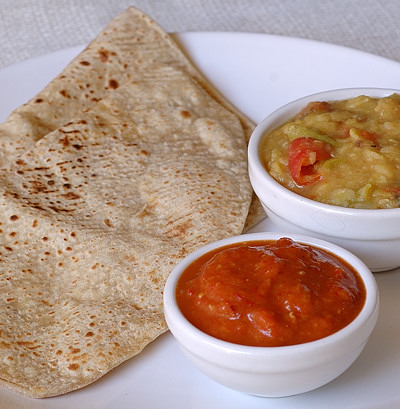
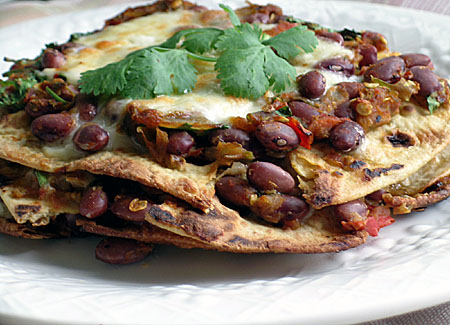
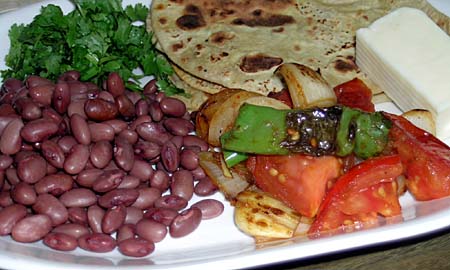
Chard-masoor dal tastes good with rice and chapati.


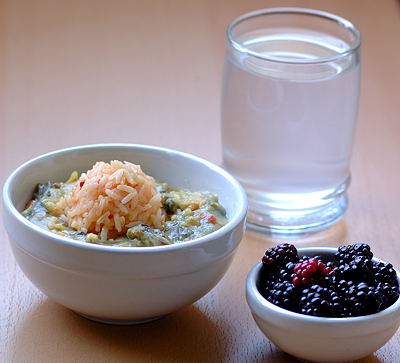
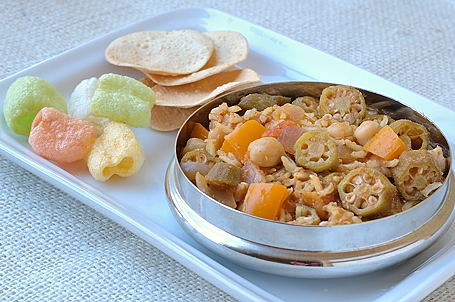
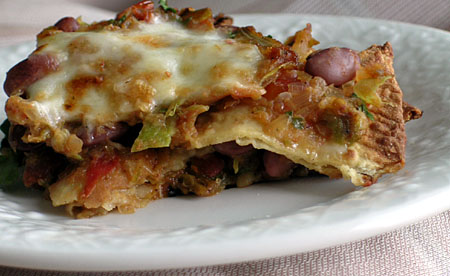
A Bowl of Chard-Masoor Dal with Tomato Pickled Rice, A glass of Coconut Water and a cup of Blackberries ~ Our Meal Today

double_curve.gif

Dazzling Dals ~ From My Digital Cookbook:

1. Amaranth Dal (Thotakura Pappu) ~ from Nandyala
2. Brinjal Dal (Vankaya Pappu) ~ from Nandyala
3. Fenugreek Dal (Menthi kura Pappu) ~ from Nandyala
4. Gongura Pappu (Ambadi Dal) ~ from Nandyala
5. Khatti Dal ~ Hyderabad Style
6. Lemon Cucumber Dal (Budamkaya Pappu) ~ from Nandyala
7. Mango Dal (Maamidi Kaya Pappu) ~ from Nandyala
8. Ridgegourd Dal (Beerakaya Pappu) ~ from Nandyala
9. Spinach Dal (Palakura Pappu) ~ from Nandyala
10. Spinach – Garlic Dal ~ from Kosta Region, Andhra
11. Spinach Mango Dal (Palakura Pullakura) ~ from Telengana
12. Spinach-Split Pea Dal ~ American Influence
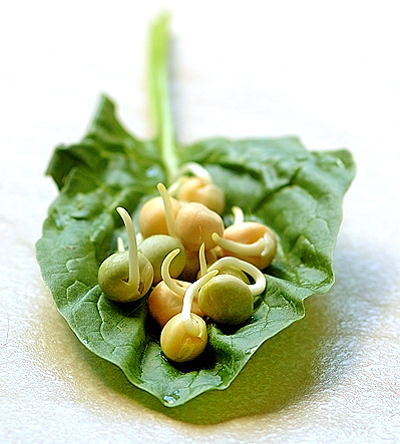
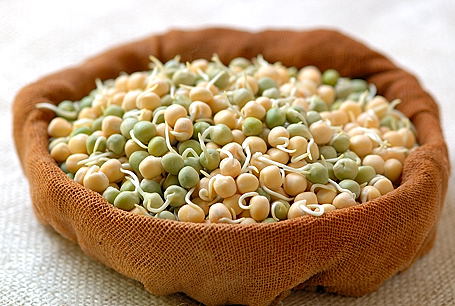
13. Sprouted Masoor Dal ~ North India inspired
14. Tomato Dal (Tomato Pappu) ~ from Nandyala
15. Tindora Dal (Dondakaya Pappu)
~ from Nandyala

16. Moongdal Aamti with Kokum and Goda Masala ~ Maratha Influence
17. Mungdal and Ridgegourd (Beerakaya Pesara Pappu) ~ from Andhra

Posted by Indira©Copyrighted in Dals (Lentils & Legumes),Masoor Dal (Red Lentils) (Tuesday August 7, 2007 at 6:38 pm- permalink)
Comments (18)

The New Home of Mahanandi: www.themahanandi.org

Black-Eyed Bean Dip

Alasandalu

I had an another recipe in mind with black-eyed bean sprouts for today’s meal. But I accidentally over-cooked the beans to mush. Thus born the bean dip for rotis.

The beautiful pale red color of the dip is from chipotle chillies. I really love how the spicy chipotle perk up a recipe with smoky flavor. I have also added fragrant cumin and lively lime juice to the pureed beans. The dip may be a last minute solution to the mushed bean problem, but the result was attractive and had a great taste, similar to refried beans that they serve in Mexican restaurants.


Overcooked Black-Eyed Bean Sprouts and Black-Eyed Bean Dip

Recipe:

Precooked black-eyed bean sprouts or beans – 1 cup
Dried chipotle chillies – 2 (presoaked in warm water for about 30min)
cumin – half teaspoon
salt – half teaspoon or to taste
Lime juice -2 tablespoons or to taste

Take the chipotle chillies and cumin in a Sumeet style mixer or food processor. Pulse few minutes until the chillies are very smooth. Add the black-eyed bean sprouts, salt and lime juice. Process to fine puree. Remove to a cup and refrigerate for about 30 minutes to let the flavor develop. Serve with roti/tortillas or corn/taro root chips.

Posted by Indira©Copyrighted in Blackeye Beans,Dried Red Chillies,Sprouts (Molakalu) (Monday August 6, 2007 at 2:48 pm- permalink)
Comments (8)

The New Home of Mahanandi: www.themahanandi.org

Series of Sprouts ~ Black-Eyed Pea Sprouts

Alasanda Molakalu


Black-Eyed Pea Sprouts

These black-eyed peas are from Indian grocery shop (Apna Bazar, Bellevue), and are imported from India like most of the lentils and legumes. Sprouting was easy with these peas. But when I tried the same last week with some American store-bought black-eyed peas, they didn’t sprout. Same thing happened with Adzuki beans.

Are these American peas and beans genetically modified? Why aren’t they coming to life?

Posted by Indira©Copyrighted in Blackeye Beans,Sprouts (Molakalu) (Sunday August 5, 2007 at 9:40 pm- permalink)
Comments (17)

The New Home of Mahanandi: www.themahanandi.org

Multnomah Falls

Recently we explored the beautiful Columbia River Gorge region. This is one snapshot from many we captured.

Multnomah Falls
Multnomah Falls ~ Photo by Singari Vijay
(Lens: Nikon 28mm f/2.8, Camera: Nikon F3)

Posted by Indira©Copyrighted in Zen (Personal) (Saturday August 4, 2007 at 10:53 pm- permalink)
Comments (16)

The New Home of Mahanandi: www.themahanandi.org

Mahanandi Selections ~ Grain Mill

I often get asked via comments and email, to recommend cooking utensils and products. I am extremely particular about the products that I buy for my kitchen. I wasn’t sure my taste is your cup of coffee, so I was reluctant all these years. Now, I have decided to take up the challenge. “Mahanandi Selections”, the shopping suggestions series is going to be a new one on Mahanandi and features products that I have at my home or would like to have in my kitchen.

I hope you find this new series interesting and useful.

double_curve.gif

Grain Mill (Issurayyi, Tiragali)


Image courtesy: Life in the Holyland

Back home, my family uses stone-made grain mill, similar to the one shown in the photograph to mill grains. This circular shaped stone mill is called “Issurayyi and Tiragali” in my language Telugu. We use it mainly for making flour for sweets like sunnundalu and attarasalu (adhirsam). The flour fineness matters a lot for these traditional sweets. Too fine powder, the sweet will stick to the roof of the mouth. Too coarse, it would be difficult to shape them. The advantage of stone-made grain mill is we can manually control the milled particle size, which in turn helps to make perfect sweets.

The one at my parent’s home is much smaller in size. The circular stones are about the size of big dinner plates and about the thickness of steroid-fed biceps muscle. It’s quite old and my mother keeps it in good condition. I remember turning the stone mill to help my mother.

This is how the stone grain mill works: A jute cloth will be placed on the flour and the stone mill will be placed on the cloth. The mill is essentially made of two circular stones. The lower circular stone stays stationary and the upper stone moves. It has an upright handle on the corner and this is used to turn the stone. The grain will be poured, a handful at a time, through the hole in the center of upper millstone, while the stone is turned continuously. Friction and weight created by the upper stone mills the grain. And the flour will get gradually pushed to the edge and falls out on to the cloth. Depending on the speed at which it is rotated and by the strength applied, the milled grain consistency varies – from fine, to medium to coarse. It may sound complicated but the whole thing operates on simple friction based principle. Looks wise Issurayyi is a real beauty. Operating wise, it’s a great way to keep the upper hands slender.

After moving to US, I was looking for a grain mill that operates in issurayyi style. I found one few years ago at a shop called Tuesday Morning. It’s a Porkert brand grain mill. A different look and feel but operates on the same principle. A big plus is it is very well made and of quality materials. The one I have has both ceramic and metallic burr plates. Ceramic ones are used for grinding oily nuts etc and metallic burr plates are great for grains and lentils like rice, urad dal etc. We have to assemble the parts and fix the machine to a table and operate it manually by rotating the handle. I have been using it to prepare sunnundalu mainly. This sweet is that important to us and cannot be made of flour from a coffee grinder or Sumeet style mixer-grinder.

If you have a traditional preparation requirement, where the milled grain size matters a lot, then go for this type of grain mill. It’s a hard, sweat inducing upper arm workout but the end result is definitely worth the effort. I have to warn you though, these manually operated machines are not magic abracadabra kind of things. A real zeal and know-how is essential for good experience.

Important:

1. You need to make some trials before you could get the required flour fineness. This could be done by adjusting the gap between the millstones, handle turning speed, and by adjusting the quantity of grains through the hopper.

2. This machine looks and works great. But also consumes considerable amount of time and effort to get the required results.


Machine Details

*****************

PORKERT’s Kitchen Grinding Mill ~ A Kitchen Gadget that I Own
Preparing Sunnundalu Sweet at home with PORKERT’s Kitchen Grinding Mill, Type 150

To purchase:

Porkert’s Manual Grain Mill

Different types of Grain Mills from Amazon.com.

Previously on Mahanandi Selections :
Sumeet Mixer Grinder
Aebleskiver Skillet (Ponganalu/Paniyaram/Uniyappam Pan)

double_curve.gif

Note: The things that I feature at ‘Mahanandi Selections’ (MS), reflects my own cooking style. You may regard a tool that I deem essential as an expendable thing or vice versa. I have absolutely no interest to convince you otherwise. It is good to be realistic about our own capabilties, limitations and what we can afford.
MS Comment Policy: Brand wars and malicious hearsay with intent to damage a brand reputation – comments of this nature will get scrubbed from comment space.

Posted by Indira©Copyrighted in Amma & Authentic Andhra,Indian Kitchen,Indian Utensils,Mahanandi Selections (Friday August 3, 2007 at 1:30 pm- permalink)
Comments (30)

The New Home of Mahanandi: www.themahanandi.org

Bell Pepper Zunka

Bell Peppers with Besan:


Bell Pepper and Besan (Gram Flour or Sanaga Pindi)

This one is easy to prepare and puts the bell peppers in season to good use.

Slice the peppers, (green, red or yellow) length-wise into thin strips. Do pan-saute and season with spices and besan. The subtle sweet flavor of besan (gram flour) complements the bell peppers greatly. Lovely to look at, even lovelier to consume, bell peppers with besan also known as Bell Pepper Zunka in Marathi, is an ideal dish for bell pepper fans.

Recipe:

3 bell peppers – green, yellow and red, cut to thin strips of 1-inch length
3 tablespoons – besan (gram flour)
¼ teaspoon each – chilli powder, salt and turmeric (or to taste)
Popu or tadka ingredients:
1 teaspoon oil
Pinch each – cumin, mustard seeds, and a sprig of curry leaves

In a wide skillet, heat the oil until a curry leaf tossed in it sizzles. Keep the heat to medium. Add the curry leaves and toast to pale brown. Toss in cumin and mustard seeds. When seeds start to splutter, add the bell peppers. Stir-fry few minutes, until bell peppers become crisp and fork-tender. Sprinkle the besan, chilli powder, salt and turmeric. Mix. Sauté, stirring often. Do not cover the skillet at this stage. When the pale yellow besan starts to get pale brown, time to turn off the heat. Serve the bell pepper Zunka hot. Makes a tasty meal when eaten with chapati or rice and dal combination.


Chapati with Bell Pepper Zunka, and Cantaloupe ~ Brunch Today

Bell Pepper Recipes:
Marathi Mirchi Bhaaji ~ from Kay
Stuffed Bell Peppers
Green Bell Pepper Saute with Dalia Powder (Pappula Podi)
Red, Yellow and Green Bell Pepper Curry
Bell Pepper Masala

Posted by Indira©Copyrighted in Bell Pepper,Gram Flour (Besan) (Thursday August 2, 2007 at 10:38 am- permalink)
Comments (26)

The New Home of Mahanandi: www.themahanandi.org

Chipotle Chilli Chutney

My enthusiasm for food blogging events has been going south in recent months. I am not able to muster up much energy like before. Even my beloved event JFI, featuring an ingredient that I worship (chillies) couldn’t pepper me enough. The motivation is there, but I don’t know what’s going on with me, it’s not manifesting into actual results. Well, I guess this is another food blogging phase that I have to go through.

After observing my mental struggle, my kind husband Vijay offered some help. “Tell me what to do, I will make it and will take the pictures. But in writing and publishing the results, you are on your own buddy”, he said. How can I resist such affectionate offer? So here it is, the chipotle chilli chutney for JFI: Chillies. My recipe through Vijay’s magic hands.

Chipotle Chillies, Cherry Tomatoes and Garlic
Chipotle Chillies, Cherry Tomatoes and Garlic ~ Ingredients for Chipotle Chilli Chutney

Recipe:

Chipotle chillies – 6
Cherry tomatoes – 1 pound
Garlic cloves – 6
Sea salt and cane sugar – Half teaspoon each
Peanut oil – 1 tablespoon

Soak the Chipotles:
Take chipotle chillies in a cup. Pour and cover with hot water, about half cup. Soak until pliable about 30 minutes.

Grill the Tomatoes and Garlic:
In a wide cast-iron skillet, heat the peanut oil to smoking point. Add and brown the garlic first, then add the cherry tomatoes. Cook until the tomatoes are lightly browned. Turn off the heat and cool completely.

Blend:
Transfer the chipotles and the water they soaked in to a Sumeet style mixer. Pulse for few minutes. Add the roasted garlic, tomatoes, salt and sugar. Blend to smooth. Remove to a clean, glass jar.

Chipotles bring not only spiciness but also a unique smoky flavor and the chutney tastes terrific with chapatis, French fries etc.


Chapatis with Tomato Dal and Chipotle Chilli Chutney ~ Our Meal Today and
My Contribution to JFI:Chilli, Hosted by Lovely Nandita of Saffron Trail

Kitchen notes:
Chipotle chillies are mature jalapenos that have been dried and smoked, can be purchased at Mexican grocery shops. Unlike the Indian variety dried red chillies, Mexican originated chipotles have a hard bark like skin. Prior soaking in water is needed for easy, smooth blending.

Posted by Indira©Copyrighted in Dried Red Chillies,Jihva For Ingredients,Peppers,Tomato (Wednesday August 1, 2007 at 2:44 pm- permalink)
Comments (17)

The New Home of Mahanandi: www.themahanandi.org

Vegetarian Gumbo ~ India Inspired

When we lived in Houston, one of the recipes we picked up from that region was gumbo. Okra, vegetables, beans, rice and seafood/meat, together cooked in wheat flour broth (called roux). That is gumbo in a nutshell. Vijay is a big fan of seafood gumbo and often prepares shrimp gumbo at home. Being the non-meat eater that I am, I had to develop a vegetarian version for myself. The following recipe is the result of my trials.

I’ve made few changes to the traditional recipe to suit my taste. I replaced roux with lots of okra and coconut-spice seasoning. And for today’s meal, fresh chickpea sprouts and brown basmati have joined the excellent cast of gumbo characters.

Swampland approach, but a new appeal with Southern India seasoning, my vegetarian gumbo is a delightful one-pot dish. The side effects I have noticed so far, it’d inflict a dramatic mood change. Kindlier attitude towards fellow beings, even towards themselves, which at times could be of even greater importance, may happen.

Ingredients for Vegetarian Gumbo
Red Onion, Orange Capsicum, Tomato, Sprouted Chickpeas, Brown Basmati and Okra

Recipe:

1 tablespoon ghee
2 cloves of garlic – finely chopped
1 red onion, 2 capsicums and 4 tomatoes – finely chopped
20 okra – cut to half-inch rings
1 cup sprouted chickpeas (or beans of your choice)
½ cup brown basmati rice
Turmeric and salt – half teaspoon each or to taste

Southern India Seasoning :
Two tablespoons of grated fresh coconut, 6 dried red chillies, 6 cloves, quarter teaspoon cumin, fistful of fresh cilantro leaves, and a pinch of salt – blend to smooth, adding half cup of water in a mixer.

In a heavy pot, melt the ghee over medium heat. Add the garlic and onions and cook until translucent. Add the capsicum, tomatoes, okra, chickpea sprouts and brown basmati rice. Mix and cook, occasionally stirring for about ten minutes. Add about three cups of water and also stir in the turmeric and salt. Cover the pot with a lid and cook for about another 15 minutes.

When the rice starts to get tender, stir in the coconut-spice seasoning. Mix gently and simmer another ten minutes or so. When the rice is cooked to tender, turn off the heat. Cover and let the gumbo sit for sometime. The whole thing will thicken further on cooling.

Vegetarian gumbo goes well with papadams. They are great to scoop up the gumbo.

Vegetarian Gumbo
Vegetarian Gumbo with Okra, Chickpea Sprouts and Brown Basmati, Served with Papadams ~ Our Meal

Kitchen notes:
Grated fresh coconut, Brown basmati rice and papadams of different shapes can be purchased at Indian grocery shops. (Before serving, papadams should be fried in oil until crisp.)

Posted by Indira©Copyrighted in Bell Pepper,Benda Kaaya(Okra),Brown Basmati,Sprouts (Molakalu) (Tuesday July 31, 2007 at 12:11 am- permalink)
Comments (18)

The New Home of Mahanandi: www.themahanandi.org

Series of Sprouts ~ Chickpea Sprouts

Chickpea Sprouts

Posted by Indira©Copyrighted in Chickpeas,Sprouts (Molakalu) (Monday July 30, 2007 at 10:54 am- permalink)
Comments (8)

The New Home of Mahanandi: www.themahanandi.org

Weekend Seattle


Neighborhood Snapshot: Pike Place Market


A Favorite Vegetable and Fruit Shop


View from the Market ~ Elliott Bay

Posted by Indira©Copyrighted in Zen (Personal) (Sunday July 29, 2007 at 12:20 pm- permalink)
Comments (7)

The New Home of Mahanandi: www.themahanandi.org

Weekend Kittaya Blogging

Kittaya on the Patio
Curious Kittaya

Posted by Indira©Copyrighted in Kittaya (Saturday July 28, 2007 at 1:08 am- permalink)
Comments (9)

The New Home of Mahanandi: www.themahanandi.org

Mahanandi Selections: Sumeet Mixer

I often get asked via comments and email, to recommend cooking utensils and products. I am extremely particular about the products that I buy for my kitchen. I wasn’t sure my taste is your cup of coffee, so I was reluctant all these years. Now, I have decided to take up the challenge. Mahanandi Selections, the shopping suggestions series is going to be a new one on Mahanandi and features products that I have at my home or would like to have in my kitchen.

I hope you find this new series interesting and useful.

double_curve.gif

SUMEET MIXER GRINDER

Sumeet homepage: Sumeet.net
(I own a Sumeet and I’ve been using it for almost six years. Great Machine!)

Product Features: The Multipurpose Asia Grinder was created specifically to tackle the tough DRY & WET grinding tasks required in the diverse cuisines of India. Yet it is equally at home where grinding is vital to the cuisines from other parts of the world, (Mexican Moles, Thai Green Curry, Harissa, etc). The Asia Grinder effectively grinds Dry or Wet ingredients into fine powder or a smooth thick paste, from as little as 50 grams to as much as 400 Grams in less than 2 minutes. Soaked Lentils, Rice, Coconuts, Chilies, Herbs, Ginger, Garlic to name a few, can be ground without adding a drop of water. A feat only possible using Stone & Pestle. It comes with 4 Interchangeable blades for various tasks such as Blending, Whipping, Mincing, Grating etc. The Small Quantity Grinder Jar is ideal for small amounts of dry and wet grinding, be it fresh coffee powder or quick chutney.

Heavy Duty Indian Mixer/Grinder has Safety Lock System, 110 Volt. 3 Stainless Steel Jars with a “Double Wall Stainless Steel” construction, a redesigned integrated blade and lids with a more user friendly snap-in locking system.

Product Reviews:

From Amazon: “It can take a kitchen aid for breakfast and black dekker for lunch and still have appetite for a couple of sun beams.”

From Food Bloggers: Barbara of Tigers and Strawberries often mentions Sumeet in her well detailed recipe instructions. Her review:

“I am very fond of and use my Sumeet Multi-Grind all the time. It is a really fine piece of equipment that will grind up any wet or dry ingredient that you would have into a very smooth paste (or powder if all the ingredients are dry), including rock hard galangal and chunks of cinnamon stick, without fail. The parts of the machine that come into contact with the food are all dishwasher safe, so they are simple to clean. I have had it for nearly eight years and have used it at least four times a week, and it has never choked, failed me or even considered not running.”

Price Details:
Ships and Sold via Amazon.com
Sale Price: $169.00 ($174.99)

For news and new product information, here is the Sumeet homepage: Sumeet.net

Last week on Mahanandi Selections :
Aebleskiver Skillet (Ponganalu/Paniyaram/Uniyappam Pan)

Posted by Indira©Copyrighted in Mahanandi Selections (Friday July 27, 2007 at 3:34 am- permalink)
Comments (42)

The New Home of Mahanandi: www.themahanandi.org

Layered Pizza with Chapatis

Layered Pizza with chapatis
Crispy, Layered Pizza with Chapatis

When it’s this easy to make flavorful, delicious pizza at home, I can only imagine restaurants suffer. Why? This homemade crisp pizza tastes as good or better as any thin crust pizza I have ever had in a restaurant.

I started with few leftover chapatis of yesterday. I added the tomato chutney layer and topped with red beans and cheese. Baked in an oven for few minutes, the outcome was a scrumptious looking, saliva inducing meal. An impressively, easy way to satiate the pizza cravings without doing the back-breaking pizza labor.

Red Beans, Onion, Garlic, Chilli, Tomato, Cheese and Chapati
Red Beans (Adzuki, Chori), Chutney Ingredients, Chapatis and Cheese ~ Ingredients for Chapati Bake

Recipe:

1. Pressure cook: One cup red beans (soaked in water overnight beforehand) to tender or use the canned red beans.

2. Prepare chutney: In a skillet, add oil and cook coarsely chopped one onion, two tomatoes, three cloves of garlic and four chillies to brown. Cool, then add salt and blend to coarse puree.

3. Take fresh or leftover chapatis, about 4 to 6. Cut each chapati to 4 wedge-shaped pieces of equal size.

4. Slice to thin strips or grate cheese. I used Monterey Jack cheese in this recipe – About half cup.

Before Meal Time:

Preheat the oven to 400°F.

In an iron skillet or in an ovenproof dish:
First, place the chapati pieces, then on top, add and spread tomato chutney to a thin layer. Sprinkle some red beans, cheese and cilantro. Continue until the last chapati, ending with a layer of the chutney, beans and cheese on top. Place the skillet in the oven and bake at 400°F for about 10-15 minutes, until the cheese melts and chapatis start to brown. Remove, slice and serve.

The whole combination of baked chapatis, spicy tomato chutney, red beans and cheese came out very well and tasted real good.

Slice of Red Bean Pizza
A Slice of Layered Pizza

This recipe was first published on Mahanandi, on September 19th, 2005.

Posted by Indira©Copyrighted in Revisiting Old Recipes (Wednesday July 25, 2007 at 9:05 pm- permalink)
Comments (17)

The New Home of Mahanandi: www.themahanandi.org

Marathi Usal with Sprouted Peas & Spinach

Sprouted Vatana (batani, peas) on a Spinach Leaf

Sreemathi Kamalabai Ogale, my authority on Maharashtrian vegetarian cuisine has written in Ruchira that usal can be prepared with fresh or rehydrated dried peas and also with sprouted ones. So, I reserved a cup of sprouted peas to try the usal recipe today. I couldn’t resist adding little bit of green – the fresh spinach from the local ritu bazaar. Two pretty and ordinary foods together became an extraordinary combination, all thanks to miracle like Marathi usal recipe. What a way to enjoy the sprouted peas!

Recipe:

1 teaspoon peanut oil
¼ tsp each – mustard seeds and asafetida
1 cup – yellow and green sprouted peas
1 bunch – fresh spinach, finely chopped
¼ tsp turmeric
2 tablespoons fresh coconut gratings, 4 green chillies and ¼tsp cumin
(blend to smooth paste)
Salt to taste or ¼ tsp

Heat peanut oil in a wide skillet.
Add and toast mustard seeds and asafetida.
When seeds start to pop, add the sprouted peas and reduce the heat to low.
Sprinkle handful of water, cover and steam-cook the peas to tender.
Add the chopped spinach.
Sprinkle turmeric, coconut-chilli-cumin ground paste.
Mix and cook until the spinach collapses. Season with salt and serve hot.


Sprouted Peas and Spinach Usal ~ A Fine Sidedish for Rice and Chapati

Posted by Indira©Copyrighted in Peas (whole),Spinach,Sprouts (Molakalu) (Tuesday July 24, 2007 at 9:05 pm- permalink)
Comments (20)

The New Home of Mahanandi: www.themahanandi.org

Scrumptious Subjis ~ Sprouted Pea Subji

In pale green and yellow colors, the dried peas make pleasant looking sprouts. The sprouting process changes dried peas to tender and also enhances the natural sweetness unique to peas. And when cooked together with tomatoes and spices, sprouted peas make a robust and filling meal.

Both green and yellow colored dried peas can be purchased from Indian grocery shops. To sprout, soak the peas in water overnight. Next day, drain the water and gather the peas in a clean, breathable cotton cloth. Place them in a basket, cover, and keep the basket at a well ventilated windowsill or warm area in the home. Don’t let the cloth dry. Spray water to supply moisture necessary for sprout growth. Usually within a day, sprouts start to appear and wait another day or two, to grow them the size shown in the photograph.

Green and Yellow Vatana  Sprouts
Green and Yellow Sprouted Peas

Recipe:

1 teaspoon peanut oil
4 curry leaves and a pinch each cumin and mustard seeds
1 onion and 4 tomatoes – finely chopped
1 cup green and yellow sprouted peas
2 tablespoons roasted cashews – ground to fine powder
½ tsp each – ginger-garlic paste and garam masala powder
¼ tsp each – turmeric, red chilli powder and salt or to taste
Lemon/lime juice to taste

In a big saucepan, heat the oil until a curry leaf tossed in it sizzles. Keep the heat to medium. Add the curry leaves and toast to pale brown. Toss in cumin, mustard seeds. When seeds start to splutter, add the onions and ginger-garlic paste. Stir fry few minutes until onions soften. Stir in tomatoes, sprouted peas and about a cup of water. Cover the pot with a lid and cook.

When peas start to get tender, stir in the garam masala powder, turmeric, chilli powder, salt and cashew powder. Add water if the subji looks too dry. Mix and simmer until peas reach the tenderness you desire. Serve the Subji warm with lime juice sprinkled on.

We had it with paratha and a cup of yogurt on the side. Good meal.


Punjabi Inspired Sprouted Pea Subji
for RCI: Punjabi Cuisine Event Hosted by Richa of As Dear As Salt

Posted by Indira©Copyrighted in Peas (whole),Sprouts (Molakalu) (Monday July 23, 2007 at 7:45 pm- permalink)
Comments (16)

The New Home of Mahanandi: www.themahanandi.org

« Next PagePrevious Page »