Mahanandi

Living in Consciousness ~ Indi(r)a’s Food and Garden Weblog

Rosematta Idly

This Image is Copyrighted and Property of www.nandyala.org/mahanandi. Do Not Steal
Rosematta Rice and Idly Batter

Imagine munching on the fluffy clouds. That was my experience of Rosematta idlies.

Rosematta rice, the ancient terracotta colored rice from Kerala region of India and the nutritional urad dal are soaked and ground together. After overnight fermentation, the batter is steam-cooked in a special saucer like molds. The result is pinkish-white idlies that are lightweight, delicate and fluffy. They are worth preparing just to take in the breathtaking pale pink color alone. Of course, it also helps that they taste wonderfully good the way idlies should taste.

Rosematta idlies are truly for nostalgic dreamers only, the ones who find munching on the clouds a familiar thing to do.

This Image is Copyrighted and Property of www.nandyala.org/mahanandi. Do Not Steal
Rosematta Rice and Urad Dal ~ After Six hours of Water Soaking

Recipe:
(for 12 to 16 idlies)

2 cups Rosematta rice
1 cup urad dal
Idly molds for steam-cooking

Soak rice and urad dal in about 6 cups of water for about 6 hours. Drain the water and grind to silky smooth consistency using a stone grinder or blender. Remove and keep the batter covered in a warm place, overnight or for about 8 hours. Fermentation happens naturally, and yeast/baking soda etc are not used in this traditional method. The batter doubles in size and small bubbles appear in the batter. That means time to cook idlies.

Add one teaspoon of salt to the batter and mix thoroughly. Pour the batter into idly mold impressions and steam-cook, following the method described in detail here. When the batter turns from runny to firm, remove the mold and using a spoon carefully separate idlies from the impressions.

Serve hot. Coconut or peanut chutney and shallot sambar is the usual accompaniments to idlies.

This Image is Copyrighted and Property of www.nandyala.org/mahanandi. Do Not Steal
Rosematta Idly with Coconut Chutney ~ Our Weekend Brunch

Notes:
Rosematta rice, also known as Kerala Red Rice is avialable in Indian grocery shops here in US.
Recipe Idea : From My Brain

Posted by Indira©Copyrighted in Biyyamu (Rice),Rosematta Rice (Monday May 21, 2007 at 3:33 pm- permalink)
Comments (28)

The New Home of Mahanandi: www.themahanandi.org

Curry with Fresh Amaranth (Thotakura)


Fresh Amaranth (Thotakura) Leaves, In Different Stages of Development ~ for JFI-WBB: Greens

“The People of The World Shall Eat Amaranth” says a Richard Thomas and I agree.

Amaranth, like the temple Amarnath, has a devoted following. From India to Inca, amaranth is loved and praised for its nutritional benefits. If there is a vegetable valedictorian in green leafy vegetable world, then amaranth must be it. In our hometown, Nandyala in India, bunches of fresh amaranth leaves are a common sight at ritu bazaars (farmer markets) and sold under the name of Thotakura or Koyagura. Translation “garden leaf”. Just one seed is enough, amaranth spreads and makes the garden look vibrant with its beautiful red tinged-green leaves, so the name. Here, they are sold as Amaranth/Red Spinach/Chinese Spinach and available in most of the Indian and Southeast Asian grocery shops, during spring and early summer.

Amaranth (Thotakura) leaves start out green when they are tiny. As they grow, the red streak begins to appear and becomes prominent, almost covering the entire leaf in mature leaves. The leaves are stronger than regular spinach and on cooking do not ooze much water. The flavor of cooked amaranth leaves is more prominent and way better than that of spinach or other similar greens. Traditionally we prepare curries and also add the leaves to flavor dals. A quick stir fry, together with garlic, onions and green chilli-coconut powder is the popular method of cooking. And the curry is often served as a side dish to rice and dal, or chapati and dal. A cup of yogurt on the side makes this combination a complete meal for us.


Chopped Amaranth Leaves, Green Chilli-Coconut (Grinded and Shaped into a Round) and Onions

Recipe:

1. A bunch of fresh amaranth (thotakura), medium sized onion and garlic clove.
Pluck the leaves and tender stalks. Wash and drain. Finely chop the leaves, stalks and also onion and garlic to small pieces.

2. Four green chillies and a tablespoon of fresh or dried grated coconut.
Grind green chillies, coconut powder and a pinch of salt to fine consistency in a blender/spice grinder or in mortar with a pestle.

3. A teaspoon oil and quarter teaspoon each- urad dal, cumin & mustard seeds.
Heat oil in a wide skillet. Add and toast urad dal, cumin and mustard seeds, in that order.

4. Add garlic and onion. Stir fry to soft.

5. Add finely chopped leaves and stalks. Also, sprinkle green chilli-coconut powder and turmeric. On medium-high, cook until the leaves wilt. Sprinkle salt to taste and mix. Cook another couple of minutes and serve hot.


Amaranth (Thotakura) Curry with Chapati and Plantain Moong Dal

Fresh amaranth:
Nutritional Benefits
In Indian languages – Thotakura, Koyagura (Telugu), Cheera (Malayalam), Chaulli or Chowlii Chauli, Chavleri Sag (Hindi, Punjabi)
In Other languages – Red spinach, Rau Den, Chinese spinach, Hon-toi-moi, Yin choy, Eeen choy, Hsien tsai

Posted by Indira©Copyrighted in Amma & Authentic Andhra,Thotakura (Amaranth) (Monday April 16, 2007 at 8:28 am- permalink)
Comments (27)

The New Home of Mahanandi: www.themahanandi.org

Menthi Beerakaya (Methi-Turai Curry)

Our kitty, Kittaya enjoys greens. He likes to eat cilantro, wheat grass and catnip. His latest green find is methi (fresh fenugreek leaves). He picks up a branch with his mouth and walks around the house munching on the leaves. Kitties are notoriously finicky eaters, some of you may know this already and we are extremely happy with his new choice. See, we like fresh methi too. So the recent routine is, almost every week we buy a bundle of fresh fenugreek from local Indian grocery shop. I keep few branches for Kittaya on the side in a vase. With the remaining I was trying out different recipes. One such recipe is methi with ridge gourd (turai, beerakaya). Sweet tasting vegetables like ridge gourd and potato etc compliment potent fresh methi. Easy to prepare, decent curry to have with chapatis or with rice and dal. A different taste but nonetheless a good one.

Fresh Fenugreek Leaves and Ridge Gourd Pieces (Turai, Beerakaya)
Fresh Methi and Ridge Gourd Pieces

Recipe:

2 ridge gourds (peel the ridges, wash and chop to bite sized pieces)
1 bunch fresh fenugreek (Wash and chop or pluck the leaves)
1 onion – finely chopped
6 green chillies and one tsp of grated coconut – finely ground in a spice grinder
Turmeric and salt to taste
Ingredients for popu or tadka (1 tsp each – oil, curry leaves, cumin and mustard seeds)

Heat oil in a wide skillet. Add and toast popu ingredients in the order listed. When mustard seeds start to jump around, add the onion. Saute until the onion pieces soften. Add ridge gourd pieces. Mix. Cover and cook on medium heat for about 10 minutes. Ridge gourd pieces usually are tender and they cook fast. Methi leaves won’t take more than two or three minutes to wilt/cook.

At the end of 10 minutes, add methi leaves, green chilli-coconut paste, turmeric and salt. Mix and cook for another 5 minutes, stirring in-between. Serve hot with rice or with chapati.


Methi Turai Curry (Menthi Beerakaya) with Plain Toor Dal Rasam and Rice ~ Our Meal Today

Posted by Indira©Copyrighted in Amma & Authentic Andhra,Beera kaaya(Ridge Gourd),Menthi Kura(Fenugreek) (Tuesday February 13, 2007 at 3:40 pm- permalink)
Comments (18)

The New Home of Mahanandi: www.themahanandi.org

Scrumptious Subjis : Chayote in Chilli Sauce (Bengaluru Vankaya Kurma)

Chayote in Chilli Sauce (Chayote Kurma)

Just a little color dabbed on the cheeks can do wonders to a pale, lifeless face. Same thing, small dose of vibrant chilli sauce can do wonders to otherwise bland, mild flavored chayote. Just add a dash of chilli and a pinch of spice. Sprinkle some tamarind juice and touch of tadka – here we go. Utterly lip-smacking yet not at all overblown. Impressively energetic but balanced with a persistent sweetness from chayote. Another traditional, savory and scrumptious sabji would be ready. We usually have this sabji with sorghum roti or with chapatis.

Cubed Chayote and Powdered Ingredients for Chilli Sauce

Recipe:

1 chayote – peel, slice to half, remove seed and dice to bite-sized cubes
1 onion – finely chopped

For chilli Sauce:
5 dried red chillies
2 tablespoons – dalia (pappulu, bhuna chana)
1 tablespoon – grated coconut (fresh or dried)
1 tablespoon each – powdered jaggery and tamarind juice
1 teaspoon – mustard seeds
½ teaspoon – cumin
¼ teaspoon each – salt and turmeric
Take all of the above and grind to smooth in a blender or spice grinder.

For popu or tadka:
1 tsp each – oil, minced garlic, curry leaves, dried red chilli pieces, cumin and mustard seeds

………

In a wide skillet, heat oil. Add and toast the popu or tadka ingredients in the order mentioned above.

When the mustard seeds start to dance, add onions and chayote cubes. Cook, stirring occasionally for about 5 minutes.

When the chayote starts to soften, add the powdered chilli sauce ingredients and one cup of water. Mix. Have a taste. Adjust the salt and jaggery sweetness level to your liking.

Cover and simmer for about 15 to 20 minutes until the chayote becomes tender and chilli sauce thickens and coats the spoon.

Serve warm with a cup of yogurt or tea on the side. Taste great with sorghum roti/chapati/naan. (Not that good with rice.)

Chayote Kurma with Naan and a Cup of Tea

Posted by Indira©Copyrighted in Chana Dal-Roasted (Dalia),Chayote (Cho Cho),Dried Red Chillies (Wednesday January 24, 2007 at 6:32 pm- permalink)
Comments (27)

The New Home of Mahanandi: www.themahanandi.org

Tandoor ~ The Great Indian Barbeque Cookbook Review, Poem and Recipe


Cookbook by Ranjit Rai

Seattle’s public library system has the biggest collection of cookbooks I have ever seen, and it covers a gamut of traditional and contemporary cuisines. Whenever all-day rain is in the forecast, I pack up a bag and hike to the library to spend the day. The library is spacious, vibrant, well-lit, and equipped with WiFi system. We can either browse through the bookshelves or sit in a corner and surf away on laptops. Stepping inside the library is my way of shutting out the gloom and grayness of winter, so I go.

One such day last week, I was in the cookbooks aisle, my usual hangout place at the library. Flipping the pages of various cookbooks, trying to decide which deserved the 10-minute trek back home. I usually place cookbooks into two categories. Books that are worthy of the paper they are printed on and books that would make even the docile trees of the rainforests cry. After all the sacrifice made of these gentle giants in the name of nourishing the human mind, the trash printed in the name of food and sustenance would make any decent person weep with disgust. We have to pulp the green to mint the green, I know that, but some cookbooks are truly a violation of everything that the rainforests stand for.

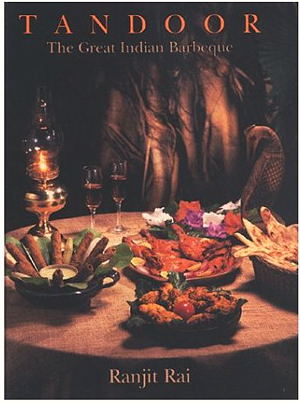
But I digress. So here I was in the pursuit of cookbooks worthy of my energy. The Seattle public library did not disappoint me. I found one that made me stop looking further. The book was titled “Tandoor – The Great Indian Barbeque”. It is not often that one finds a cookbook dedicated to a cooking technique as ancient as the 5000 years old tradition of tandoori. I had to pick it up. What a wonderful use of my time it was to read that book! “Tandoor” is written by Ranjit Rai of New Delhi. He had diligently detailed a manuscript on tandoor cooking, but had passed away before it could be published. His daughter and his best friend together edited and completed the publication of the book.

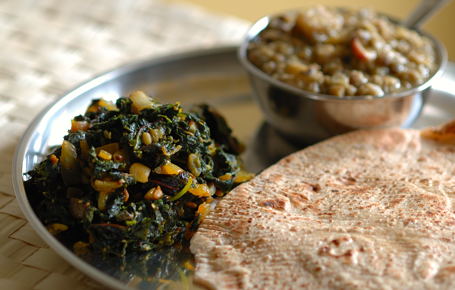
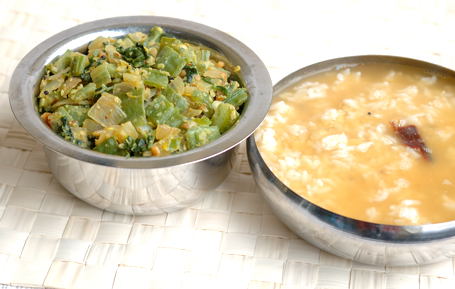
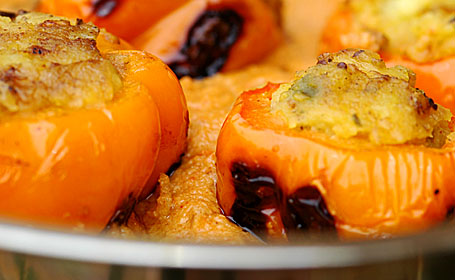
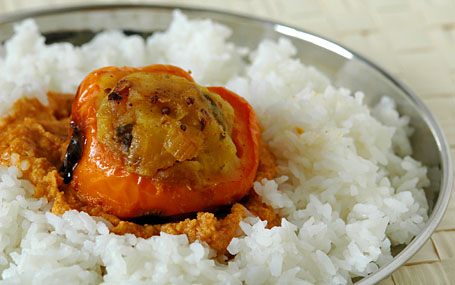
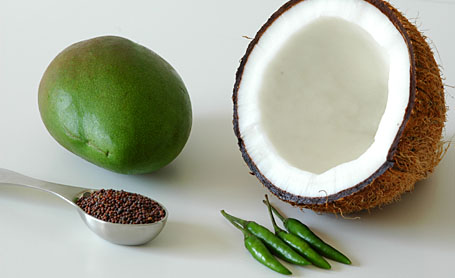
I can truly say that this cookbook is like the Bhagavad Gita for connoisseurs and lovers of fine cooking. Everything one would ever want to know about tandoor, the kartha, karma, kriya are described in detail. The first part of the book is dedicated to the history and different types of tandoor. Useful tips and tricks – how to construct a tandoor in your backyard, and how to adapt tandoor-style cooking to an apartment kitchen – are recited in eye-opening detail with captivating pictures. The second part of the book is about the karma, the basic work and preparation needed for tandoor cooking. Different types of tenderizers, marinades and masala powders that add special touch to tandoori dishes – what, how and why – are narrated with scientific explanations. Part three includes tandoor recipes for poultry, lamb, fish, vegetables, and breads. The book has a total of 105 recipes and each recipe is accompanied by one or two photographs of either the preparation stages or the finished product. Classic crowd-pleasers such as tandoori chicken, cocktail kababs, masala chops, tandoori jhinga, and paneer tikka along with kababs and tandoori rotis – you will find them all in this book. In spite of coming from a family with non-vegetarian food traditions, I have consciously avoided meat all these years. But even I cannot resist a masala tikka if it is cooked and served in the manner described in this book. That tempting!

Whether you are a culinary enthusiast or simply browse cookbooks as a pastime, if you ever come across this book in a bookshop or at your local library, please stop and pick it up. Mr. Ranjit Rai’s meticulousness and passion will leave you awestruck, as it did me. What a wonderful tribute to the timeless tradition of tandoor cooking! Well done! My vinamra namaskar to the father and daughter team.

double_curve.gif

Ode To The Tandoor ~ By Ranjit Rai
(excerpt from “Tandoor”)

Fired from below Ranjit Rai (1923 - 1993)
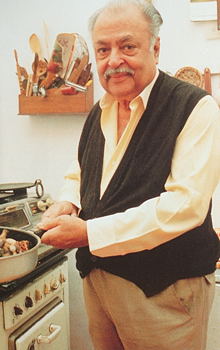
And cascading hear from above
Made from mother earth
By gently hands of women in love
Charging the clay with strength
Thou wondrous oven
Fail-safe cooker of goodness and health

From Unknown time
Through millenniums you serve
Now underground now from above
‘Big’, aromatic, baking and roasting
Accepting grain, meat and dove
The chicken brought you fame
And now on every lip is your name

You sit burning for others
Calling bring your meal ‘bread and dough’
And stir around me ‘timber’
Warm yourself a moment
The day’s work is done
Pay homage to the world’s greatest preserver.

Sri Ranjit Rai (1923-1993)

double_curve.gif

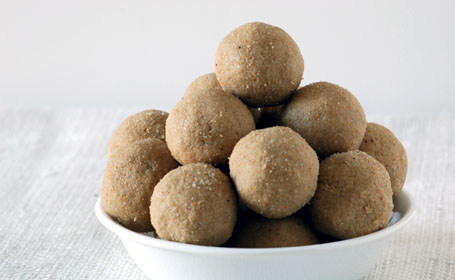
Hare Chane ki Seekh (Green Chickpea Kababs)
Recipe from “Tandoor”, page: 229

Like the author’s family, we too grew up with the tradition of indulging in green chickpeas (hare chane) during season. Like fresh peas of spring, green chickpeas taste wonderfully sweet with the delicate, earthy scent of the motherland. Fresh foods like these belong to a special category and the associated memories always make them irresistibly spectacular to me.

Seekhs/kababs prepared from fresh chickpeas, without a doubt are a great tandoori snack item. So here is a recipe from the “Tandoor” cookbook, adapted to my apartment’s electric-powered oven.

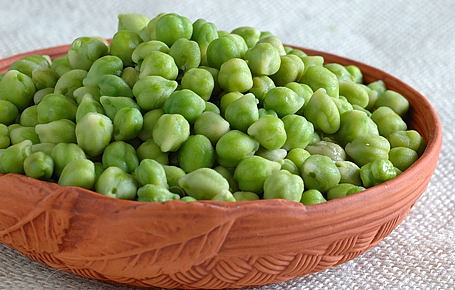
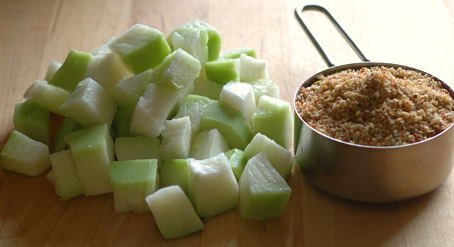
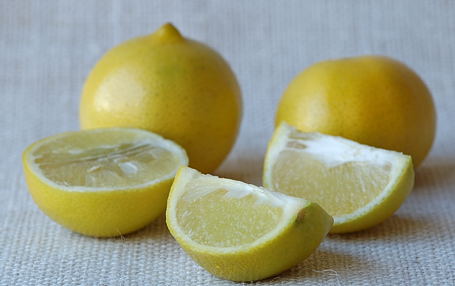
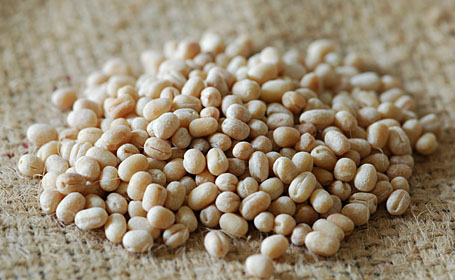
Fresh Chickpeas (Hare Chana, Cholia)

Ingredients and Method:
(for 7 or 8 medium sized kababs)

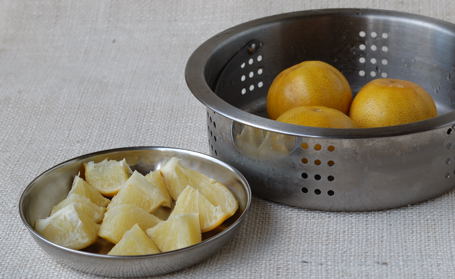
2 cups green chickpeas (hare chane, cholia)
1 small red onion or 2 shallots – finely chopped
1 teaspoon – cumin and quarter teaspoon – salt
1 tablespoon – peanut oil/ghee
2 tablespoons – gram flour/besan (acts as binding agent)
Half cup hung-yogurt (hang yogurt in a thin cotton cloth overnight to drain water)
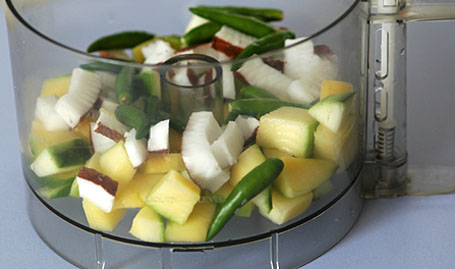
6 green chillies, 4 curry leaves, 2 garlic, 1-inch ginger, 1 tablespoon grated coconut and pinch of salt – grind them together to smooth consistency in a spice grinder or in a mortar with pestle

Skewers – 3
side dish – a cup of yogurt and grilled baby onions

Hung-Yogurt, Green Chilli-Ginger Paste, Shallots
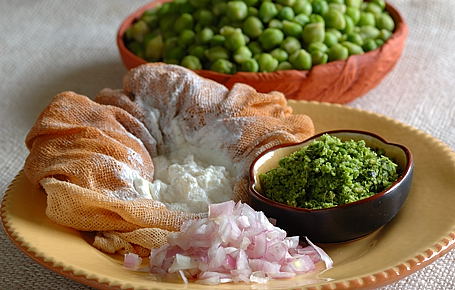
Hung-Yogurt (Yogurt Cheese), Green Chilli-Ginger Paste, Shallots

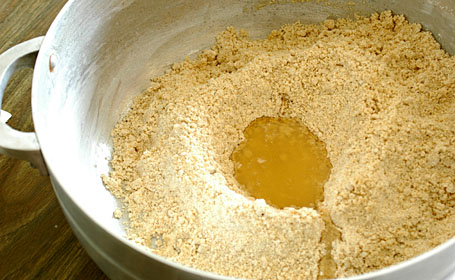
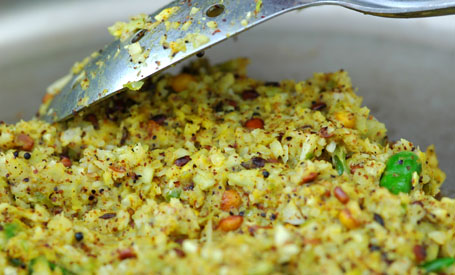
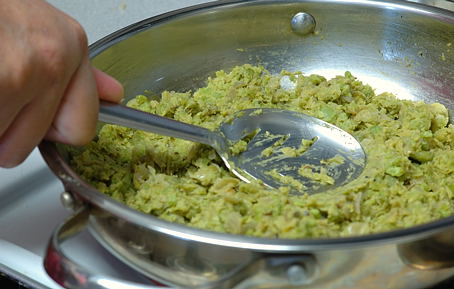
In a wide skillet, heat oil/ghee. Add and toast cumin first . Then add and saute onions plus green chilli-ginger paste. When onions are pale red, add green chickpeas. Mix. Cover and cook on medium-low heat for about 5 minutes, until the chickpeas soften a bit. (Like fresh green peas, green chickpeas cook fast.)

Add hung-yogurt and salt to taste. Mix and cook on low heat, until water evaporates from yogurt. With the back of the wide, slotted spoon, mash the whole thing to coarsely smooth consistency. Sprinkle besan flour and mix. Let cool.

Mashing the Cooked Chickpea-Spice Mixture
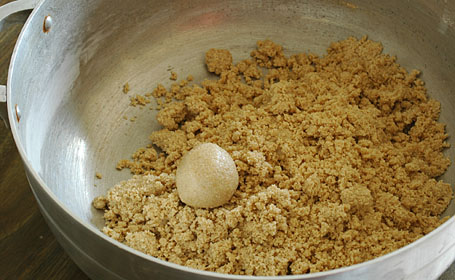
Mashing the Cooked Chickpea-Chilli Saute

Oil and wipe the skewers. Shape the mashed chickpeas into chilli shape directly onto the skewers. Apply gentle pressure while shaping the kababs. Place skewer on a baking pan.

Chickpea Kababs Ready for Grilling
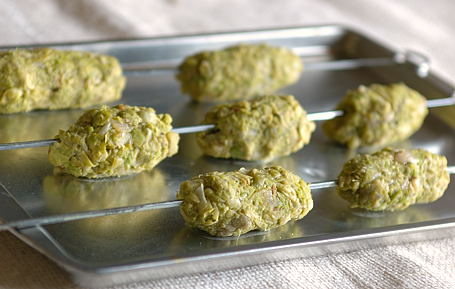
Chickpea Kababs Ready for Grilling in Oven

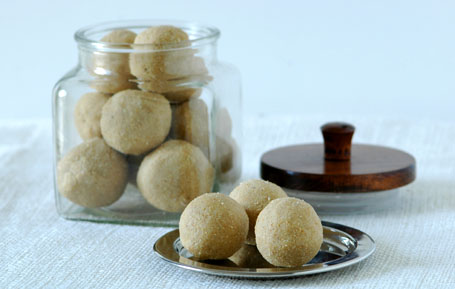
Once ready, place the pan in oven and broil, each side for about 4 to 5 minutes. Using a fork and fingers, carefully turn each kabab to opposite side for uniform cooking and broil to pale gold color.


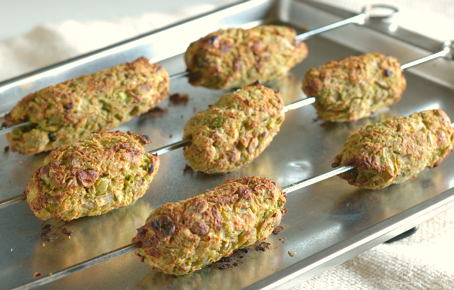
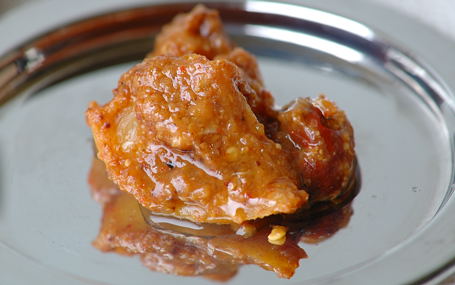
Grilled (Oven-Broiled) Golden Chickpea Kababs

Serve hot with a cup of yogurt and some grilled pearl onions/small shallots.


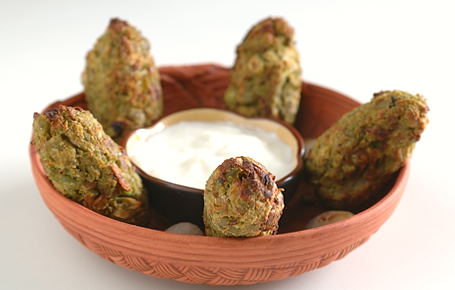
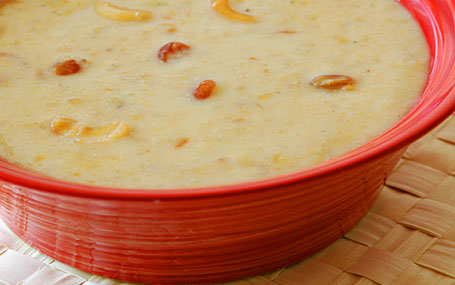
Hare Chane ki Seekh (Green Chickpeas Kababs) with Yogurt and Grilled Onions
My Entry to “Saffron, White and Green” Event at Puja’s My Creative Ideas.

Notes:
Book Cover, Ranjit Rai photo and “Ode to the Tandoor” poem is taken from “Tandoor” cookbook (Copyright:Anuradha Ravindranath) for review purpose.
Thanks V!
Available at : Amazon, Powell’s.com, Indiaclub.com
Recommend this book to your local libraries.

Posted by Indira©Copyrighted in Hara Chana(Green Chickpeas),Reviews: Cookbooks,Yogurt (Monday January 22, 2007 at 2:03 pm- permalink)
Comments (30)

The New Home of Mahanandi: www.themahanandi.org

Mitha Nimboo Chutney (Sweet Lemons Pickle)

Mitha Nimboo (Sweet Lemons, Karinaaranga)

Nandyala is closer than ever here in Seattle for me. I am able to find all kinds of vegetables and fruits, which I’d normally find in India, without looking hard. Even in winter. Example is these sweet lemons or mitha nimboo. We purchased them last week from a grocery store named Lenny’s Market. I’ve never thought I’d see this type of lemons outside of India, but here they are, for sale in Seattle, unbelievably fresh and at low prices.

Usually, we prepare lemonade with sweet lemons. The lemonade tastes like plain, flat sugary water without the acidity and perfume of lemons. The juice is naturally very sweet, similar to kalkand water. Prepared mainly for children during hot summer months of Andhra. That’s only thing we do with them but LG of Ginger and Mango recently wrote a Kerala recipe with sweet lemons called “Karinaaranga Curry” (Lemon Curry) – combination of curry and pickle. I had to try.

Unlike the regular lemon pickle, there is no mandatory 2-week waiting for this one. Preparation method is also different. Here we steam-cook the sweet lemons as whole. Then cut and simmer them with pickle masala powder, salt, little bit of tamarind and jaggery. Curry leaves touch of tempering. That’s it. It’d be ready to have immediately with rice, and with breakfast items like upma, dosa etc. Mildly hot and spicy, little bit sour and bitter without the characteristic lemony puckering effect. Metha Nimboo pickle is definitely different from the regular pickle and worth a try. This is my first time; still it came out good and tasty. All because of Dear Inji Pennu’s neat recipe instructions. Thanks Inji Pennu and a very Merry Happy New Year to you!

Steam-Cooked Mitha Nimboo/Sweet Lemons ~ Ready for Pickling

Recipe:

Prep work:

1. Soak lemon-sized tamarind in warm water for about 30 minutes to soften. Squeeze juice and keep it aside.

2. Fill a big pot with water and bring it to a boil. Insert the perforated vessel suitable to steam cook. Drop 4 sweet lemons in it. Cover the pot and cook them for about 15 to 20 minutes, until the firm skin softens a bit (like shown in the photo above). Remove them from the vessel. Cut – half and half and then quarter them to small pieces. Remove seeds.

3. Meanwhile prepare the pickle masala. Roast and grind following items:

1 tablespoon each – urad dal, chana dal, raw rice, coriander seeds
1 teaspoon – fenugreek seeds (menthulu)
8-10 each – dried red chillies and curry leaves
Roast them in an iron skillet one by one or all together to gold color.
Grind them all to smooth powder in a grinder or spice mill.

Preparing the Pickle:

In a non-reactive saucepan, combine tamarind juice and pickle masala. Stir in 2 cups of water and a tablespoon each- powdered jaggery and salt. Cook for about 5 minutes on medium heat, stirring frequently. Add the cut, steam-cooked sweet lemon pieces. Reduce the heat to medium-low. Cover and simmer for about 15 to 20 minutes, stirring in-between, until the mixture becomes thick. Keep the heat as low as possible to prevent burning.

Just before when you turn off the heat. Do the popu or tadka. In a small pan, heat a tablespoon of peanut or sesame oil. Add a teaspoon each – dried red chilli pieces, curry leaves, cumin and mustard seeds. Toast them to red and when mustard seeds start to dance around – add the whole thing to the pickle and mix thoroughly.

When the pickle is cool enough, transfer it to clean, dry glass/ceramic jar with non-reactive airtight lid. I’ve prepared this pickle last week and kept in the refrigerator. It’s good stuff.

Mitha Nimboo Chutney (Pickle with Sweet Lemons)

Recipe source: Karinaaranga Curry (Lemon Curry) from Inji Pennu of “Ginger and Mango”
sweet lemons for sale in Chennai
More about sweet lemons – here
Mitha = sweet, Nimboo= lemon/lime

Posted by Indira©Copyrighted in Limes/Lemons,Mitha Nimboo(Sweet Lemon) (Monday January 8, 2007 at 6:11 pm- permalink)
Comments (5)

The New Home of Mahanandi: www.themahanandi.org

Chayote Curry (Bengaluru Vankaya Kura)

Chayote (Bengaluru Vankaya or Cho Cho)

Cho Cho, Christophen, Mirliton, Xuxu – the vegetable Chayote has more names than any other vegetable, I think. The name changes with ethnicity of grocery shop. In Nandyala, my hometown in India, chayote is sold as ‘Bengaluru Vankaya’. Our tiny town imports this vegetable from Bengaluru (Karnataka) region, so the name. The kind we get has more prominent ridges, unlike the very smooth surfaced ones that’s common here. Pale green and pleasantly sweet, chayotes are favored in curry and sambar preparations in our area.

Although available year round, this is the season, where you would see the prices come down for this vegetable here in US. We can buy 2, or sometimes 3 chayotes for a dollar. And 2 are needed to make a decent portioned curry to eat with chapatis for two people. Often I combine the chayotes with potatoes and carrots to make it more substantial and to last at least two meals for us.

Mild flavored chayotes dressed up in coconut-chilli seasoning and little bit of turmeric, together with potatoes and carrots make a delicious curry and a welcome addition to the meal at any time of the day.

Choyate cut to half, seed removed and diced to cubes
Choyate cut to half, seed discarded and diced to cubes

Recipe:

2 each – chayotes, small red potatoes and carrots – lightly peeled and cubed to bite sized pieces. I usually remove and discard the seed from chayote (see the photo above) following the traditional method. Reason given by elders is that seeds are not good for health. I am not sure how true that saying is but still I follow.

1 tablespoon of fresh grated coconut and 6 small green chillies – grind finely in a spice grinder or in a mortar.

½ cup of fresh green chickpeas (green garbanzos/Hara chana or Choleye)
½ teaspoon each – salt and turmeric

popu or tadka ingredients – 1 tsp each – peanut oil, cumin, mustard seeds and 4-6 curry leaves.

———-

In a wide skillet, heat peanut oil on medium heat. Add and toast curry leaves, cumin and then mustard seeds. When seeds start to jump around, add the green chickpeas. Saut? them for few minutes.

Add the chayote, potato and carrot cubes. Cover and cook on medium heat for about 10 to 15 minutes, stirring in-between. Just when they are getting tender, stir in the green chilli – coconut paste, salt and turmeric. Mix thoroughly and cook for few more minutes, covered until the vegetables reach the tenderness you desire. Chayote releases water on cooking and this water helps to tenderize the potatoes and carrots.

Serve warm with chapatis or with naans.


Chayote curry wrapped in chapatis with a cup of yogurt on the side ~ Our afternoon meal

Fresh, green chickpeas purchased from – Indian grocery & and also at Trader Joe?s Frozen section.

Posted by Indira©Copyrighted in Amma & Authentic Andhra,Baby Potatoes,Carrots,Chayote (Cho Cho),Hara Chana(Green Chickpeas) (Wednesday January 3, 2007 at 2:02 pm- permalink)
Comments (13)

The New Home of Mahanandi: www.themahanandi.org

Stuffed Bell Peppers (Capsicums)

Capsicum (Bell Pepper)

Hollywood often portrays the pretty blonds as cute and dumb. The same role in vegetable world is filled by bell peppers or capsicums. I think.

Bell peppers are colorful! Look so pretty, cute and also would bring that much needed (in some eyes) color and attraction when added to a dish. They are popular mainly for that reason and they have hollow insides, giving the impression of empty pretty heads just like the blond stereotype. No wonder we are tempted to fill them up. Almost every cuisine has several stuffed recipes for bell peppers. Rice, meat, lentils, nuts and cheese, every other thing in food world is used to stuff the bell peppers. Even other vegetables,… aah, the humiliation. The bell peppers must feel mortified when we fill them up with other veggies. But graceful they are, they won’t show it. They stand our mistreat and still look pretty. Such graciousness always invites strong reaction; people would hate or love them. But few could resist their charms.

One such charming, capsicum recipe is from India. Here the bell peppers are stuffed with spiced mashed potatoes and cooked to brown and then placed in peanut-sesame sauce. Served with rice or chapati, this is a meal fit for a rani (queen). Though the recipe makes us work like kitchen helpers in a rani’s kitchen, once you wipe off the sweat from the brow, once it’s plated, you would feel like a rani. Worth the effort, that’s what I am saying.:)


Capsicums Stuffed With Potato Curry – Ready For Browning

Recipe:

Potato Stuffing:
Good quality potatoes (red or baby alu) – 3 or 6, Pressure-cook or boil them in water, until tender. Remove the skins, mash them to smooth paste.
In a pan, heat a teaspoon of oil, do the tadka (toast ¼ tsp each – mustard seeds, cumin and curry leaves). Saute finely chopped pieces of one onion, 4 green chillies and a fistful of fresh peas. Add the mashed potato. Stir in salt, turmeric and one teaspoon of clove-cinnamon-cumin-coriander seed powder (garam masala). Mix them all well. Cook covered on medium-low heat for about 10 to 15 minutes – That’s our potato stuffing for bell peppers.

Bell peppers (Capsicums):
Pick 6 small sized, fresh and firm bell peppers – any color (green, red, yellow or orange) or color combination is fine. This curry is all about appearance and size matters. Small sized capsicums are perfect for this curry. Jumbo regular grocery (US) type are too big and the curry won’t look good when prepared with them. (Local farmers markets here in US, often carry small sized ones during summer time.)

Cut the tops off. Remove the seeds and membranes inside and make a hollow. Fill them up with potato curry to the top.

In a big iron skillet, heat about 1 tablespoon of peanut oil. Place the stuffed bell peppers neatly in a circle and cook them covered on medium heat for about 15 to 20 minutes. Turn them to sides in-between so that they could get brown evenly on all sides. (You could also cook these stuffed bell peppers in oven – baking and broiling at 375 F until they are soft and tender to touch.)


Stuffed and Cooked Capsicums in Peanut-Sesame Sauce

Peanut-Sesame Sauce:
Toast quarter cup each – peanuts and sesame seeds to golden color. Take them in a grinder, add 2 cloves and 2 one-inch pieces of cinnamon, half teaspoon each – chilli powder and salt and a tablespoon of tamarind juice and powdered jaggery . Grind them to smooth paste.

Heat a teaspoon of peanut oil in a big pan. Add the peanut-sesame sauce and about a half cup to one cup of water. Mix well. Simmer on medium heat for about 10 minutes. Have a taste and adjust salt, sweet and sour levels to your liking.

Add the stuffed capsicums to the thickened sauce. Cook for another 10 minutes on medium heat, covered. Serve with rice or with chapatis.


Stuffed Capsicum Curry with Rice

Notes:
Traditional North- Indian recipe does not inlclude the gravy, and cooking the stuffed peppers in peanut-sesame sauce is my version. Adding little bit Andhra touch.

Posted by Indira©Copyrighted in Bell Pepper,Peanuts,Sesame Seeds (Monday July 17, 2006 at 2:04 pm- permalink)
Comments (36)

The New Home of Mahanandi: www.themahanandi.org

Sunnundalu(Urad Dal Laddu)~Indian Sweets 101

Sunniundalu

When Sailaja of Sailu’s Food selected dals to feature this month’s Jihva For Ingredients, I was ecstatic. The one and only ingredient that truly represents India is the variety of dals, in my opinion. There are rice states and there are wheat states, but common to all 28 states in India are dals. Each state has dazzling array of dal dishes both sweet and savory. Menus always include dal dishes for everyday, for celebrations and as well as for festivals. Even in a foreign land, our meals always would include dals in one way or other. It’s not stretching the truth, when I say dal dishes are the true heart and soul food of India.

By the way, if you haven’t been to Sailaja’s blog already, please go visit now. She blogs from calm, coastal city of Vishakapatnam by the Bay of Bengal, from my home state Andhra Pradesh. Her recipes are visual delight and pure gold. Whenever I visit her blog, I feel happy to see her creations and also feel nostalgic about what I am missing being away from home.

As an entry to JFI~Dals, I have prepared Sunniundalu, a traditional Andhra sweet. Roasted urad dal is ground with sugar into super fine sand like powder, mixed with pure ghee, and the mixture is shaped into round balls. This sweet is much beloved because of its unique taste and nutritional value. These are often prepared for special occasions like baby showers (srimantham) etc., I am so happy that I am able to recreate this favorite sweet of mine for JFI, an event created to celebrate the natural ingredients.

Recipe:
(for 15 medium-sized laddus)

3 cups of whole urad dal – roasted to golden color slowly and on low heat, continuously stirring in a big iron skillet
1½ cups of sugar
1 cup of melted ghee at room temperature
For grinding – esirayyi (grain mill) or Food processor
How this sweet tastes, 50 percent, depends on grinding method. Old world stone grain-grinder is the traditional method of choice. High powered, sharp bladed, food processor comes close. Whatever machine/method you use, the end product must be like fine sand.

Whole urad dal - Roasted to light gold color
Whole urad dal – Roasted to light gold color

Grinding urad dal and sugar to superfine sand like powder using a grain mill

Adding melted ghee to the urad dal-sugar powder

Urad dal-sugar powder and ghee mixture being made into laddus
Urad dal-sugar powder and ghee mixture being made into laddus.

Sunnundalu
Indian Sweets 101 ~ Sunnundalu for JFI-Dals

Many thanks to Sailaja for hosting this month’s Jihva For Ingredients. I am sure the roundup of this event is going to be spectacular. The entries that I have seen so far – Munthirikkotthu (Sweet Moong Dal Balls), Dal Podi Sushi Roll (Indianized Sushi roll), Mid-Eastern Mujadarah (rice-lentil dish) and Azuki paste ravioli in caramel sauce make this obvious. Have a fun and happy dal day on this July 4th weekend, everyone!

Notes:
Grain mill brand Name: PORKERT’s Kitchen Grinding Mill, Type 150
Purchased at a clearance sale from Tuesday Morning.
Sailu’s Sunnundalu – Link

Posted by Indira©Copyrighted in Amma & Authentic Andhra,Ghee,Indian Sweets 101,Jihva For Ingredients,Mitai,Sugar,Urad Dal (Washed) (Saturday July 1, 2006 at 12:02 am- permalink)
Comments (53)

The New Home of Mahanandi: www.themahanandi.org

Moong Dal Payasam (Pesara Pappu Payasam)

A Cup of Moong dal Payasam
A Cup of Moong dal Payasam for Indian Sweets~101

If I have to choose between a cup of payasam and a slice of cake, I’d always go for the cup. Here, mothers prepare cakes lovingly; back in India, payasams are the norm. Every Saturday my mother would prepare payasam for puja naivedyam. I believe she prepared payasam mainly because of us, four little darlings:), who would come home from school hungry for something sweet. We had half-day school on Saturdays and afternoon meals at my mother’s home always included a type of payasam. Creamy rich with full of cashews and golden raisins, it was like spoonful of heaven on a warm afternoon.

Together between my mom and mother-in-law, there are recipes for at least a dozen different payasams. Who would really need a cook book when you have this type of rich resource right a phone call away? Because they all follow a basic method, it’s not that difficult to remember the procedure. Moong dal payasam is one such easy recipe I picked up from the family.

Moong dal is cooked in sweetened and thickened, rich poppy seed milk. Light golden hue, incredible, inviting aroma and delight to the senses – this is how I would describe this payasam.


Roasted in Ghee – Yellow Moong Dal

Recipe:

Moong dal, yellow (pesara pappu) – 1 cup
Sugar – 1 cup
Milk – 5 cups
Poppy seeds (Khus-khus, gasa gasalu) – ¼ cup
(Soaked in ½ cup of warm water for at least half an hour, to soften them)
Cashews and Golden Raisins, each – ¼ cup
Cardamom (Elachi, aluka) – 6
Ghee (neyyi) – 2 tablespoons

Prep Work:

1 In an iron skillet or tava, heat a teaspoon of ghee on medium heat. Add and roast, yellow moong dal until the color changes from yellow to light red and releases the wonderful fragrance. Remove them to a plate. Aromatherapy starts with this first step.

2 In the same iron skillet or tava, heat a tablespoon of ghee on medium heat. When it is hot, add and toast first golden raisins and then cashews. Golden Raisins puff up like little gold balloons and cashews turn from creamy white to light gold. Take care not to burn. Remove them to a plate.

3 Powder cardamom seeds to smooth powder in a mortar using the pestle or in a spice grinder.

Toasted in Ghee - Cashews and Golden Raisins
Toasted in Ghee – Cashews and Golden Raisins

In a pressure cooker, take roasted moong dal, sugar, milk and soaked poppy seeds along with the water it’s soaked in. Mix and close the lid. Pressure cook until two whistles. Once all the valve pressure is released, remove the lid and with a wood-masher or immersion blender lightly mash the dal. Pressure-cooking is my method; I follow it mainly for the convenience of not stirring and for the speed. In actual recipe, they would take all the ingredients in a wide, thick-bottomed vessel and cook until the dal reaches fall-apart stage. If you don’t have a pressure cooker at home, then follow the second method. It may take little bit more time, but the end result will be worth the trouble, I promise.

Add the toasted cashews and golden raisins along with the ghee they toasted in. Also stir in the cardamom powder to the cooked payasam. Have a taste and add sugar and milk, if needed. Simmer the payasam on medium-low heat about 20 to 30 minutes, until it reaches thick, creamy consistency. Serve warm or cold.


A Cup of Moong Dal Payasam with Poppy Seeds, Cashews and Golden Raisins

Poppy seeds can block the cooker nozzle and that may create a mess, if they not soaked in warm water beforehand. Soak poppy seeds in water first, if you are to cook this in a pressure cooker.
Chana Dal Payasam – Link

Posted by Indira©Copyrighted in Amma & Authentic Andhra,Indian Sweets 101,Milk,Moong Dal (Washed),Naivedyam(Festival Sweets),Poppy Seeds,Sugar (Friday June 9, 2006 at 8:31 pm- permalink)
Comments (45)

The New Home of Mahanandi: www.themahanandi.org

Mango-Coconut Pulihora (Mamidi Kobbarannam)

I started out my weekend with a plan. The plan was to prepare the famous Andhra mango pickle, ‘avakaya’, for next week’s JFI. You know about pickles. To prepare and present it, you need to make it at least one week in advance. So, I went to Pittsburgh and picked out the greenest mangoes available at one of the Indian grocery stores. The mangoes were very green and hard and so I was confident that they were unripe. On Sunday, I was in full pickle making mode. Cleaned out the kitchen, dried out any signs of moisture from counter tops and prepared all the essentials – mustard seed powder and red chilli powder. I was all ready to make pickle. But alas…

As often happens with the best laid out plans, things went awry. In this case, green, hard and thought to be unripe mangoes, when cut open, were ripe inside. The flesh was pale yellow and the taste was not very sour. I had to drop my plan to make pickle. Instead of going down the path of questioning my life in US, where I can’t even prepare my favorite pickle, I picked up my spirits and quickly found a use for my not so green, not so ripe mangoes. I remembered Mika’s comment about her way of preparing mango rice with coconut and also her recently blogged mango rice recipe. I had all the ingredients, including a fresh, decent coconut. Viola… the life in US looked much better.:)

I tried out the mango pulihora with coconut and mustard powder. Between the tangy sweetness of mango+coconut and the sharp, zesty flavor of mustard+chillies, the taste of pulihora was so unique and irresistible. I was glad that I tried this recipe, this one is a keeper. Thanks Mika.

Fresh coconut, Green Unripe Mango, Mustard Seeds and Green Chillies

Recipe:
(steps written in order of preparation)

Cook Rice:
1 cup of rice in 2 cups of water.
(I prepared it with Sona Masuri Rice)

Finely Powder:
2 teaspoons of mustard seeds – using a spicemill or coffee grinder

Make a Paste:
1 medium sized green unripe mango – peeled and cubed
½ cup of finely chopped fresh coconut
8 to 10 small green chillies

Grinding the mango, coconut and green chillies

Heat and Toast:
1 teaspoon of peanut oil, in a big sauté pan.
¼ cup of peanuts to golden brown color and remove.

Do the Popu or Tadka:
Add another teaspoon of oil or ghee to the same pan. Do the popu by toasting one teaspoon of each – cumin, mustard seeds, urad dal, chana dal, few pieces of dried red chillies and curry leaves.

 Sauteeing the ingredients for Mango-Coconut Pulihora
Sauteeing the ingredients

Add and Sauté:
To the popu, add the
Mustard seed powder,
Smooth mango-coconut-chilli paste,
1 teaspoon of turmeric and salt.

Stir and sauté this mixture for 3 to 5 minutes on medium heat, until the mango paste leaves its raw smell. Don’t overcook, that would kill the precious mango flavor completely. Stir in the toasted peanuts that were kept aside. Switch off the heat.

To this sautéed mixture, add the cooked rice. Mix thoroughly and serve. The pulihora should taste little bit tartly because of unripe mango, sweet due to coconut, spicy strong because of chillies and mustard powder.

Mango-Coconut Pulihora

Mango Pulihora – Andhra Style

Posted by Indira©Copyrighted in Coconut (Fresh),Mamidikaya (Green Mango),Mango (Monday April 24, 2006 at 1:46 pm- permalink)
Comments (23)

The New Home of Mahanandi: www.themahanandi.org

Banana Pepper – Baby Potato Curry

Vegetables which are at normal prices at our local grocery store now are banana peppers and baby red potatoes. Banana peppers are mildly hot and the new crop, baby red potatoes are mildly sweet. These two are cooked in tomato gravy thickened by the addition of creamy-white, rich poppy seed (khus-khus, gasa gasalu) paste. The taste of the curry is like that of made with almond paste.

Banana Pepper, Baby Potato and Khus khus (gasa gasalu)
Banana Pepper, Baby Red Potato, Poppy Seeds(Khus Khus, Gasa Gasaalu)

Recipe:

Heat in a big saucepan, over medium-low heat:
1 teaspoon of peanut oil

Toast to do the popu or tadka:
1 teaspoon each of cumin, mustard seeds, minced garlic and few curry leaves

Add and Saut�: (listed in order)
1 onion – chopped
4 juicy tomatoes- chopped
8 baby red potatoes -peeled and cubed
4 banana peppers – cut into small rings crosswise

Stir in:
¼ cup poppy seeds(gasa gasalu)-finely powdered using a spicemill/coffee grinder
1 tsp of ginger-garlic-coriander paste
2 tsp of cumin-coriander seed-clove-cinnamon powder
1 tsp of salt
½ tsp of red chilli powder and turmeric

Add 2 cups of water and mix well. Cover and cook on medium heat for about 15 to 20 minutes, stirring in-between. When the gravy reaches the consistency you desire, turn off the heat. Let the curry sit for 10 minutes and serve warm.
Tastes superb with chapatis or with rice.

Banana Pepper- Baby Alu Curry with Chapatis
Banana Pepper- Baby Alu Curry with Chapatis ~ Our meal today

Posted by Indira©Copyrighted in Baby Potatoes,Banana Pepper,Poppy Seeds (Friday April 21, 2006 at 2:37 pm- permalink)
Comments (15)

The New Home of Mahanandi: www.themahanandi.org

Masala Dosa

Masala Dosa with Coconut chutney and a cup of sambhar
Masala dosa with coconut chutney and a cup of shallot and carrot sambhar

How can anyone not like dosas? Just one bite, that’s all it takes to fall in love with them. They are such a knockout mini meal any time of the day. I often dream of starting my own franchise here, 🙂 to cater freshly cooked dosas with all kinds of filling inside them. There is one already in New York, New Jersey area, called ‘Dosa Express’, which boasts about 50 different types of dosas – all kinds, from just plain dosa to dosas with variety of fillings, like cheese-potato curry combo etc.,

But if you ask me, nothing can beat the old classic, ‘Masala Dosa’. Crisp dosas filled with spicy powders, onion-red chilli paste and potato curry, if that’s not enough they are served with coconut chutney and a cup of sambhar. Can’t stand on your feet kind of knockout combo. Preparing this type of restaurant dosa at home is really easy, only thing you need is time and some planning.

Recipe:

A thick bottomed, flat, seasoned cast-iron pan
1 cup of rice
½ cup urad dal

Wash and soak rice and dal together in 2 to 3 cups of water for at least 6 hours. Drain and grind them in a blender or wet grinder into a smooth batter. Add little water in-between for smooth grinding, if necessary. The consistency of batter must be like that of evaporated milk (commercial kind). Not too watery or not too thick.

Pour the batter into a big vessel, cover it with a lid and keep it in a warm place for overnight fermentation. By morning the batter will be doubled, usually. Add half teaspoon of salt to the batter and stir thoroughly and the batter is ready for dosas. Place and heat the dosa skillet on the stove and follow the procedure shown in the pictures below.


Season the Dosa skillet with a teaspoon of oil and rub it with a cut onion. Onion not only gives nice flavor to dosa, also seasons the skillet.(this is an oldtime tip)


Pour a ladleful of batter on the skillet. Spread it around with the ladle.


With the ladle, shape and move the batter outwards in concentric circles – until it shapes in a circular, thin round. Sprinkle half teaspoon of peanut oil around the batter. Increase the heat high and cook it for few minutes.


Flip it to other side to cook for few seconds.


Reverse it again and quickly sprinkle some pappula podi(spicy dalia powder), apply red onion-dried red chilli paste around the dosa and then place a general portion of potato curry in the middle.


Fold the dosa in middle, remove and serve it immediately. This whole process must be done in maximum two to three minutes. Hot skillet and fast hand action is necessary and do not keep dosa on skillet for long, it’ll turnout hard and brittle, instead of soft and chewy.

Masala Dosa with Coconut chutney and a cup of sambhar
Masala dosa with coconut chutney & a cup of sambhar ~ Our weekend brunch

Prepared in a style of Udipi restaurant dosa, Nandyala, India.
Potato Curry: Pressure cook/boil potaotoes until tender. Remove the skin, cut or crumble them into bite-sized pieces. Saut̩ finely chopped onions, green chillies and crumbled potatoes together. Season to taste Рpotato curry for dosa is ready.
Onion -red chilli paste: Cut one big red onion or 4 to 6 shallots into chunks. Add 6 dried red chillies and quarter teaspoon of salt or to taste, and grind into coarse mixture.
Pappula podi – recipe.
Coconut chutney – recipe.
Sambhar – recipe.

Posted by Indira©Copyrighted in Amma & Authentic Andhra,Sona Masuri Rice,Urad Dal (Washed) (Tuesday March 21, 2006 at 4:53 pm- permalink)
Comments (69)

The New Home of Mahanandi: www.themahanandi.org

Idly (Idli, Iddenlu)

Our love for idlis, the soft, fluffy white, round discs made of rice and lentil batter, began when we were children. Two, three year old babies with tiny idlis in their hand, playing around mom, is a common scene you see in many Indian households. As we grow up, the role of idlis also changes – first as toddlers’ teething food, to childhoods play, fun kind of food. Then in teenage years, the kind of breakfast we really enjoy eating without complaining much. Later In twenties and thirties – we try, struggle and wonder how folks back home make those fluffy cloud like visions of idlis so effortlessly. Try as we may, we can’t recreate those beauties here, because the weather, the grain and even the water is different here.

Method of making idlis is very simple yet little bit time consuming, only in the sense that you have to plan ahead. Whether idlies turn out like cotton soft or solid, white round bricks – it all depends on fermentation (that means where you live and how you grind the batter etc.,). Most of the times, the recipe I follow gives good, decent idlis, considering I live in a very cold climate area. See, if my recipe works for you.

Idly stand and idly plates
Idly stand and idly plates, some filled with urad dal– rice ravva batter

Recipe:

Urad dal and rice ravva (cream of rice, rice suji) in a ratio of 1:2
1 tsp of fenugreek seeds
Pinch of baking powder
Utensils
Blender/wet grinder
Idly stand with idly plates (see the photo above)
And a vessel with tight lid (suitable to fit idly stand)

Soak urad dal in just enough water overnight or for at least 4 to 6 hours.
Drain the water and keep the drained water aside.
Grind the dal into silky smooth batter. To get the medium tight consistency, add the drained water kept aside, as needed to the batter,while grinding. Remove the batter in a vessel.
Add rice ravva and mix thoroughly without any lumps.
Keep it covered, for overnight fermentation (at least 6hours) in a warm place. By morning, the batter will be doubled in volume. Stir in salt and baking powder. Consistency of batter must be medium (like condensed milk), not too tight or too watery. Add water if necessary.

Idli plates filled with rice-lentil batter just before cooking Steamed idlies just out of the vessel
Idly plates filled with rice ravva-urad dal batter all ready for steam cooking***Idlies after steam cooking

In a big vessel (fit to idly stand) with tight lid, add about half to one glass of water and bring to a boil.

Separate the plates in idly stand; pour spoonfuls of batter in round impressions (see the photo above). Fill all the plates with idly batter and place these filled idly plates, back on the stand. Place this idly stand with filled plates in the vessel with boiling water. Cover it tightly and cook them on steam. The plates are perforated and allow the idlis to be steam-cooked evenly.

After about 15 to 20 minutes, the batter will be hardened and when touched, won’t stick to your fingers like a wet batter does. Turn off the heat and remove the idly stand from the vessel. Run a spoon under each impression to separate steamed idlies from the plate. Remove them all like this and get ready to steam the next batch of idlis.

Serve idlis piping hot with sambhar, coconut chutney and idly karam podi ~ for a traditional, proper south Indian breakfast.

Idlies with coconut chutney, idli karam podi and shallot sambhar
Idlis with coconut chutney, idli karam podi and shallot sambhar ~ Our weekend brunch

double_curve.gif

Answering questions about my Idly routine:

I usually prepare idlis for our weekend brunch. My prep work for Saturday’s brunch of idli starts like this. I soak the urad dal on Friday morning, around 7-9 AM. It takes at least 4 to 6 hours for them to soften. Around 6-8 PM evening, I grind them into smooth, silky smooth batter. I remove the batter into a big vessel and mix up with store bought idli rava. Then I keep it covered overnight for fermentation. By morning, the batter will be fermented and changed in looks and consistency. After stirring in salt and little bit of baking powder, I pour ladleful of batter into the impressions on idly plates and steam cook them.

The tips I follow:
1. I use round urad dal(whole and white). Somehow they are better than the broken ones for idlis.
2. I soak the urad dal in just enough water and while grinding I add this drained water. This tip works only in cold climate to aid the fermentation.
3. While grinding I also add one or two teaspoons of soaked fenugreek seeds. This is an old tip, to improve the taste and fermentation.
4. Urad dal batter- the smooth the batter, the fluffy and silky, the idlis will be. Grind, grind and grind, run that blender motor until it gets hot.:)
4. Rice ravva- I use store bought kind.
5. Fermentation- I set the oven on to minimum (lowest setting/warm) for about 5 minutes, then I’ll turn it off. By the time I’m ready with batter, the oven will be warm. During bitter cold wintertime, keeping the batter in this cozy, warm oven aids fermentation process.
6. In the morning, I usually add a pinch of baking powder to the batter (old time tip).
For more tips, check out this wiki article on Idlis.

Recipe source: Amma

Posted by Indira©Copyrighted in Amma & Authentic Andhra,Rice Ravva (Cream of Rice),Urad Dal (Washed) (Tuesday February 21, 2006 at 4:50 pm- permalink)
Comments (119)

The New Home of Mahanandi: www.themahanandi.org

Idly Kaaram Podi

Idli Kaaram - Made of Roased  and Powdered -urad dal, chana dal, Red Chilli, black pepper seeds, cumin, coriander seeds, mustard seeds, fenugreek seeds and tamarind,

Recipe:
½ cup Urad dal (Minapa pappu)
½ cup Chana dal (Sanaga pappu)
6 dried red chillies
6 black pepper
1 teaspoon of each – cumin, coriander seeds, mustard seeds
½ teaspoon of salt
½ teaspoon of fenugreek seeds (Menthulu)
Small piece of tamarind (optional)

Toast them in one teaspoon of oil or ghee separetly or together in an iron skillet, constantly mixing. Take care not to burn them and let cool to room temperature. Powder them using a spice grinder or mixer. Store in a clean jar. Stays fresh upto 1 to 3 months.

Drizzle some melted ghee into this powder and have it with Idlis. My home state folks go crazy for this ‘Idly – kaaram podi’ combination.

Recipe Source: Attamma(MIL)

Posted by Indira©Copyrighted in Amma & Authentic Andhra,Dried Red Chillies,Peppers (Friday November 11, 2005 at 4:56 pm- permalink)
Comments (38)

The New Home of Mahanandi: www.themahanandi.org

« Next PagePrevious Page »