Raayalaseema, Konaseema and Telengaana, these are the three regions in Andhra Pradesh, my home state.
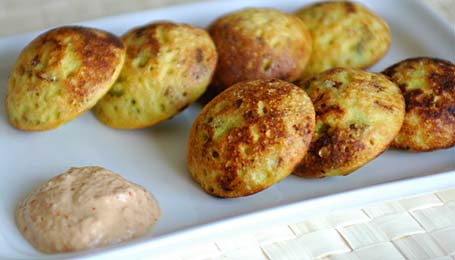
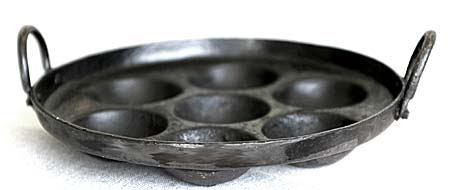
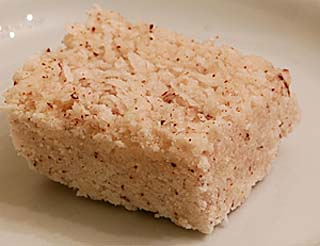
Each region has its own way of cooking things and special recipes. In case of breakfast/brunch worth getting up early for, ‘Konaseema’ is famous for their ‘Pesarattu–upma‘ combination (beautifully put together by Sailu). I’m not that familiar with ‘Telengaana’ cuisine and ‘Raayalaseema’, where I’m from, has few special breakfast dishes unique to our region. One is “buggani” – prepared with puffed rice(murmura), I blogged already, and the other is “ponganalu” – rice lentil batter is seasoned with shallots, green chillies etc., then cooked in round impressions in an iron skillet until golden. These small pretty, dome shaped rounds are usually served with peanut chutney or coconut chutney.
In our homes, whenever relatives from other regions of Andhra or from other states visit us for holidays, out comes the “ponganala Pennam”(ponganala skillet). Round, golden colored ponganalu, hot off from the skillet, always elicits oohh… aahh… from our relatives and from their weird offspring (are there any other kind? :)). Because they are unique to our region, preparing them is our showoff kind of thing, to out of staters who were related to us by marriages etc.,:)
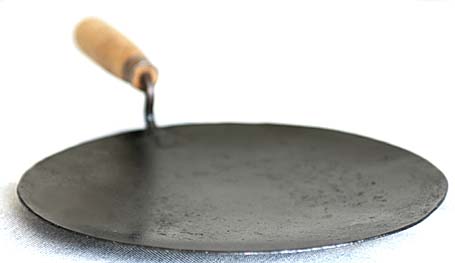
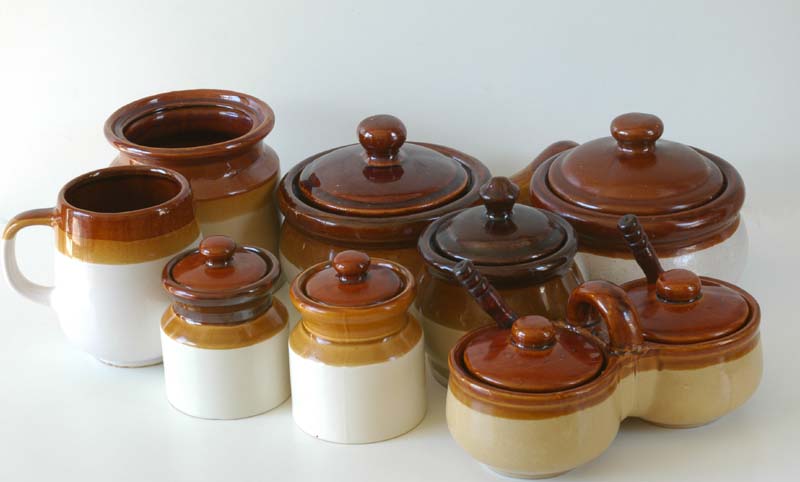
Preparing ponganalu, it’s all in the skillet. Right kind of skillet delivers or breaks a ‘ponganam’. Nothing can beat an old world style, well seasoned iron skillet. They are the best and the place where you can buy is of course India. I’ve seen some non-stick skillets here in US in some Indian shops lately. They are also fine, if you don’t mind the non-stick coating.
Recipe:
For 3 to 4 batches of Ponganalu
Ponganala batter:
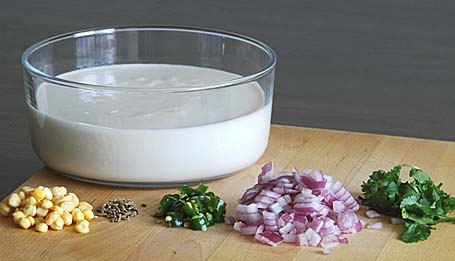
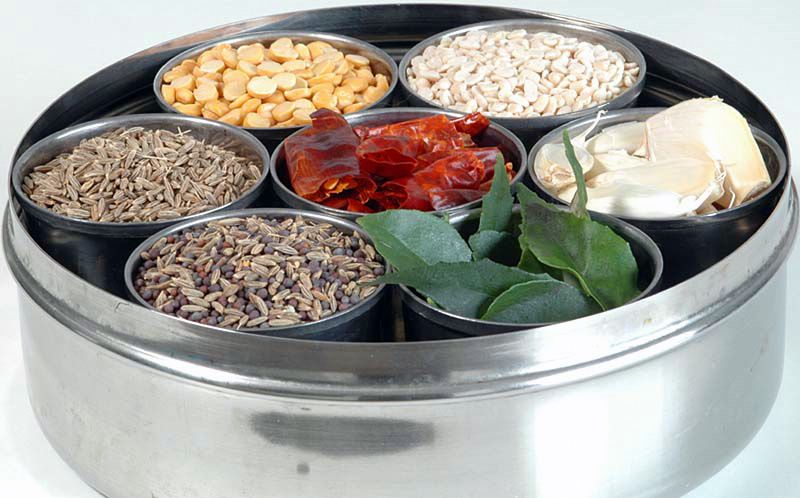
1 cup rice
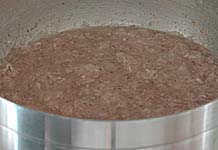
½ cup urad dalSoak them in water for about 6 hours. Drain (reserve the water) and grind them into smooth batter adding just enough water (add the reserve one, we kept aside). The consistency of the batter must be thick like idli batter or like condensed milk (commercial kind). Take the batter into a big vessel, cover and let it sit overnight for fermentation.
Sour and leftover dosa batter is perfect to prepare ponganalu. If you have some, try ponganalu with it, for a change.
Seasoning (Add to the overnight fermented batter):
1 big red onion or 6 shallots – finely chopped
(Because we mix them in the batter raw, avoid yellow onion for its smell & awful rawtaste)
4 green chillies – finely chopped
Few springs of cilantro – finely chopped
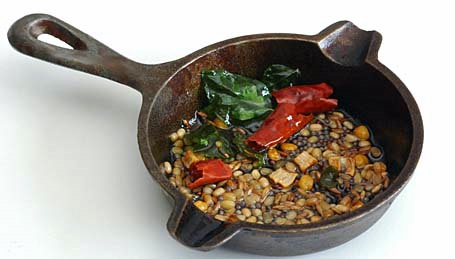
A fistful of chana dal (soaked overnight)
1 teaspoon of cumin
½ teaspoon of turmeric and salt
Add all these ingredients to the batter and mix thoroughly.
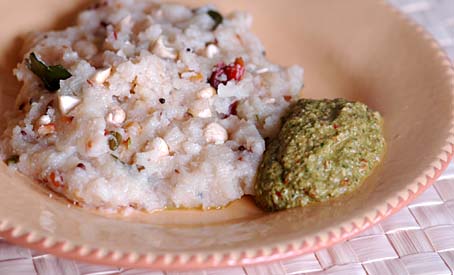
Also prepare peanut or coconut chutney.
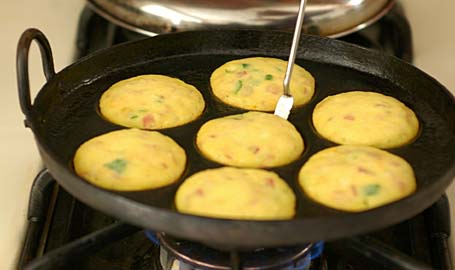
Cooking: Place the ponganala skillet on medium heat. Add few drops of peanut oil into each impression. With a spoon or with a piece of paper towel, rub oil around, to season the skillet. When the skillet is hot and ready, proceed like this, following the images.
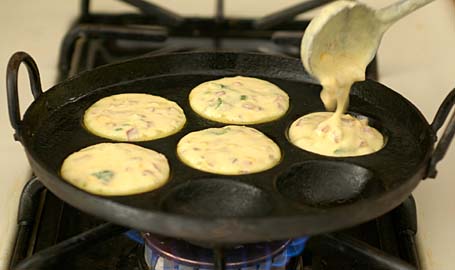
Pour a ladleful of batter into each impression.
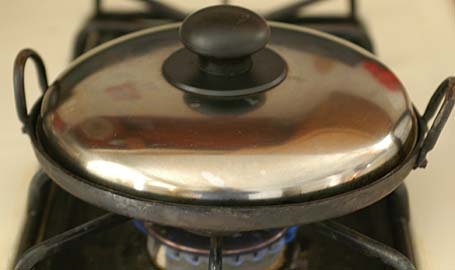
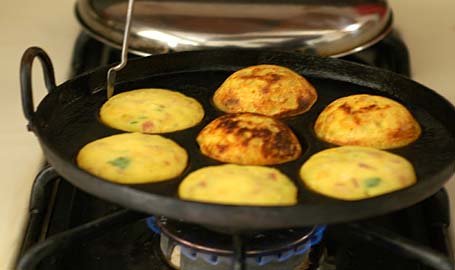
Once all impressions are filled, cover the skillet with a lid and cook on medium heat for about 5 minutes undisturbed.
Remove the lid; The batter will be set by now. Gently lift the ponganalu with a “ponganala lifter” or with a spoon. If properly cooked, they should come out easily without sticking to the skillet. If not, cook them for few more minutes.
Turn each one to opposite side to cook.
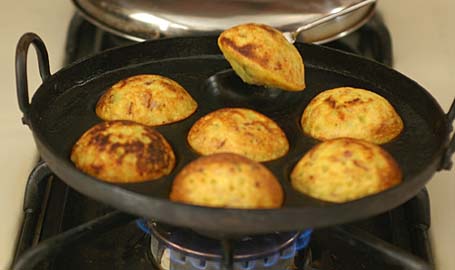
Cook them another 5 minutes on medium heat undisturbed. Gently lift them from out of the skillet. When properly cooked they should come out easily without sticking to the skillet. If not, cook them for few more minutes. Remove them all onto a plate. Season the skillet with oil, again repeat the steps to cook another batch. Medium heat is the key.(Cooking them on high heat in a hurry or on too low heat won’t work- usually the outcome will be messy ponganalu.)
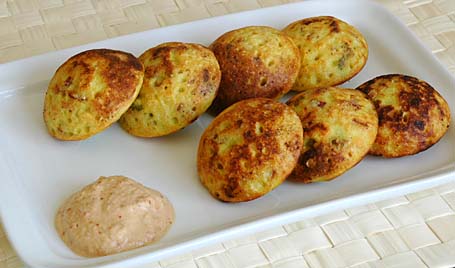
Ponganalu with peanut chutney – Breakfast worth getting up early for.
Recipe Source & Origin: Amma and Rayalaseema (Andhra, India)
Also checkout ‘Ponganalu’ by Santhi, friendly, fellow Raayalaseema vaasi.


