Mahanandi

Living in Consciousness ~ Indi(r)a’s Food and Garden Weblog

Raagi Malt (Raagi Ganji)

I love Raagi malt, particularly on cold rainy days like today. It’s May, still so cold here. It is like this since last week. I am waiting for the Sun to shine again.

Raagi (Finger millet, Ragi, Kelvaragu, Muthari, Nachni) is a Sanskrit word, and it is a type of millet grain cultivated in India from ancient times. Raagi is well-known to be rich in protein, calcium, iron and it is gluten free grain. At our home in India, ragi grains are sprouted, then gently roasted on low flame and milled to fine powder. With this freshly milled ragi powder, we prepare a rejuvenating drink called ragi malt or ragi ganji.

Ragi flour, milk and water boiled together and sweetened with sugar or jaggery is ragi malt – popular as poor man’s or farmers health drink because of ready availability, low prices for the grain and nutritious, filling quality. If it is good for a farmer and to an ancient Sanskrit speaking person, then it must be good for me too, so I often prepare this drink in place of coffee and tea.

Raagi flour is available at Indian grocery shops. I brought mine from India. Freshly milled and needless to say so much better than the store bought flour. Back home, my mother and mother-in-law, both prepare this drink daily. It’s a routine for them, nothing fancy or special like for us here. And they always flavor the drink with cardamom.

Ragi Flour and Mixing water into ragi flour

Recipe:
for two cups

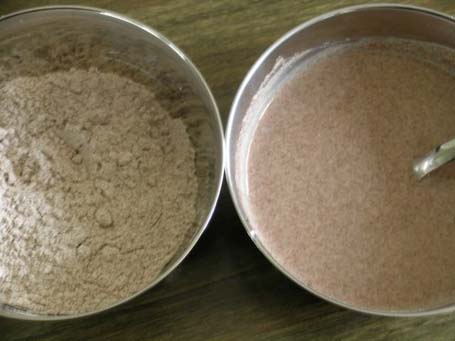
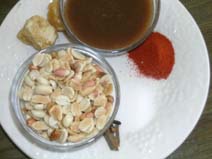
1 tablespoon of ragi flour
1 glass of water or milk
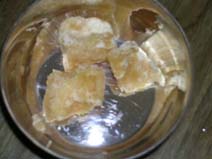
2 tsp of sugar or powdered jaggery
1/2 tsp of powdered cardamom

Boiling the water(milk) for Ragi malt Mixing the Ragi flour solution

Preparation:

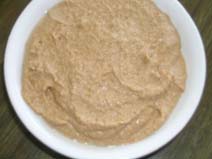
First take the ragi flour in a cup. Add half glass water slowly. Combine to smooth, lump free paste. This is essential. Do not add the flour directly to boiling water, it will clump into lumps.

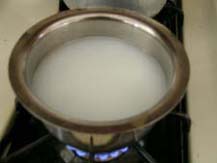
In a vessel, take one glass of water or milk. Preparing this drink with milk alone is too rich for me so I usually add few drops of milk to water.

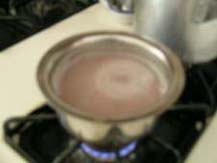
Heat till the water reaches boiling stage. Then add the dissolved ragi flour solution slowly to the boiling water (milk), continuously stirring with a spoon. This will prevent the formation of lumps. If you add the flour mix to water before the boiling stage, the flour will separate and it won’t be suitable to drinking. You have to throw it away, so wait for water (milk) to start boiling, and then add the flour mix. This step is very important in preparing the good raagi malt.

Add sugar or jaggery per your taste and pinch of cardamom (Elachi) powder. Reduce the heat to medium level, and simmer the ragi malt for 5 minutes, stirring in-between. Turn off the heat.
Let it cool to warm, and then pour into a glass or cup.

Ragi Malt

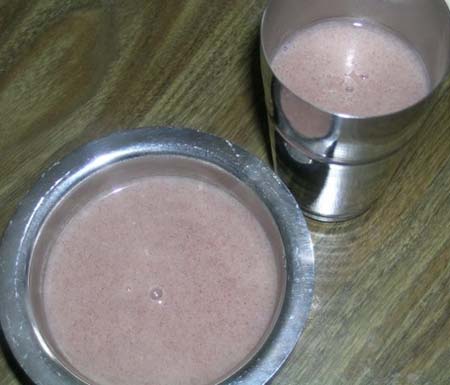
When the body needs a break from caffeinated drinks like coffee and tea, Ragi Malt is the perfect warm beverage.

Posted by Indira©Copyrighted in Amma & Authentic Andhra,Dhanyam (Grains),Jaggery,Milk,Ragi,Ragi Flour (Monday May 2, 2005 at 1:18 pm- permalink)
Comments (76)

The New Home of Mahanandi: www.themahanandi.org

Potato Kurma

This potato kurma with soya chunks goes great with rice or chapatis/nans.

Recipe:

3 to 4 potatoes peeled and cut into cubes
4 juicy tomatoes and 1 onion cut into small pieces
Half cup peas
1 tsp of ginger,garlic,cilantro paste,
2 tsp coconut powder (fresh or dried)
1 tsp each of red chilli powder, salt and turmeric
popu or tadka ingredients (read the preparation)

I also added protein rich soya chunks (the white round ones in the photo below) to this carbo rich curry.

Potato Kurma Ingredients

Add 1 tsp of oil to a hot pan, saute 1 tsp of each cumin, mustard seeds(popu or tadka), when they start to splutter, add garlic ginger cilantro paste, sauté it, and then add onions, tomatoes and peas.

First step Final step

Once the tomatoes are well cooked and juicy, add potatoes, soya chunks, salt, red chilli powder, coconut powder, turmeric and little bit of water. Cook them covered, stirring occasionally, until the potatoes are tender, for about 10 to 15 mts, on medium flame.

Potato Kurma with Chapatis

Chapati and potato kurma, yum…. this is good eating. How many times I prepare and eat this curry, the taste never gets boring.

Posted by Indira©Copyrighted in Potato,Soy (Tofu, Yuba) (Thursday April 28, 2005 at 9:13 am- permalink)
Comments (47)

The New Home of Mahanandi: www.themahanandi.org

Capsicum(Bell Pepper) Curry

Like chillies, bell peppers are also members of the capsicum family. They range in color from green through to orange, yellow, red and now the latest fancy color in US markets is purple.

The most common varity we see in Nandyala region is green bell peppers. They have refreshing juicy flesh and crisp texture. And unlike mature bell peppers yellow and red, they do not have sweet flesh, which suit the curry preparations.

The following is a traditional recipe with green bell peppers from Nandyala, India. In peanut sweet and sour sauce, this beloved bell pepper curry is easy to prepare and tastes quite good.

Capsicum-Peanut Curry Ingredients
Green Capsicum, Tomato and Onion

Recipe:
3 green bell peppers (capsicums)
1 small onion
1 big, ripe tomato
Cut the above vegetables into bite-sized pieces.

For gravy:
1 cup of roasted, unsalted peanuts, skins removed
1/2 tsp red chilli powder
2 tbsps of tamarind juice
2 tbsps of crushed jaggery or cane sugar
2 cloves, 1-inch cinnamon stick, 1 tsp cumin (jeera)
1/2 tsp of salt.
Grind all the above into a smooth paste by adding half cup of water.
Sometimes I substitute peanuts with toasted sesame seeds and sometimes I combine both peanuts and sesame seeds for different tastes.

Gravy Ingredients Peanut Paste

Sauteeing the bell pepper Curry Cooking

Preparation:

In a pan, add one teaspoon of oil, when it is hot, add pinch each –jeera (cumin) and mustard seeds. When they start to pop, add the cut vegetables. Saute until they are half cooked. Stir in the prepared peanut paste and half cup of water. Mix well, taste the gravy and add jaggery, salt and red chilli powder if needed. Simmer for 10 to 15 minutes on medium flame, covered, stirring occasionally, till the bell peppers become tender and gravy thickens.

This capsicum curry tastes great with rice and with chapati.

Capsicum-Peanut Curry with Rice
Capsicum in peanut sauce with rice ~ Our meal today.

Posted by Indira©Copyrighted in Bell Pepper,Peanuts,Sesame Seeds (Tuesday April 26, 2005 at 1:41 pm- permalink)
Comments (70)

The New Home of Mahanandi: www.themahanandi.org

Upma with Cracked Wheat

My mother used to make upma for breakfast 2 or 3 times a week when I was growing up. I can’t blame her, with four children, making them to get ready for school in the morning; I don’t know how she even found time to prepare breakfast. Upma is easy to prepare, filling and nutritious. During marriages upma is the standard breakfast item in our area and tastes completely different from that of home made one, I have to say much better. Now I know the secret, measurements of ghee and oil were equal to the upma rava quantity. No wonder it tasted so good. But at home, my mother was always conservative in use of ghee/oil in upma, unconsciously healthy. I didn’t appreciate that back then, but now I do.

Recipe:

Upma Ingredients

2 cups of semolina or suji or cracked wheat and 4 cups of water
(suji:water always in 1:2 ratio)
1 onion, 2 green chillies, 1 carrot, small piece of ginger
– all cut into small pieces
Half cup of fresh peas
Handful of roasted cashews or peanuts
For popu or tiragamata: 1 tsp each – urad dal, chana dal, minced garlic, curry leaves, cumin and mustard seeds.

If you are going to prepare upma with fine semolina or suji, roast them slowly till the color changes from cream to light gold. This process makes them not only more tasty, it also allows the grain to thoroughly mix with water without forming any lumps. For cracked wheat, bulgar because of large size of the grain, this step is not necessary. But roasting always adds some extra flavor so do it if you can spare some time.

Preparation:

Saut�ing the Ingredients Adding water to the ingredients

Heat 2 tsp of oil in a pan, add popu ingredients in the order listed. Popu is a must for upma. When fried in oil, urad dal and chana dal bring cruchy nuttiness, garlic and curry leaves add some sweet fragrance, where as cumin and mustard seeds some essential oils and health benefits.

When mustard seeds start to jump around, then quickly add onions, green chillies, ginger, carrot and peas. Saute them to tender. Sometimes, I also add other vegetables like potato, bell peppers and tomato to make it more rich and nutritious. You can change the vegetables and create numerous varieties of upma. Do not be afraid to experiment. Upma is a very forgiving recipe.

Add 4 cups of water and 1 teaspoon of salt. Mix. Close the lid and bring the water to a boil on high heat.

Adding Upma ravva Upma in final stage of making

Once the water starts boiling, reduce the heat. Pour the upma ravva (suji, semolina, or cracked wheat) slowly, stirring continously with a spoon, to prevent the lump formation.

Also add the toasted cashews or peanuts. On reduced heat, cook the upma covered, untill all the water is absorbed and upma becomes soft and smooth like porridge. Turn off the heat and let it sit for few more minutes, covered.

Serve warm with lime/lemon juice sprinkled to taste. Have delicious upma with pickle (mango or lemon) or with chutney (coconut or peanut).

Upma and Andhra Mango Pickle

Upma with Mango Pickle. Traditionally a breakfast, but now at my home, a quick filling meal on a weekend or on a busy day.

Posted by Indira©Copyrighted in Bulghar,Goduma (Wheat) (Wednesday April 20, 2005 at 5:03 pm- permalink)
Comments (37)

The New Home of Mahanandi: www.themahanandi.org

Taro Root Soup (Chaama Dumpala Rasam)

Taro root (Chaama Dumpalu) is a starchy tuber vegetable like potato but has nut-like flavor when cooked. I know four recipes with taro root, among all; the easiest one is this taro root rasam or soup.

Taro Roots

Boil 5 medium sized taro roots (chaama dumpalu) in water for about 5 to 8 minutes. Don’t keep the roots in hot water for too long. They must be firm, not soft or mushy to touch after removing from the water.

Remove them from the water. Peel the skin off. The skin comes off easily and the tuber inside holds its shape without going all mushy. That’s the result of timely removal from hot water and is what we want for this recipe.

Cut each one into one inch thick round pieces.

Boiling Taro roots in waterPeeling the skin off

Ingredients to make taro root soup (chaama dumpala rasam):

1 small onion, cut into thin long pieces
3 tablespoons of tamarind juice,
Small piece of jaggery or 2 tsp of sugar
1/4 tsp of redchilli powder and turmeric
1/2 tsp of salt
popu ingredients: 1 tsp each of mustard seeds, cumin, minced garlic and curry leaves

Taro Root slicesJaggery pieces

Preparation:

On medium flame, in a saucepan, add one tsp of oil, do the popu (tiragamata).To it add onions, fry them little bit, and then add tamarind juice, salt, red chilli powder, jaggery (sugar), and one cup of water. Stir them once, cover and bring it to boil. Remove the lid and add taro root pieces and let it simmer for few more minutes.

Serve the rasam hot with rice.

Chama Dumpala Rasam (Taro Root Soup)

Taro root rasam

Posted by Indira©Copyrighted in Taro Root (Thursday April 7, 2005 at 10:02 pm- permalink)
Comments (6)

The New Home of Mahanandi: www.themahanandi.org

Black-Eyed Pea Fritters (Alasanda Vada)

Alasanda (black-eyed peas) vada is a Raayalaseema specialty. They are prepared for special occasions and usually served with chicken curry. They are eaten usually dunked in Chicken gravy. I prefer them with vegetable gravy curries like potato kurma or with dal and rice. They taste great just as they are too.

If you already know and make vadas or fritters with other type of dals, like and enjoy the taste of them, then you must try this black-eyed pea version. You will be surprised about how good they taste. The recipe is again one of those passed from generation to generation, and also one of my all time favorites. And I am very happy to share this with you all, my readers.

Soak 2 cups of black-eyed peas (Alasandalu) in water for overnight. They expand in water, so choose a big vessel for soaking. In the morning, drain the water and pat the rehydrated black-eye peas to dry using a cotton cloth.

Blackeye Peas, (alasandalu, bobbarlu) Soaking in Water After soaking in water - Blackeye peas

Ingredients to make vada or fritters:

1 big onion, finely chopped
5 green chillies, chopped
1×1 inch of fresh ginger, peeled and sliced
2 cloves
1 teaspoon of salt or to taste,
Peanut oil, about two to three cups to deep fry

Alasandalu, Onion, Ginger, Green Chillies, Cloves

Alasanda Batter
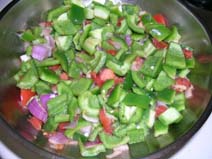
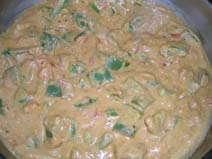
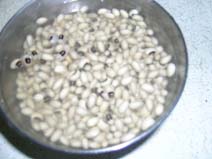
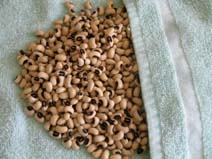
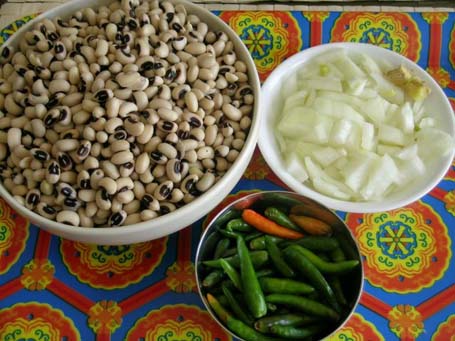
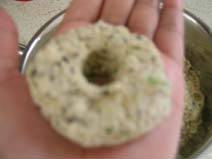
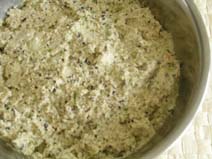
Grind the blackeye peas, ginger, cloves, salt and green chillies into coarse batter in a food processor or mixer without adding water. Just before removing the batter add the finely cut onion pieces. Grind few seconds more. The batter must be solid, and if you make a round with it, it must hold the shape without running to the edges. So do not add water while grinding the peas.

Remove the batter to a vessel. You can use your hands or small cotton cloth to make vadas. Using your left hand is very convenient. First wash and dry your hands. Take small amount of batter in a ball shape, put that ball on your left palm and flatten it lightly and make a hole in the middle. Drop gently into hot oil from the side of kadai or pan.

Giving the Alasanda batter 'vada' shape on my hand Alasanda Vadas deep frying in oil

In batches, deep fry them in hot peanut oil, turning them until they are golden-brown on both sides. Takes approximately 5 to 10 minutes, each batch.

Serve them hot with gravy curry for a genuine Raayalaseema experience or with a condiment of your choice.

Alasanda(bobbarla) Vadalu - Blackeye Pea Fritters

Black-eyed pea fritters (Alasanda/Bobbarla vada)

Recipe Source: Amma

Posted by Indira©Copyrighted in Amma & Authentic Andhra,Blackeye Beans (Sunday April 3, 2005 at 8:18 pm- permalink)
Comments (25)

The New Home of Mahanandi: www.themahanandi.org

Spinach Dal (Palakura Pappu)

Pressure-cooking with toor dal is the most common way that we consume green leafy vegetables like spinach etc., in our home. Combine all the ingredients below; mix them with one glass of water and pressure cook. Within a half an hour, you can have a tasty, nutritious dal. Mix it with steamed rice for a complete meal, or enjoy it like a light and filling soup.

Recipe:

One bunch of Spinach, washed and cut or tiered into big pieces
One cup of Toor dal (Kandi Pappu)
One medium sized tomato and onion, cut into pieces
One tsp of chilli powder or 7 to 8 Indian variety green chillies
Half tsp of turmeric (pasupu)
Key-lime size tamarind (Chinta pandu)
One glass of water
For popu or tadka:
1 teaspoon of peanut oil or ghee
1 teaspoon of each – cumin, mustard seeds, minced garlic, chana dal, urad dal and few pieces of curry leaves and dried red chilli pieces

Spinach, Onions, Tomato and Tamarind, Red Chilli Powder and Toor dal

After pressure-cooking all of the above ingredients, add 1 tsp of salt and with a whisk or a wood masher make a paste of spinach dal.

In a saucepan, add one tsp of oil or ghee and lightly fry the minced garlic, urad dal, chana dal, cumin and mustard seeds, red chilli pieces and curry leaves. This is called “Popu” or “Tiragamata”in Telugu. Without the Popu the dal is not ‘dal’, so don’t even think about skipping this step. Popu not only adds wonderful fragrance to dal, hot oil or ghee with all other toasted ingredients makes the dal more palatable, sort of like dressing it up.

Add the spinach dal to the popu and combine them together. Serve the dal with rice or with chapati/roti.

 Spinach Dal pressure cooked and salt just added before making the dal into a pasteDoing the popu or tiragamata
Spinach DalSpinach dal, Rice and Papad

Our meal:
Spinach dal with rice, ghee and papad and of course a cup of yogurt on the side.

Recipe Source: Amma

Posted by Indira©Copyrighted in Amma & Authentic Andhra,Spinach,Toor Dal (Tuesday March 29, 2005 at 6:05 pm- permalink)
Comments (53)

The New Home of Mahanandi: www.themahanandi.org

Mango – The National Fruit of India

Mango from India
Delicious Mango, Sprinkled with Salt and Chilli Powder

Namaste. Welcome to my website ~ Mahanandi. A showcase of my latest interest, that is recording the age-old recipes my family prepares at home in India.

Indian cuisine is one of the mother cuisines of the world and Indian cuisine is sustenance cooking at its best. In our day-to-day cooking, the local, humble ingredients are elevated through healthy, sophisticated cooking techniques to scrumptious dishes. The precious culinary traditions have been preserved and passed from generation to generation through word of mouth and daily hands-on-ingredients experience, without the need of fancy cooking schools, culinary degrees, cookbooks and recipe cards for so long. But the times are changing…

I am attempting this from my home in Ohio, US. I have come across a number of recipe sites, but I could not find any with pictures of ingredients or everyday meals. My hope is that Mahanandi with food photos will entertain and delight those who already knew the ingredients and recipes, also offers some level of interest and assistance to novice who loves and wants to try Indian cuisine.

Posted by Indira©Copyrighted in Fruits,Indian Ingredients,Mango (Saturday March 26, 2005 at 8:46 pm- permalink)
Comments (6)

The New Home of Mahanandi: www.themahanandi.org

« Next Page