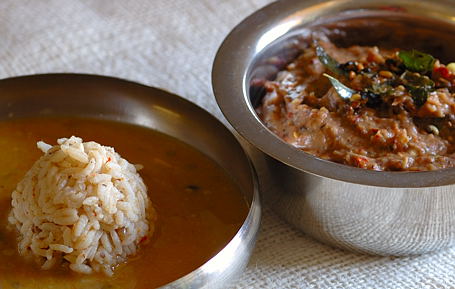
Mahanandi

Living in Consciousness ~ Indi(r)a’s Food and Garden Weblog

Tomato Bath

JFI, an online food blogging event celebrating the natural ingredients is hosted by sweet and talented RP of My Workshop for April. The ingredient she picked for JFI is Tomatoes. What a fine choice it is to celebrate the spring season with beautiful colors and flavors of tomatoes!

The sheer number of tomato based recipes can be overwhelming and sometimes it is reassuring to go back to an old favorite. So I picked a recipe. A Tiffin box favorite from my childhood called tomato bath. Yes, you read it right. The recipe has bath in its name. In this traditional south Indian recipe, toasted semolina is generously bathed and simmered in tomato juice. Not one or two tomatoes, but a lot of tomatoes are used to prepare tomato bath. This is the main difference between regular upma and tomato bath. Because of generous tomato addition, pale wheat colored semolina changes to bright orange color and the tomato dominates the flavor profile. It’s easy to prepare and even easier to enjoy. A must try for tomato fans.


Tomato and Semolina

Recipe:

2 cups semolina or suji
4 ripe tomatoes – finely chopped (about 2 cups)
6 green chillies – finely chopped
1 small red onion – finely chopped
1 inch piece of ginger – grated
¼ cup each – fresh green peas and charoli nuts (or your choice)

Seasoning: (added to bring crunchy bite and fragrance to tomato bath)
1 tablespoon oil or ghee
6 fresh curry leaves and a tablespoon of finely chopped fresh cilantro
½ tsp each – urad dal, chana dal, cumin and mustard seeds

Place an iron skillet on stove top. On medium heat, add and roast semolina/suji to pale gold color, stirring in-between.

Meanwhile, proceed with tomato bath preparation. In a wide pan, add and heat oil/ghee. Toast the ingredients listed in seasoning in the order mentioned. When mustard seeds start to jump around, add green chillies, onion and ginger. Cook for few minutes until the onions soften. Stir in chopped tomatoes and fresh green peas. Cook until tomatoes become mush.

Add about 4 cups of water along with half teaspoon of salt. Cover and bring the water to a boil. At this stage, pour in the roasted semolina/suji at a constant flow/speed, continuously stirrng. Take care not to form semolina lumps. Stir, stir and stir. Sprinkle charoli nuts. Reduce the heat to medium-low and cook until the whole thing comes together to a moist firm mass.

Serve hot with coconut/peanut chutney or with a cup of yogurt.


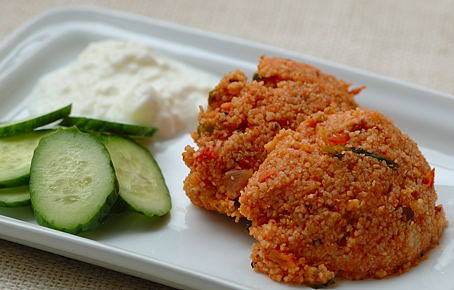
Tomato Bath with Yogurt and Cucumber Slices ~ Our Weekend Brunch and
My entry to JFI: Tomatoes hosted by RP of My Work Shop

JFI Notes:
I’ve planned to invite hosts for Jihva (June 07- April 08) on April 2nd. If you are interested to host the event, please visit tomorrow to read the guidelines and pickup your time slot. Thanks.

Posted by Indira©Copyrighted in Amma & Authentic Andhra,Jihva For Ingredients,Suji/Semolina,Tomato (Sunday April 1, 2007 at 11:45 am- permalink)
Comments (23)

The New Home of Mahanandi: www.themahanandi.org

Dazzling Dals ~ Tomato Dal


Dazzling Dals ~ Tomato Dal (Tomato Pappu)

I get lot of questions about the recipes I write at Mahanandi. Some show a mix of disdain and curiosity typical of a museum visitor and some convey a genuine interest. I live in a foreign country, still I cook and write about the food of my home. I guess it is expected to get both types of comments on my recipes.

When people show genuine interest, it feels good and I try to respond to their comments. One such genuinely interested person is Linda of Out of the Garden food blog. From her comments, I had a sense that she is very fond of one particular recipe of mine. So, whenever Linda inquired about the details, I replied her with equal enthusiasm. Guess what! She not only used the recipe to prepare the dish, but she also perfected the process and wrote about it on her blog. The recipe is none other than the dazzling dal, my beloved amma mudda. Linda’s description of amma muddas truly conveys her enthusiasm and a delight to read. I thank Linda for treating the recipe and the feelings associated with it with respect. I will think of her amma mudda post as a great gift to Mahanandi on its second anniversary.

Here is one more dazzling dal recipe – tomato dal. A basic and beginners favorite in Indian cooking, tomato dal is a simple and flavorful main course dish. Can be served with rice or chapatis for a hearty, satisfying meal.

Recipe:

• ½ cup toor dal and 1½ cups of water
• 1 big ripe tomato – cut to chunks
• 1 small onion – cut to chunks
• 6-8 green chillies – finely chopped
• ¼ tsp turmeric and marble-sized tamarind

– Take them all in a pressure cooker and cook until the dal reaches fall apart stage. Usually takes about 10 to 15 minutes in a pressure cooker. Once the valve pressure is released, remove the lid and add about half teaspoon of salt. Mix and mash the dal to soft consistency with a wood masher.

In a separate vessel, do the popu or tadka (toasting cumin, mustard seeds, curry leaves etc in oil). Add the mashed tomato dal to the popu. Mix and serve hot with rice or with chapati.


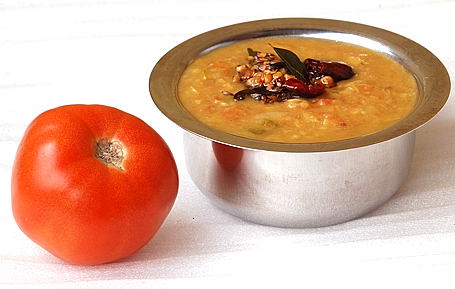
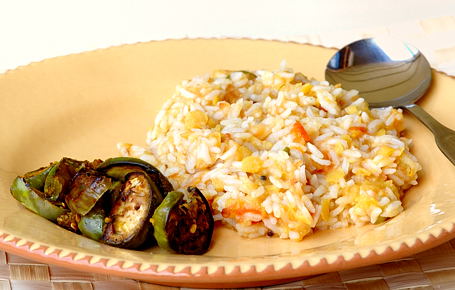
Tomato Dal mixed with Rice and on the side Green Brinjal Curry ~ Our lunch today
and my entry to JFI: Tomato hosted by Lovely RP of My Workshop

Notes:
Recipe source: Amma

Posted by Indira©Copyrighted in Amma & Authentic Andhra,Jihva For Ingredients,Tomato,Toor Dal (Wednesday March 28, 2007 at 5:22 pm- permalink)
Comments (51)

The New Home of Mahanandi: www.themahanandi.org

Dazzling Dals ~ Brinjal Dal (Vankaya Pappu)


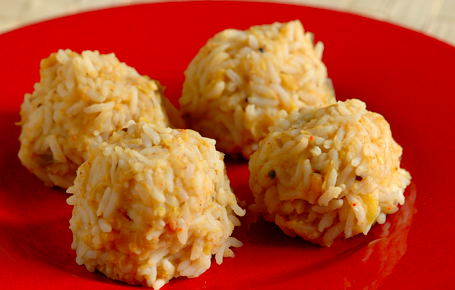
Brinjal Dal mixed with Rice and Ghee (Vankaya Pappu Muddalu)

Traditionally in Nandyala, dal is usually prepared with less water. The idea is to make round balls of rice, dal and ghee called pappu mudda or amma/mama mudda . Mothers prepare this small rounds to feed children in our homes. Less water means tight dal means firm, round amma mudda.

We love this type of rice-dal muddas. For dal fans, this less water dal is a must try. You will be hooked, I promise. The taste is completely different from watery type of dal. There are some vegetables which suit this type of tight dal, and brinjal is one of them. Young, firm, white fleshed brinjals are cooked with toor dal and red chilli powder. The taste is really special and this traditional dal from Rayalaseema region is a must try for purple/green brinjal fans.


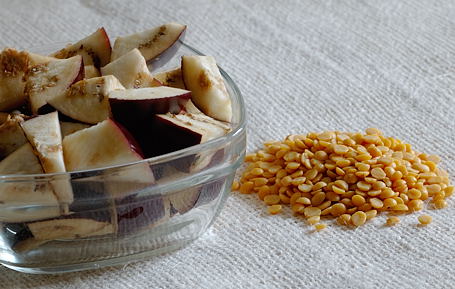
Firm, white fleshed purple brinjal pieces and Toor dal

Recipe:

½ cup of toor dal and 1½ cups of water
2 purple or green young, firm and white fleshed brinjals – cut to small pieces
1 onion – cut to chunks
½ tsp each – red chilli powder, turmeric and salt
2 marble sized tamarind pieces

Popu or tadka ingredients:
1 tsp of oil and
½ tsp each – chopped garlic, curry leaves, urad dal, cumin and mustard seeds

Take toor dal in a pressure cooker. Wash and drain. To this washed dal, add one and half cups of water. Also the brinjal, onion, red chilli powder, turmeric and tamarind. Mix with a spoon. Cover and pressure-cook to two or three whistles until the dal is cooked to fall-apart stage.

Once all the valve pressure is released, remove the lid. Add salt. With a wood masher or whisk, mash the dal to smooth consistency. Have a taste and adjust the salt level to your liking.

Now in a saucepan, heat oil to do the popu or tadka. Add and toast the popu ingredients in the order mentioned above starting with chopped garlic and the final item would be toasting the mustard seeds. When mustard seeds start to jump around, add the mashed dal to this popu. Mix and cover with a lid.

To serve, add a small cup of cooked rice to a plate. To it, add a tablespoon of ghee and a big ladle full of dal. Combine them all thoroughly. Shape the mixture into round balls using your hand. Place the rounds on a plate and enjoy. A side dish of curry/ papad/pickle will enhance the experience very much. Finish off the meal with a glass of buttermilk or yogurt and some fruit for dessert.


Brinjal Dal mixed with Rice and Ghee (Vankaya Pappu Muddalu)

Kitchen Notes:
From Telugu to English, Mudda = Round shape
Prepare this dal only with white fleshed, firm brinjals. Black seeded ones are not suitable and the dal will taste bitter.
We usually add red chilli powder to brinjal dal. Not that good with green chillies

Posted by Indira©Copyrighted in Amma & Authentic Andhra,Toor Dal,Vankaya (Brinjal) (Wednesday March 7, 2007 at 6:52 pm- permalink)
Comments (28)

The New Home of Mahanandi: www.themahanandi.org

Plain Potato Curry for Jihva~Potato

Vijay went through a severe case of flu-like illness last week. It started suddenly with fever and within a day it got worse with 104 °F temperature. We had to go to emergency and after several tests the doctors diagnosis was Acute Viral Syndrome. With prescription Tylenol, fever is under control now and he is recovering slowly. Poor guy, he dropped nearly eight pounds in a week. That bad. Compared to him, I had a very mild case of flu. Mainly I lost appetite. Sonti Kashayam, tomato rasam, plain toordal rasam, orange juice and capsules in-between – that’s all we could manage these past few days.

We are feeling better today and I couldn’t resist participating in Jihva~Potato event hosted from Pune, India by lovely Vaishali Kamath of Happy Burp. I prepared potato curry for lunch. Just plain, light oil and no onion, the variety we usually have on festival days. Nice, simple side dish and good to recover the appetite.


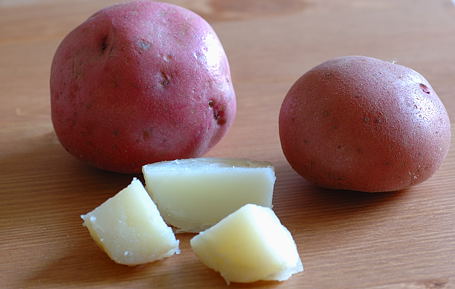
Red Potato ~ Raw, Cooked and Cubed

Recipe:

Boil or pressure-cook 4 medium sized potatoes to tender. Peel and remove the skin. Cut the potatoes to cubes.

In a wide skillet, heat a teaspoon of oil. Add and toast a half teaspoon each – cumin, mustard seeds, dried red chilli pieces and curry leaves. Add the potato cubes. Sprinkle turmeric, red chilli flakes and salt to taste. If you want you can also add fresh grated coconut and garam masala powder to taste. Mix and cook on medium heat for about 5 to 10 minutes until potato pieces brown a bit. Serve hot with a cup of rice and dal or rasam.

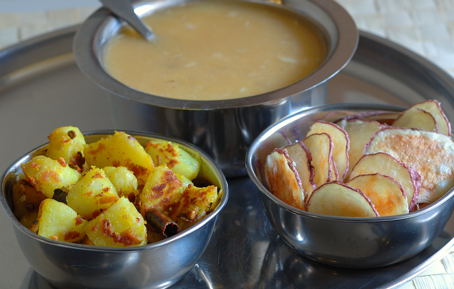
Plain Potato Curry and Microwave Oven Baked Potato Chips with Plain Toordal Rasam and Rice
Plain Potato Curry and Microwave Oven Baked Potato Chips with Plain Toor dal Rasam and Rice
Our Meal Today and My Entry to Jihva~Potato Event by Vaishali of Happy Burp

Posted by Indira©Copyrighted in Amma & Authentic Andhra,Jihva For Ingredients,Potato (Thursday March 1, 2007 at 2:04 pm- permalink)
Comments (29)

The New Home of Mahanandi: www.themahanandi.org

Khatti Dal ~ Hyderabad Style

Even though I am partial to golden yellow toor dal, I do think of masoor dal as the prettiest dal of all dals/lentils. Round and in reddish pink, they look like cute bindis. When cooked, they turn to tasty yellow mush. Masoor dal is rarely used in Andhra cooking and only place where you can find masoor dal recipes is Hyderabad, the capital city of Andhra. People in the city prepare a dal called “Khatti dal” with masoor dal. Here masoor dal is cooked and seasoned with tamarind juice and ginger-garlic paste. Mildly sweet, pungent and tart, khatti dal dazzles the taste buds and tastes great on its own or with rice/chapatis.


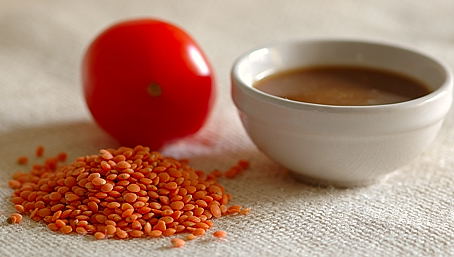
Masoor Dal, Tomato and Tamarind (squeezed and strained juice)

Recipe:

1 cup masoor dal
1 tomato – finely chopped
¼ cup of finely chopped green chilli
¼ tsp each – turmeric, cumin and ginger-garlic paste
½ tsp salt or to taste
1 small lime sized tamarind pieces
Soak in a cup of warm water for 15 minutes. Squeeze and using a tea filter strain the juice to remove particles.

Wash and rinse the dal first. Take masoor dal in a big pot. Add 5 cups of water along with tomato, green chilli, turmeric, cumin and ginger-garlic paste. Mix and on high heat bring to a boil.

Then reduce the heat to medium and partially cover the pot with a lid. Simmer until the dal reaches fall apart stage. Takes about 15 minutes. At this time, stir in tamarind juice and salt. Mix and cook the dal for another 5 minutes.

The cooked dal will be so soft, I usually do not mash the dal. But if you like smooth consistency, go ahead and puree the dal using an immersion blender or wood masher.

Now do the popu or tadka. In a tadka pan or in a skillet, heat about a tablespoon of ghee or oil. Add and toast one after another, half teaspoon each – minced garlic, small pieces of dried red chilli, curry leaves, cumin and mustard seeds – in the order mentioned. When mustard seeds start to jump around, add the cooked dal to the popu. Mix and serve with rice or with chapati.


Dazzling Dals: Khatti Dal with Chapatis ~ Our afternoon meal today

Posted by Indira©Copyrighted in Amma & Authentic Andhra,Chintapandu(Tamarind),Masoor Dal (Red Lentils) (Tuesday February 20, 2007 at 1:43 pm- permalink)
Comments (37)

The New Home of Mahanandi: www.themahanandi.org

Menthi Beerakaya (Methi-Turai Curry)

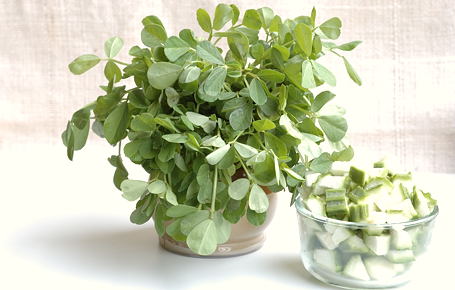
Our kitty, Kittaya enjoys greens. He likes to eat cilantro, wheat grass and catnip. His latest green find is methi (fresh fenugreek leaves). He picks up a branch with his mouth and walks around the house munching on the leaves. Kitties are notoriously finicky eaters, some of you may know this already and we are extremely happy with his new choice. See, we like fresh methi too. So the recent routine is, almost every week we buy a bundle of fresh fenugreek from local Indian grocery shop. I keep few branches for Kittaya on the side in a vase. With the remaining I was trying out different recipes. One such recipe is methi with ridge gourd (turai, beerakaya). Sweet tasting vegetables like ridge gourd and potato etc compliment potent fresh methi. Easy to prepare, decent curry to have with chapatis or with rice and dal. A different taste but nonetheless a good one.

Fresh Fenugreek Leaves and Ridge Gourd Pieces (Turai, Beerakaya)
Fresh Methi and Ridge Gourd Pieces

Recipe:

2 ridge gourds (peel the ridges, wash and chop to bite sized pieces)
1 bunch fresh fenugreek (Wash and chop or pluck the leaves)
1 onion – finely chopped
6 green chillies and one tsp of grated coconut – finely ground in a spice grinder
Turmeric and salt to taste
Ingredients for popu or tadka (1 tsp each – oil, curry leaves, cumin and mustard seeds)

Heat oil in a wide skillet. Add and toast popu ingredients in the order listed. When mustard seeds start to jump around, add the onion. Saute until the onion pieces soften. Add ridge gourd pieces. Mix. Cover and cook on medium heat for about 10 minutes. Ridge gourd pieces usually are tender and they cook fast. Methi leaves won’t take more than two or three minutes to wilt/cook.

At the end of 10 minutes, add methi leaves, green chilli-coconut paste, turmeric and salt. Mix and cook for another 5 minutes, stirring in-between. Serve hot with rice or with chapati.


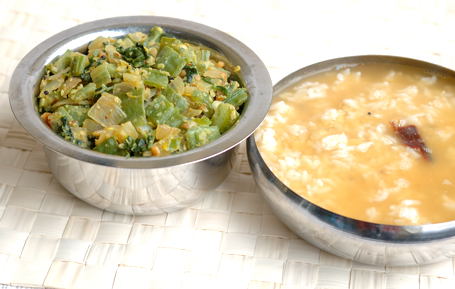
Methi Turai Curry (Menthi Beerakaya) with Plain Toor Dal Rasam and Rice ~ Our Meal Today

Posted by Indira©Copyrighted in Amma & Authentic Andhra,Beera kaaya(Ridge Gourd),Menthi Kura(Fenugreek) (Tuesday February 13, 2007 at 3:40 pm- permalink)
Comments (18)

The New Home of Mahanandi: www.themahanandi.org

Peanut ~ Jaggery Chutney

Peanut – jaggery chutney is a timeless classic. Like the comfort of the Kashmir shawl wrap on a cold day and the elegance of kumkum bottu on the forehead after a visit to the temple, it can be relied on to instantly make the meal both totally comforting and effortlessly elegant.

Stylish enough for a special elaborate meal and at the same time, casual enough for a spur of the moment put-together breakfast or light lunch – Peanut jaggery chutney is a rural Andhra classic side dish and much beloved recipe from my home. Usually prepared in a rolu (mortar) and served during Makara Sankranthi with pulagam or pongali and ghee.

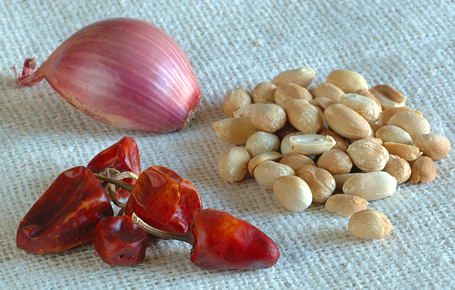
 Shallot, Dried Red Chillies, Roasted Peanuts
Shallot, Dried Red Chillies and Roasted Peanuts

Recipe:

Peanuts – 1 cup
Shallots 4 or one big red onion – cut to chunks
Dried red chillies – 6 to 10. I usually add at least 8 for a cup of peanuts
Tamarind – small marbleround size
Jaggery pieces – 1 tablespoon or to your liking
Salt – 1 teaspoon

Roast peanuts to light brown color. Cool and remove the skins.

In a skillet, heat a tablespoon of peanut oil. Add and fry shallot/onion pieces and dried red chillies to brown color. Let cool to room temperature.

Soak tamarind in a quarter cup of hot water for about 10 minutes, to soften.

Take them all in a blender or in a mortar. Add jaggery and salt. Grind to smooth consistency. Remove to a cup and serve with breakfast items or with chapati/rice along with ghee.

Peanut-Jaggery Chutney with Pulagam and Ghee

Posted by Indira©Copyrighted in Amma & Authentic Andhra,Jaggery,Peanuts,Shallots (Wednesday January 17, 2007 at 8:26 pm- permalink)
Comments (11)

The New Home of Mahanandi: www.themahanandi.org

Pulagam ~ Sankranthi Tradition

Rice, moong dal, peanuts, jaggery and ghee rule the kitchen during Sankranthi in our homes.

For bhogi, pulagam (rice + split moong dal + salt) is the main dish, not pongali (rice + yellow moong dal + salt), and three peanut based recipes are prepared for pulagam.

Peanut-jaggery chutney,
Stuffed brinjal curry with peanuts and
No boil, cold peanut rasam (Peanut pacchi pulusu)

And the meal begins with prasadam – either jaggery rice pudding or sweet pongali. See, the whole kitchen revolves around rice, moong dal, peanuts, jaggery and ghee during Sankranthi.

Even though I grew up on this tradition, I rarely prepared them all for Sankranthi here. Because, for two people it’s lot of food and one also needs deep appetite to enjoy them. The whole combination is heavy and would make one sleepy in a minute. But yesterday I dared and cooked everything for Sankranthi. I was shivering 24 hours of day under Seattle’s arctic cold blast – God, I needed some rich food. So the rice, moong dal, peanut and ghee extravaganza.

Pulagam, Stuffed Brinjal Curry with Peanuts, Peanut-Jaggery Chutney, Peanut Pacchi Pulusu and Homemade Ghee
Pulagam, Stuffed Brinjal Curry with Peanuts, Peanut Pacchi Pulusu, Peanut-Jaggery Chutney & Ghee

Pulagam Recipe

1 cup split moong dal
1 ½ cups rice
6 cups water
1 teaspoon salt

Wash the rice and split moong dal together, once or twice, until the water is clear. Take them in a pressure cooker or in a big pot. Add 6 cups of water and a teaspoon of salt. Mix and simmer for about 20 to 30 minutes, stirring in-between or simply pressure cook to soft, falling apart stage.

Serve hot with peanut chutney/stuffed brinjal curry/peanut pacchi pulusu along with generous amounts of ghee for a festive meal or with homemade yogurt for an easy on stomach, light meal.

Sona Masuri Rice, Split Moong Dal and Salt ~ Ingredients for Pulagam


Preparing pulagam during Sankranthi is a Nandyala tradition.

Posted by Indira©Copyrighted in Amma & Authentic Andhra,Moong Dal (Split),Sona Masuri Rice (Tuesday January 16, 2007 at 10:57 pm- permalink)
Comments (13)

The New Home of Mahanandi: www.themahanandi.org

Sankranthi Prasadam ~ Bellam Paramannam (Jaggery Rice Pudding)

Sankranthi Prasadam ~ Bellam Paramannam (Jaggery Rice)
Sankranthi Prasadam ~ Bellam Paramannam (Sweet Jaggery Rice)

Bellam Paramannam or jaggery sweet rice pudding is a creamy rice dessert with a difference, being sweetened by old world sugar – “jaggery” and subtly flavored with cardamom. It is wonderful warm or cold and usually served as puja prasadam on festivals like Sankranthi (the harvest festival).

Recipe:

1 cup Sona Masuri rice
2 cups milk + 2 cups water
2 cups jaggery + 1 cup water
½ cup each – cashews and golden raisins
¼ cup – ghee
4 cardamom pods – seed powdered

This is how I prepare this traditional sweet:

Cook rice in milk and water to very tender, falling apart stage.

Melt jaggery in water and simmer to plain syrup stage.

Add cooked rice to jaggery syrup. Mix and cook on medium-low heat.

Meanwhile, in a small skillet, heat ghee on medium heat. First fry cashews and then golden raisins to light gold color. Add the whole thing – ghee along with fried cashews and golden raisins to the rice-jaggery mixture.

Simmer on medium-low heat stirring in-between, until the whole thing thickens a bit and comes together to moist, firm mass.

Just before turning off the heat, stir in cardamom powder and mix thoroughly. Serve warm or cold.

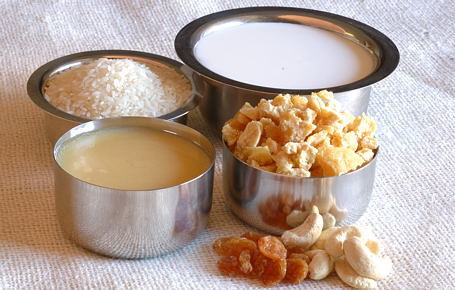
Milk, Rice, Ghee, Jaggery, Golden Raisins and Cashews ~ Ingredients for Bellam Paramannam

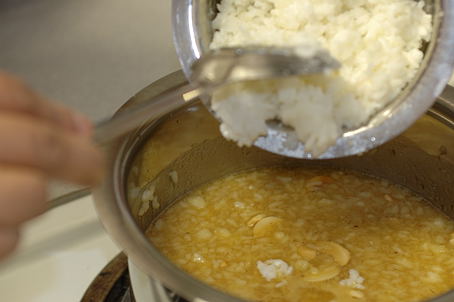
Adding the cooked rice to Jaggery Syrup

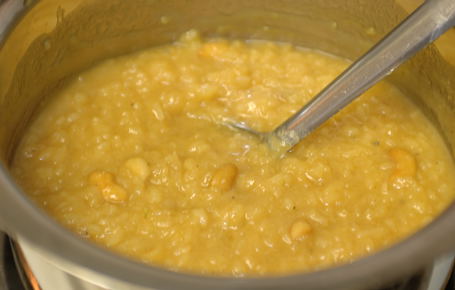
Bellam Paramannam
Bellam Paramannam to celebrate Sankranthi

Kitchen notes:
When directly added, jaggery sometimes could separate milk avaialble here, into curds and whey. Preparing rice with milk first and then adding it to jaggery syrup is my way for fail proof bellam paramannam prasadam.
Paramannam with sugar ~ Recipe
Sweet Pongal (Tiyya Pongali) ~ Recipe
From Telugu to English: Bellam = jaggery, Paramannam = Sweet rice

Posted by Indira©Copyrighted in Amma & Authentic Andhra,Biyyamu (Rice),Ghee,Indian Sweets 101,Jaggery,Naivedyam(Festival Sweets),Sona Masuri Rice (Monday January 15, 2007 at 3:52 pm- permalink)
Comments (45)

The New Home of Mahanandi: www.themahanandi.org

Millet Rice (Korra Buvva, Korra Annam)

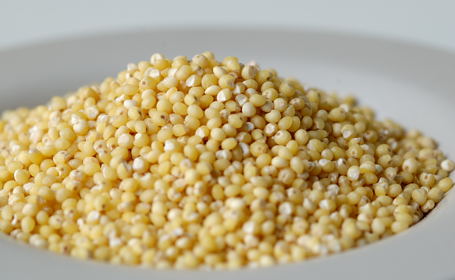
Korralu (Millet, Foxtail Millet)

Korralu (Millet/Foxtail Millet/Kauni/Varagu)

Birds and bees like it. The hard working farmers in rural India like it. I liked it too. I am talking about the grain – millet or korralu as we call it in Telugu. The foxtail millet is often food of people who can’t afford rice in Andhra. And here in America, one more choice the market place provides us to achieve the never attainable mirage of “perfect health”.

I vaguely remember tasting this grain with egg pulusu at my grand parents home when I was an itsy bitsy baby. Today I tried it again.

Millet + water + salt = a revelation!

Wholesome and great, no wonder, intelligent hard working beings on the earth like this grain. For comparison sake, it almost tasted like middle-eastern couscous but nuttier, almost similar to broken rice, you know the kind, we use to prepare ganji or kanji. Do you know the type? Similar to that one. That’s why the millet preparation is called “korra annam” (korra=millet, annam=rice) in Andhra Pradesh.

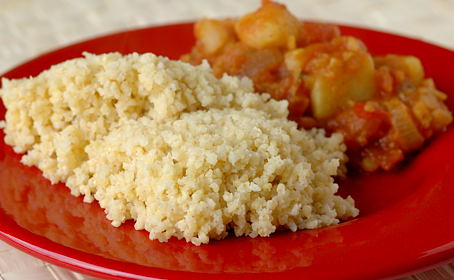
Yesterday, I was talking to my mother-in-law on phone about this millet preparation. She mentioned that Korra annam is traditionally served with watery pulusu curries (kurmas/stews) like potato or egg pulusu and also with spicy chutneys like gongura chutney etc. I went with her suggestion and prepared potato kurma for millet rice. Good combination. My Mother-in-law is right.


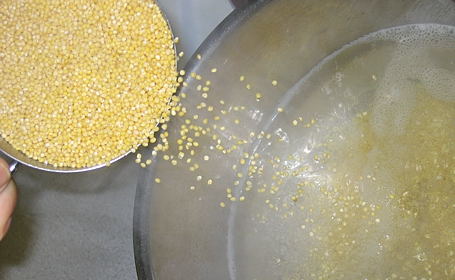
Adding Millet to Boiling Water


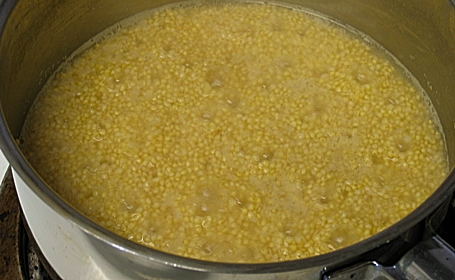
Millet Rice (Korra Annam) after 10 minutes of cooking

Recipe:

1 cup millet (korralu, foxtail millet)
2 cups water
¼ teaspoon of salt or to taste

In a saucepan bring the water to a rolling boil on high heat. Continuously stirring, add the millet along with salt, to the water. Reduce the heat to medium. Cover the pot with a lid and cook for about 15 to 20 minutes, stirring in between. The hard grain will loose its punch and get softened within 15 minutes. If this is your first time, taste the grain to test the doneness for every 5 minutes. When it loses its biting resistance and become soft supple like cooked rice, turn off the heat. Cover and let it sit for another 5 to 10 minutes.

Serve hot with a kurma curry like potato/brinjal/drumstick/egg and little bit of ghee.


Korra Annam with Potato Kurma ~ Our Afternoon Meal Today

Kitchen notes:
Recipe source: My Mother-in-law (Attamma)
Korralu (millet) is purchased from US grocery shop called ‘Whole Foods’ – bulk bins (labelled ‘Millet’).
More about foxtail millet and nutritional profile – Organic Uttaranchal, from Gramene Project, here.
About Millet and farming in Andhra Pradesh – diaries from hard working farmers.
How to prepare different types of millets – photo demonstrations (good info)

Posted by Indira©Copyrighted in Amma & Authentic Andhra,Millet,Millet (Korralu) (Thursday January 4, 2007 at 3:25 pm- permalink)
Comments (20)

The New Home of Mahanandi: www.themahanandi.org

Chayote Curry (Bengaluru Vankaya Kura)

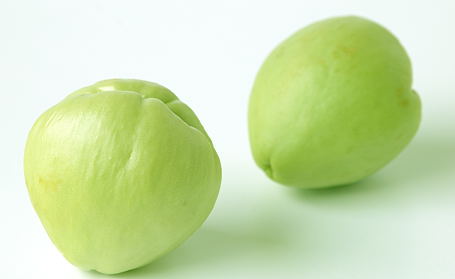
Chayote (Bengaluru Vankaya or Cho Cho)

Cho Cho, Christophen, Mirliton, Xuxu – the vegetable Chayote has more names than any other vegetable, I think. The name changes with ethnicity of grocery shop. In Nandyala, my hometown in India, chayote is sold as ‘Bengaluru Vankaya’. Our tiny town imports this vegetable from Bengaluru (Karnataka) region, so the name. The kind we get has more prominent ridges, unlike the very smooth surfaced ones that’s common here. Pale green and pleasantly sweet, chayotes are favored in curry and sambar preparations in our area.

Although available year round, this is the season, where you would see the prices come down for this vegetable here in US. We can buy 2, or sometimes 3 chayotes for a dollar. And 2 are needed to make a decent portioned curry to eat with chapatis for two people. Often I combine the chayotes with potatoes and carrots to make it more substantial and to last at least two meals for us.

Mild flavored chayotes dressed up in coconut-chilli seasoning and little bit of turmeric, together with potatoes and carrots make a delicious curry and a welcome addition to the meal at any time of the day.

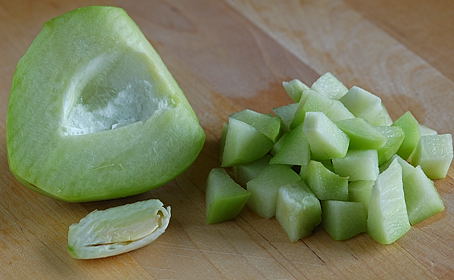
Choyate cut to half, seed removed and diced to cubes
Choyate cut to half, seed discarded and diced to cubes

Recipe:

2 each – chayotes, small red potatoes and carrots – lightly peeled and cubed to bite sized pieces. I usually remove and discard the seed from chayote (see the photo above) following the traditional method. Reason given by elders is that seeds are not good for health. I am not sure how true that saying is but still I follow.

1 tablespoon of fresh grated coconut and 6 small green chillies – grind finely in a spice grinder or in a mortar.

½ cup of fresh green chickpeas (green garbanzos/Hara chana or Choleye)
½ teaspoon each – salt and turmeric

popu or tadka ingredients – 1 tsp each – peanut oil, cumin, mustard seeds and 4-6 curry leaves.

———-

In a wide skillet, heat peanut oil on medium heat. Add and toast curry leaves, cumin and then mustard seeds. When seeds start to jump around, add the green chickpeas. Saut? them for few minutes.

Add the chayote, potato and carrot cubes. Cover and cook on medium heat for about 10 to 15 minutes, stirring in-between. Just when they are getting tender, stir in the green chilli – coconut paste, salt and turmeric. Mix thoroughly and cook for few more minutes, covered until the vegetables reach the tenderness you desire. Chayote releases water on cooking and this water helps to tenderize the potatoes and carrots.

Serve warm with chapatis or with naans.


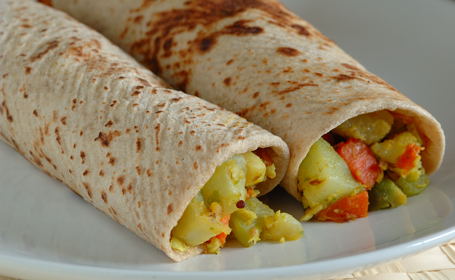
Chayote curry wrapped in chapatis with a cup of yogurt on the side ~ Our afternoon meal

Fresh, green chickpeas purchased from – Indian grocery & and also at Trader Joe?s Frozen section.

Posted by Indira©Copyrighted in Amma & Authentic Andhra,Baby Potatoes,Carrots,Chayote (Cho Cho),Hara Chana(Green Chickpeas) (Wednesday January 3, 2007 at 2:02 pm- permalink)
Comments (13)

The New Home of Mahanandi: www.themahanandi.org

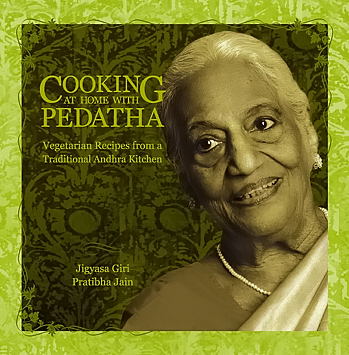
Cooking at home with Pedatha ~ Cookbook Review, Interview and Recipe

Recently I have received a cookbook to review. The title of the book is “Cooking at home with Pedatha”.

Atha (or attha) means father’s sister in Telugu. Pedatha means eldest Atha. After grandparents, Pedatha, an authority motherly figure is the most important person and pedatha’s advice and asheerwad (blessings), are always sought in our homes during difficult times and for celebrations. We respect pedatha. After reading and trying a couple of recipes from Pedatha’s cookbook, I felt like I’ve found an emerald gem that would bring good health and good luck to my cooking.

Here in this cookbook, the authors Jigyasa Giri and Pratibha Jain captured their Pedatha’s 85-years kitchen experience and wisdom. A blend of hot, sweet, sour and aromatic flavors, often all in one dish – the genius and simplicity of Andhra cooking, are laid out in endearing detail. Rice preparations, simple stir-fry curries, spicy powders, savory rasams and traditional sweets are all explained in Pedatha’s words. The result is like a marriage of perfect flavorings with natural goodness of fresh ingredients.

What I particularly liked about this cookbook is how it speaks to us, the Indians. It has an authentic voice which is compelling. I am from Nandyala, Andhra Pradesh and almost all of the recipes are just the way my mother would prepare. There are no shortcuts and there is no compromise in authenticity to please the western audience taste. Accompanied by breathtaking images, the recipes are easy to follow and most of them can be cooked in a short 30-minute time.

The only drawback I can think of is, when compared to ‘Hummer’ size cookbooks in vogue now, this book with 61 recipes in 87 pages may look like ‘Toyota Prius’. On the other hand, this may not be a drawback at all. I think even a newbie will easily get an idea and can cook a decent full fledged Andhra feast called “vindu bhojanam”, following the recipes, images and the menu ideas.

If you are like me, uninspired by cookbooks that devoid of originality and authenticity, often poor victims of meddling editing and mega publishers pressuring tactics, and hungry for a true Indian cookbook, then this book is for you. You may be a novice or an experienced cook, “Cooking at home with Pedatha” with its clutterfree instructions and clean, pleasant images will definitely assist and delight you just like Pedatha in our lives. Check it out!
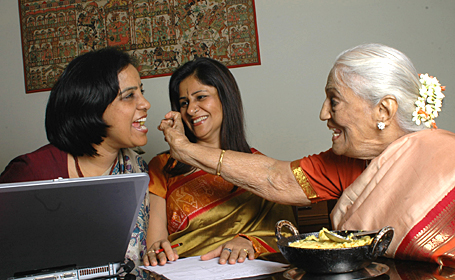

Pratibha Jain and Jigyasa Giri with Pedatha (Sreemati Subhadra Krishna Rau Parigi)

double_curve.gif

Interview with Jigyasa Giri and Pratibha Jain

Cookbooks are dime a dozen here in USA, but they are rare in India. There is no cottage cookbook industry and publishing a cookbook particularly one that focuses on regional cooking is still a big deal. Most of the times it’s truly a labor of love.

I wanted to know who inspired and what motivated the authors, and how they survived the brutal publishing phase to bring the book into market. Pratibha and Jigyasa responded immediately to my questions and were kind to this newbie. Thanks Pratibha and Jigyasa!

Here is my interview with the authors.
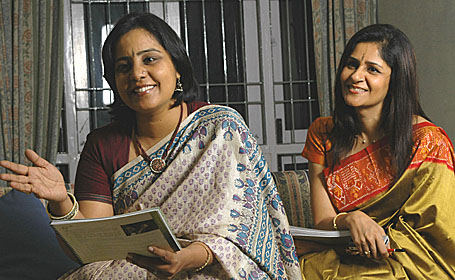

Pratibha and Jigyasa ~ Authors of the Cookbook

You have made an excellent book with uncompromising authentic recipes. What motivated you to write and publish this book? Who is your intended audience?

Thank you for the compliments. Frankly, the main motivating factor was pure love. When you meet Pedatha, you will realize how true this answer is. You know Indira, most of the things we have done in life have always been planned. Strangely, this book was never an agenda. Both of us like interacting with elders very much and we just used to visit Pedatha and chat – invariably about food, for such is her passion for cooking. When that personal collection became a book…. it was destiny’s hand and we just went along with the force of it.

Regarding the audience, we thought it was a niche product. Therefore, the only way to appeal to a wider audience was the idea of a coffee table book. Honestly, we never ever expected to go into second print, and so soon.

Our elders, who are greatly experienced in our cooking styles are exceptional assets for us. “Peddatha” is one such great asset. What did she think about publishing her recipes in the form of a book?

She would be very excited about teaching us whenever we visited her. But later, when the idea of a book emerged (initially from Jigyasa’s husband who said this is not a personal collection, this is a book in the making), she was very apologetic and shy. She kept saying it was home food and that there was nothing to it. In fact, she also once said that she feared people would say that she had misled us ‘little girls’ into thinking that her food was exceptional.

We remember one day when she said the same thing again. And we told her, “Pedatha, does a pearl know its worth? Only a jeweler knows that. So you Pedatha, are our precious pearl and we are your jewelers. Oh how she laughed and said – Now I understand. Ok ok.”

After all the fame and interviews, she is still as simple as always. We can’t stop marveling at that. But she thanks us a hundred times and laughs – “Without walking the ramp, you naughty girls have made me a model”. She calls us – The three Musketeers. She calls our laptop a lapdog because she says it has been so faithful to her. She thinks the recipes are just as she cooks them.

The beauty of the book you made truly portrays the essence of the recipes you put in the book. Cooking is intensively skilled process. Recording and reproducing these processes in the form of a book requires another level of skills too. What was your approach and method to create such wonderful design, photographs and narration? Who was your inspiration?

The first step of inspiration was Pedatha’s photographs – we were

stunned when we saw the results of the camera. I guess from there, we just had to make a book that blended with her pictures.

Regarding the layout and graphics, all credits to our team – Prabodh Jain (every adjective mentioned in the thanks note in the book is just apt – creativity and sustained vision) – he nudged us along every step of the way, challenging us not to compromise; Kavitha Shivan, our young layout designer, is a dream to work with (if u put aside her moods:) and spells of inactivity), guess that’s what creativity is about. In fact, Kavitha played a vital role in food presentation. Srivatsa, our photographer, simple, genuine and hard working – ever willing.

Pratibha’s mom once asked her brother Prabodh what made him so passionate about this project. He said, “Mom! These girls will kill themselves for that right word, the right phrase (he had seen our endless editing and the dozens of times we tried each recipe). How can any of us not respond likewise!” This was a compliment indeed.

I can understand that publishing a book is not as simple a process as preparing a dish. You might have gone through a great deal of work to get the book in to the market. How did you survive through tedious process?

Once the book was ready, quite a few friends and relatives came forward to launch the books. You can see that in the calendar page of our site. Pedatha’s son Mr. A.P.Parigi, an encouraging, positive, friendly person, came forward to launch the book in a big way in Mumbai. That evening was a phenomenal success.

Apart from that, Westland immediately agreed to distribute in India. We are still far behind in distribution though. As single book authors, it is not easy to get a shelf place in stores. However, since we are primarily ambitious as writers, it gives us that space within ourselves not to get obsessed with sales and marketing beyond a point.

What do you think about food blogs and would you like to share anything else with the readers of food blogs?

Food blogs are a reaching-out point for most net savvy cooks. It is almost like a huge wave out there. So easy to find recipes now, just a click away. And in blogs, the responses from other readers to the recipes make it interesting, as well as help decision-making. The best thing is the photographs on food blogs – they are honest, the food looks as it cooks. We wish every food blog would have a grandma’s corner – recipes, health tips, and anecdotes. Grandmas and granddads are such an awesome phenomenon.

What a wonderful thing that blogs are free! Anywhere, anyone who has something to say or share has a forum to do so. Thanks to food bloggers, our kitchens are constant discovery zones now.

double_curve.gif

Arati ~ Ava Pettina Kura (Raw Banana with a Twang of Mustard)
Recipe from “Cooking at home with Pedatha”
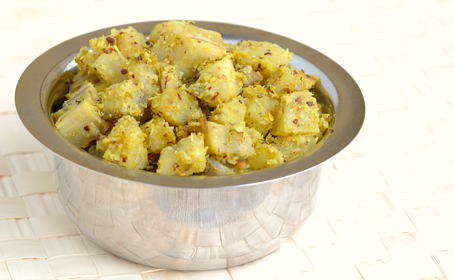
I have been cooking several recipes from the cookbook for the last few days. Traditional recipes that I totally forgot until now. One such recipe is plantain curry with mustard seeds paste. Known as arati ava pettina kura, this special, seasonal dish of Andhra is often prepared for festivals.

I’ve followed Pedatha’s words and instructions mostly, and added salt and chillies to suit my taste. The result was a spectacular, simple dish, which brought me incredible joy. The kind of joy and happiness one would feel when remembering a cherished memory or taste from the past. Thank you Pedatha!
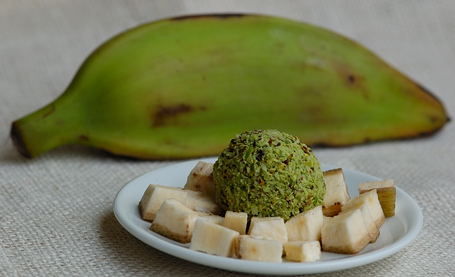

Plantain cubes and Mustard Seed- Coconut Paste

Recipe:

2 plantains
peeled & cut into cubes – boiled in water just until tender & drained.

For Mustard Seed ~ Coconut Paste:
2 teaspoons mustard seeds and 1 tablespoon of raw rice
(soaked in warm water for 10 minutes – to soften, so that they can grind well)
¼ cup of fresh grated coconut
8 green chillies – small, Indian variety
1 inch piece of ginger – peeled and cut to tiny pieces
¼ cup of fresh cilantro leaves and pinch of salt
grind them to smooth paste without adding any water – in a mortar or in a blender

For popu or tadka:
1 tsp each – urad dal, cumin, mustard seeds
6 each- curry leaves and red chilli pieces
A pinch of asafetida powder

Salt and turmeric to taste

In a wide skillet, heat a tablespoon of oil. Add and toast popu or tadka ingredients listed to gold color. Add the grinded paste. Saute until it leaves the raw smell for few minutes on medium heat. Add in boiled plantain cubes, turmeric and salt. Mix thoroughly. Sprinkle two tablespoons of water and cook covered for about 10 minutes stirring in-between.

Serve warm with chapati or rice.
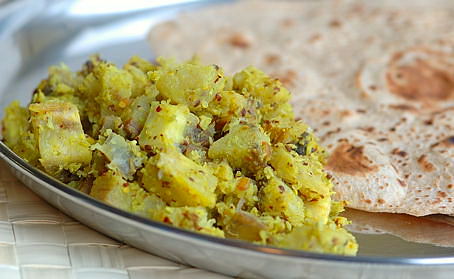

Arati Ava Pettina Kura with Chapati (Plantain – Mustard Curry with Chapatis)

Cooking at home with Pedatha:
Recommend this cookbook to your local libraries
Jigyasa and Pratibha’s Website: www.pritya.com
Cookbook cover and authors photo credit : Jigyasa and Pratibha

double_curve.gif

Posted by Indira©Copyrighted in Amma & Authentic Andhra,Arati Kaaya (Plantain),Biyyamu (Rice),Coconut (Fresh),Reviews: Cookbooks,Zen (Personal) (Tuesday December 12, 2006 at 8:48 pm- permalink)
Comments (63)

The New Home of Mahanandi: www.themahanandi.org

How to Food Blog? ~ Live and Let Live philosophy & Methi-Nariyal Pulao (Fenugreek-Coconut Pilaf)

The holiday season is here in US!

Food blogging community is abuzz with calls for donations and charity drives, to show that we are not some greedy gluttons always in search of next best exotic ingredient, and we have a compassionate heart. Good things we are doing. Also without some family ‘discussions’, where is the joy in holidays? In last few weeks, we’ve seen amateur gourmets to who spits wine, issuing ultimatums to the community. One blogger writes stop being mediocre, stop writing about what you had for lunch and urges us to strive for the foodie exhibitionist avatar, him in a nutshell. And one wants to name and shame the bloggers who don’t provide – ha… the terminal crime, RSS feeds. Imagine the audacity of some food bloggers, who wish for people to spend some time visiting their page and recipes they laid out neatly, instead of being treated like ‘grab and gulp’ fast food road stops. Imagine, for all their hard work, some food bloggers want people visit their actual web page, instead of being one more bland white page in a RSS feed hell.

Just few lunches with corporate promoted celebrity chefs and few sponsored dinner reservations at 300 dollars a meal – French Laundry, is all one needs these days to act like all-knowing, bloggity wisdom dispensers. Like utterly corrupted evangelical leaders that issue bully ultimatums of one has to follow only their religion to enter the heaven, these food bloggers who tasted the fame, suddenly forgot their beginner days of blogging and thunder on us, to write like them and do what they do, to enter the golden greedy gates of mainstream fame. What if the ‘mediocre’ home cooks start writing what’s on their minds about such things? These sermon serving, self-proclaimed soul savers, will they be ready to hear how shallow they sound in their daily posts.

What happened to “live and let live” philosophy?

They may join forces with few food magazine columnists in demeaning the home cooks who blog about cheese sandwiches – the everyday food. But they keep forgetting that home cooking and bloggers who write about lunch meal recipes have been the building bones of food blogging community. Home cooks in general are compassionate, understanding and gentle. Rarely narcissistic and flashy. Not only towards the ingredients and the recipes they blog, but also in their writing style and in interaction with readers. This approach is considered boring and mediocre by advice dispensers. Really? If we want to read glorified, glibbery accounts of restaurant food or doltish gibberish of kitchen mishaps, or how micro plane zester or some latest kitchen gizmo saved their cooking – we already have puffed up Frank Bruni and his kind’s writings in newspapers and food magazines, all available free at the local libraries. These ‘wannabe’ food bloggers may think they are being original, but who are they kidding?

I blame the current tide in food blogging world on holiday pressures. I do hope that this drive to conform foodbloggers to their thinking passes once the holiday season is over. There are many ways and many reasons to blog. Live and Let Live. With that said, here is today’s recipe – what I had for lunch, very much homemade, not RSS fed – coconut and fenugreek pulao.

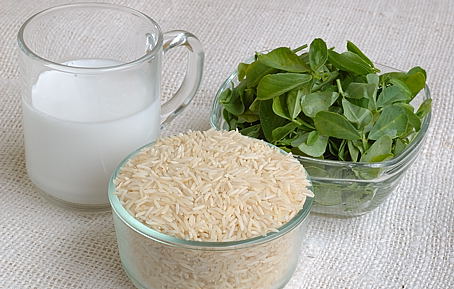
Aromatic basmati rice, sweet homemade coconut milk and potent fresh fenugreek leaves – cooked together is a recipe that I have learnt from my mother and very much illustrates the ingenuity and wisdom of home cook. Nutritious, wholesome and a one-pot meal, give it a try.


Homemade Coconut Milk, Basmati Rice, Fresh Fenugreek Leaves

Recipe:

2 cups basmati rice
2 cups fresh methi (fresh fenugreek) leaves
6 chillies – sliced thin lengthwise
1 cup fresh peas
1 cup finely sliced onion – lengthwise
½ cup homemade coconut milk or ¼ cup of store-bought type
½ cup roasted cashews (optional)
1 teaspoon each – ghee or peanut oil and salt or to taste
¼ teaspoon each – black peppercorns, cloves and fresh ginger pieces
coarsely grind using a spice mill or in a mortar with pestle

Wash and soak basmati rice in 3 cups of water for about 15 – 30 minutes.

Meanwhile, in a thick-bottomed wide pot, heat ghee or oil on high heat. Add and fry the onions first and then the peppercorn-clove-ginger paste and chillies. Add the fresh peas and fresh methi leaves. Stir-fry until the leaves wilt.

Add the basmati rice and along with the water it soaked in. Stir in coconut milk and salt. Mix thoroughly. Reduce the heat to medium and cook, covered for about 15 to 20 minutes. By the end of 20 minutes, the water will be absorbed and rice will be cooked to perfection. At this time, add and gently mix roasted cashews. Close the lid and let the rice sit for another 5 to 10 minutes.

Serve hot. Sprinkle in some lime/lemon juice just before serving.

Coconut milk and fresh peas balance methi ruchi (flavor). Basmati and roasted cashews addition makes it even more pleasant. Good meal when combined with a kurma/kofta curry or just plain yogurt/raita.


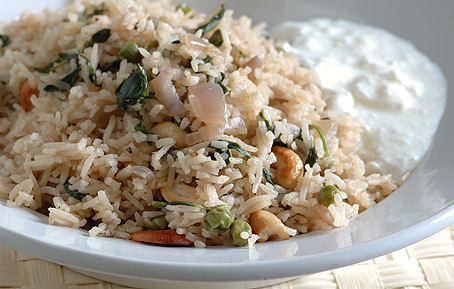
Methi-Nariyal Pulao with Yogurt ~ Our lunch today

Added on Dec 7:
Thanks for all your responses. It has been a lively discussion. Glad to see this topic has given all of us a chance to express our ideas about food blogging and how to do it. I had to scrub four comments because of the rude and soliciting nature of the content.
Also, thanks very much for trying out the recipe and letting me know. I greatly appreciate it!
– Indira

Posted by Indira©Copyrighted in Amma & Authentic Andhra,Basmati Rice,Biyyamu (Rice),Coconut (Fresh),Menthi Kura(Fenugreek) (Wednesday December 6, 2006 at 7:46 pm- permalink)
Comments (37)

The New Home of Mahanandi: www.themahanandi.org

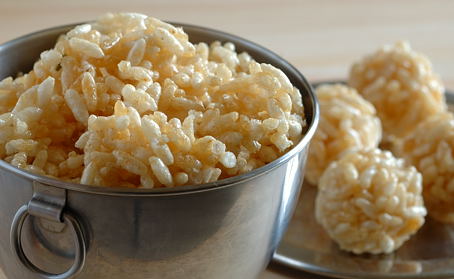
Borugula (Murmura) laddu (Homemade Rice-Jaggery Crispy Sweet from India)


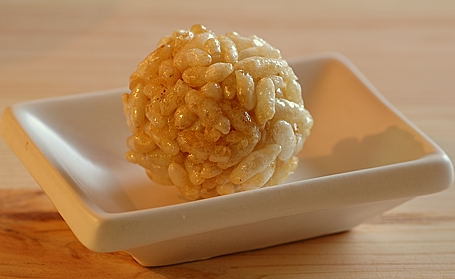
Golden Borugula Laddu under Evening Sunlight

How can one convey nostalgia? I am no wordsmith and sometimes words escape me, so I try it with my camera lens.

A nourishing and delightfully scented, not so sweet but fun kind of treat from my childhood days is murmura laddu. Also known as borugula mudda in Telugu and rice crispies in English.

During December and January months (Sankranthi time), when parents are busy with harvesting rice and sugarcane, grand parents prepare these crunchy, homely sweets for children with freshly popped murmura from rice battis and just minted 24 karat quality jaggery. Jaggery syrup is prepared and murmura are added – just these two ingredients and tiny touch of cardamom – that’s it. Magical, irresistible laddus would be ready to keep us children (mouths) busy.

I am happy that I am finally able to recreate this Sankranthi magic on Mahanandi. Though recipe looks simple, I know how difficult it is to prepare these kinds of sweets, so I measured and timed the process to make it fail proof and for decent results. Give it a try.


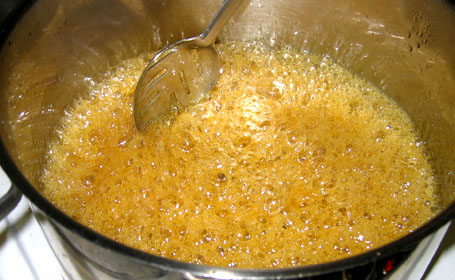
Preparing Jaggery Syrup for Murmura laddus

Recipe:

Murmura (borugulu, puffed rice)one quart
Jaggeryone cup (powdered)
Water – one cup
Cardamom – 2 (seeds powdered)
To test jaggery syrup readiness – Keep a small plate with cold water ready by stove side.

In a big, sturdy, thick-bottomed vessel, add water and jaggery. Cook on medium-high heat. Jaggery melts and begins to concentrate. When it starts foaming like shown in the photo above, it reached the consistency we want for this recipe. To test, add few drops of jaggery syrup to the cold water. When pushed with fingers, if the syrup can be rolled to a round and keeps share without melting in spite of tilting the plate to different directions, it is done and the syrup is ready. This whole process takes about 15 to 20 minutes.

Constantly stirring, add murmura. Also sprinkle in cardamom powder. Within one or two minutes, murmura starts to soak up the syrup and comes together in to dry mass. Turn off the heat. Remove the pot from the stovetop to countertop.

Wait for about 5 minutes for murmura-jaggery mixture to cool down and then start making laddus. Take a spoonful of mixture into hands and press gently into round shape. Keep a bowl of cold water on the side. Dip your hands in-between laddu making to keep hands unsticky and cool. Or ladle off the whole mixture into a greased pan. Press firmly and evenly. Cut into squares and let it cool. Break along the lines to separate the pieces.

Makes about 12 medium sized laddus or squares.


Hot Murmura-Jaggery Mixture and Making of Laddus


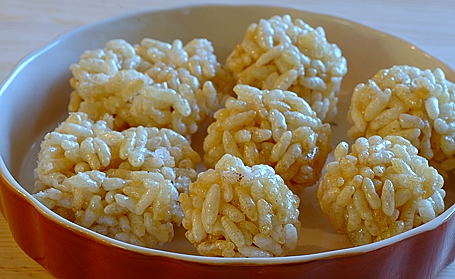
Murmura (borugulu, puffed rice) laddus and squares
Fun Jaggery-Rice Crispy Treats From India for Kay’s JFI

Kitchen Notes:
1 quart = 2 pints = 4 cups = 32 fluid ounces =.95 liter
Murmura and Jaggery are available at local Indian grocery shops.
Prepare this sweet with fresh, crunchy tasting murmura only, for best results.
One more recipe for murmura laddu – from Cooking Medley

Posted by Indira©Copyrighted in Amma & Authentic Andhra,Biyyamu (Rice),Indian Sweets 101,Jaggery,Mitai,Murmura (Borugulu) (Thursday November 30, 2006 at 10:05 pm- permalink)
Comments (55)

The New Home of Mahanandi: www.themahanandi.org

Brinjal~Jaggery Chutney (Vankaya Bellam Pacchadi)

Cooking is an ultimate balance act, isn’t it? Take time to learn and practice to achieve that balance, the rewards are high. Not only good health, but also a balanced mood. Some ingredients and recipes are easy to balance and master. But for some, one needs yogi’s kind of patience and sadhana. Jaggery, particularly in savory recipes, is one such ingredient that I needed to practice a lot to achieve the balance. Consistency and quantity are difficult to explain and I had to rely on my flavor senses for guidance in my beginner days of cooking. I hope you do the same when you cook with jaggery in savory recipes, like the one I am posting today, as part of my weeklong Jihva jaggery journey.

Brinjal-Jaggery chutney (Vankaya-Bellam pacchadi) is a classic Andhra (Nandyala) recipe where young brinjals, dried red chillies and ginger are first roasted and then grinded together with jaggery, tamarind and salt. The result is a mouthwatering side dish with all 5 flavors and some extra smoky flavor, usually eaten with rice, ghee and dal or sambar. If you like baingan burtha, baba ghanouj style brinjal preparations, where brinjal is grilled and mashed, then this chutney is also your style.


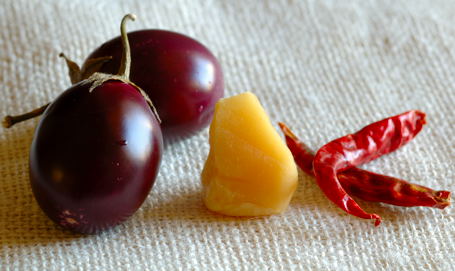
Brinjals, Jaggery and Dried Red Chillies

Recipe:

8 young brinjals – ends removed and sliced lengthwise
8 dried red chillies
1 rupee coin sized ginger
1 red onion or shallot – sliced lengthwise
1 tablespoon each of powdered jaggery and tamarind juice
¼ teaspoon of salt or to taste

Heat two tablespoons of peanut oil in an iron skillet. Bring the oil to smoking point. Now add brinjal, onion and ginger. On high heat, grill them. Do not cook and soften but brown them -secret to tasty chutney. If you are one of those ‘gifted’ with charring or blackening all things you cook, then you need to use that gift here, my friend. Leave the care to the world and char the brinjals’ white flesh to your hearts content. Remove them to a plate. Add and grill dried red chillies for few seconds.

In a food processor or blender, take grilled brinjals, onion, ginger and dried red chillies. Add salt, tamarind juice and jaggery. Hit pulse button and coarsely puree. Remove to a cup. Traditionally popu or tadka (toasting cumin, mustard seeds and curry leaves in one teaspoon of oil) is added to the chutney at the end but this step is entirely optional. Sometimes I do it, sometimes I don’t, depends on my time and patience.

Serve with rice, ghee and dal or with pappu chaaru/sambhar.


Brinjal-Jaggery chutney mixed with Rice in Pappu chaaru – Savory Jaggery Entry to Kay’s JFI

Posted by Indira©Copyrighted in Amma & Authentic Andhra,Jaggery,Vankaya (Brinjal) (Wednesday November 29, 2006 at 9:40 pm- permalink)
Comments (33)

The New Home of Mahanandi: www.themahanandi.org

« Next PagePrevious Page »