Mahanandi

Living in Consciousness ~ Indi(r)a’s Food and Garden Weblog

Scrumptious Subjis ~ Sprouted Pea Subji

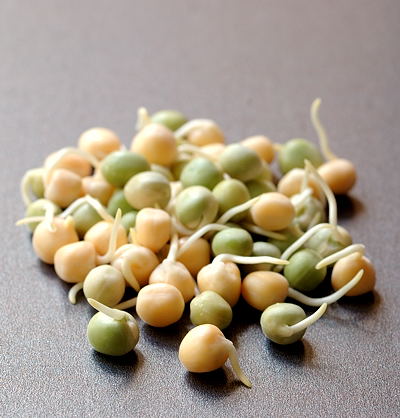
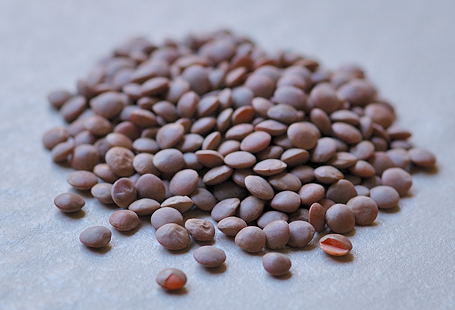
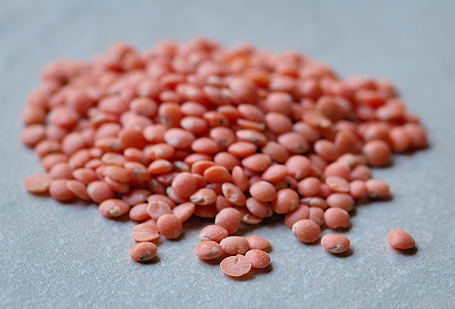
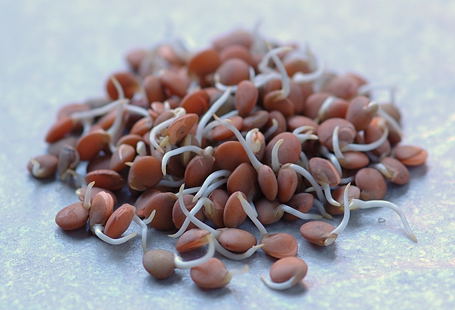
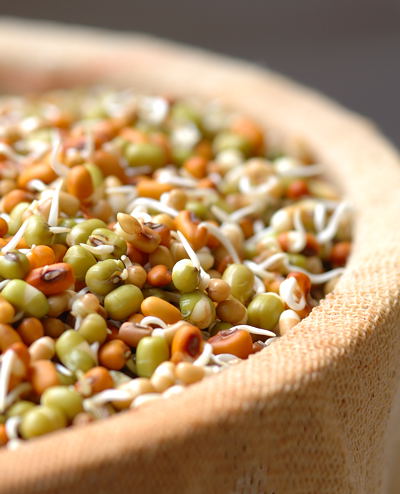
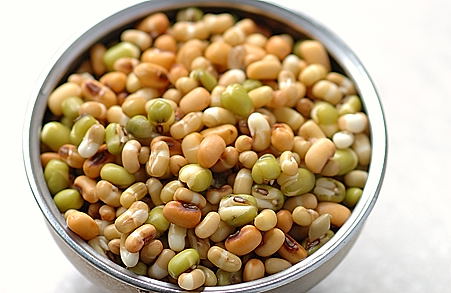
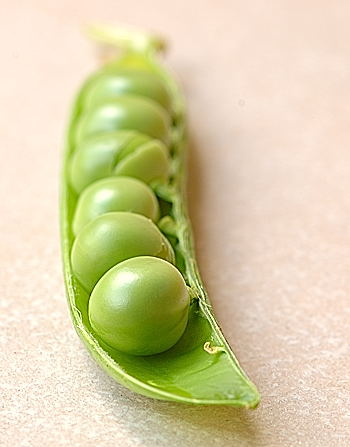
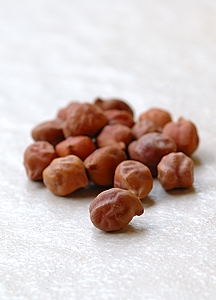
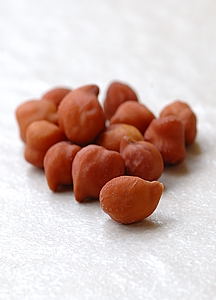
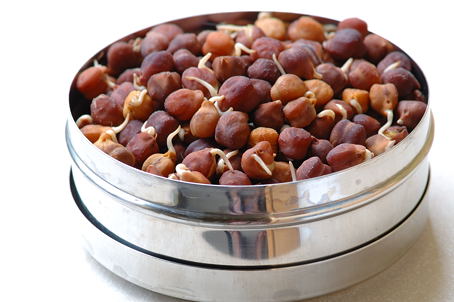
In pale green and yellow colors, the dried peas make pleasant looking sprouts. The sprouting process changes dried peas to tender and also enhances the natural sweetness unique to peas. And when cooked together with tomatoes and spices, sprouted peas make a robust and filling meal.

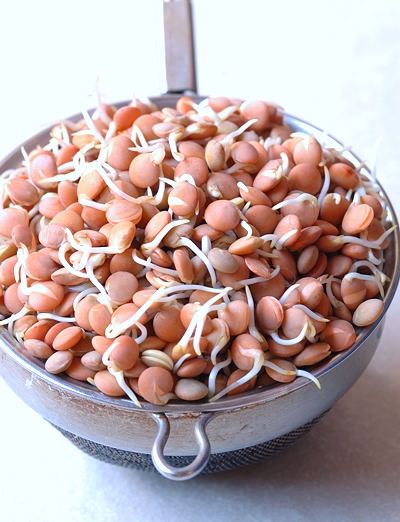
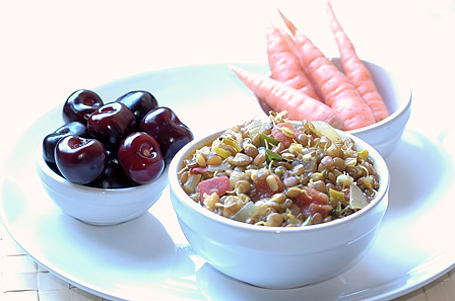
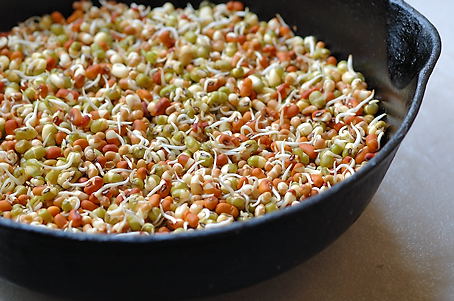
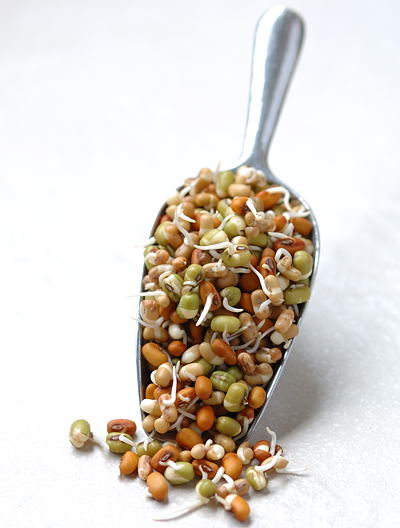
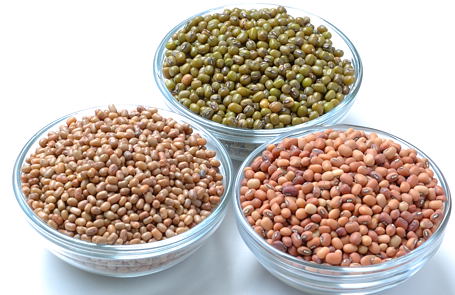
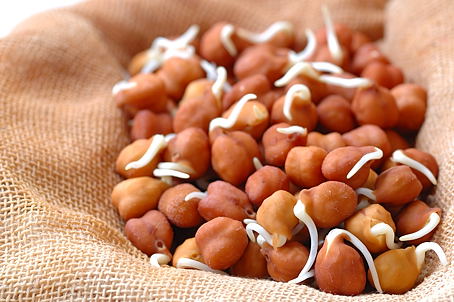
Both green and yellow colored dried peas can be purchased from Indian grocery shops. To sprout, soak the peas in water overnight. Next day, drain the water and gather the peas in a clean, breathable cotton cloth. Place them in a basket, cover, and keep the basket at a well ventilated windowsill or warm area in the home. Don’t let the cloth dry. Spray water to supply moisture necessary for sprout growth. Usually within a day, sprouts start to appear and wait another day or two, to grow them the size shown in the photograph.

Green and Yellow Vatana  Sprouts
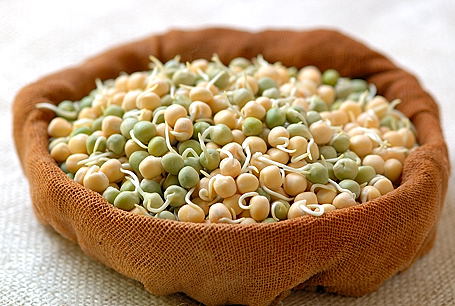
Green and Yellow Sprouted Peas

Recipe:

1 teaspoon peanut oil
4 curry leaves and a pinch each cumin and mustard seeds
1 onion and 4 tomatoes – finely chopped
1 cup green and yellow sprouted peas
2 tablespoons roasted cashews – ground to fine powder
½ tsp each – ginger-garlic paste and garam masala powder
¼ tsp each – turmeric, red chilli powder and salt or to taste
Lemon/lime juice to taste

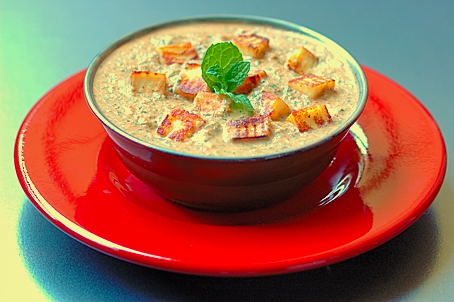
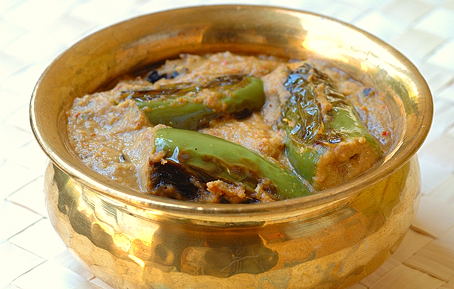
In a big saucepan, heat the oil until a curry leaf tossed in it sizzles. Keep the heat to medium. Add the curry leaves and toast to pale brown. Toss in cumin, mustard seeds. When seeds start to splutter, add the onions and ginger-garlic paste. Stir fry few minutes until onions soften. Stir in tomatoes, sprouted peas and about a cup of water. Cover the pot with a lid and cook.

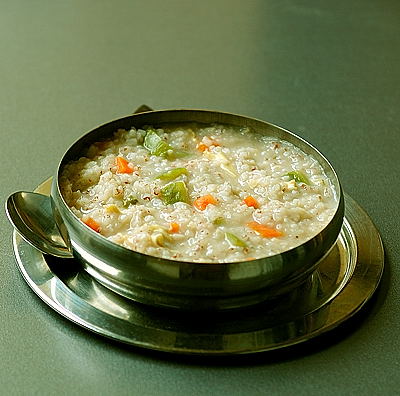
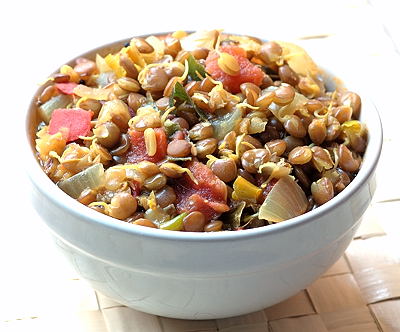
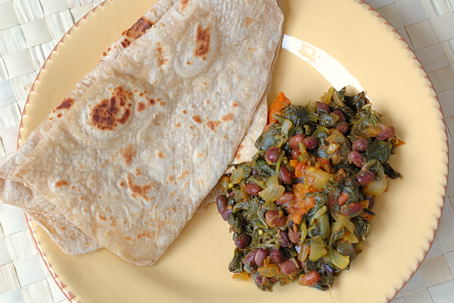
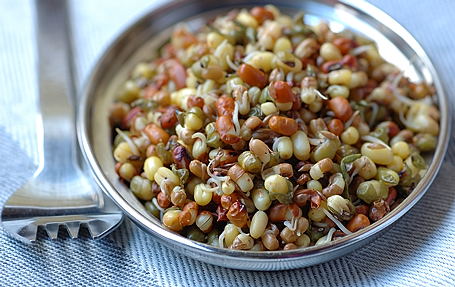
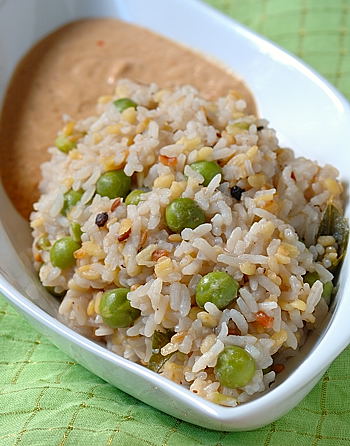
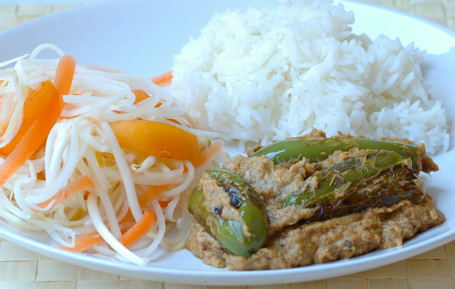
When peas start to get tender, stir in the garam masala powder, turmeric, chilli powder, salt and cashew powder. Add water if the subji looks too dry. Mix and simmer until peas reach the tenderness you desire. Serve the Subji warm with lime juice sprinkled on.

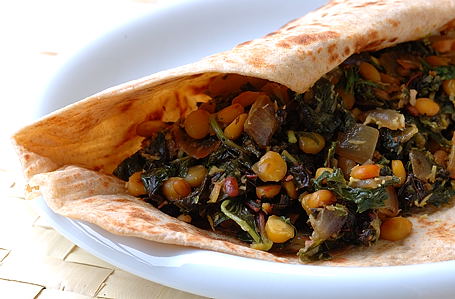
We had it with paratha and a cup of yogurt on the side. Good meal.


Punjabi Inspired Sprouted Pea Subji
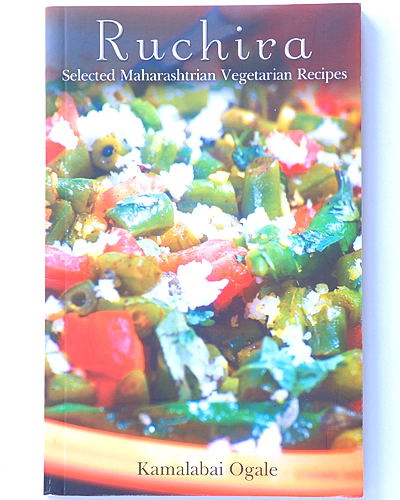
for RCI: Punjabi Cuisine Event Hosted by Richa of As Dear As Salt

Posted by Indira©Copyrighted in Peas (whole),Sprouts (Molakalu) (Monday July 23, 2007 at 7:45 pm- permalink)
Comments (16)

The New Home of Mahanandi: www.themahanandi.org

Batani (Vatana) Sprouts ~ Green and Yellow

Green and Yellow Pea Sprouts
Green and Yellow Pea Sprouts ~ for This Week’s Indian Kitchen

Yellow peas split are marketed as yellow split peas. And, yellow split peas are neither toor dal nor chana dal.

Posted by Indira©Copyrighted in Indian Ingredients,Indian Kitchen,Peas (Bataani),Peas (whole),Sprouts (Molakalu) (Sunday July 22, 2007 at 9:13 pm- permalink)
Comments (7)

The New Home of Mahanandi: www.themahanandi.org

Weekend Garden ~ Chickpea Flower

Chickpea Flower
Chickpea Flower ~ From Our Patio Garden


Slide Film Photography ~ by Singari Vijay

Sree’s Canvas ~ by talented artist Sree of Kochi, India

Posted by Indira©Copyrighted in Chickpeas-Black,Hara Chana(Green Chickpeas),Zen (Personal) (Saturday July 21, 2007 at 9:05 pm- permalink)
Comments (12)

The New Home of Mahanandi: www.themahanandi.org

Vegetarian Congee with Rosematta and Yuba

I’ve been experimenting different recipes with Rosematta rice (the terracotta colored rice variety from Kerala, India).

In addition to the traditional steam-cooked Rosematta rice, I’ve made Rosematta pongal and Rosematta idly so far. Everything turned out excellent. Rosematta truly brings wholesome and wholegrain rosy goodness to a meal. The Chocolate Lady seems to agree with me. Check out her Rosematta rice and cashew matar meal combination.

One another recipe I wanted to try with Rosematta is vegetarian congee. Congee or ganji is little amount of rice simmered in large quantities of water to a creamy porridge. At its most fundamental, congee is rice water, flavored with buttermilk or coconut milk, chilli and salt. For today’s meal I dressed up the Rosematta congee with vegetables and Yuba (The thick cream that forms on the top of simmering soy milk is removed in layers, sun-dried and rolled into sheets). Add few pieces, the yuba will soak up the saaram, become soft and taste like milk meegada. A neat protein delicacy popularized by Buddhist monks, I gathered.

Sometimes you have to spend hours in the kitchen to make a remarkable meal. Sometimes it becomes effortless, today is one such day. Rosematta and yuba together made a hearty vegetarian congee. We loved our soothing, simple supper.

Broken Rosematta Rice and Yuba
Coarsely Milled Rosematta Rice Grains and Yuba (Soymilk Meegada, Bean Curd Sticks)

Recipe:

1 cup – coarsely milled (broken) Rosematta rice
½ cup yuba (bean curd sticks, broken to one-inch length pieces)
½ cup each – cut pieces of carrot and ridge gourd (turai, beerakaya)
6 cups water and 1 cup milk.
1 teaspoon peanut oil or ghee
Seasoning:
6 fresh curry leaves
1 tablespoon ginger juice (Grate or crush the ginger & squeeze.)
1 teaspoon – coarsely crushed black pepper
½ teaspoon salt or to taste

In a big pot, heat ghee or oil.
Add and saute curry leaves, black pepper, carrot and ridge gourd pieces 2mts.
Add the yuba, Rosematta rice, water and milk.
Stir in salt and ginger juice.
Bring to a boil, then lower the heat, cover and simmer for about 30 minutes.
When the congee becomes thick and creamy, turn off the heat.
Serve warm. Tastes great with pickle.


Vegetarian Congee with Rosematta and Yuba ~ Our Meal Today

Notes:
Homemade Yuba ~ Recipe
Rosematta rice ~ Broken variety purchased at Apna Bazar, Bellevue
Yuba (Bean Curd Sticks) at Uwajimaya or also at Chinese grocery.

Posted by Indira©Copyrighted in Beera kaaya(Ridge Gourd),Biyyamu (Rice),Rosematta Rice,Soy (Tofu, Yuba) (Wednesday July 18, 2007 at 9:23 pm- permalink)
Comments (19)

The New Home of Mahanandi: www.themahanandi.org

Dazzling Dals ~ Sprouted Masoor Dal


Masoor Dal Sprouts

Whole masoor dal is quick to sprout. Just few hours soak-time in water and few hours hang-time in a cotton cloth under the warm rays of the sun. That’s about it. Like the sensitive student that staunchly strives to deliver a stellar performance, masoor dal swiftly transforms itself from drab brown to dazzling shade of orange-brown within a day. Truly impressive.

This is the first time I did the sprouting thing with whole masoor and I found the process undemanding and the sprouts pleasant tasting. I remember from science classes that the sprouting process turns the starches in lentils and legumes into more digestible sugars. Whole masoor dal provides a textbook example. Prominently perceptible sweet taste, crisp texture, delicate and a delight, masoor dal sprouts are a must try for sprouts connoisseurs. I totally recommend.


Sprouted Masoor Dal Stew

This is what I’ve prepared with sprouted masoor dal. A light and easy, low-calorie stew with a taste that humbles even the contrived sprouts-cynic. That’s how I felt after the meal.

Recipe:

1 teaspoon peanut oil
2 each – curry leaf sprigs and garlic cloves, coarsely chopped
¼ tsp each – cumin, mustard seeds and asafetida(inguva)
1 onion, 2 tomatoes and 3 green chillies – finely chopped
2 cups sprouted masoor dal
¼ tsp each – turmeric and salt, or to taste
1 lime – juice squeezed
Few Springs of Fresh Coriander

In a big saucepan, heat the oil until a curry leaf tossed in it sizzles. Lower the heat to medium. Add the curry leaves and the garlic to cook to pale brown. Toss in cumin, mustard seeds and asafetida. When seeds start to jump, add the onions, tomatoes and chillies. saute for few minutes until they soften.

Stir in sprouted masoor dal, turmeric and salt. Add about a cup of water. Bring to a boil and reduce the heat and simmer until the dal reaches fall-apart stage, about 10-15 minutes. Add lime juice and few sprigs of fresh coriander leaves. Mix and serve warm. It tastes good on its own. No rice or chapati is needed to enjoy the sprouted masoor dal and that makes it a perfect meal for calorie-conscious.


Sprouted Masoor Dal with Farm Fresh Carrots and Cherries ~ Humble Meal on a Hot Day

Notes:
Whole masoor dal (brown) and Split masoor dal (Red) can be bought at Indian groceries and also at natural food stores in bulk bins here at US.

Posted by Indira©Copyrighted in Masoor Dal (Red Lentils),Sprouts (Molakalu),Tomato (Monday July 9, 2007 at 9:09 pm- permalink)
Comments (18)

The New Home of Mahanandi: www.themahanandi.org

Series of Sprouts ~ Masoor Dal


Masoor Dal ~ Whole


Masoor Dal: Outer Brown Skins Removed and Split


Masoor Dal Sprouts

Posted by Indira©Copyrighted in Indian Ingredients,Masoor Dal (Red Lentils),Sprouts (Molakalu) (Sunday July 8, 2007 at 9:02 pm- permalink)
Comments (9)

The New Home of Mahanandi: www.themahanandi.org

Pudina Paneer for Picnic


Pudina (Mint) from our Patio Garden

Pudina Paneer has the perfect punch to serve with pulaos and parathas on a picnic party. It’s good with grilled chicken and fish too.

Recipe is easy to execute. Involves grilling and grinding.

Grilling :
On stove-top or on a hot grill, place a slab of paneer and grill each side for a minute. Remove, cool and slice the paneer slab to bite sized cubes.
On stove-top or on a grill, place an iron skillet and heat the oil until it’s very hot. Add and saute Pudina leaves till they wilt. Remove to a plate.
In the same skillet, place onions, tomatoes, garlic and green chillies. Grill to brown.

Grinding:
In a food processor or mixer, take roasted peanuts. Grind to fine consistency.
Add the sautéed Pudina leaves, grilled onions, tomatoes, garlic and green chillies. Also tamarind, salt and two cups of water. Process the whole thing to smooth paste. Remove to a cup. Stir in grilled paneer cubes and serve with pulao or parathas.


Pudina Paneer ~ for Picnic Party

Ingredients
Palm sized, one-inch thick slab of paneer (about 15 to 20 cubes)
1 tablespoon peanut oil
2 bunches of Pudina (mint) – about 4 cups of leaves
1 big red onion
2 semi ripe tomatoes
6 to 8 green chillies
1 small garlic bulb – about 4-6 garlic cloves
1 tablespoon tamarind pulp
½ cup roasted peanuts
½ tsp salt or to taste

Recipe source: My own creation

Posted by Indira©Copyrighted in Mint,Paneer,Peanuts (Wednesday July 4, 2007 at 9:32 pm- permalink)
Comments (19)

The New Home of Mahanandi: www.themahanandi.org

Chinese Spinach Curry (Thotakura)

Thotakura Palakura Tomato Kura:

The summer season for vegetables is coming into full swing here in Seattle. It’s overwhelming to see so many American as well as Asian vegetable varieties and it is getting impossible not to lose mind and money. The choice is endless and I love to be greedy. But, how many and how much one can buy, cook and eat? So, I am trying very hard to keep my cool at farmers’ markets and pick only the ingredients I’ve known from my childhood days that speak to my heart.

One fresh vegetable that I am enjoying to the fullest along with green brinjals is fresh amaranth. (Thotakura in Telugu). The label at the local farmers’ market says Chinese spinach or red spinach and one bunch is usually priced at one dollar. I have been buying this vegetable almost every week since May simply because I love the fresh amaranth taste. It is one of those “looks simple and yet yields results far outweighing the effort” kind of vegetable. In today’s recipe, another Nandyala classic, the fresh amaranth is paired with spinach and tomatoes. A stellar combination and a scrumptious curry!

Chinese Spinach, Red Spinach, Fresh Amaranth, Thotakura
Bunch of Fresh Chinese Spinach/Red Spinach/Amaranth/Thotakura ~ From Local Farmers Market

Recipe:

1 teaspoon peanut oil
¼ teaspoon each -cumin, mustard seeds and curry leaves
1 big onion – finely sliced, about one cup
2 tomatoes – finely chopped, about one cup
5 green chillies -finely chopped
1 teaspoon – ginger garlic paste
½ tsp each- turmeric and salt
1 bunch fresh amaranth (leaves and tender stems) – finely chopped, about 5 cups
1 bunch fresh spinach – finely chopped, about 5 cups
I have also added about ½ cup chori/adzuki beans (pre soaked in water overnight). This is my choice and optional. Chickpeas, kala chana etc also taste good.

Heat peanut oil in a wide skillet. Add cumin, mustard seeds and curry leaves and let them sizzle a moment before adding the sliced onion, tomato, green chillies and red beans. Also stir in the ginger-garlic paste, turmeric and salt.

Let everything stew together for about 10 to 15 minutes, stirring occasionally, until the whole thing comes together into cooked soft mass with tender chori (adzuki) beans.

Now add the fresh amaranth and spinach. Stir to mix and cook covered on medium-high for about five minutes until the leaves wilt. Remove the lid and cook another five minutes. Turn off the heat. Let the curry sit for few minutes so that the flavors could mix well.

Serve the curry warm with chapatis or sorghum roti and a cup of yogurt plus fresh fruit for a complete meal.


Chapatis with Fresh Amaranth-Spinach-Tomato Curry

Posted by Indira©Copyrighted in Amma & Authentic Andhra,Red Beans (Chori),Spinach,Thotakura (Amaranth) (Monday July 2, 2007 at 9:12 pm- permalink)
Comments (16)

The New Home of Mahanandi: www.themahanandi.org

Sautéed Sprouts ~ Moong, Moth & Red Chori


Tiranga Sprouts: Moong, Moth and Red Chori Bean Sprouts

Sprouts for breakfast is still a solution for early morning hunger in Bharat’s many “long-life” rural villages, where they are considered essential to good health and longevity. One of the few people in the world to start off the day with sprouts, Bharatiya – the old world kind, point to the fact that sprouts are quick and easy to prepare. For our grandparents, the hearty ruchi of filling sprouts was as appetizing as that of bagel and bread for many of our generation. Even today, my grandparents and in-laws start the day with sprouts. Their explanation is that sprouts offer abundant nourishment, stamina and energy that last all morning. It is also well known fact that sprouts aid to digestion and assimilation.

Among all legume and lentil sprouts, the moong beans make the popular choice. Mellow and subtly sweet, freshly sprouted moong beans are easy to like and easy to digest. Equally good are moth (Matki) and red chori bean sprouts. Together, in three vibrant colors, the Tiranga sprouts make a very satisfying snack or meal.

Vijay and I, we both are big fans of Tiranga sprouts. Vijay goes for raw; I on the other hand prefer when they are lightly sautéed and sprinkled with salt and pepper. The oil-less sautéing imparts a heartwarming sweet aroma and makes them an irresistible kind of snack for me.


Sautéing the Sprouts in an Iron Skillet

Method:

Half cup each – freshly sprouted moong, moth and red chori beans
Half teaspoon each – salt and pepper
Iron Skillet and 5 minutes of your time

Heat an iron skillet or kadai on medium flame.
Place the sprouted beans.
Saute them continuously mixing for about five minutes.
Turn off the heat, when they are still soft yet crunchy.
(Avoid prolonged saute. It makes them extremely crispy, which in turn would cause hard dental workout and we don’t want that.)
Sprinkle salt and pepper. Mix and serve hot.
Lemon juice, finely chopped onions etc can be added if desired.


Sautéed Sprouts with Salt and Pepper ~ An Heartwarming Snack

Notes:
Tirangā – तिरंगा (Hindi) = Tri Color (English)
Moong, Moth and Red Chori beans are available in Indian grocery.

Posted by Indira©Copyrighted in Moong Dal (whole),Moth (Desi Chori),Red Beans (Chori),Sprouts (Molakalu) (Tuesday June 26, 2007 at 9:58 pm- permalink)
Comments (19)

The New Home of Mahanandi: www.themahanandi.org

Ruchira ~ Cookbook Review and Recipe Sprouted Beans Usal


Ruchira by Kamalabai Ogale

“Ruchira ~ Selected Maharashtrian Vegetarian Recipes” by Kamalabai Ogale is a sweet little cookbook that I have been using for just over a year. The cookbook is an English translation of 25-year old original by the same name “Ruchira” in Marathi language.

Ruchira is chock full of honest content. A total of 94 recipes in 11 categories, nearly all recipes are within reach of competent home cooks. Many recipes are quite simple to prepare, the instructions are easy to follow and the rewards are great. The difference is not in the dishes offered, but in the ingredients and how the Marathas use them. The text should be read first to get a feel for the Maharashtrian cooking. Then head for the kitchen to cook one of the divine recipes. Next to going to Maratha heartland, Ruchira offers a great way to treat ourselves to cooking real Marathi way.

If you are looking for a book that will teach you to cook the best Maharashtrian food, then I will definitely recommend Ruchira. It’s a precious little gem!


Sprouted Moong, Moth and Red Chori Beans

“Sprouted Beans Usal” from Ruchira cookbook has become one of my favorite recipes. What makes this recipe standout from our own Nandyala style moog bean curry recipe is the addition of kala masala, and jaggery. Subtly spiced and well balanced, I’ve become a loyal fan of sprouted beans usal.

Recipe:

Grind to Paste:
5 peeled garlic cloves, 8-10 green chillies (small, Indian type), 1 teaspoon cumin and two to four tablespoons of grated fresh coconut.

Heat and Simmer:
Heat a teaspoon of oil in a big saucepan.
Add one cup each – moong, moth and red chori sprouted beans.
Add about three cups of water.
Cover and simmer the beans, until they reach fall-apart stage.

Add and Mix:
To the cooked beans, add the ground paste.
Also a tablespoon each- kala masala and powdered jaggery and
Half teaspoon each – turmeric and salt.
Mix and simmer another five minutes.
If the Usal(curry) looks too dry, add about half cup of water.

Popu or Tadka Touch:
While the beans are simmering with spices, do the tadka in a small pan.
Heat a teaspoon of oil in a pan. Add and toast few fresh curry leaves, pinch of cumin, mustard seeds and asafetida. (This technique is called popu or tadka.)
Add the tadka to the sprouted beans. Mix and turnoff the heat.
Sprouted beans usal tastes great with chapatis/rotis/parathas.


Sprouted Beans Usal with Paratha ~ From Maratha Heartland to Our Home
My Entry to RCI~Maharashtra hosted by Nupur of One Hot Stove

Notes:
Thanks for this lovely gift Veena!
I’ve prepared Kala Masala following the recipe outlined here.
Ruchira Available at Aggarwaloverseas.com
Recommend “Ruchira” to local libraries.

Posted by Indira©Copyrighted in Moong Dal (whole),Moth (Desi Chori),Red Beans (Chori),Reviews: Cookbooks,Sprouts (Molakalu) (Monday June 25, 2007 at 7:08 pm- permalink)
Comments (30)

The New Home of Mahanandi: www.themahanandi.org

Moong, Moth and Red Chori Bean Sprouts

Series of Sprouts ~ Tiranga Sprouts


Moong Beans, Moth Beans and Red Chori Beans ~ for This Week’s Indian Kitchen

Moong Beans – Green colored beans
Moth Beans – Brown colored beans. Available in Indian stores.
Red Chori Beans – Reddish-brown colored beans, smaller than adzuki (chori) and Rajma beans. Available in Indian stores (packet label – “Red or Desi Chori”).

Moong, moth and red chori – three beans, three different colors, but they are similar in size and almost in taste. Very fast and reliable sprouters, they produce delightful looking sprouts that taste mellow and crisply sweet. Consumed raw, curried or dal’ed, the sprouts of moong-moth-red chori combination make a perfect meal any time of the day.


Moong, Moth and Red Chori ~ After a Day of Soaking in Water

Soak moong, moth and red chori beans in water overnight.
Drain and gather them in a loosely woven cotton cloth.
Tie a knot and hang the cloth at a kitchen window or warm area in the house.
Keep the cloth moist by spraying water at regular intervals.
Because they are similar in size, the sprouts make an appearance at the same time, usually within a day.
When the sprouts grow to the size of beans, remove and enjoy raw or curried.


Moong, Moth and Red Chori Sprouts ~ To Start the Day off Mellow

Posted by Indira©Copyrighted in Indian Ingredients,Indian Kitchen,Moong Dal (whole),Moth (Desi Chori),Red Beans (Chori),Sprouts (Molakalu) (Sunday June 24, 2007 at 11:12 pm- permalink)
Comments (10)

The New Home of Mahanandi: www.themahanandi.org

Pongal with Green Pearls

We, Indians could learn so much from Italians when it comes to food marketing, I think. Take for example, – they have risotto, we have pongal. There are thousands of articles, recipes written on risotto. Good, old fashioned risotto, risotto with saffron, risotto with that, risotto with this… the list goes on and on. It’s easy to apply the same thing to pongal. The basic recipe never changes but by adding fresh seasonal produce like fresh peas or asparagus etc, it’s possible to rekindle the interest in centuries-old pongal recipe. Of course we also need excellent writers, poets and photographers to create that harp effect, a swooning, spiritual experience at the mere utterance of “Pongal”. Few movie scenes where the hero adoringly feeds the heroine a spoonful of creamy pongal would also help.

We have golden recipes, excellent technique. What we lack is co-coordinated, full throttle marketing. Inspired tactics used with savvy and creativity could not only resurrect genuine interest plus prestige in the preservation and application of the food traditions, they would also benefit the farmers back in the country, in my view.

Here is my humble effort.


Green Pearls ~ Fresh Peas of Summer

Brimming with that glorious just-off-the vine sweet flavor, the fresh peas of summer make a succulent addition to the classic, creamy pongal recipe. Easy to prepare and full of flavor, pongal with fresh peas make a pleasing meal any time of the day.

Recipe:

1 tablespoon – ghee
1 teaspoon each – black peppercorn, cumin and cloves
8 fresh curry leaves
½ cup – yellow moong dal
1 cup – shelled fresh green peas
1 cup – Sona Masuri rice
6 cups – water
1 teaspoon – salt or to taste

Melt ghee in a big saucepan on medium heat. Coarsely crush peppercorn, cumin and cloves in a mortar or in a spice mill and add to the ghee. Also add the curry leaves. Saute them gently for a minute or so.

Add the yellow moong dal. Continuously mixing, saute the dal to pale-pink color. At this stage add fresh green peas. Cook couple of minutes. Stir in Sona Masuri rice along with water and salt.

Bring the water to a boiling point on high heat. Once the water and rice start to dance, reduce the heat, cover the pot and simmer, mixing in-between until the rice is cooked to soft.

Turn off the heat, and add a last spoonful of water (or ghee, if you can afford it healthwise).

Leave to stand for 2-3 minutes then stir. Serve hot with chutney/kurma or yogurt.


Heaven in a Plate:Pongal with Fresh Peas and Peanut Chutney ~ Weekend Supper

Recipe Notes:
All about Sona Masuri Rice – here
Pongal is good with chutneys, pickles, tomato based kurmas, coconut based curries and plain homemade yogurt.

Posted by Indira©Copyrighted in Biyyamu (Rice),Ghee,Moong Dal (Washed),Peas (Bataani),Sona Masuri Rice (Monday June 11, 2007 at 12:31 am- permalink)
Comments (24)

The New Home of Mahanandi: www.themahanandi.org

Series of Sprouts ~Black Chickpea sprouts


Black chickpeas~Dried ………………………………Black Chickpeas~Soaked

A ganji gudda (loosely woven cotton cloth),
Few seeds or grains,
Water and warm weather

There you go, you have everything you need to create one of the truly miracle foods of nature – the sprouts.

The warm weather during late spring and summer season suits seed sprouting. The seeds germinate quickly and easily, often within a day or two. And this type of natural sprouting process produces superior quality sprouts that taste way better than store bought stuff, I think. There won’t be any such doubts as how old are the sprouts, any chemical spraying involved, etc. After all, you are the one who assisted in the creation of precious life force.

I started this year summer sprouts series with black chickpeas (kala chana). Earthy and nutty, black chickpeas produce robust sprouts. I found that they are little bit tough to digest raw but steam-cooked, they sure make us go shabba shabba.


Black Chickpea Sprouts in Ganji Gudda

How to:

2 cups of black chickpeas (kala chana, Nalla Sanagalu)
Loosely woven cotton cloth (cheesecloth or ganji gudda)

Wash and soak black chickpeas in plenty of water, overnight. They expand considerably, so place them in a big vessel.

In a colander, spread the cheesecloth. Pour away the water and gather soaked black chickpeas. Bring the edges together and tie a knot. Hang the cloth in a windowsill.

Allow to sprout. Usually takes a day or two. Don’t let them dry completely. Remove, sprinkle water and hang again or use a sprayer to keep the cloth moist.

Incase of chickpeas, I usually let the sprouts grow only as long as the seed. Too long a sprout, the seed turn to bitter sometimes.

Remove and simmer them in salted water until they are tender or steam-cook. I usually do steam-cooking or plain stir-fry in guggllu/sundal style.

Sprouted black chickpeas make a great snack, and a good addition to curries/stews/kurmas.


Steam-Cooked Black Chickpea Sprouts ~ Our Weekend Snack

Posted by Indira©Copyrighted in Chickpeas-Black,Sprouts (Molakalu) (Monday June 4, 2007 at 9:45 am- permalink)
Comments (18)

The New Home of Mahanandi: www.themahanandi.org

Mirchi Ka Salan from Hyderabad

Paying Salaam to Salan with Jalapenos:


Mirchi Ka Salan ~ For RCI: Andhra

Recipes with chillies are many. Pickled, stuffed, stewed, sun-dried, consumed raw or added in desserts like cakes or in ice creams – different varieties for different flavors and strengths. All of them are highly cherished by chilli enthusiasts.

One chilli recipe that stands out from the bunch is the famous Mirchi Ka Salan recipe from Hyderabad (capital city of Andhra). Whole green chillies pan-fried and simmered in sesame-peanut spicy sauce. The dish is easy to prepare and has a refreshingly pleasing taste. But if you don’t know what you are doing, the chances that it could blow your head off are high. Whether one call it pushing the limits or perspiration-inducing love affair, Mirchi ka Salan is the culinary expression of an Andhra vasi‘s adventurous spirit and fun-seeking nature. Nutritious, dangerous and deeply satisfying – that is what Mirchi ka Salan is in a nutshell.


Skillet-Frying the Green Chillies

Recipe:

Mirchi (Green Chillies):

12 medium-sized jalapeno peppers
To lessen the heat: Remove the stem and slice each jalapeno lengthwise on one side, use caution not to cut into half and to keep the tail end intact. Pluck the white pitch and seeds like shown in this photo. (Wear gloves for sensitive skin.)

Salan:

½ cup peanuts – roasted and skins removed
¼ cup sesame seeds – toasted
½ cup sauteed pieces of shallots or red onion
4 dried red chillies – toasted
1 teaspoon each – coriander seeds, cumin, cinnamon and cloves, toasted lightly
Take them all in a blender and add about a teaspoon each – ginger, garlic, salt and about 4 tablespoons of tamarind juice. Pour in about a cup of water and grind to smooth paste. I usually add about 2 tablespoon of jaggery/sugar to bring a mild-sweet flavor to the dish.

Making of Mirchi ka Salan:

In a wide skillet, heat about a tablespoon of peanut oil. Bring the oil to smoking point. Add and sear mirchi (jalapenos) to sand color. Take care not to black/burn.

Add the prepared Salan paste to the seared chillies. Add about a cup of water and mix. Have a taste, adjust salt, sour(tamarind), sweet(jaggery) levels to your liking. Cover the pot and simmer for about 15 to 20 minutes on medium-low heat, stirring in-between. The color of the sesame-peanut sauce darkens and sauce thickens. Mirchi ka Salan will be ready.

Serve warm with rice/chapati/parathas. A cup of soothing saaru(chaaru/rasam), salad or yogurt on the side helps a lot. Best place to have this meal is balcony/patio’s shady spot or with windows open/fan whirring at a low speed. Cool breeze enhances the chilli experience.


Mirchi Ka Salan with Rice and Green Papaya Salad ~ Our Meal Today

More salaam to Salan:
Mirchi ka Salan – from Past, Present and Me
Mirchi ka Salan – from Elaichi et Cetera…
Mirchi ka Salan – from Hyderabadi Kitchen
Mirchi ka Salan – from Vindu

Posted by Indira©Copyrighted in Amma & Authentic Andhra,Green Chillies,Peanuts,Peppers (Thursday May 10, 2007 at 4:23 pm- permalink)
Comments (58)

The New Home of Mahanandi: www.themahanandi.org

Chana Dal~Amaranth Curry from Nandyala

Sanagaballa Thotakura :


Fresh Amaranth Leaves (Red Spinach, Thotakura)

Regional Cuisines of India (RCI), a fresh food blogging event is started by Lakshmik of Veggie Cuisine last month. I loved this event idea very much. Great opportunity for those of us who would like to move away from restaurant created regional cuisine constraints. For example, stereotypes always associate dosa, sambar, green beans-coconut curry/poriyal and laddus with South India. The four southern sister states of India, share these. They are the Kohinoors, I agree but explore further, the chance to write/learn about the khajana of gems that sustain individual home plates are plenty. Certain recipes are much hard to find than others and that location is different for every enthusiast. You never quite know where you will find that great regional gem recipe that speaks to you. That’s why I am attracted to this concept very much. For this month, RCI is celebrating Andhra Cuisine and is hosted by lovely Latha of Masala Magic.

Although I am from Andhra Pradesh, India, I don’t dare to speak for all Andhra vasi. What can I do is to share my family recipes from Nandyala. My mother and father, my in-laws, they are all from this town and surrounding villages. The relations we have in this town go back at least 4 generations. The roots are deep. Nandyala may be a tiny town in Andhra but it sparkles like an electric dream at my blog, Mahanandi. Vijay and I are the first ones in the family who moved so far away from Nandyala. I think, that explains why the pull is so strong for us.

RCI provides me another chance to share Nandyala bounty. One special recipe is Chana dal-Amaranth Curry. The ingredients are all from around here (Seattle), but the method is from Nandyala. Fresh amaranth leaves and chana dal saut�ed with onions, grated coconut and green chillies make a deeply satisfying curry that tastes great with sorghum roti or with chapatis. Very tasty, very much Nandyala! Another must try for amaranth fans.


Chopped Amaranth Leaves and Chana Dal (Pre soaked in water)

Recipe:

I bunch fresh amaranth – washed and finely chopped, about 2 quarts
Half cup chana dal – soaked in water for about 2 hours
1 jumbo red onion – finely chopped
2 tablespoons of coconut and 5 green chillies – grind to smooth

Popu or tadka ingredients –
1 tablespoon peanut oil
¼ teaspoon minced garlic, cumin and mustard seeds

Heat oil in a wide skillet. Add and toast garlic, cumin and mustard seeds.

Add and saute onion and chana dal on medium heat for about 5 minutes. Onions become soft and chana dal turns to crisp.

At this stage, stir in the chopped amaranth leaves, along with coconut-green chilli paste, turmeric. Mix once and cook on medium-high, covered for couple of minutes until the leaves wilt. Increase the heat. Remove the lid and cook another couple of minutes until the water evaporates from the skillet. Sprinkle salt in the end, mix and serve hot.

The soft nutty chana dal plus potent amaranth makes a great combination and tastes quite good when eaten with sorghum roti or with chapatis.


Sanagaballa Thotakura with Chapati (Chana Dal Amaranth Curry with Chapati)
~ A recipe from Nandyala to Latha’s RCI Andhra Cuisine Event

Recipe Source: Amma

Posted by Indira©Copyrighted in Amma & Authentic Andhra,Chana Dal,Thotakura (Amaranth) (Tuesday May 8, 2007 at 10:37 pm- permalink)
Comments (27)

The New Home of Mahanandi: www.themahanandi.org

« Next PagePrevious Page »