Mahanandi

Living in Consciousness ~ Indi(r)a’s Food and Garden Weblog

Pala Kova (Doodh Peda)

For Deepavali, I preprared ‘Pala Kova’ (Doodh Peda), one of the classic sweets from home.

Pala Kova , Paal Kova, Doodh Peda)

Recipe:

1 gallon of whole milk
1 1/2 cups of sugar
Cooking time : 3 hours

This is one of those recipes, which allows multitasking, at least for the first two hours. Also make it only when you have some good natured, dear friends or family nearby, so that they can give you moral support:) or help out, when you get frustrated with stirring and the slow way it takes for milk to thicken. Chit chat or clean up the kitchen, wash the dishes, cook up other recipes or fold the laundry and in between for every 2 to 3 minutes, stir the milk. This way you won’t notice the time.

Milk after half an hour of boiling Milk after two hours of simmering

Preparation:

In a big sturdy pan, bring the milk to a boil. Keep the heat on medium high and boil/simmer the milk for about 2 hours, stirring in between. By the end of two hours, the milk reduces in volume, becomes quite thick and turns from white to color of gandham(sandal wood) paste.

Milk and sugar simmering Pala Kova (Doodh Peda) - The final product of milk and sugar after 3 hours on the stove

Add sugar to the thickened milk. Continuously stirring on medium heat, cook for about 30 to 45 minutes. By the end of this time, the milk-sugar paste further thickens and when you think, you can almost make a ball with it, then only switch off the heat.

Ladle off the paste onto a clean plate or round dish. Let it cool completely. Cut it into squares or shape into rounds. If you want, decorate the sweets with toasted pistachios or almonds.
I used an ice cream scooper to make round balls of pala kova.

 Malai Ladoo,Pala Kova, Doodh Peda, Paal Kovah
Pala Kova (Doodh Peda) for Deepavali

Recipe Source: dear Vijay

Posted by Indira©Copyrighted in Amma & Authentic Andhra,Indian Sweets 101,Milk & Products,Mitai,Molasses,Sugar, Jaggery and Honey (Monday October 31, 2005 at 9:12 pm- permalink)
Comments (53)

The New Home of Mahanandi: www.themahanandi.org

Steelers Pizza

Steelers Logo from www.seatseek.comI consider Pittsburgh as my hometown in US because it was where we arrived in US from India. We spent three wonderful years full of firsts; first snow fall, first snow storm, first time assembling the furniture for our house from Ikea, first of lot of things.
And Pittsburgh is a sports town, Steelers is THE team, they all route for. Naturally we couldn’t escape the enthusiasm of locals and now we are also turned into full-fledged, The Terrible Towel waving, Steelers flag in front of the house kind of fans.

Last year was particularly exciting for us Steelers fans. The rookie quarterback brought the team almost to the finals. I could have prepared ‘Roethlis-berger’ in his honor for last years wonderful play, alas I am not a meat eater.

So instead I prepared our favorite game party food – Pizza, for this month’s sport theme party hosted by lovely Stephanie of Dispensing Happiness. Not any pizza but a pizza resembling the Steelers logo and wishing for a season of Steelers super bowl.

Steelers Pizza with Mozzarella and goat cheese with yellow, red bell peppers and olives as toppings

Steelers Pizza:

This Pizza is made with a basic white dough base, flavored with tomato sauce and topped with mozzarella and goat cheese and also roasted yellow and red bell peppers and olives.

Our lunch today:)-

Posted by Indira©Copyrighted in All-Purpose Flour(Maida),Bell Pepper,Cheese,Goduma (Wheat) (Thursday October 20, 2005 at 3:01 pm- permalink)
Comments (14)

The New Home of Mahanandi: www.themahanandi.org

Mysore Pak

I don’t know why but we both are losing weight, significant amounts, since coming back from India. We are not doing anything out of ordinary and on our recent yearly medical checkup, the family doctor billed our medical reports as excellent, so no problems there. This sudden weight loss is baffling us. The only reason for this I can think of is homesickness. Leaving the dear and near ones back home, I thought it would get easy with age and time, but not so in our case, it seems. The life we created here seems so dull, empty and purposeless. Is this what happens in 30’s, if so, I would love to go back to the carefree 20’s. Little bit early for a midlife crisis, I know.

To counter the weight loss and also to satiate my cravings for an Indian sweet, we made Mysore Pak last Sunday. A deliciously rich, decadent sweet, made of chickpea flour and pure ghee. South India’s favorite. The sweet is as colorful and mouthful as its name sounds. All of our sweets names are like that, unique and colorful… Badusha, Chandra Kala, Mohan Bhag etc.,

There are no shortcuts for this sweet; you need quality ingredients and no cutbacks on the amount of ghee. Otherwise you end up with not so tasty, yellow brick kind of mixture. So use freshest possible ingredients, mainly besan flour for this recipe. And also you need an extra pair of hands. So keep family or friends on the side.

Recipe:
1 cup Besan flour, sift to aerate & to remove any lumps
1 cup ghee, melted & at room temperature
3/4 to 1 cup sugar – your wish
2 cardamom pods, seeds powdered

Besan Flour, Ghee, Sugar and Cardamom Pods

In a big sturdy pot, take one cup of water, add sugar and bring them to boil till the sugar syrup reaches one string consistency. Reduce the heat.
Now pour the ghee and besan flour in a steady stream into the sugar syrup while stirring. You need an extra hand here. Continuously and thoroughly stirring, cook until the ghee starts to leave the sides of the pan and the mixture starts to thicken and turns to become porous and light gold in color. Stir in the cardamom powder.

Sugar Syrup On the Stove Pouring Besan Flour in Sugar&Ghee Syrup

Immediately pour onto a greased tray & evenly level it out with a spatula. When it is still hot, cut into diamond shapes. Makes about 10 to 12 pieces.

Mysore Pak Right Out Of the Stove, On to the Plate, Cut into Diamonds

Mysore Pak - Traditional Indian Sweet
Mysore Pak – Simple, sinfully rich tasting, sweet golden diamond

Posted by Indira©Copyrighted in Amma & Authentic Andhra,Ghee,Gram Flour (Besan),Indian Sweets 101,Mitai,Molasses (Wednesday September 21, 2005 at 3:59 pm- permalink)
Comments (91)

The New Home of Mahanandi: www.themahanandi.org

Pizza with Red Beans & Tomato Chutney

Red Bean Pizza

When it’s this easy to make flavorful, delicious pizza at home, I can only imagine restaurants suffer. Why? This homemade crisp pizza tastes as good or better as any thin crust pizza I have ever had in a restaurant.

I started with few leftover chapatis of yesterday. I added the tomato chutney layer and topped with red beans and cheese. Baked in an oven for few minutes, the outcome was a scrumptious looking, saliva inducing meal. An impressively, easy way to satiate the pizza cravings without doing the back-breaking pizza labor.

Red Beans, Onion, Garlic, Chilli, Tomato, Cheese and Chapati

Recipe:

1. Pressure cook: One cup red beans(soaked in water overnight beforehand) to tender or use the canned red beans.

2. Prepare chutney: In a skillet, add oil and cook coarsely chopped one onion, two tomatoes, three cloves of garlic and four chillies to brown. Cool, then add salt and blend to coarse puree.

3. Take fresh or leftover chapatis, about 4 to 6. Cut each chapati to 4 wedge-shaped pieces of equal size.

4. Slice to thin strips or grate cheese. I used Monterey Jack cheese in this recipe – About half cup.

Layering Chapati pieces, Tomato, chutney, red beans and cheese in an iron skillet

Before Meal Time:

Preheat the oven to 400°F.

In an iron skillet or in an ovenproof dish:
First, place the chapati pieces, then on top, add and spread tomato chutney to a thin layer. Sprinkle some red beans, cheese and cilantro. Continue until the last chapati, ending with a layer of the chutney, beans and cheese on top. Place the skillet in the oven and bake at 400°F for about 10-15 minutes, until the cheese melts and chapatis start to brown. Remove, slice and serve.

The whole combination of baked chapatis, spicy tomato chutney, red beans and cheese came out very well and tasted real good.

Slice of Red Bean Pizza

Posted by Indira©Copyrighted in Cheese,Red Beans (Chori),Tomato,Wheat Flour (Durum Atta) (Monday September 19, 2005 at 11:44 am- permalink)
Comments (12)

The New Home of Mahanandi: www.themahanandi.org

Mini Custard Tarts

Lovely Elise of Simply Recipes selected custards for this month’s “Sugar High Fridays” theme. I know that I am not a big fan of custards. Still I wanted to give it a try. Why not? How I felt about certain foods changed with time and may be with the recipe I selected, I might like it. You never know until you try. So, I baked mini custard tarts.

The recipe is simple with only 5 ingredients. All Purpose Flour, butter, powered sugar, eggs and milk. Tart shell is made with the first three ingredients and the custard filling is made with the last three ingredients. All basic, nothing fancy sounds easy, right, so I gave it a try!

Recipe: Tart Shell, One Empty & the Other Filled with Custard

1 cup of all purpose flour
4 tablespoons of butter
2 tablespoons of powdered sugar
2 tablespoons of water

To make the dough, sift the all purpose flour into a bowl. Add the powdered sugar, butter and water. Mix and knead to form a smooth, firm dough. Cover and leave to chill in the refrigerator. Meanwhile prepare the custard filling.

Custard:

2 eggs
1/4 cup of powdered sugar
3/4 cup of milk

To make the custard, beat the eggs and sugar together. Gradually add milk and beat until well combined.

Take out the dough from the fridge; divide it into even sized pieces (makes about 6). Flatten the dough pieces into rounds and press into shallow tiny pans. Spoon the custard into the tart shells and cook in a preheated oven at 325° F, for about 30 minutes or until set. Remove the dishes, set aside to cool. To serve, run a knife around the edge of each dish and turn out onto a serving plate. Serve hot or chilled with or without cream.

Custard Tart

The outcome looked, smelled and tasted good. But I am not going to go ga-ga over custard anytime soon. I should have baked a cheesecake instead. I read somewhere that cheesecake is also a sort of custard. Yum… that’d be the one I like more!

Take a look at custard and its many avatars at Elise’s Blog .

Posted by Indira©Copyrighted in All-Purpose Flour(Maida),Eggs,Milk & Products,Molasses (Friday September 16, 2005 at 9:21 am- permalink)
Comments (18)

The New Home of Mahanandi: www.themahanandi.org

Cherry Clafouti

What can one do with cherries, when they are purchased at $1.19 per pound. Of course, bake them with all purpose flour, the only recipe I know using cherries. Giant Eagle, the chain grocery shop, near my home is selling bing cherries for 1.19 a pound this week. No, they are not damaged. They are perfect, plump, sweet and irresistible as always and as good as the cherries I bought at farmers market last week for 3 dollars a pound.

After downing about 3 pounds, we decided to make some sort of dessert with the remaining cherries. So I baked Cherry Clafouti or more like Cherry Custard or two-inch pancake filled with cherries. This is such an easy dessert that is very simple and quick to put together.

Recipe:

Half-pound cherries- cut in half and pits removed
Half-cup pancake mix (or all purpose flour)
One-cup whole milk and one egg
2-4 tablespoons of sugar
For flavoring I added dried and powdered ginger (sonti)

Removing the pits from Cherries Cherries flaoting in flour-milk batter

Preparation:

I’ve added the pancake mix, milk, egg, sugar andsonti in a mixing bowl and whisked them by hand until all the ingredients are well combined and the batter was smooth.

This was only for us two so I used a small 6-inch oven proof-serving dish for baking. After greasing the dish, I filled it with batter and arranged the cherries, more like jam-packed. Baked this in the preheated oven at 350° F for about 40 minutes, until risen and golden. The top will be browned like a pancake and the insides will be gooey with cherry sweetness.

Cherry Clafouti

I didn’t add lot of sugar. The sweetness is all from cherries (I did the quality control by tasting half of each cherry:)). With mild sweetness and a texture falling between a custard and a pancake, cherry clafouti was such a delight. We loved this simple dessert.

Taking a bite of Cherry Clafouti
Cherry Clafouti

Posted by Indira©Copyrighted in All-Purpose Flour(Maida),Cherries,Eggs,Milk,Milk & Products,Molasses (Thursday June 30, 2005 at 3:45 pm- permalink)
Comments (13)

The New Home of Mahanandi: www.themahanandi.org

Homemade Indian Yogurt (Curd, Perugu, Dahi, Thayir)

I make yogurt at home regularly. I am not sure if I will be saving any money by making yogurt at home instead of buying in stores. But I like the taste of the homemade better than the store bought.

Perugu (Telugu), Dahi (Hindi, Gujarati, Marathi, Nepali, Punjabi, and Urdu), Doi (Bengali), Dohi (Oriya), Mosaru (Kannada), or Thayir (Tamil) is the yogurt of the India, known for its characteristic sweet-tart taste and semi solid consistency. It’s also commonly called as “Curd”. Perugu or Dahi is part of the everyday meal for us, and also I prepare raita with it.

Perugu is really quite easy to make at home. First, bring the milk to a boil, reduce the heat and simmer it for few minutes till a layer of cream forms on top of the milk. Turn off the heat and let the milk cool down to lukewarm level. Now add one tablespoon of live active culture of yogurt to this milk. Stir it once and cover the vessel with a lid. Keep the container in an oven or in a microwave (they act like incubators) undisturbed for about 8 to 12 hours. After this period, milk in liquid state will become semisolid – like yogurt. This is how you will know that the process of making yogurt is complete.

How much milk you need depends on how much yogurt you want to make. Small or large quantity, all it takes is adding one tablespoon of live active culture of yogurt. It’s that simple.

I read somewhere a list of 100 food related things one must do before they die, I don’t know about skinning and preparing the chicken but how about a taste of real yogurt.

About to add a spoon of yogurt to boiled milk and Yogurt
Adding a tablespoon of live active yogurt culture to lukewarm milk,
Homemade yogurt (Dahi, Perugu)

Where can one get active live culture of yogurt in US? This is the question I often get asked. Here is the list of sources that I can think of. Hope this helps.

• Try your Indian neighbors and colleagues. A lot of Indians prepare yogurt at home even in this day and age, particularly first generation Indians like us. But there are always exceptions to the rules so do not assume anything and be polite when you are inquiring.

• Try asking waiters at Indian restaurants. Yogurt is used to prepare raita, chutneys etc. Many Indian restaurants prepare yogurt freshly in their kitchen everyday.

• Try kitchens at Indian temples: Indian temples in US serve prasadam or food daily to the visitors. Yogurt rice is often part of the prasadam.

• Health food stores, Natural health stores etc.

Posted by Indira©Copyrighted in Milk,Milk & Products,The Essentials,Yogurt (Thursday June 23, 2005 at 7:53 pm- permalink)
Comments (109)

The New Home of Mahanandi: www.themahanandi.org

Walnut-Coconut Caramel Toffee

This weekend, I prepared a carrot cake and walnut-coconut caramel for weekend barbecue party at our friend’s house. Last month, they added a big deck to their house and also bought a new gas grill. It is a sort of opening party for the new deck and grill.

I initially started making the carrot cake, then I remembered my pregnant friend who had just passed very difficult first 3 months, when she couldn’t eat anything because of high case of nausea. I thought walnut-coconut toffee is the best in-between meals snack for her now. Just like that, I made the caramel toffee. I also used some of it as topping or dressing for the carrot cake. The cake was a big hit with the children. They loved it and one curious kid asked me why I made the caramel instead of cream cheese topping. I Knew caramel is unusual topping for carrot cake and told him that I was just trying something different. He told me that he loved caramel and he served himself a big piece. 🙂

Walnut-Coconut Caramel Toffee: Walnuts, Dry coconut flakes, Light brown sugar and Ghee

  • 1-cup light brown sugar
    1/2 cup melted ghee
    1/2 cup toasted walnuts, finely chopped
    1/2 cup dry unsweetened coconut flakes
    1/2 can of 5 oz of Nestle evaporated milk

Preparation:

Combine ghee, brown sugar and evaporated milk in a thick-bottomed vessel. Cook them stirring occasionally until they reach the softball stage. Now add walnuts and coconut flakes, stir them until well coated or for about 2 to 3 minutes. Pour them into a greased flat dish, refrigerate until set. Cut into small squares and wrap them individually in wax paper.

Walnut-Coconut Toffee

I can never make this type of sweet for us. We don’t do enough work to spend the extra calories. But for a special friend in her special condition- they are prefect treats.

Posted by Indira©Copyrighted in Milk,Sugar,Walnuts (Monday June 13, 2005 at 2:36 pm- permalink)
Comments (7)

The New Home of Mahanandi: www.themahanandi.org

Kadai Paneer (Paneer Jalfrezi)

I prepared a big block of paneer this weekend. Half of it went into the palak paneer and with the remaining half, I prepared this tasty kadai paneer, today.

Ingredients:
Three ripe juicy tomatoes, 4 bell peppers, small onion – all cut into small pieces
Half tsp of ginger- garlic-cilantro paste
Cumin-coriander powder, salt and red chilli powder~ each half tsp or as per your taste
10 to 15 paneer cubes.

Kadai Paneer Ingredients

Preparation:
Cooking all the Ingredients - Kadai Paneer in making
Just like the regular curry, first fry the onions in 1 tsp of oil, then add g-g-c paste and c-c powder, sauté them little bit, then add salt, red chilly powder, tomatoes and bell peppers. Cook them for few minutes until the gravy (juice from tomatoes) thickens, then add paneer cubes. Simmer them for few more minutes in the gravy.

Kadai paneer and chapati- that’s one good and filling combination

Chapati and Kadai Paneer(Paneer Jalfrezi)

You can always substitute paneer with very firm tofu. I often make paneer curries with tofu. Different taste, but after knowing how they obtain milk here, I cautiously use milk and its products.

Posted by Indira©Copyrighted in Bell Pepper,Paneer,Peppers (Tuesday June 7, 2005 at 8:21 pm- permalink)
Comments (9)

The New Home of Mahanandi: www.themahanandi.org

Palak Paneer (Sag Paneer, Spinach Paneer)

I learned the organized approach to cooking North Indian dishes from Deviji, a kind Punjabi lady, our neighbor in Pittsburgh, when we were living there. She taught me how to cook my favorites, she insisted that I come and see how she prepares in her kitchen so that I won’t forget. She used to say if you see, you won’t forget, particularly cooking. I think that is true. My entire north Indian cooking is her recipes including the paneer post below. Hope you try them and enjoy as much as we do. Here is one…The famous palak paneer

Recipe:

One big bunch of spinach (fresh green ones)
Paneer ~10 to 15 cubes
One medium sized ripe tomato
Green chillies 5, half onion~ chopped finely into small pieces
Half tsp of garlic-ginger-cilantro paste
One tsp of dhania-jeera (coriander-cumin) powder
Quarter cup cashews
Half tsp of salt

Palak Paneer Ingredients

Preparation:

Spinach and Green Chillies – Wash the spinach, cut or tear them into big pieces. Heat a teaspoon of oil in a wide skillet. First add green chillies to hot oil, then spinach. Saute until the leaves are wilted. Turn off the heat. Wait few minutes to cool. Add them to a blender and also a pinch of salt – blend to smooth paste. Adding green chillies to spinach puree is very important step; it gives punch to bland spinach.

Tomato- Boil tomato in hot water till the skin break down, remove the skin, mash the tomato to a pulp.

Cashews- Roast cashews lightly, make fine powder of them.

Paneer- Lightly saute paneer cubes in one teaspoon of ghee till they are golden brown. (This is optional, you can add paneer cubes just as they are.)

Palak Paneer-Preparation

Now with the curry:

Add one teaspoon of ghee or oil to a wide skillet. When it is hot, fry the onions till translucent. Add ginger-garlic-cilantro paste and dhania-jeera powder, mix them and saute for 2 to 3 minutes.

Now add pureed spinach, tomato and cashew powder along with a pinch of turmeric and salt to taste. Mix thoroughly and add water if needed. Do not dilute the curry too much. It should not spread like flooding river when served on a plate.

Cook it covered on low flame for about 5 to 10 minutes. Just before turning off the heat, add the paneer cubes. Mix them with the spinach (palak). Let simmer for 2 or 3 minutes and then turn off the heat.

Serve the curry hot with chapatis (rotis) or with rice. Also for novelty, you can make a Palak Panner Naanini (Split naan into two layers, apply generous potions of palak paneer in-between. Grill or Oven-broil for few minutes and serve with yogurt raita.) Anyway you prefer, palak paneer is truly a guilt free, satisfying, well balanced delicious dish.

Palal Paneer with Chapati
Palak Paneer with Chapatis ~ Our Meal Today

Posted by Indira©Copyrighted in Paneer,Spinach (Monday June 6, 2005 at 6:20 pm- permalink)
Comments (162)

The New Home of Mahanandi: www.themahanandi.org

Delightful Paneer

What you need: Milk, Lime and Cheesecloth

Whole Milk – half gallon

Juice from one lime, about 2 to 3 tbs

Muslin cloth (gangi gudda)

Boil the milk in a thick-bottomed vessel on medium heat, stirring occasionally (sometimes milk stick to the bottom and burns, so take caution). Once the milk starts to boil, reduce the heat and add the limejuice, stirring continuously.

In few minutes, you see small curds like white clouds floating on top. Wait till they get bigger (if they don’t, add some more lime juice and stir) and the whey below gets less milky. This process takes few minutes, so wait at least five minutes. Switch off the heat and let it stand for few more minutes. Then pour the whole thing immediately into a clean muslin or cheese cloth in a sieve, over a sink. Gather the curds and discard the whey.

Milk turning into paneer seperating paneer from whey

Keep the curds in the cloth, tie a knot much above their level and hang it over a kitchen sink. Let the whey drip for half an hour. Now remove the knot, twist the cloth several times to make it tighten, squeeze out any remaining whey, make a tight knot just above the paneer, shaping the paneer into a round ball. Keep it hanging for another 30 minutes.

draining the whey tightening the cloth to squeeze out the remaining whey from paneer

Remove the paneer from the cloth. Now with the all the whey gone, it turns out into a firm ball. Store this in the refrigerator, 2 to 3 hours, for further solidification. After that, you can use the delightful paneer in curries or just plain fried, as you wish.

Paneer

Try it, if you have not already, this easy to make, pure, rennet free, Paneer~ the Indian cheese.

Paneer Recipes I have blogged so far on Mahanandi:

Palak Paneer ~ Paneer with Spinach
Pudina Paneer ~ Paneer with Fresh Mint
Paneer Jalfrezi ~ Paneer with Green Bell Pepper and Tomato
Kadhi Paneer ~ Paneer with Spicy Yogurt Based Sauce
Matar Paneer ~ Paneer with Fresh Peas of Summer
Hare Chane Paneer ~ Paneer with Fresh Green Garbanzo/Chickpeas
Sarson da Saag ~ Paneer with Baby Mustard Greens and Spinach
Paneer Pad Thai with Bok Choy
Paneer Naanini ~ Naan stuffed with crumbled paneer & spinach curry

Posted by Indira©Copyrighted in Milk & Products,Paneer (Monday June 6, 2005 at 9:18 am- permalink)
Comments (85)

The New Home of Mahanandi: www.themahanandi.org

Glorious Golden Ghee (Neyyi)

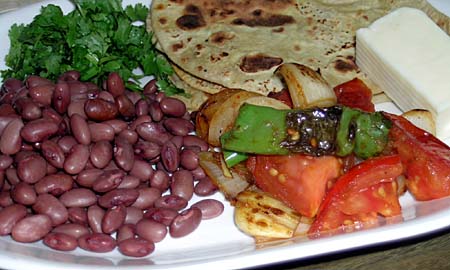
To prepare authentic Indian meals, you have to make the ghee first. North, south, east and west, people all over in India know ghee is the best, and they love it. All auspicious occasions in life starts with ghee in India. Be it an offering to God, or the babies first solid food – people lavish their love with ghee.

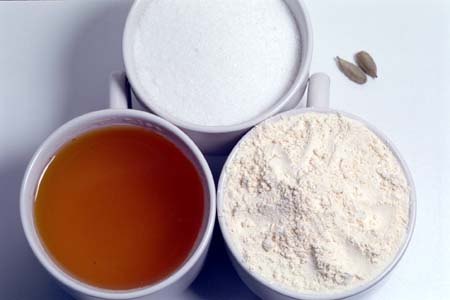
Ghee is as easy to make as it sounds. This is how I usually make ghee here: I would buy one pound (four sticks) of unsalted butter. If you are lucky enough to find bovine-hormone free, organic butter, the ghee prepared from it would be better tasting and more like what we can get in India. Ghee from the four sticks lasts for about three to six months for us.

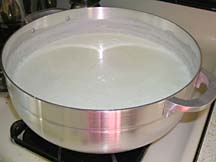
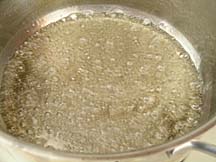
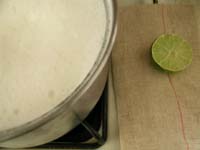
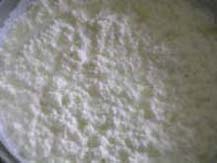
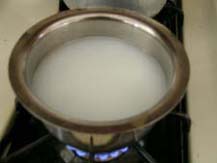
Take a heavy bottomed vessel. Place the butter sticks in it, and on medium heat melt them. When the butter starts to melt, there will be lot of bubbling and gurgling. Don’t panic. Reduce the flame to low; in a few minutes this action will subside. Next the butter will begin to develop foam at the top.

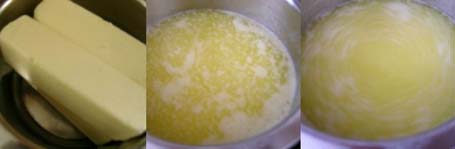
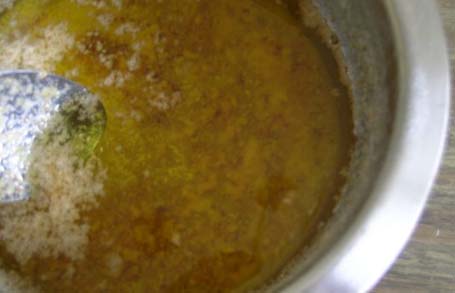
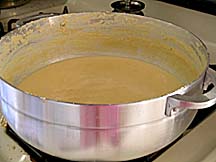
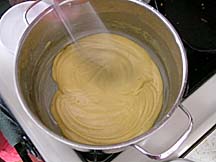
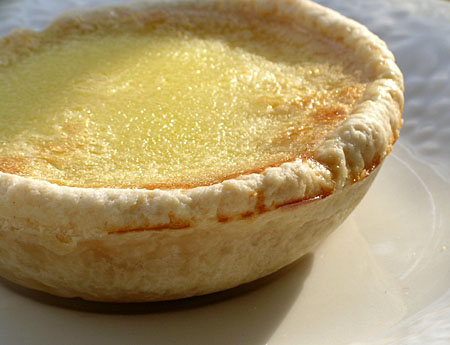
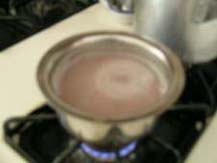
Simmer on low heat, uncovered and undisturbed, for 30 to 45 minutes, until milk-solids on the bottom of the vessel turn from white to beige-brown, and butter on top becomes transparent like clear water. This is the signal to turn off the heat. Please take caution not to burn the bottom part. That would lead to scalded milk smell, and it would stick. All the effort would be a waste and you have to throw everything away. So never use high-heat to make ghee.

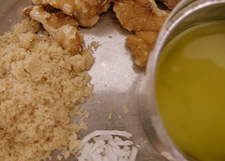
What happening was milk-solids separating into 3 layers. Foaming milk-solids on top, clarified butter in the middle, protein milk-solids on the bottom.

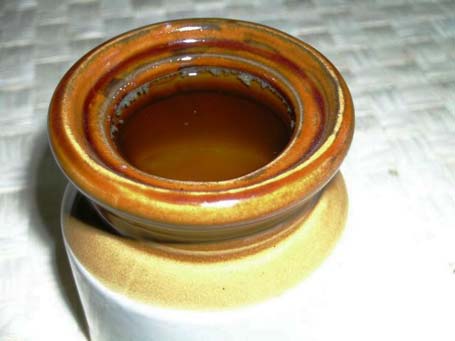
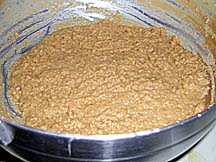
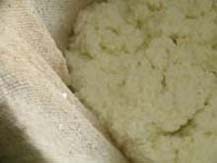
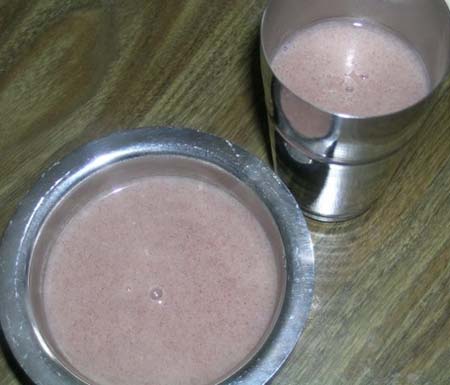
After turning off the heat, do not cover with lid. Let the ghee stand for ten minutes. Remove any crust that rises to the surface with a spoon. Strain, discarding the milk solids at the bottom of the vessel, using a coffee filter or muslin cloth (gangi gudda). Or simply ladle off the clean water like ghee into a dry jar. Let it reach to room temperature. Then cover with a lid. Store at room temperature.

Removing the solids from the ghee with a spoon

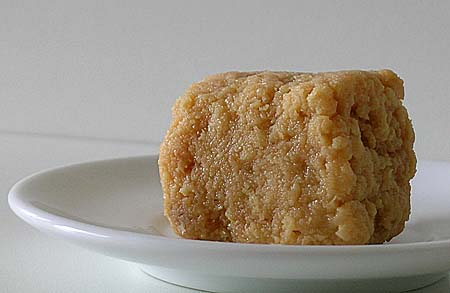
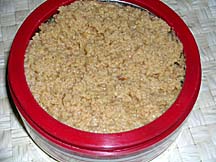
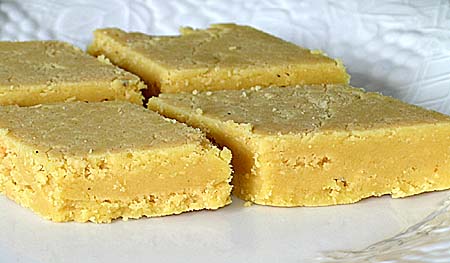
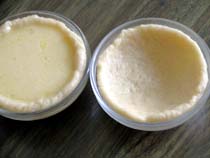
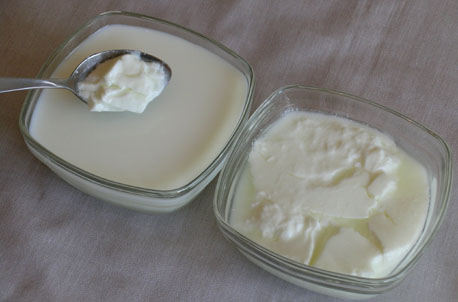
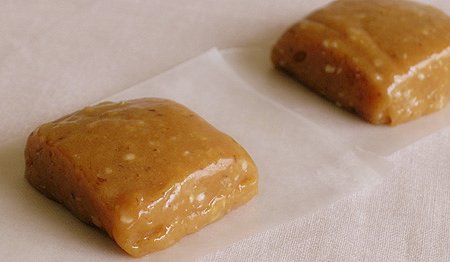
When first made or heated, ghee will look clear, like golden oil. At room temperature it will be in kova or fudge like consistency. It would turn to solid block when exposed to extreme cold temperature. To use, take necessary amount with a dry spoon and add to the food. Moisture spoils the ghee, so never use a wet spoon when handling ghee.

What I do with ghee:

1. Drizzle one teaspoon of ghee on hot cooked rice. Anything with rice tastes so much better with ghee, particularly the dal, sambhar and rasam.
2. To prepare different types of pulaos/fried rice.
3. Saute spices for masala (garam masala, various types of masala and curry powders).
4. For popu or tadka (frying the cumin, mustard seeds and curry leaves in ghee).
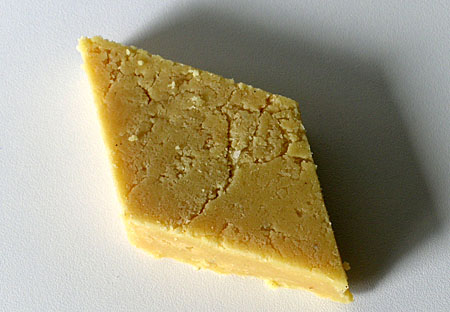
5. To prepare sweets like payasams, bhakshalu (puran poli), burfis, kheers, halwas and laddus.
6. On toasted bread and on a boiled potato.
7. Garlic roasted in ghee, spread on the bread is garlic-bread at its best.

Anything with ghee is ghee-licious. It’s simply impossible to go wrong with ghee. For any culinary enthusiast, the authentic Indian food experience has to start with this ancient Indian staple. Try and Enjoy!

Ghee

Note:
Ghee is often equaled to clarified butter. But it’s a simple-minded simplification. The ghee making process is lengthy and the end result is more refined when compared to clarified butter. Now you know the difference, don’t you go on regurgitating same falsehoods about ghee equals to clarified butter. No, it’s not. And, for God’s sake have the decency to call it by its given name – Ghee. You can say gee, right? Add an ‘h’, and say out loud “ghee” as in geese. There you go. Thank you for indulging me about ghee.

Posted by Indira©Copyrighted in Amma & Authentic Andhra,Ghee,Milk & Products,The Essentials (Friday May 27, 2005 at 9:21 am- permalink)
Comments (72)

The New Home of Mahanandi: www.themahanandi.org

Raagi Malt (Raagi Ganji)

I love Raagi malt, particularly on cold rainy days like today. It’s May, still so cold here. It is like this since last week. I am waiting for the Sun to shine again.

Raagi (Finger millet, Ragi, Kelvaragu, Muthari, Nachni) is a Sanskrit word, and it is a type of millet grain cultivated in India from ancient times. Raagi is well-known to be rich in protein, calcium, iron and it is gluten free grain. At our home in India, ragi grains are sprouted, then gently roasted on low flame and milled to fine powder. With this freshly milled ragi powder, we prepare a rejuvenating drink called ragi malt or ragi ganji.

Ragi flour, milk and water boiled together and sweetened with sugar or jaggery is ragi malt – popular as poor man’s or farmers health drink because of ready availability, low prices for the grain and nutritious, filling quality. If it is good for a farmer and to an ancient Sanskrit speaking person, then it must be good for me too, so I often prepare this drink in place of coffee and tea.

Raagi flour is available at Indian grocery shops. I brought mine from India. Freshly milled and needless to say so much better than the store bought flour. Back home, my mother and mother-in-law, both prepare this drink daily. It’s a routine for them, nothing fancy or special like for us here. And they always flavor the drink with cardamom.

Ragi Flour and Mixing water into ragi flour

Recipe:
for two cups

1 tablespoon of ragi flour
1 glass of water or milk
2 tsp of sugar or powdered jaggery
1/2 tsp of powdered cardamom

Boiling the water(milk) for Ragi malt Mixing the Ragi flour solution

Preparation:

First take the ragi flour in a cup. Add half glass water slowly. Combine to smooth, lump free paste. This is essential. Do not add the flour directly to boiling water, it will clump into lumps.

In a vessel, take one glass of water or milk. Preparing this drink with milk alone is too rich for me so I usually add few drops of milk to water.

Heat till the water reaches boiling stage. Then add the dissolved ragi flour solution slowly to the boiling water (milk), continuously stirring with a spoon. This will prevent the formation of lumps. If you add the flour mix to water before the boiling stage, the flour will separate and it won’t be suitable to drinking. You have to throw it away, so wait for water (milk) to start boiling, and then add the flour mix. This step is very important in preparing the good raagi malt.

Add sugar or jaggery per your taste and pinch of cardamom (Elachi) powder. Reduce the heat to medium level, and simmer the ragi malt for 5 minutes, stirring in-between. Turn off the heat.
Let it cool to warm, and then pour into a glass or cup.

Ragi Malt

When the body needs a break from caffeinated drinks like coffee and tea, Ragi Malt is the perfect warm beverage.

Posted by Indira©Copyrighted in Amma & Authentic Andhra,Dhanyam (Grains),Jaggery,Milk,Ragi,Ragi Flour (Monday May 2, 2005 at 1:18 pm- permalink)
Comments (76)

The New Home of Mahanandi: www.themahanandi.org

« Next Page