Mahanandi

Living in Consciousness ~ Indi(r)a’s Food and Garden Weblog

Sesame Buns

Yay… spring has definitely sprung here! Plenty of sunshine days have arrived finally. Even the yeast is ready for some action. When I mixed a packet of yeast with warm water, zoom… it rose to the sky as if it was trying to kiss the sunshine. See.

Yeast in action
Yeast in Action

Recipes that need good fermentation like preparing bread, idlies, dosas and yogurt, are going to be easy from now on. Last weekend, I tried a recipe for sesame buns from my recipe book. I used to note down the western bread and cake recipes that caught my fancy in a notebook. That was before I knew about the foodblogs. I wasn’t even aware of copyrights etc., at that time, so I’m not sure where I got this recipe from, but definitely from a cookbook, or might be from TV. I am not sure. Whatever the origin, I am very fond of this recipe. Adding a bundle of sesame, gives the bread that nutty taste I like and the buns are great with soups, salads or for homemade simple sandwiches.

Recipe:
(Makes about 8 to 10 medium sized buns)

3 cups whole-wheat flour
1 cup sesame seeds
1 cup quick oats
½ cup watermelon seeds (My addition)
1 tsp of salt and honey to your taste or ½ cup
Warm milk or water for mixing the dough into a ball
Yeast:
¼ ounce packet of active, dry ‘quick rise’ yeast or 2 tsp
Take 2 tablespoons of water in a cup, stir in a pinch of sugar. Pour the contents of yeast packet and stir. Keep it in a warm place and wait for it to turn bubbly, usually 5 to 10 minutes.

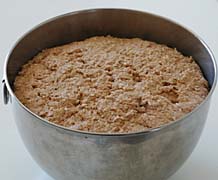
The dough at '0' hour The dough after one hour

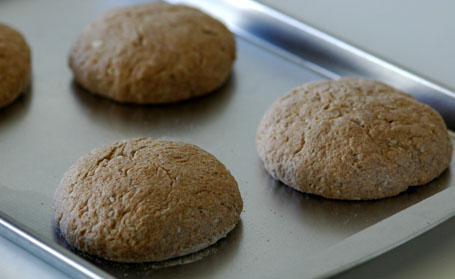
The dough is shaped into buns is ready to go into the oven

Method: Take all the above ingredients in a big bowl and mix them thoroughly. Knead the dough for at least 5 to 10 minutes. Cover and let it rise. Takes about at least one hour. I’ve kept it for about 3 hours.

Take the dough out and on a clean board, sprinkle in some flour, and deflate and knead the dough again. Do it for at least 2 to 5 minutes. Divide the dough into small balls, shape them into buns. Place them on a greased baking pan; leave space for them to expand. Wait for another 30 minutes for them to rise.

While the shaped buns are rising, preheat the oven to 350 F. Place the baking pans with buns in the oven and bake at 350 F for about 30 minutes or until golden brown. Remove and let cool.

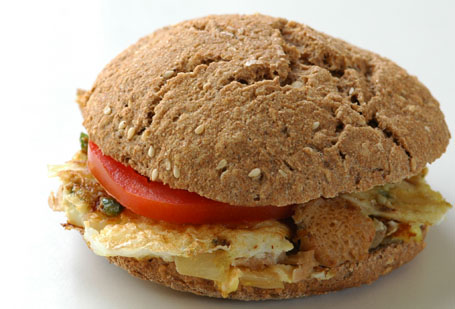
Sesame Bun Sandwich
Sesame bun and dried soya chunks-eggs omelet sandwich.

Posted by Indira©Copyrighted in Sesame Seeds,Whole Wheat Flour (Monday April 17, 2006 at 9:34 am- permalink)
Comments (26)

The New Home of Mahanandi: www.themahanandi.org

Methi Chutney (Fenugreek Chutney)

I was watching David Letterman show on a Monday night few days ago. He was making jokes about Winter Olympics… about Bode Miller, his poor performance and how Germany won the No.1 spot in medal count beating the US etc., He also made a joke about German victory celebrations – “Germany celebrated the No.1 spot in Winter Olympics with a victory parade. It started in Berlin and ended in Poland“. He was of course referring to German occupation of Poland under Hitler. I got the joke, but couldn’t laugh because I was thinking how could he make jokes about Germany, when his own country is committing war crimes, occupying and killing thousands of innocent civilians in Iraq and Afghanistan. Talk about projection. Dave is the most cynical and sharp one in late night circuit, I was surprised at his pretense that Nazi Germany is worse than current US behaviour. US is following the pattern, aren’t they?

Well, anyway, back to cooking, today it’s methi chutney.:) People back in India may wonder how come methi is so popular in Mahanandi’s world? Methi, spinach, and occasionally gongura (ambari) are the only familiar green leafy vegetables available year round in Indian grocery shops here in US. Reason for the methi’s frequent appearance.

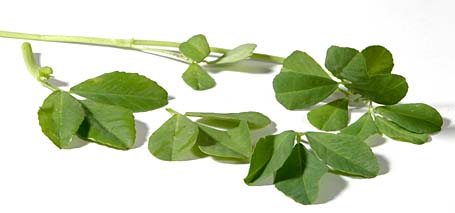
Methi Leaves

Methi chutney is completely an acquired taste. Sauteed methi and sesame combined with other ingredients, taste little bit bitter, sour and spicy. If you are going to prepare it from my recipe, first check the list of ingredients, imagine the taste, see if you like the combination, then attempt it. Please don’t nag me if it doesn’t turn out to your expectations in a typical mother-in-law fashion. Some people would say that I didn’t add this, I didn’t do that, or I didn’t cook their way etc., I might have accepted these if I were their daughter-in-law, but I am not :-).

Recipe:

3 cups of fresh methi leaves (one small bunch)
¼ cup of sesame seeds
8 dried red chillies or more
(This chutney needs a little bit of extra hotness, so don’t skimp on chillies)
2 teaspoons tamarind juice
½ teaspoon urad dal
¼ teaspoon salt or to taste
1 teaspoon of peanut oil

In a kadai, heat half teaspoon of peanut oil. First add and toast dried red chillies, then sesame seeds and urad dal, until golden. Remove them. In the same kadai heat another half teaspoon of oil and sauté methi leaves for few minutes. Take them all in a plate, wait to cool. Whenever you make these kinds of chutneys always wait for the ingredients to cool, never blend when they are hot. If you do this, the change in taste will be significant.

When they are cool enough to touch, take them in a blender, add tamarind juice and salt. Puree them to smooth paste. If necessary add few tablespoons of water for smooth blending. (Don’t make it too watery.) Remove and serve this chutney with upma or with rice and dal.

 Semolina Upma and Methi Chutney
Semolina Upma with Methi Chutney

Posted by Indira©Copyrighted in Menthi Kura(Fenugreek),Sesame Seeds (Thursday March 16, 2006 at 2:17 pm- permalink)
Comments (24)

The New Home of Mahanandi: www.themahanandi.org

Coconut Burfi (Kobbari Paakam, Kobbari Lauju)

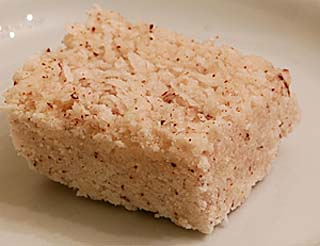
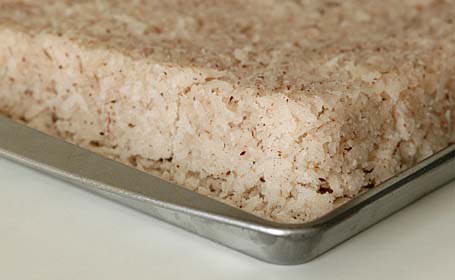
Coconut Burfi

Sweet, flavorful and chewy, coconut burfi is one of my favorite sweets. Fresh coconut meat cooked in cardamom flavored sugar syrup – recipe is so simple, method is very easy and the taste is heavenly. We, in our family prepare it without adding milk in contrast to some other versions, where milk and ghee are also added along with fresh coconut to sugar syrup.

Last weekend, weather was so perfect and spring like. We felt like having some sweet. So we went to neighborhood Rulli Brothers grocery shop and purchased two coconuts, each for about 79 cents. Came home, prepared the sweet and enjoyed it. We still have some pieces of burfi left but the spring like weather – gayab ho gaya (disappeared). It’s snowing here today!

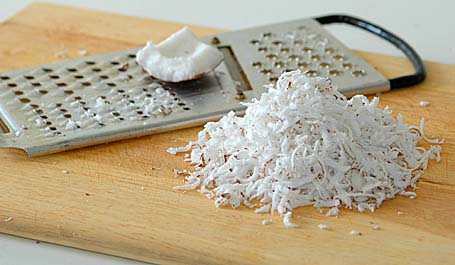
Grating the Coconut

Recipe:
(For 12 medium sized squares)

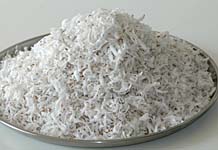
2 cups of fresh grated coconut
1½ cups of sugar (or 2 cups – your choice)
Half glass of water
2 cardamom pods, seeds finely powdered
A tray greased with ghee (for pouring the cooked mixture)

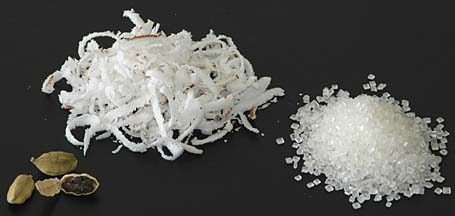
Freshly grated coconut, Indian sugar, Cardamom pods

Method:
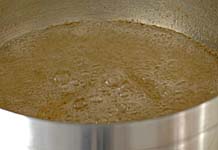
In a big sturdy vessel take water and sugar. Keep the heat on medium-low allowing the sugar to melt completely to prepare the sugar syrup. Cook it until the sugar syrup reaches softball like consistency. To know the right consistency – do the cold water candy test. Take few tablespoons of water in a cup, add a drop of sugar syrup to water. If it holds its shape (softball) doesn’t dissolve into water then it’s at the right consistency.

Fresh Grated Coconut Plain sugar syrup
Fresh Grated Coconut ………………Sugar Syrup on the way to softball stage

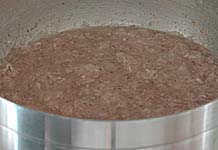
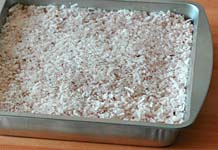
Grated fresh coconut is added to sugar syrup Coconut Burfi cooling
Fresh coconut is added to the thickened sugar syrup…… Coconut burfi – pressed into a squarepan to cool

Add the grated coconut and cardamom powder to the sugar syrup. Keep the heat on medium and cook, stirring frequently to prevent the mixture from sticking to the pan. In 10 to 15 minutes, the mixture will be reduced to half, becomes very thick and comes away easily from the sides of pan – this is the signal to turnoff the heat. (At this stage, you’ve to be fast and alert, otherwise, the mixture will be overcooked and turns into dry sweetened coconut flakes – commercial kind of mixture.) Immediately pour this mixture into the greased tray. Level it evenly with a spatula, and cut into squares. Let cool.

To serve or store, reverse the tray onto a big plate, separate the squares and store them in an airtight container. Because it doesn’t have any milk products, this sweet can stay fresh up to two weeks.

Kitchen notes:
Authentic South Indian coconut burfi is prepared only with fresh grated coconut. Grating the coconut takes little bit effort but I think of it as an exercise, mainly upperarm workout.
Checkout this site for clear photo and video demonstration of sugarsyrup stages.

Tray of Coconut Burfi
Indian Sweets 101 – Celebrating Holi with Coconut Burfi

Recipe Source:Amma

Posted by Indira©Copyrighted in Amma & Authentic Andhra,Coconut (Fresh),Indian Sweets 101,Mitai,Sugar (Tuesday March 14, 2006 at 11:07 pm- permalink)
Comments (57)

The New Home of Mahanandi: www.themahanandi.org

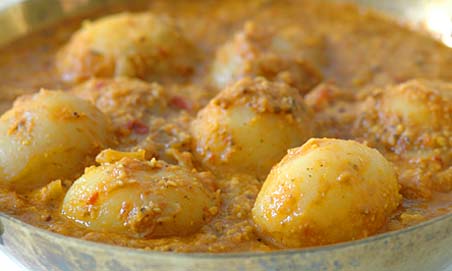
Aloo Dum (Baby Potatoes in Masala Sauce)

Thanks to the weird, spring like weather we have in this part of the world, the baby potatoes, which usually appear in market during spring and early summer, are on the market for sale in February. Rulli Brothers, the local Italian grocery shop had a sale going on baby potatoes last weekend. A pound of potatoes for one and half dollars and we could hand pick them from the pile. That’s a change from the usual prepackaged stuff. I picked out two pounds of tiny, key-lime sized baby reds, thinking they would be perfect for ‘Aloo dum’. Every home cook/chef of experience has few dishes in their repertoire, which they are certain about the outcome and happy to prepare and serve. Mine, among other things is, Indian restaurant style Aloo Dum. Baby potatoes cooked in an unforgettable flavorful sauce – the kind of dish that makes you swoon with its rich and satisfying goodness.

Recipe:

The preparation is three step. First boil the baby potatoes until they are just tender. Roast and grind the spices, the vegetables and the nuts for masala sauce. Combine and cook them together. The whole preparation takes about 30 to 45 minutes, if you have everything at hand.:) And the main chunk of it is of course to wait for the potatoes to boil.

Ingredients:

12 tiny baby potatoes
For Sauce- veggies
4 medium sized ripe tomatoes, each cut into four quarters
1 medium sized red onion or 4 shallots cut into big chunks
¼ cup finely chopped coriander
1×1 inch piece of fresh ginger
2 big garlic cloves
Nuts
½ cup cashews
¼ cup fresh grated coconut
Dry masala
6 dried red chillies
1 teaspoon coriander seeds & cumin
½ teaspoon peppercorns
3 small cinnamon sticks and cloves
1 star anise
for popu/tadka
2 teaspoons of peanut oil
1 teaspoon of mustard seeds, cumin and some curry leaves

½ tsp of turmeric
Salt to taste

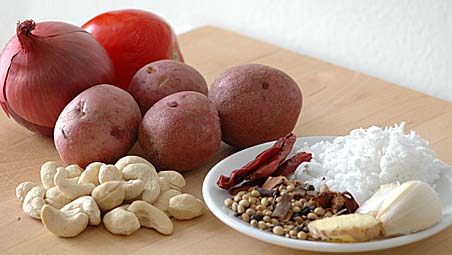
The list is long, but checkout the photo of ingredients together. It’s not much, is it?

Preparation:

Preparation is as I mentioned above, boil, roast-sauté-grind and cook.

Boil the potatoes until they are just fork-tender. When they are cool enough to handle, peel the skin. Prick them with a fork in multiple sites and keep them aside.

Gather the listed ingredients for masala sauce, ready on hand on a big plate. Heat an iron skillet and proceed like this.

1. Roast dry masala ingredients, for few minutes, until they release their smell. Remove them from the skillet and keep aside.
2. Roast cashews, then fresh grated coconut for few minutes. Remove them from the skillet and keep aside.
3. Roast ginger and garlic for few minutes. Remove them from the skillet and keep aside.
4. Finally heat one teaspoon of oil and roast onion and tomatoes for few minutes.

Let them cool down little bit. When they are cool enough to touch, put them in a blender. Add half glass of water and half teaspoon of salt. Grind them into smooth paste.

Cook: Heat one teaspoon of peanut oil in a big wide pan or kadai. Toast the popu ingredients (mustard seeds, cumin and curry leaves) until they start to splutter. Add the grinded masala paste and another half to one glass of water. Stir in turmeric. Taste and add salt if needed. Add baby potatoes. Cover and cook on medium heat for about 15 to 20 minutes. Finally stir in finely chopped cilantro and serve.

My Kitchen Notes:
Don’t forget to prick the potatoes, so that they can absorb the sauce.
Onions – avoid yellow onion and go with shallots or red onions
If you want, you can also stir in cream/yogurt at the end.


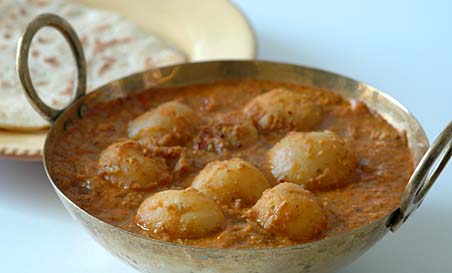
Aloo Dum and Chapatis

Check out another version of Aloo dum from Lera of Myriad Tastes.

Posted by Indira©Copyrighted in Baby Potatoes,Cashews,Coconut (Fresh),Potato (Monday February 27, 2006 at 9:45 am- permalink)
Comments (50)

The New Home of Mahanandi: www.themahanandi.org

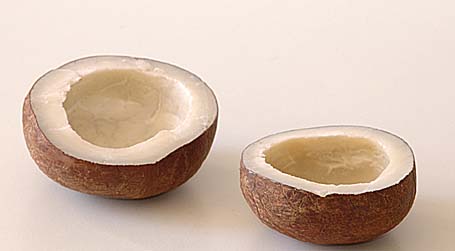
Ballari Coconut (Ballari Kobbera)

Ballari Coconut (Ballari Kobbara)

For this week’s Indian kitchen, I’m showcasing a unique Indian ingredient, “Ballari Coconut”. It’s a dried whole coconut, and the unique thing about it is how it is dried. Under hot summer sun, some selected whole coconuts are dried with coconut water inside so that the coconut meat can absorb all the coconut water while drying. This process makes the dried coconut very sweet. A completely different taste when compared to ordinary dried coconut, where the drying process is done after removing the coconut water.When cut into half (above image) and grated or powdered, Ballari coconut almost taste like sweetened, sugar added coconut flakes.

In our area, Nandyala (India), it’s called ‘Ballari coconut’. Because of the special process involved in making, it’s priced little bit high than the ordinary dried coconut. Due to high cost, it’s used mainly during special occasions like for preparing sesame laddus and as part of traditional ‘sare’ (care package) to married daughters from mothers etc.,

Are you aware of this type of dried coconut? If so, what do you call it at your place? Any feedback is much appreciated. Thanks!

it’s available in Indian grocery stores here in US. I saw it at Subji Mandi in New Jersey and also at Pittsburgh Indian grocery shop. Look for whole dried coconut instead of halved shells.

For more weekend food/herb blogging, check out Kalyn’s Kitchen.

Posted by Indira©Copyrighted in Amma & Authentic Andhra,Coconut (Dry),Indian Ingredients (Sunday February 19, 2006 at 6:11 pm- permalink)
Comments (24)

The New Home of Mahanandi: www.themahanandi.org

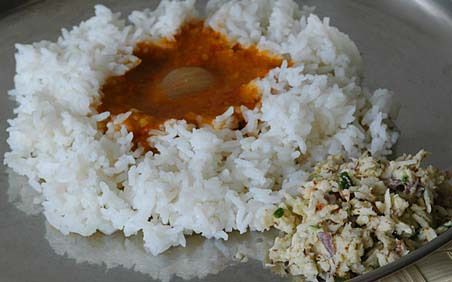
Coconut Chutney ~ Andhra Style Raw Cuisine

This is another type of chutney (pacchadi) that we prepare with fresh coconut. Young, fresh coconut, red onion and green chillies, little bit of salt and tamarind juice – all pounded together in a stone mortar for about 10 minutes. The result is dynamite stuff and a completely raw food item. Sweet flesh of fresh coconut mixed together with hot, tangy flavors is a taste worth 10 minutes of my time and energy.

Dry Coconut Chutney and Sambhar Rice
Coconut chutney with rice and shallot sambhar ~ Our lunch today.

Recipe Source: Amma

Posted by Indira©Copyrighted in Amma & Authentic Andhra,Coconut (Fresh),Green Chillies (Friday February 17, 2006 at 1:45 pm- permalink)
Comments (10)

The New Home of Mahanandi: www.themahanandi.org

Coconut Chutney (Kobbari Pacchadi)

Coconut chutney is an example of how good a raw food can taste when prepared with right ingredients. Whoever came up with this recipe, my salute to them! People remember and replicate a good recipe; no wonder, this age old recipe continues to be popular and beloved by all who tried it.

Breakfast is not a proper breakfast without coconut chutney in Southern states of India (Andhra, Tamilnadu, Karnataka and Kerala). Perfect blend of different flavors and the ease with which it can be made – coconut chutney is a great example of traditional, health conscious South Indian food and a showcase recipe for raw cuisine. See the photo below, if you find coconut chutney looking similar in an Indian restaurant along with your dosas, idlies, that’s a sure sign that you are getting a proper south Indian food.

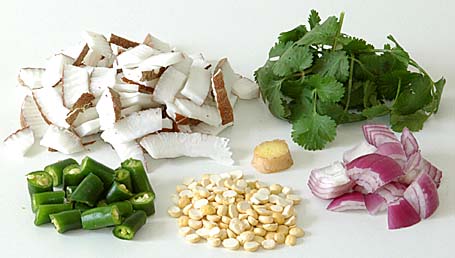
Fresh Coconut, Cilantro, Red onion, Ginger, Dalia(pappulu) and green chillies

Recipe:

1 cup of thinly sliced fresh coconut
¼ cup of pappulu(dalia, roasted chickpeas)
6 Indian small green chillies, chopped
1 tiny red onion or shallot, sliced into chunks
6 sprigs of fresh cilantro and 1/2 inch of ginger
½ tablespoon of tamarind extract
¼ tsp of salt
for popu or tadka
1 tsp each of mustard seeds, cumin, urad dal, fresh curry leaves and few pieces of dried red chilli.
extras(optional)
1 tablespoon of yogurt and one lime

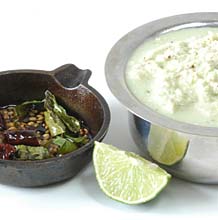
Tadka/popu is done and ready to add to the coconut chutney Final step- adding the tadka/popu to coconut chutney

Preparation:
Preparation means grinding. Taste of coconut chutney varies with grinding method. Believe it or not, different grinding tools give different taste. The best taste comes out of using a stone mortar. Closest is the machine, which grinds with a stone. Last is the food processor or the blender etc., The taste is inversely proportionate to how easily you can grind it.

In a mortar or blender, combine all the ingredients (coconut, pappulu, onion, green chillies, cilantro, ginger, tamarind extract and salt). Add half to one cup of water and grind them until the ingredients are pureed. Transfer the mixture to a cup.

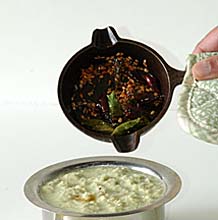
In a small pan, add half teaspoon of peanut oil, add the popu ingredients, sauté them until they start to splutter. Remove the pan from heat and add this popu to the pureed coconut mixture in the cup. Stir in little bit of yogurt now (our family variation). The chutney is ready. Just before serving, squeeze few drops of limejuice.

Traditionally coconut chutney is served with dosa, idly, vada, upma, utappam, pesarattu and pongal, as a part of morning breakfast.

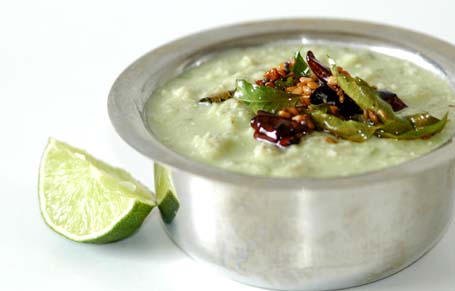
Coconut chutney with popu/tadka just added
Coconut Chutney ~ South Indian Style

Note to reader: I use, tiny red onion or shallot (Indian onion, small baby onion) for this chutney. Either one is preferable than white/yellow onions (US). Red onion/shallots are less harsh in flavor when raw and don’t overpower the chutney with their bitterness.

Recipe source: Family- Amma & Attamma(mother and mil)
For several variations of this recipe, read the comments.

Posted by Indira©Copyrighted in Amma & Authentic Andhra,Chana Dal-Roasted (Dalia),Coconut (Fresh) (Thursday February 16, 2006 at 8:13 pm- permalink)
Comments (54)

The New Home of Mahanandi: www.themahanandi.org

Kadala Curry/Ghughni (Black Chickpeas&Coconut Milk)

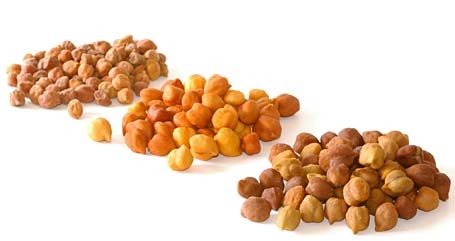
Black chickpeas are another type of legume, which I frequently add to the regular sauté curries. Compared to white chickpeas, black ones – we call them ‘kaala chana’, like all other colored ingredients, have an earthy taste and a more robust nutty flavor. They not only bring color to the dish and also fill that essential, guilt free protein need. They are the wonder food, that taste good.

Raw black chickpeas, Soaked overnight in water-black chickpeas, Pressure cooked black chickpeas
Black Chickpeas – Raw, Soaked in water and Pressure-cooked

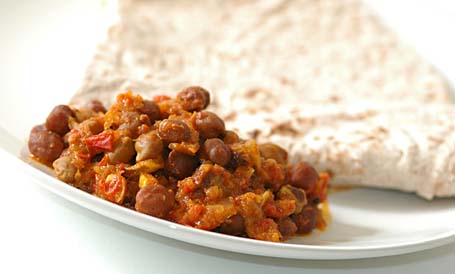
I learned by reading other food bloggers recipes that, black chickpeas cooked in coconut milk based sauce is Keralas favorite dish – ‘The Kadala Curry’. Cooked in tomato-onion sauce without the coconut is Bengalis favorite dish – ‘The Ghughni’. Last weekend I prepared – ‘Kadala curry’ with coconut milk.

Recipe:

1 cup black chickpeas, overnight soaked in water
Sauce:
½ cup coconut milk (homemade watery kind)
4 medium sized ripe tomatoes,
1 medium sized red onion or 4 to 6 shallots
Seasoning:
1 tsp of g-g-c paste (Ginger-Garlic-Cilantro)
1 tsp of c-c-c-c powder(Cumin-Coriander seed-Cloves-Cinnamon)
½ tsp of red chilli powder and turmeric
Salt to taste
Popu(tadka)
1 tsp of each, mustard seeds, cumin, minced garlic and curry leaves

1. Take black chickpeas in a pressure cooker, add ¼ tsp of salt and 2 cups of water. Pressure-cook them till they are just tender. (Take caution not overcook them.) Drain and keep aside.
2. Meanwhile – roast tomatoes and onions in half teaspoon of oil. When they are little bit cool, grind them to smooth paste. Also prepare coconut milk and g-g-g paste and c-c-c-c powder.
3. Cook 1 and 2 together. In a big sauce pan, heat 1 teaspoon of oil, toast popu or tadka ingredients, add the sauce and seasonings and half cup of water. Cover and cook them for about 10 minutes. Stir in black chickpeas and coconut milk and simmer them, stirring in between until the curry reaches the thickness you desire or for about 10-15 minutes on medium heat.
Serve hot with roti/nan or with rice.

Variation: If you are calorie conscious, you can make this curry without coconut milk. Just increase the amount of tomatoes and onions for sauce – you’ve prepared a traditional Bengali dish ‘Ghughni‘.

Kadala Curry and Roti

Recipe Source: Priya’s Kitchen and Kadchi Ki Kamal.
For Ghughni and its different variations try Google search.

Posted by Indira©Copyrighted in Chickpeas-Black,Coconut (Fresh) (Tuesday February 14, 2006 at 9:56 am- permalink)
Comments (17)

The New Home of Mahanandi: www.themahanandi.org

Homemade Coconut Milk (Kobbari Paalu)

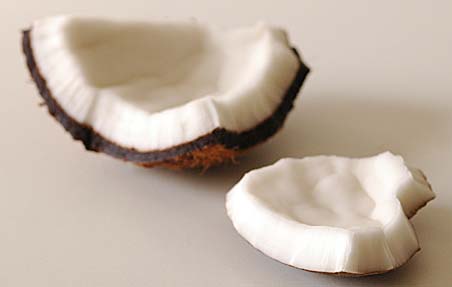
Even after all these years living in US, still I can’t bring myself to buy or use canned stuff in metal containers. Commercial Coconut milk is available here, packed in metal tins only. So, I avoid that stuff and I make fresh coconut milk at home whenever a recipe calls for it. Very easy to do, the only things required are fresh coconut, muslin cloth (cotton cloth), a hammer and a blender. 10 minutes of work- homemade fresh coconut milk, without any additives will be ready to add in cooking.

Fresh Coconut Pieces

Method:

Hold the coconut in your hand firmly. Hit coconut hard with hammer. Show off your aggression and hit hard. Depending upon your aggression level:), it will break open in few attempts. Catch and pour the coconut water in a glass/pitcher. Hitting with hammer, break each coconut half into pieces. Do all this, over a clean, empty kitchen sink- very convenient to pick up the falling coconut pieces and also to clean the whole mess.

Using a knife, separate the coconut piece from its shell. Young coconut is easily separable from the shell, but mature ones, some with attachment issues won’t come off that easily. Then try this old time tip – soak the pieces in water for 5 minutes. Water seeps between shell and coconut, creates a thin barrier and makes it easy to separate the coconut from the shell.

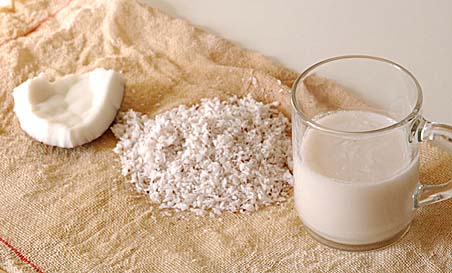
Rinse the coconut pieces with water. Slice them into very thin pieces. Place the coconut pieces in a blender, add water and grind smooth. Cover a bowl with muslin cloth (cotton cloth/gangi gudda) and pour the grinded coconut liquid-slush into the cloth. Allow it to drip for few minutes, and then squeeze handfuls of the coconut meat to extract as much liquid as possible into the bowl. Discard the squeezed pulp and use coconut milk in recipes. Stored in a glass jar, coconut milk can stay fresh for 1 or 2 days refrigerated.

Compared to store-bought concentrated stuff, homemade coconut milk tastes completely different. Fresh, tasty and watery. By playing with water quantity added to the blender and by cooking, you can control the consistency and thickness of coconut milk according to your needs.

Coconut, Finely Powdered and Squeezed Coconut Powder Using the Cheesecloth and Coconut Milk
Homemade coconut milk

Posted by Indira©Copyrighted in Amma & Authentic Andhra,Coconut (Fresh) (Monday February 13, 2006 at 10:07 am- permalink)
Comments (37)

The New Home of Mahanandi: www.themahanandi.org

Cashew~Walnut Laddu (Kaju-Akhrot Burfi)

When I invited my friends to celebrate Sankranthi festival, in addition to the traditional ‘sweet pongal’, I also prepared cashew walnut laddu. Low in sugar calories, high in nut energy! Cashews and walnuts are first roasted and powdered, then cooked in milk-sugar kova till they all came together into solid fudge like consistency. Cooling further solidifies the mixture and then small portions are taken and shaped into rounds -‘laddus‘ or cut into squares-‘burfis‘. I like the round shape, so I always go with round laddus. Very convenient to hold and eat, children particularly love laddus.

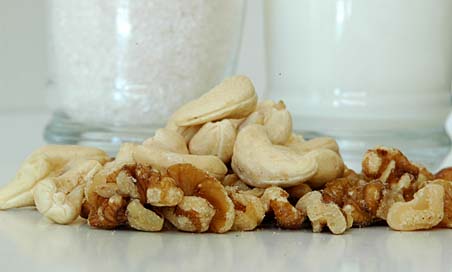
Cashews, Walnuts, Milk and Sugar in the Background

Recipe:

Half gallon- Whole milk
2 cups-sugar (3 cups if you like the laddus on the sweeter side)
1 cup – cashews
1 cup – walnuts

Preparation:

Milk and Sugar: In a thick bottomed big pot, bring milk to boil. Add sugar. Stirring occasionally, simmer the milk-sugar mixture until it gets thick and is reduced to about one fourths of the original quantity. It takes at least 45 minutes to one hour.:) Do this on medium heat. Avoid high heat and take care not to scald the milk.

Cashews and Walnuts: Meanwhile, lightly roast cashews and walnuts separately in an iron skillet. Let them cool down to room temperature. Separate 10 pieces from each and chop them into small pieces. With the remaining ones – make fine powder of them in a food processor/mixer.

Milk and sugar simmering thickened milk and sugar after 1 hour on the stove
Milk and sugar simmering………………..Thickened milk and sugar kova after one hour on the stove

Kova into Laddu: Add this fine powder to the thickened milk-sugar kova and cook for 15 minutes, stirring continuously, until the mixture is firm. Sprinkle chopped chunks of cashews and walnuts that were kept aside. Continue cooking for another 10 minutes until the mixture is almost crumbly and comes away easily from the sides of pan.

Take a spoonful of mixture and press it with your hands into a ball. If it holds shape, then mixture is ready for cooling. Turn off the heat. Spoon the mixture into a greased square or round pan. Level it with a spatula and let it cool for at least 4 to 5 hours. Cut into squares for burfis or take a spoonful of mixture, shape it with your hands into a round ball for laddus. Store the laddus in glass jar. They will stay fresh for upto one week.

(This recipe makes 15 medium sized laddus.)

Cashew-Walnut Laddu

One medium sized cashew-walnut laddu, my entry to ‘Sugar-Low Friday’ event hosted by lovely Sam of Beck & Posh.

By the time my friends left, I had only four laddus remaining out of 20. Two for me and two for Vijay, enough for us. This is how I do my ‘Sugar – Low’, by portion control. In my view, this is also one of the ways to lower the sugar consumption.

Tagged with:

Posted by Indira©Copyrighted in Cashews,Indian Sweets 101,Milk,Mitai,Sugar,Walnuts (Friday January 27, 2006 at 7:16 pm- permalink)
Comments (26)

The New Home of Mahanandi: www.themahanandi.org

Sweet Pongal, The Sankranthi Sweet

Sankranthi:

Harvest festival Sankranthi is all about celebrating rice in our part of world. Particularly in South India, rice plays an important role as the main cultivated grain and as nourishing food that people subsist on every day of their life. It’s no wonder that there is a festival dedicated to the almighty rice. Equally worshipped are the man’s best partner, the kind-hearted cow, and the elements – sun, earth and water. They make rice cultivation a success, and also add a magic touch to the rice, making the rice a cherished, beloved food of the people.
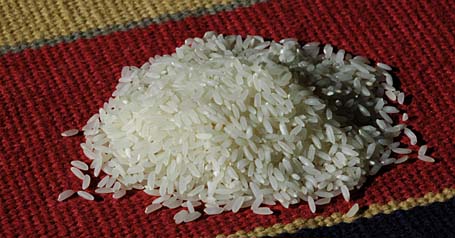
Sona Masuri Rice - Grown and Imported from Andhra, India
Sona Masuri Rice – Grown and Imported from Andhra Pradesh, India

Sweet Pongal (Tiyya Pongali):

This famous south Indian, Sankranthi sweet is traditionally made with freshly harvested rice. Very simple to make but spectacular in taste, the ordinary rice becomes mouthwateringly extraordinary in sweet pongal. The rice soaks up the milk, absorbs the jaggery, picks up the cardamom scent and takes up the generously added moong dal, cashews and golden raisins. And in this new avatar, becomes an offering to the Gods (naivedyam, we call it), and also simply irresistible to all who try it.

Some Tips:

Jaggery:

I follow the classic recipe and don’t do or like shortcuts. Method is neat and easy and the end result is always like the prasadam offering of temples. Jaggery is the traditional sweetener of sweet pongal and my choice too, simply because sweet pongal tastes better when made with jaggery and not sugar.

Rice:

The rice that I prefer is Sona Masuri. Because this variety is grown and imported from my home state Andhra Pradesh, and is the variety that I grew up on. Grain is thin, medium sized and very lightweight. Available in almost all Indian grocery shops here in US. Little bit pricey, but the taste is worth the money and farmers in my state really can use the money. Support farmers and buy this rice.

Consistency:

Sweet pongal is like a rice-dal porridge, consistency must be gooey thick and sticky. That means, the amount of liquid I usually add for sweet pongal recipe is more than the amount that I normally add to cook plain rice of equal measurements. Also, I always use equal amounts of water and milk for this recipe. Variations are – you can cook the rice-dal entirely in milk or in coconut milk, or if you are lactose intolerant and diet conscious, then in just plain water. Just add more liquid compared to the regular rice preparation.

Rice, Yellow Moong Dal, Cashews, Golden Raisins, Cardamom and Jaggery

Recipe:
For two people

1 cup – Sona Masuri rice
½ cup – yellow moong dal (pesara Pappu)
1 – 1½ cups – jaggery, crushed to fine
¼ cup each – cashews and golden raisins
¼ cup – ghee, melted
4 cardamom pods – skins removed and seeds powdered finely
3 cups each – milk and water (or 2 cups each, if you like a halwa like pongali)

Here is the 3-step method I follow to prepare sweet pongali at our home.

1.Toast and Roast:

Yellow moong dal:
Heat one teaspoon of ghee in an iron skillet. Add and roast yellow moong dal, on medium heat, until the color changes from yellow to pink. Take care not to brown. Slow-roasting freshens up and imparts a sweet smell to yellow moong dal. Remove them to a plate and keep aside.

Cashews and Golden raisins:
In the same skillet, add and heat two teaspoons of ghee. Add and fry the cashews and golden raisins till they turn to light gold. Remove and keep them aside.
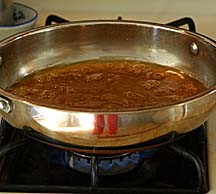
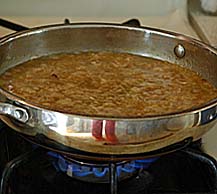
Jaggery Syrup Cooked Rice-Dal Mixture is added to Jaggery Syrup
Jaggery syrup simmering…………Cooked Rice-Dal Mixture is added to Jaggery Syrup

2.Cook and melt:

Rice, moong dal and milk:

Take rice and roasted moong dal in a pot. Add water and milk. Mix well. Partially cover the pot and cook the rice and dal to tender soft. I use a pressure cooker but an electric rice cooker also works fine. Stove-top slow simmering also produces best tasting pongali.

Jaggery and water:

While the rice is cooking, in another pot, melt jaggery. Add the powdered jaggery and one cup of water. Stir and cook till jaggery melts. Bring the solution to a rolling boil. and reduce the heat and simmer for about five minutes. Turn off the heat. Let the jaggery syrup cool a bit.(Jaggery has to be cooked separately and you can’t add it directly to uncooked rice and milk. Because it prevents the rice from cooking properly and also splits the milk. Please keep this in mind.)

3. Stir and Simmer:

Adding the cooked rice: Add the cooked rice-dal pongal to jaggery syrup. Keep the heat on medium. Stir in the ghee, cashews, golden raisins and cardamom powder. With a strong laddle, stir well to combine all. Cover and simmer until the whole mixture comes together into a sticky, gooey mass. Turn off the heat. Cover and let it sit for 10-15 minutes. Sweet pongal thickens further on cooling.

First offer to Gods as naivedyam (if you have this tradition), then serve it your loved ones, near and dear. Don’t forget to drizzle some ghee just before serving.
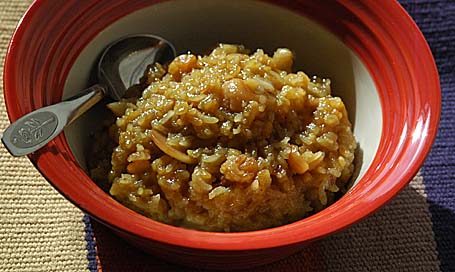
Sweet Pongal (Tiyya Pongali) - The Traditional Sweet of Sankranthi
Heavenly Sweet Pongal

For people hungering for a traditional, naivedyam kind of recipe but don’t have time or energy to make puran poli (bhakshalu), sweet pongal is The one. Speaking from experience, my suggestion is, keep your reservations aside and try it. You’ll be glad and can be proud of yourself for finally making one decent kind of naivedyam. I promise! Follow the recipe and this ancient classic delivers every time. People would ask for a second serving, diet or no diet.
Posted by Indira©Copyrighted in Amma & Authentic Andhra,Cashews,Ghee,Golden Raisins,Indian Sweets 101,Milk,Moong Dal (Washed),Naivedyam(Festival Sweets),Sona Masuri Rice (Monday January 16, 2006 at 3:08 pm- permalink)
Comments (79)

The New Home of Mahanandi: www.themahanandi.org

Tindora In Sesame Sauce (Dondakaya-Nuvvula Kura)

Another recipe with tindora (ivy gourd, dondakaya, Kovakku), this time with a sauce. Sauce is prepared from roasted sesame seeds, fresh coconut and dried chillies, sweetened with little bit of jaggery. Usually sesame sauce calls for the addition of tamarind, but in this case, slightly sour taste of tindora cancels the need for tamarind.

A different recipe, sweet and sour – because of jaggery and tindoras, nutty and nourishing due to sesame-coconut combination. A must try, for those of you who are interested in cooking up something new with tindoras.

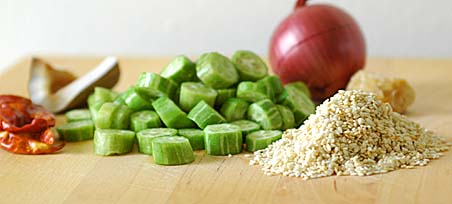
Tindora slices, Onion, jaggery, Sesame Seeds, Dried Red chillies, Fresh Coconut

Recipe:

20 fresh tindoras – each, cut crosswise into rounds (3 to 5),
1 medium sized onion – finely chopped
½ cup sesame seeds
¼ cup powdered coconut – I used fresh coconut-oven dried
4 to 6 dried red chillies
1 tablespoon powdered jaggery (or to your taste)
½ teaspoon salt and turmeric
Popu or tadka ingredients

Preparation:

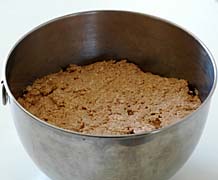
In an iron skillet, lightly toast sesame seeds, powdered coconut and dried red chillies. Cool and take them in a blender or food processor and make a smooth paste.

In a pan, heat one teaspoon of peanut oil, do the popu or tadka i.e. toasting one teaspoon each of mustard seeds, cumin, minced garlic and curry leaves

Add onion, saute a little bit, and then add round slices of tindora. Mix them once, cover and cook, stirring in between for 10 to 15 minutes on medium heat. Allow cooking tindora in its own moisture, sort of steam-saute.
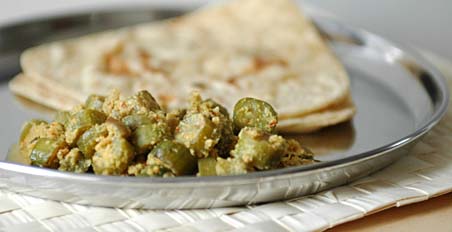
When they are tender and giving off wonderful smell, add the sesame-coconut paste, jaggery, salt and turmeric. Add half glass of water. Stir to mix and cook them covered, until the sauce thickens. Serve warm with rice or chapati.

I have to say this curry tastes great with chapati/roti than with rice.

Tindora in Sesame Sauce with Chapatis
Tindora Curry with chapatis ~ Our lunch today.

Posted by Indira©Copyrighted in Coconut (Fresh),Dondakaya(Tindora),Sesame Seeds (Tuesday January 10, 2006 at 2:24 pm- permalink)
Comments (20)

The New Home of Mahanandi: www.themahanandi.org

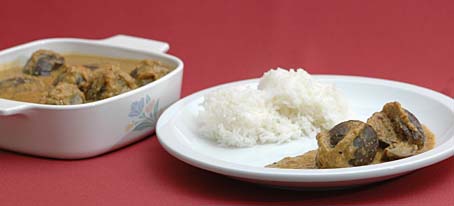
Bagara Baingan (Nune Vankaya Kura)

Do you remember my post about stuffed brinjal curry with peanuts and sesame seeds? In that post, I also mentioned different kinds of stuffing that I know. Here is another type of stuffed brinjal curry, I am calling it by Hindi name – ‘Bagara Baingan’ – This time with purple brinjals, stuffing made with dals and fresh coconut and cooked in a pan. The stuffing doesn’t taste very good when pressure-cooked. So for this kind, I make it in a pan, like how they do it back home.

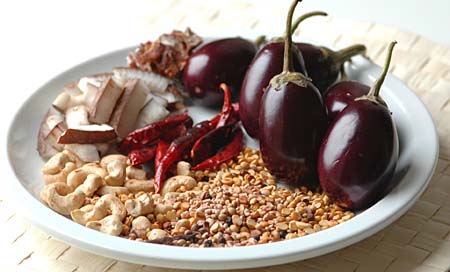
Fresh Coconut, tamarind, purple brinjals, roasted dried red chillies, cashews and mix of chana dal, urad dal, coriander seeds, fenugreek seeds, cumin  - ingredients for Bagare Baingan
Recipe:

Small, fresh, young, blemish free brinjals – 8 to 12

Roasting for stuffing and gravy:

Chana dal and urad dal – quarter cup each
Black peppercorns and cloves – 4 to 6 each
Dried red chillies – 6 to 8
Cumin, coriander seeds & methi seeds – 1 teaspoon each
Roast them in an iron skillet till golden. Mix them with
Fresh or dried coconut – 1/2 cup
Tamarind juice and powdered jaggery – 1 tablespoon each
Salt – 1/2 teaspoon
My addition: One fistful of roasted cashews
Ginger garlic paste and roasted red onions can be added to this mix.

Make a smooth paste of all the above ingredients without adding any water. Divide it into two portions. One for stuffing the brinjals and the other portion is for making the gravy.
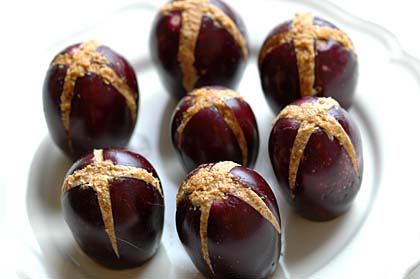
Purple brinjals stuffed with roasted dal- coconut-cashew paste
Stuffing:

1. Wash to clean up the wax coating on brinjals. Neatly cut and remove the stem of each brinjal.
2. Starting at opposite side of stem, make a plus (+) shaped cut towards the stem side, but not all the way through. (See the photo above, to get an idea)
3. Gently separating the brinjal petals, fill the narrow gap with the prepared paste.

Cooking:

1. In a big, wide, flat pan – heat one tablespoon of peanut oil, do the popu or tadka (toasting one teaspoon each of mustard seeds, cumin, curry leaves and minced garlic).
2. Arrange the brinjals – stuffing side up, neatly in rows. Cover and cook them in their own moisture for about 15 to 20 minutes on medium heat or until they soften. The younger the brinjals, the faster they cook.
3. Once you are sure that brinjals are tender and cooked, remove them carefully without disturbing shape onto a serving dish.
4. Pour the remaining paste that was kept aside to the pan. Mix it with half glass of water. Sprinkle in turmeric and adjust the salt, spice (red chilli), sour (tamarind) and sugar to your taste. Cook for another 10 to 15 minutes on low medium heat, until the gravy thickens.
5. Now put the brinjals back into the thickened gravy. Cook for another couple of minutes.

With rice or roti, this curry is a party favorite and a crowd pleaser.
 Stuffed Brinjal Curry (Bagare baingan, Nune vankaya Kura) with rice

Bagara Baingan with Rice ~ Our dinner today.

Posted by Indira©Copyrighted in Amma & Authentic Andhra,Cashews,Chana Dal,Coconut (Fresh),Urad Dal (Washed),Vankaya (Brinjal) (Thursday December 29, 2005 at 9:56 pm- permalink)
Comments (35)

The New Home of Mahanandi: www.themahanandi.org

Walnut Burfi (Akhrot Laddu)

Vijay got a good grade in this semester. He is studying for his master’s degree in software engineering, part time at Carnegie Mellon University. And the walnut burfi is for celebration. The combination of walnuts and milk-sugar is a classic. The resulting walnut burfi or laddu is a rare indulgence for us.

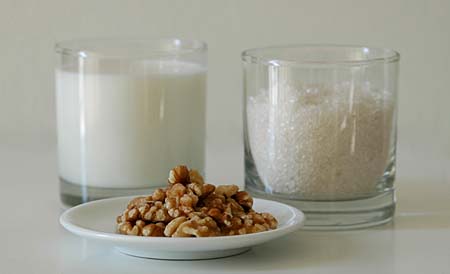
Milk, Sugar and Toasted Walnuts

Recipe:
(makes about 6 medium sized laddus)

2 cups of walnuts (Akhrots)
2 cups of whole milk
3/4 cup of sugar

Lightly roast walnuts in an iron skillet and let them cool down. Keep one fistful of nuts aside and grind the remaining walnuts into powder.

Boil milk and sugar until they come together into very thick mass almost like the final stages of pala kova. It takes about 30 minutes. At this stage, stir in powdered walnuts. Mix thoroughly and keep stirring until, the walnut-kova mixture leaves the sides of the pan and comes together into one big lump. Takes about 10 to 15 minutes. Sprinkle the whole walnuts and mix once and remove the mixture into a pan. Allow it to cool and make small laddus with it or press the whole mixture evenly and tightly in a greased pan to cut squares.

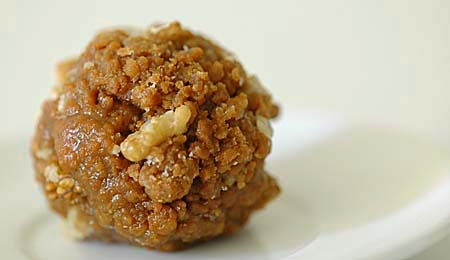
Walnut Burfi (Akhrot Laddu)
Walnut burfi (Akhrot laddu) – Old fashioned

Posted by Indira©Copyrighted in Indian Sweets 101,Milk,Mitai,Sugar,Walnuts (Monday December 26, 2005 at 1:07 am- permalink)
Comments (12)

The New Home of Mahanandi: www.themahanandi.org

Chestnut-Almond Cookies

For Indian recipes, I can’t and won’t break the tradition and I will always follow the elder’s footsteps in preparing food. I believe the ingredients they use for a particular recipe have been chosen for a reason, and the steps they followed to make a recipe work are methodic, implicitly giving a perfect taste and nutritional boost.

But when it comes to western food, since I ‘m not used to making these traditionally, I feel very free to experiment. Also I believe most of ‘traditional’ recipes that I see in magazines and TV shows are the stuff that they makeup as they go, to promote some food ingredients or products following the corporate orders. When food ingredients have their own associations and mega budgets to promote and influence peoples opinion in their favor with advertisement blitzes, I am not sure how traditional most of these recipes are, though they proclaim otherwise.

Chestnut cookies first posted by Mine of Teatime then submitted to cookie swap event by Ulrike of Kuchenlatein, captivated me mainly because they sounded real authentic, traditional and old world. When I saw the beautiful photographs, I so wanted to try these cookies. I changed few things here and there, going all the way to make them rustic pure. Use of molasses in place of powdered sugar, turned the cookies golden brown instead of creamy white. I tried decorating cookies differently, but it didn’t come out as I expected. Except for that one gaffe, the cookies turned out to be mouthfuls of wholesome goodness. Thanks Mine and Ulrike for sharing this wonderful, traditional recipe.

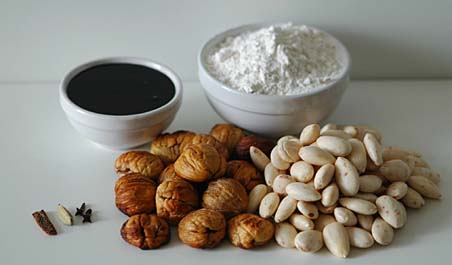
Molasses, All purpose flour, Almonds, Roasted Chestnuts, Clove, Cardamom, Cinnamon

Recipe:

2 cups of almonds, soaked in water overnight, then skins removed
15 chestnuts, roasted, then shells removed
1 cup of all purpose flour
11/2 cups of molasses
(Molasses is an acquired taste, difficult to like. Sugar/honey works fine too)
2 egg whites
1 inch cinnamon, 1 clove, and seeds from 1 cardamom pod – finely powdered together

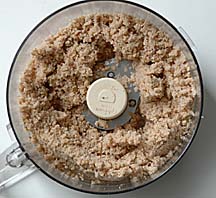
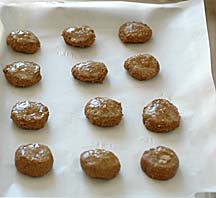
Powdering Almonds and Chestnuts in a Food Processor Almond-Chestnut cookies all ready to go into oven
Powdering Almonds and Chestnuts in a Food Processor…Almond-Chestnut cookie dough, ready to be baked

Preparation:

Powder the almonds and roasted chestnuts in a food processor to a smooth powder. Make it easy on the motor and do it in batches. In a vessel, take egg whites and beat them until they turn to foamy white. To these egg whites, add molasses and cardamom-cinnamon-clove powder. Mix and stir in all purpose flour and almond-chestnut powder. Mix them thoroughly. Shape the dough into a log, wrap it in a wax paper and store it in the freezer, until the cookie dough firms up. I had to keep it overnight in the freezer.

Preheat the oven to 350° F. Remove the hardened cookie dough from the freezer, cut it into 1 to 2 inch rounds crosswise. Place them neatly in rows on a greased or parchment paper lined baking tray. I egg washed the tops and sprinkled some brown sugar on top of each cookie, my idea of decoration, not so successful, I have to say.:) Place the baking tray in preheated oven and bake them at 350°F for about 20 minutes.

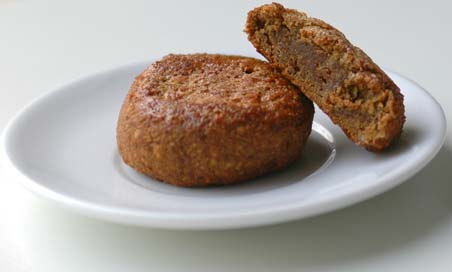
Believe it or not, they tasted like, do you know the South Indian sweet “Ariselu“, exactly like that. Roasted chestnuts and molasses gave a special and characteristic taste to these cookies, a first for us and we liked them very much.

chestnut cookies
Chestnut-Almond Cookies

Posted by Indira©Copyrighted in All-Purpose Flour(Maida),Almonds,Chestnuts (Marrons),Molasses (Tuesday December 13, 2005 at 7:16 pm- permalink)
Comments (12)

The New Home of Mahanandi: www.themahanandi.org

« Next PagePrevious Page »