Mahanandi

Living in Consciousness ~ Indi(r)a’s Food and Garden Weblog

Roasted Chestnuts

My first experience of roasted chestnuts was at a local winter fair. Team of two, wearing funny costumes in addition to roasting the chestnuts, were doing juggling, whistling holiday tunes. And they were handing out free samples; all to attract the customers. We tried the free sample… surprise, it was not like any nut I tasted until then.
Chestnuts (Marrons)
The first word that came out of my mouth was ‘sweet potato’. Roasted chestnut tasted more like a roasted sweet potato, than a nut. When opened from the shell, they were warm to touch, had a starchy, crumbly texture, a unique sweet smell and buttery sweet taste. We were sold and we bought both roasted chestnuts for the ride home and raw ones to tryout at our home. They also gave us a pamphlet about how to roast chestnuts, different methods and some tips and recipes etc.,

From then on, every winter, we look forward to chestnuts. These winter holiday treats are not that expensive compared to other nuts. 2 dollars something for a pound and few roasted chestnuts fill you good. I am going to leave the cultural significance and nutritional value of roasted chestnuts to the storytellers and experts. I am sure you are going to see many more posts/paeans about chestnuts in future weeks from food blogosphere.:)

Roasting Chestnuts in an Iron Skillet on Stovetop (Almost done)

How we do the roasting: First we make a cut in the shell of chestnut, with a sharp knife. This is to release the steam from inside, which builds up during the roasting process. Otherwise, each one will explode just like pressure cooker whose valve is blocked. So take time and make a cut or a hole in each shell.

Turning them once in a while, roast them in an iron skillet. It’s better to use the skillet that you don’t normally use for regular cooking. Roasting process is not good for the vessel. I accumulated several iron skillets in my quest to find the right one. The brand new one, with no patina, I use it to for roasting not only for chestnuts also for peanuts.

Do the roasting, on medium high heat, for about 15 to 20 minutes or until the shells are all black and cracked. When done to perfection, you can easily open the shell, the chestnut inside is gold in colour and piece of chestnut has rosy hue and sweet to taste.
.

Roasted Chestnuts (Marrons)
Pure, simple and satisfying – roasted chestnuts on a snowy winter day.

Posted by Indira©Copyrighted in Chestnuts (Marrons) (Monday December 12, 2005 at 9:11 am- permalink)
Comments (34)

The New Home of Mahanandi: www.themahanandi.org

Murukulu (Janthikalu, Chakli)

We created our own winter holiday custom; making murukulu, our favorite savory snacks. Vijay’s birthday comes during this month, and he loves murukulu more than anything. So, I make them in large quantity for his b’day and also for us, to snack all throughout the month of December, the traditional holiday season here.

Murukulu and hot tea, South Indian style, under the gorgeous golden rays of wintry Sunset.

Murukulu and Tea, served in a traditional Andhra way, on one fine evening

For the uninitiated, murukulu are India’s snack food. They are made with spiced up rice and lentil flour dough, pressed using a mold into beautiful round coils, then deep-fried in oil. Krum. karum is the sound they make when munched. Indian grocery shops usually carry several varieties of these snacks, try them out first, before trying out the recipe. For who know, love and want to try making murukulu at home, here is the recipe.

Recipe:

2 cups – Rice flour
1/2 cup – Gram flour (Besan)
1/2 cup – Moong flour (Pesara Pindi)

1/4 cup – sesame seeds
1 teaspoon each – cumin and ajwan/vaamu (carom seeds)
1/2 teaspoon each- red chilli powder and salt
Pinch of baking powder

Cooked Potato, Moong flour, Rice flour, Gram flour (besan), sesame seeds, Molds to make different shape murukulu and on the plate Red chilli powder, Ajwan seeds, baking powder, salt and Cumin

Some tips for good quality murukulu:

1. Boiled and Mashed Potato – a tip from my attamma for soft yet crunchy murukulu. One small potato will do for the above measurements. To make the dough more easy to work with, and as emulsifier, she substituted the ghee with the boiled and mashed potato paste. It is a great tip that works.

2. Peanut oil for deep frying – I find it that murukulu tastes great when deep-fried in peanut oil. I tried canola, corn oil… They go rancid only after 15 minutes on high heat and murukulu also taste almost bitter.

Muruku maker with discs – You can buy it in almost all major Indian grocery/appliance shops here in US, or you can try online stores. Cookie press like Sawa or Cookie guns are also good for muruku making.

Prepared dough for murukulu making cylinder shaped log with the dough and dropping it into the muruku maker

Preparation:

Sieve and mix together the flours. Add the sesame seeds, pureed potato paste, red chilli powder, baking powder, salt, cumin and ajwan seeds. Make a soft dough by adding the water gradually. Dough shouldn’t be too stiff. Take small portion of dough and make a cylindrical shaped log and drop it into the muruku mold, like shown in the photo above.

Pressing the dough into muruku shape using muruku maker into hot oil Making of Murukulu- after 5 minutes in hot oil

Deep Frying:

In a wok like deep, sturdy vessel, heat the peanut oil to hot. With your hands, press the muruku mold over the hot oil, making concentric circles, so that the coils of dough come out and drop into the hot oil in circle shape. When you are practiced at making them, you can get two to three circles of dough coils, successfully. My level of expertise at making these beautiful circles is a hit and miss. Anyway you make them, they will turn out, one tasty, crunchy snack, so don’t stress out too much about circles and technique, I don’t.

Fry both sides till golden, and then remove. It takes approximately 5 minutes to fry one batch. Repeat till all the dough is used. Let them cool and store in an airtight container.

During frying, always keep the stove heat on very high. Just by changing the discs, one can make several different shaped murukulu. Shammi of Food in the Main, made recently ribbon shaped muruku for Diwali. I usually use medium round holes disc and star shaped holes disc. The ones photographed here are made using the star shaped holes disc.

Golden Murukulu - Photo taken in evening Sun light
A plate of Murukulu

Recipe Source: Attamma (MIL)

Posted by Indira©Copyrighted in Amma & Authentic Andhra,Gram Flour (Besan),Moong Flour,Rice Flour,Sesame Seeds (Monday December 5, 2005 at 2:28 am- permalink)
Comments (53)

The New Home of Mahanandi: www.themahanandi.org

Ma’amoul (Dates & Pistachios Filled Cookies)

Chanit of My Mom’s Recipes and More left a comment on my blog last month. To return the compliments I visited her blog, and what I found was a very detailed recipe for mamoul (dates filled cookies) with photos. I knew I had to try it. What attracted me to this recipe more than anything is the use of semolina for dough. I did some googling on these famous Middle Eastern cookies to know more about them and how they are made. Next, I went and bought the ingredients: fine Tunisian pitted dates, pistachios and wooden ma’amoul mold from the only ethnic grocery store in our small town, Ghossians Mid East Bakery.

I did experiment with the recipe. First, I used ghee instead of butter because ghee is not only more flavorful and unlike butter has no unnecessary baggage. I reduced the ratio of all-purpose flour to semolina. I also complimented the dates filling by adding pistachios. Finally I skipped the eggs. One more thing is I prepped the mamoul mold with ghee so that when cookie dough pressed into the mold and reversed, it can come out easily without sticking to the mold.

The final result of my experimentation was exquisite, one of a kind sweet cookies, the one I am going to make many more times from now on. A delicious paradox, they have a mildly sweet, crisp and grainy outside because of semolina and insides are moistly sweet and tender. Thanks Chanit! It is little bit of time consuming to make these using the ma’amoul mold but I had time and so happy with the beautiful outcome.

Ma'amoul mould, Pistachios, Dates, Rose water, Semolina, All Pupose Flour (Maida)

Recipe:

Dough:
2 cups – semolina
½ cup – all purpose flour (maida)
½ cup – melted ghee
½ cup – powdered sugar ( or more if you like sweet cookie covering)
1 tablespoon – rose water
1 teaspoon – active dried yeast melted in 1 tablespoon of luke warm water
Pinch of salt

Melt the ghee and cool it to room temperature. Sift the all purpose flour(maida) and mix it with semolina and ghee. Add the yeast water, rose water, powdered sugar and salt. Mix and make a dough by adding little bit of water. Set aside for about 3 hours, covered, to rest.

Cookie Dough after 3 hours of rest and Dates-Pistachios Filling Making of Ma'amouls - Pressing the cookies dough into ma'amoul mold

Dates- Pistachios Filling:
2 cups – fresh soft-pitted dates
½ cup shelled pistachios
¼ cup – powdered cane sugar
1 teaspoon – rose water
and Ma’amoul mould to press and shape the cookies

In a food processor, take pistachios and powder to fine. Then add the dates, sugar and rose water. Blend them together into fine paste. Remove to a cup.

Ma'amouls (Dates-Nut filled Cookies) Ready for Oven Ma'amouls After 20 minutes in the Oven

Preparation:

After 3 hours of rest, knead and divide the dough into lime sized balls. Flatten each ball using your hand and lift the sides up to form a hollow. It is now ready for the filling. Place one tablespoon of dates-pistachios filling into the hollowed dough. Close the dough over the dates mixture. Press the edges to seal well. Press it into the ma’amoul mold to give it a decorated appearance. Reverse the mold; gently shake to loosen it from the mold. Prepare each one in this way and place them neatly in rows, on a greased/parchment paper lined baking tray.

Place the tray in a preheated oven at 350° F and bake for about 20 minutes. I reversed the cookies to the opposite side after 10 minutes in the oven for even baking. After 20 minutes or when they turn lightly golden, remove them from the oven and let them cool.

Ma'amouls (Dates-Pistachios Filled Cookies)

Ma’amoul (Dates-Pistachios Filled Cookies) ~ Delicate, rose flavored and naturally sweet. Our Thanksgiving treat and contribution to this month’s SHF-IMBB Cookie-Swap event.

Posted by Indira©Copyrighted in All-Purpose Flour(Maida),Dates (kharjuram),Ghee,Molasses,Pistachios,Sugar, Jaggery and Honey,Suji/Semolina (Friday November 25, 2005 at 8:46 pm- permalink)
Comments (63)

The New Home of Mahanandi: www.themahanandi.org

Gutti Vankaaya Kura (Stuffed Brinjal Curry)

From Telugu to English, The literal translation of Gutti vankaaya is ‘bouquet of brinjals’. As its name suggests stuffed brinjal curry is not only an Andhra classic, it is also very pretty to look at and the taste is pure fiery heaven. Greenish white brinjals are perfect for this curry. I make this curry only with this particular variety of brinjal. Unlike the purple brinjals, the green ones have a very delicate skin, cook very easily and taste great.

First part of the recipe is selecting the right brinjals:
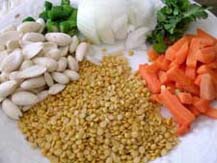
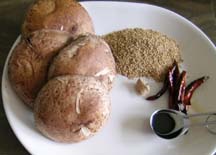
If you are going to try this recipe with green brinjals like me, for two people, buy at least 15 to 20 very fresh looking, small size, and perfectly round green brinjals. The brinjals should look shiny without any blemishes, or holes and the stem that they are attached to should be in lively green without having that dried, black look. The tender the green brinjals are, the tastier the end result is. The ones with black seeds are very mature (at least half of your pick will be like this), don’t even bother to cook them, they taste bitter. Because they mature very rapidly, cook them on the same or on next day. Trying to keep them fresh and young in the refrigerator, it’s useless.

It takes at least 30 to 45 minutes to prepare the ingredients and another 30 minutes to cook the curry so attempt this curry only when you have the freshest green brinjals.

Second part is preparing the stuffing:
Ingredients for the stuffing change from home to home. Every home has their own recipe for stuffing. I can make five different kinds stuffing. The one I am going to post today is the family recipe.
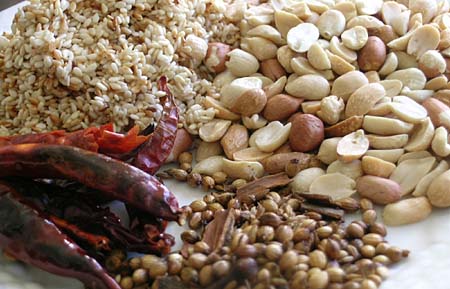
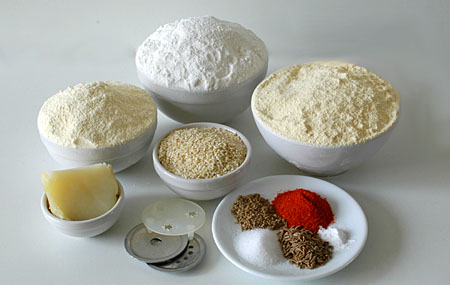
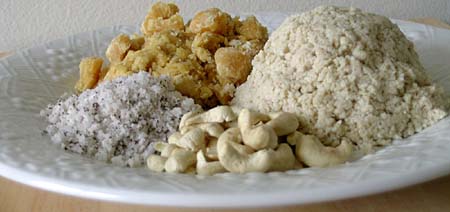
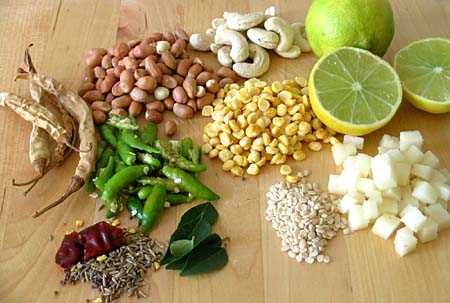
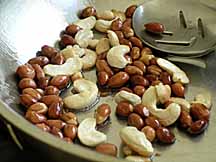
Roasted Peanuts, Sesame Seeds, Red Dry Chillies, Coriander seeds, cumin, cloves, cinnamon.

Dry roast:

1 cup peanuts – roast them, when they are cooled, rub and remove the skins
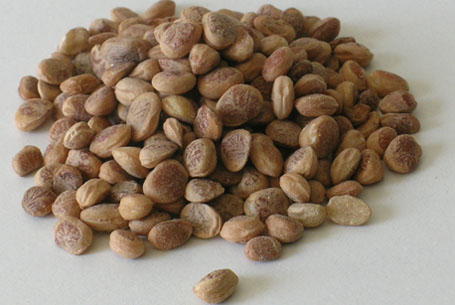
1 cup sesame seeds – dry roast them

8 to 10 dried red chillies
One tablespoon of coriander seeds
Half teaspoon of cumin
4 cloves, one small piece of cinnamon stick
5 to 6 fenugreek seeds (menthulu)(They taste bitter so limit the number)
1 teaspoon of salt
Tamarind
Soak key-lime size tamarind in half cup of water and microwave it for about 15 to 30 seconds. Let the water cool down and squeeze the tamarind to get the paste.

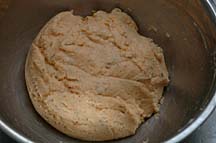
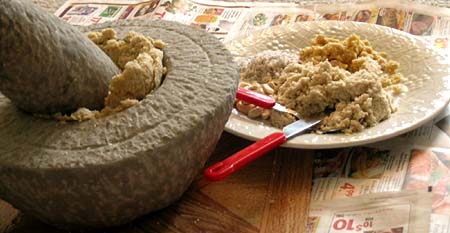
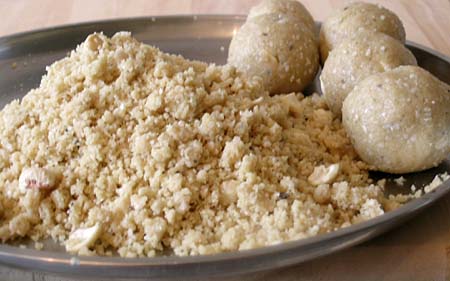
Make a tight paste: Grind all of the above ingredients to a fine, smooth paste. You have to stuff this paste into brinjals so while grinding, under any circumstances, do not add water. Take this paste onto a plate and divide it into two portions. One is for stuffing and the other half is for sauce/gravy.

Brinjals stuffed with peanut, sesame paste

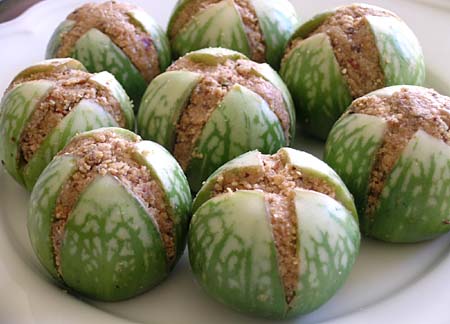
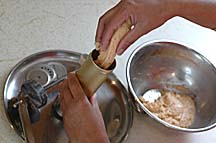
Thoroughly wash and dry the green brinjals. Even the freshest ones are not so fresh here, so I depart from the norm and remove the stems of brinjals. If you want, keep the stems. Take each green brinjal and on the end, opposite of stem, make a plus shape slit towards stem side but not all the way through (one vertical and one horizontal slit).

Fill up the plus shape slit (gap) with stuffing. Using your left hand fingers separate the quarters gently, push the stuffing inside with right hand fingers, again gently. Filling up all the slit green brinjals takes time, so have a seat, keep the stuffing and brinjals in front of you. Do it patiently and slowly without breaking the beautiful brinjals. If you do, you won’t get a bouquet but only the petals.:)- So have patience and treat them like a fragile art project.

Just placed stuffed brinjals in Pressure cooker Stuffed brinjal curry in pressure cooker after one whistle

Cooking:

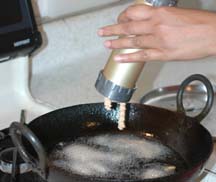
How I cook them again is different from that of home. Here I use a pressure cooker. What? I know.. my method may be new to you but the results are way better. Pressure cooker makes it fast with less oil and the green brinjals are cooked thoroughly, you can’t find not one hard uncooked piece of brinjal, cooked in this way.

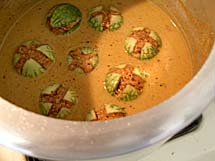
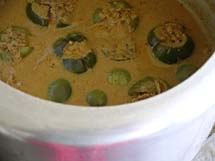
Do the popu or tadka(toasting the black mustard seeds and cumin in one teaspoon of oil). Add half of the peanut-sesame paste that was kept aside and half to one glass of water and one teaspoon of turmeric. Mix them up thoroughly without any lumps. Make the gravy/sauce more on the thin side or watery. Taste it, add salt, red chilli powder and tamarind paste if needed. I also add jaggery, very tiny amount to the gravy (making it mildly sweet). Arrange the stuffed brinjals neatly in the gravy, slit side up. Cover and cook them until the green brinjals are very tender to touch.
I pressure-cook them until one whistle on medium low heat. After the whistle sound, I immediately and slowly release the pressure from the valve by lifting the weight. Resulting in very wholesome, thoroughly cooked stuffed green brinjals.

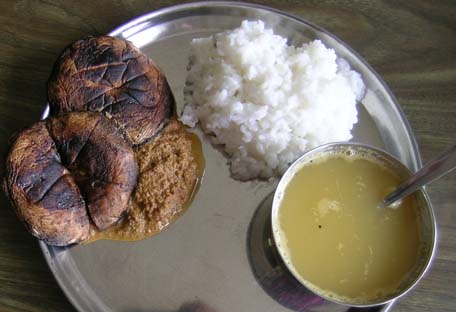
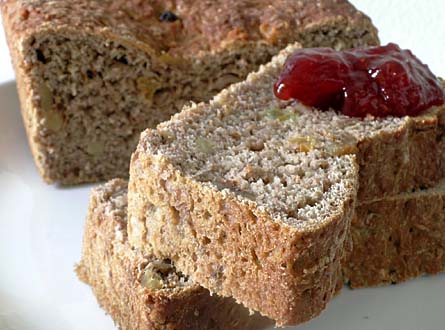
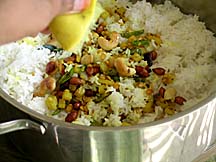
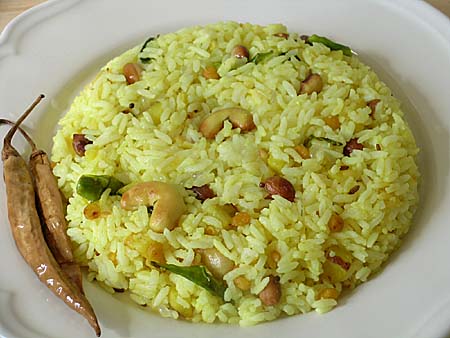
To serve, with a big spoon gently lift the stuffed brinjals, place them on a plate and pour the sauce around. Tastes great with rice or roti.

Stuffed Brinjal Curry(Gutti Vankaaya Kura) with Rice

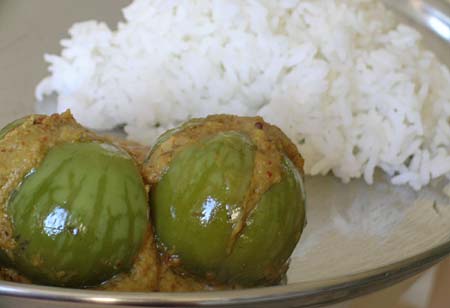
Stuffed brinjal curry (Gutti Vankaaya Kura) with rice.

Recipe Source:Amma

-------------------------- *** *** -----------------------
I am going to write it down four other types of stuffings that I know for this cury. The proportions of the ingredients are not specified because there are no hard and fast rules and people at home add a little of this, little of that. So feel free to try various proportions as per your taste.

Type 1:
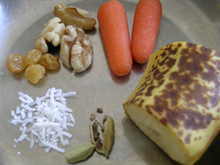
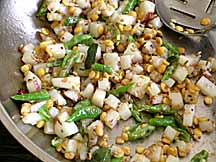
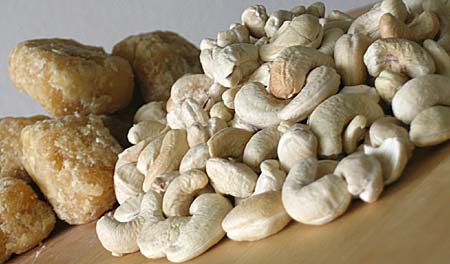
Dry red chillies + dry or fresh coconut+ chana dal & urad dal + cumin, coriander, fenugreek seeds and salt. Sauté and make a paste of them without adding water. Add cashews to make it rich.

Type2:
Besan or gram flour+onions+green chillies+ginger garlic paste+dry coconut powder+coriander powder and salt, make a paste by adding little bit of water.

Type 3:
red onions + dried red chillies roasted in oil then make a paste of them.

Type4:
Fresh coconut+ roasted peanuts+ roasted sesame seeds+dried red chillies+Coriander seeds+Cumin seeds+cloves+cinnamon stick+ chana dal+ urad dal+tamarind +jaggery and salt. This is my favorite of all.

Before me, some other Indian food bloggers also posted their recipes for this curry. More choices from three other fabulous blogs… always a good thing.

Posted by Indira©Copyrighted in Amma & Authentic Andhra,Peanuts,Sesame Seeds,Vankaya (Brinjal) (Monday October 24, 2005 at 11:31 pm- permalink)
Comments (109)

The New Home of Mahanandi: www.themahanandi.org

Chocolate Covered Sweet Sesame Spheres (Nuvvula Mudda)

Sweet sesame spheres or Nuvvula mudda as we call them in Telugu, are powerhouse of sweets, full of body building nutrients. Prepared with love and lot of manual work, they are especially made for pregnant women, children and people who are convalescing. We also prepare them traditionally for a festival called Naagula Chavithi. These kinds of sweets are very difficult to prepare without a stone mortar. That’s why from my recent trip to India, I brought a medium sized stone mortar and pestle from my hometown, Nandyala. I wanted it more than anything and I felt that it is more valuable and needed than the usual stuff that I bring from India, like dresses, sarees etc., Of 120 pounds of luggage that we are allowed to bring to this country, 30 pounds went to this thing. Changed priorities.:-)

Nuvvula Mudda:

5 cups -sesame seeds, powdered
2 cups – jaggery, powdered
1 cup -dry coconut, powdered
1/2 cup- lightly roasted cashews, finely chopped

Sesame seeds made into powder, cashews, dry coconut powder, jaggery

Traditionally, in our home in India, above ingredients are powdered manually, using a stone mortar and pestle. What I did here was, I used a food processor to coarsely powder the sesame seeds and dry coconut. And used a hammer for jaggery.

Then, I pounded these i.e. coarsely powdered sesame seeds, dry coconut and jaggery together for about 30 minutes using the stone mortar and pestle. This pounding process brings out the oils and real tastes of sesame seeds, coconut and jaggery, which is not possible if this was done in a food processor. Also a good strength workout for upper body.

Pounding the ingredients together in stone mortar at my house

I removed this finely pounded mix from the mortar onto a plate and sprinkled the cashews, mixed them all together. Shaped this mixture tightly with hands into medium sized spheres.

Making of Sweet Sesame spheres (Nuvvula Mudda)

Viola.. first time making the nuvvala muddalu on my own is a sweet success. I am so happy for finally making these at my home, here in US.

Sweet Sesame Spheres (Nuvvula Mudda)

The thing that prompted me do all this is this month’s SHF. For one year anniversary celebration of SHF event, the lovely Kelli of Lovescool chose dark chocolate. She also challenged us to come up with something new and interesting with dark chocolate. So I envisioned the idea of dark chocolate covered sweet sesame spheres. Traditional Indian sweet meets this South American & Western treasure, resulting in wonderful, very delicious and healthy dessert. I think these are very original and are not already created by chocolatiers. Please correct me if my assumption is wrong.

Dark chocolate coating is very easy. I used Lindt’s brand dark chocolate bar. Melted the bar and some ghee in microwave oven and dipped the sweet sesame spheres in melted chocolate. Then refrigerated them for about one hour.

Dark Chocolate Covered Sweet Sesame Spheres (Nuvvula Muddalu)
Something new – Dark chocolate covered sweet sesame spheres (Nuvvula Mudda).

Posted by Indira©Copyrighted in Amma & Authentic Andhra,Cashews,Chocolate,Indian Sweets 101,Jaggery,Naivedyam(Festival Sweets),Sesame Seeds (Friday October 21, 2005 at 6:44 pm- permalink)
Comments (33)

The New Home of Mahanandi: www.themahanandi.org

Honey Whole Wheat Bread

I learned the basics of bread making by watching Breaking-Bread series by Father Dominic on PBS. His show demystified the whole bread making process for me. I grew up in Andhra Pradesh, the rice bowl of India, where bread is not an everyday food. It is an exotic thing associated with sickness, prescribed by doctors as an easy digestable food for people when they are ill. Only time I had bread was when I was under the weather and that too quite reluctantly.

When we moved to US, it took some time to get know that bread is not a bland tasteless cardboard kind of food that I remembered and also to separate the bread-sickness association from my mind. I was fascinated by the completely unknown world of bread making and different varieties of bread. I was curious and eager to learn the process so I tried the cook books about baking bread. With information overload, the whole process of bread making felt as easy as preparing for an entrance exam or tooth pulling.:)

During that time, Breaking Bread series by Father Dominic started on PBS. This chubby, homely monk with a pleasant, fatherly disposition and witty, calming narrative showed the bread making in such a way, that I felt confident to try out. The bread I first baked was a plain whole wheat bread loaf. We both liked the taste of it and later on I experimented with adding honey, nuts etc., After moving to Ohio, I am using the whole wheat flour, produced in old style – stone grinding powered by water at Lanterman’s Mill (not only the major tourist attraction but also a functioning working flour mill of Boardman, Ohio) for my bread. The difference in taste is tremendous, the close thing I can compare it is that of great harvest bakery whole wheat bread. Lot of texture and full of flavor, just two slices would fill us up good.

Last weekend I tried again my bread making skills. Although the dough behaved with a mind of it’s own because of excessive rainy and humid weather, the loaf cameout good after baking. Here is the recipe and the whole process in images:

Lanterman's Mill, Youngstown, OhioStone ground Whole wheat flour  - Purchased at Lanterman's water mill, Ohio
Lanterman’s Mill……………..Stone ground Whole Wheat Flour

Recipe:

1 cup coarsely ground whole wheat flour from Lanterman’s mill
1 cup whole wheat flour (King Arthur brand)
1/4 ounce packet of dry active yeast
1 cup water
½ cup buttermilk
½ cup honey
½ cup of golden raisins and chopped walnuts
¼ cup of oil

Just Prepared dough, waiting for a rise Two hours after - the dough has risen

First Rise:
Dissolve yeast in half cup of warm water. Measure the flours in a big bowl. Mix buttermilk, oil, honey, water and yeast mixture into the flour to make soft, sticky dough. Take the dough on a wooden board and knead it for about 5 to 10 minutes, handling it gently. Use a spatula to pick up the sticky dough and turn it over as you work. Place this kneaded dough back in the bowl, cover and place the bowl in a warm place and let the yeast do the work. Wait until it tripled in size for about 2 to 3 hours.

The Second rising in the Bread Pan Second rising done

The Second Rise:
When the dough has finished rising, add nuts and raisins and prepare the dough for the second rise. Take the dough again on flour board, deflate it by pressing the dough flat. Now sprinkle finely chopped walnuts and gloden raisins. Incorporate them into the dough by kneading for few minutes. Place the dough in a loaf plan, cover and let it rise to the top of pan, takes about another two to three hours.

After this final rise, place the loaf pan in preheated oven at 400° F and bake for about 30 to 45 minutes or until golden brown. Remove it from oven, bread slides out of the pan easily and let it cool completely before slicing.

The pearls of wisdom, I learned from Father Dominic is ” Let the dough rest and don’t peek and poke it too often”. Very true for successful bread making.

Honey Whole Wheat Bread with Walnuts and Golden Raisins with strawberry jam
Honey whole wheat bread with walnuts and golden raisins
Our weekend breakfast, lunch and dinner

Recipe Source: Cooking Show on Television.

Posted by Indira©Copyrighted in Goduma (Wheat),Honey,Sugar, Jaggery and Honey,Walnuts,Whole Wheat Flour (Monday October 17, 2005 at 12:15 pm- permalink)
Comments (22)

The New Home of Mahanandi: www.themahanandi.org

Chitrannam (Lemon Rice)

Nimmakaya Pulihora:

Prasadam in temples, part of festival feast, or simple lunch – Chitrannam or lemon rice plays an important part of South Indian meal. Our celebratory feasts are not complete without this particular dish. The tangy rice prepared with lemon juice refreshes the palate after the sweet beginnings, as you may already know it is an Indian tradition to serve the sweet first. I think serving these two, traditional Indian sweet and chitrannam together, is our elders way of reminding us to appreciate life moments, both sweet and sour. That is why, I think the temple prasadam or the celebratory food in all moments of our lives includes chitrannam.

People, who know the taste, crave this lemony rice. Even though the recipe is so simple to make, there is always one expert in the family who prepares the best chitrannam. In my home, I can manage an edible one, but Vijay prepares the ‘can’t get enough’ version. We do use the same ingredients and methods; still I don’t know how his version always turns out so exceptional. I am sure it is true in every other south Indian family too. Only chosen few are blessed by Annapurna, the Goddess of Food, to prepare this favorite food of Gods. It is one of those recipes, where either you have it or you don’t. And I am sorry to say that even though I know the authentic recipe, follow all the tricks and tips still the end result in my case always turns out mediocre. There is no magic in my hand.:)

What about you, are you the chosen one? Try it out, if you have not already done so.

Recipe:
(Serves two)

Limes, cashews, peanuts, majjiga mirapakaayalu, vertically slit green chillies, mustard seeds, cumin, red chilli, curry leaves, soaked chana dal, urad dal, cubed potato

Rice:
4 cups of freshly cooked rice. (Any kind of white rice is ok for this recipe, but I prefer ‘Sona Masuri’. Cook it like for pulao or fried rice but not like pongal or risotto.
Limes and Chillies
2 to 3 juicy limes – cut and juice to a cup
6 to 8 green chillies, Indian or Thai variety – slit vertically
(Chitrannam needs spicy punch from chillies. So, add one or two chillies (of any variety) more than your normal tolerance of chillies. Otherwise the dish falls apart, and lime juice dominates the taste.)
Seasoning
¼ cup – Chana dal (senaga pappu), pre-soaked in water at least half an hour before.
2 tablespoons – urad dal (minapa pappu)
1 teaspoon each – salt and turmeric
2 tablespoons –ghee, Or oil for calorie-consicous.
For popu or tadka
1/2 tsp each – mustard seeds, cumin, and red dry chilli pieces.
12- 15 fresh curry leaves. Don’t forget to add the fresh curry leaves. Chitrannam is not authentic or complete without the curry leaves.

You can prepare decent, basic version of chitrannam with the above items. But for special occasions, and if you want to impress guests or family, then you need the following items too.

Nuts
Quarter cup – cashews
Quarter cup – peanuts
Veggies
Quarter cup vegetables – I usually add potato, finely cubed, sometimes Indian type brinjal and shredded carrot too.
5 to 6 majjiga mirapa kaayalu (Green chillies soaked in buttermilk and completely dried in sun, a specialty of Andhra), deep fried in oil.

Method:

In a skillet, heat one tablespoon of ghee. First add peanuts, fry them until they turn light brown. Remove. Add and fry cashews next. Remove from the pan to a plate, keep them aside.

Now in the same skillet, add another tablespoon of ghee. Heat. Add and fry the curry leaves first. Then cumin and mustard seeds. When seeds start to splutter, add the split green chillies, chana dal, urad dal, and cubed potatoes. Saute them till golden and crisp. In the end, sprinkle half teaspoon turmeric for that golden yellow color. Mix and then saute for another one to two minutes.

cashews and peanuts saut�ing in ghee  saut�ing the Chitrannam/lemon rice ingredients in ghee
Sauteing the cashews and Peanuts…… Sauteing the veggies and dals

Mixing turmeric Mixing saut�ed ingredients with rice along with lime juice
Stirring in turmeric………. Squeezing some lime juice over rice and sauteed ingredients

Add the sauteed ingredients of skillet, and also the toasted peanuts and cashews to the cooked rice. Stir in salt and sprinkle the limejuice. Combine thoroughly and delicately (without breaking the rice grains) with your hand or using a big slotted spoon.

Have a taste, it should zing or shock your taste buds like sucking on a fresh lime wedge. If not, add some more limejuice and salt. Mix again. And keep in mind that rice absorbs the limejuice, and the tanginess you feel during the preparation reduces in intensity after sometime.

Serve with fried majjiga mirapakaayalu (buttermilk soaked, dried green chillies) and a cup of yogurt for a nice meal.

Lemon Rice and Pickled Green Chilli (Chitrannam and Majjiga Mirapa kaayalu)
chitrannam(Lemon Rice) with majjiga mirapa kaayalu.

Chitrannam, the English translation of this Telugu word is chitra= wonderful, magical, Annam= rice. This Refreshing lemony rice is all that and more, and tastes great when served hot or cold.

Recipe Source:Attamma(MIL)

Posted by Indira©Copyrighted in Amma & Authentic Andhra,Biyyamu (Rice),Cashews,Limes/Lemons,Peanuts,Sona Masuri Rice (Friday October 7, 2005 at 2:07 pm- permalink)
Comments (46)

The New Home of Mahanandi: www.themahanandi.org

Saara Pappu (Charoli/Chironji)

Saara Pappu (Sara Pappu)

These nuts are called “Saara Pappu” in Telugu. They taste just like almonds and we usually add them in kheers, payasams and kulfis. I am curious to know their English Name, any help from fellow food bloggers and readers of this blog is greatly appreciated. Thanks!

Posted by Indira©Copyrighted in Charoli (Sara Pappu),Indian Ingredients (Sunday October 2, 2005 at 9:07 pm- permalink)
Comments (31)

The New Home of Mahanandi: www.themahanandi.org

Cashew Sweet

Lovely Sam of Beck & Posh chose vegan theme for this month’s IMBB. I never knew that vegans are called by these names or they feel that way about themselves here in US until I read her introductory post to this event. With much improved knowledge of stereotypes, here is my vegan contribution, ‘cashew sweet’: a traditional snack, my mother used to prepare and give us after school, when we were kids. The only thing I did differently because of vegan theme is I applied peanut oil to the settling pan instead of ghee.
The following recipe is simple, easy and adaptable to other types of nuts particularly peanuts.

Cashew Sweet:

2 cups of lightly toasted cashews
2 cups of powdered jaggery
1 cup of water
A greased tray to pour the cooked cashew mixture

Cashews and Jaggery

In a large sturdy pan, combine jaggery and water. Cook over medium heat, stirring, until jaggery dissolves into water. Bring this to a boil. You see lot of bubbling and raising to the surface action going on by now. Cashew Sweet Cooling in a pan 
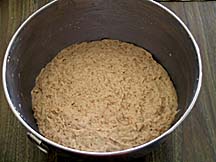
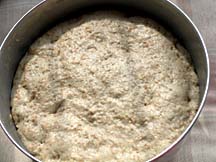
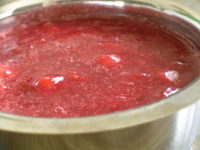
Stir, stir and stir until the jaggery syrup reaches soft- crack stage meaning when you drop a bit of this syrup into cold water, it will solidify into threads.

When jaggery syrup reaches this consistency, immediately & quickly add cashews, and stir constantly for few minutes. Turn off the heat and pour this mixture onto a greased pan. When it is still hot, make lines with a knife and leave it to cool. When cooled, break along the lines to make squares. Store them in an airtight container.

Cashew Sweet, Kaju Tikki,  Cashew Brittle, Jeedi Pappu Paakam

These Cashew brittles or tikkis are natural-food alternatives to the very fatty and sugary standard editions, a sublime and perfect pairing of nature’s goodness and man’s intelligence (or is it sweet tooth). The flavor is completely different and the jaggery really sings out. Go on.. try them.

Some tips:

1. Only a small quantity of water is sufficient while making the syrup. One cup of water is enough for upto 3 cups of jaggery powder.

2. Time it takes to make this sweet is maximum 30 minutes. Prepare to spend all this time infront of the stove, no multitasking.

3. And the most important thing is gauging the jaggery syrup readiness. When you are making this sweet, or any kind of brittle for that matter, always keep a cup of cool water by the stove side. You can check the readiness by drizzling a few drops of syrup into the cool water. If it forms strings that you can easily prod into a ball, it’s at the soft-crack stage. This is where you should add nuts to the syrup. As soon as you add the nuts to the syrup, the mixture starts to solidfy or reaches the hard-crack stage very fast, within a couple of minutes. You made a perfect brittle.
If the syrup dissolves and disintegrates in the water, the syrup is not cooked enough yet. If it tightly balls up and sinks to the bottom or if syrups color turns from gold to black, then you have overcooked it.
This website very clearly demonstrates the various stages of sugar syrup, check it out if you want to know more about candy making. It also has video demonstration of various sugar stages (applies to Jaggery syrup too) both in real player and quick time, cool!

4. Finally, even after following all these steps, if it doesn’t come out as brittle as it should be, then blame it on weather and high humidity. What I do in those cases is, keep the greased tray with cashew mixture in the freezer for atleast one hour. I don’t know how, but the freezer turns the sorry mess from saggy to solid brittle like and they can be easily breaked along the lines made earlier. This freezer version tastes ok but they will test your dental health. :)-

Tagged with: +

Posted by Indira©Copyrighted in Amma & Authentic Andhra,Cashews,Indian Sweets 101,Jaggery,Mitai (Friday September 30, 2005 at 9:07 am- permalink)
Comments (20)

The New Home of Mahanandi: www.themahanandi.org

Portabellas in Sesame Sauce

I don’t cook mushrooms that often. They are Vijay’s (my husband’s) division. He likes all types of mushrooms and often cooks them himself. He usually grills or dry sautés mushrooms but when he is in a mood to spend an extra 5 minutes in the kitchen, he whips up a sesame sauce to go along with his grilled mushrooms. He got this recipe from a Korean website. This sesame sauce is like an Indian version of one of the curry sauces but without the onions and other extras. I like the sauce so when he makes this, it’s a win-win for both us as I don’t eat mushrooms. Preparing this sauce is such an easy and quick task and he makes this himself most of the times without me setting foot in the kitchen.

Recipe:

Portabella mushrooms РQuickly rinse or wipe of portabellas with a paper towel. Remove the roots and make &#43(plus shape) cuts on them. After lightly covering them with sesame oil, stir-fry or grill them until they are golden and sprinkle with some salt and remove. When saut̩ing in a pan, leave space around the mushrooms, so that they brown evenly.

Sauce – Toast half cup of sesame seeds and 4 to 6 red chilli peppers. Make a fine paste of them by adding a small piece of ginger, salt and molasses or sugar, half teaspoon each or to your taste.

Portabellas, Sesame Seeds, Red Chilli Peppers and Molasses….Grilled Portabella Mushrooms

Preparation:

Heat a teaspoon of peanut oil in a pan. Add sesame sauce to the pan and also half cup of water. Simmer on medium-low heat for about five minutes, or until the sauce thickens.

Plate a grilled portabella on a serving plate. Pour a tablespoon of sesame sauce over it. Enjoy the portabella with sesame sauce.

Grilled Portabellas in Sesame Sauce, Lentil Soup and Rice

Our meal – Rice with Portabellas in Sesame Sauce and Chappidi Pappu (Plain Lentil soup).

Posted by Indira©Copyrighted in Mushrooms,Sesame Seeds (Wednesday July 6, 2005 at 12:54 pm- permalink)
Comments (5)

The New Home of Mahanandi: www.themahanandi.org

Tropical Fruit Tart

Stephanie’s beautiful fruit tart inspired me to make one myself. Also I saw this month’s SHF theme was tarts and that gave me the final push I needed.

I used a store bought lard-free pie shell as base for fruits. Did I say that this was my first time making tart, may be next time I might make my own tart shell. For now, this will do. For filling, I went with toasted walnuts and fresh fruits – ripe mango, strawberries, plums, cherries and cantaloupe.

Baked the pie shell in the oven for 15 minutes as per instructions on the cover of the pie shell package. Meanwhile I started to cut the ripe fruits in different shapes needed for my tart. With all the remaining scraps of fruit, I made jam/jelly, just like that. I added 6 tablespoons of brown sugar and watched the fruit bits turn into bright, colorful mush on high heat. I let it cool, stored half of it as jam and to the remaining half, I added half a cup of toasted walnuts and pureed them together to a smooth paste. This was my tart filler.

bits of fruit for jam Jam/Jelly

After filling the tart shell with the fruit-walnut puree, I arranged cut mangos, strawberries, plums, cherries and cantaloupe in order and refrigerated the tart for about one hour. Ta da… check the photo of fruit tart below, isn’t it colorful and pretty?

What a quick and easy recipe, but it gives the impression as if it took hours to prepare. We shared this delicious fruit tart with our next-door neighbor to congratulate on her new job.

Tropical Fruit Tart

My maiden attempt at fruit tart was a delightful success. I will definitely make many more.

Posted by Indira©Copyrighted in All-Purpose Flour(Maida),Fruits,Mango,Strawberries,Sugar,Walnuts (Friday June 17, 2005 at 7:49 am- permalink)
Comments (8)

The New Home of Mahanandi: www.themahanandi.org

Carrot Cake

Carrots and bananas – what happens when you put the two together, you get a deliciously rich and different dessert that’s the best of both. The recipe is my own – out with the pineapple, cloves, all-spice and eggs – in goes the bananas and cardamom. They give the cake a wonderful, fruity, honeyed fragrance. The recipe is somewhat different but tastes as good, I might say, even better than the traditional carrot cake.

Recipe: Cardamom, Coconut, Golden raisins, Walnuts, Carrots and banana
2 cups of Betty Crocker pancake flour
2 cups of grated carrots
1 cup finely chopped walnuts
1/2 cup dry unsweetened coconut flakes
1/2 cup golden raisins
1 tsp of baking soda
Mix all of the above in a big bowl.

5 cardamom pods- peel and powder the seeds inside
2 big ripe bananas- peel, mash and beat until fluffy
1/2 cup oil
1/2 cup to 1 cup of brown sugar- (your wish)
In another big bowl, mix them well.

I used the pancake flour only because I want to finish off the BIG packet, purchased at Costco last winter. You can always substitute that with all-purpose flour. You can purchase dry unsweetened coconut, golden raisins and cardamom at low prices in an Indian grocery shop.

Now back to cake making – Preheat the oven to 350 F. Meanwhile fold the wet ingredients into dry ingredients, mixing thoroughly but not hard. Add some milk and combine again if the batter is too tight. Pour this mixture into a big round buttered cake pan. Bake the cake at 350 F, for about 30 to 45 minutes or until a toothpick inserted into the center of the cake comes out clean. Cool it before applying frosting or decorating. The topping on the carrot cake is walnut-coconut caramel (see the post below for the recipe)

Carrot Cake with Walnut-Coconut Caramel Topping

Comparable to an Indian version of carrot sweet called carrot halwa, this carrot cake is simply moist, rich and delicious.

Slice of Carrot Cake

Posted by Indira©Copyrighted in All-Purpose Flour(Maida),Bananas,Carrots,Golden Raisins,Walnuts (Tuesday June 14, 2005 at 10:23 am- permalink)
Comments (62)

The New Home of Mahanandi: www.themahanandi.org

Walnut-Coconut Caramel Toffee

This weekend, I prepared a carrot cake and walnut-coconut caramel for weekend barbecue party at our friend’s house. Last month, they added a big deck to their house and also bought a new gas grill. It is a sort of opening party for the new deck and grill.

I initially started making the carrot cake, then I remembered my pregnant friend who had just passed very difficult first 3 months, when she couldn’t eat anything because of high case of nausea. I thought walnut-coconut toffee is the best in-between meals snack for her now. Just like that, I made the caramel toffee. I also used some of it as topping or dressing for the carrot cake. The cake was a big hit with the children. They loved it and one curious kid asked me why I made the caramel instead of cream cheese topping. I Knew caramel is unusual topping for carrot cake and told him that I was just trying something different. He told me that he loved caramel and he served himself a big piece. 🙂

Walnut-Coconut Caramel Toffee: Walnuts, Dry coconut flakes, Light brown sugar and Ghee

  • 1-cup light brown sugar
    1/2 cup melted ghee
    1/2 cup toasted walnuts, finely chopped
    1/2 cup dry unsweetened coconut flakes
    1/2 can of 5 oz of Nestle evaporated milk

Preparation:

Combine ghee, brown sugar and evaporated milk in a thick-bottomed vessel. Cook them stirring occasionally until they reach the softball stage. Now add walnuts and coconut flakes, stir them until well coated or for about 2 to 3 minutes. Pour them into a greased flat dish, refrigerate until set. Cut into small squares and wrap them individually in wax paper.

Walnut-Coconut Toffee

I can never make this type of sweet for us. We don’t do enough work to spend the extra calories. But for a special friend in her special condition- they are prefect treats.

Posted by Indira©Copyrighted in Milk,Sugar,Walnuts (Monday June 13, 2005 at 2:36 pm- permalink)
Comments (7)

The New Home of Mahanandi: www.themahanandi.org

Banana – Walnut Cake

We had a three day holiday for Memorial Day, and this is how we spent the weekend:

Saturday- shopping, cleaning the house, preparing dinner with my husband Vijay’s help. Our Nandyala family friend and his college friends came all the way from Milwaukee. They made a pit stop at our house before reaching their final destination – SV temple, Pittsburgh.

For dinner, we prepared puri, rice, chana masala, chicken kurma, Boiled eggs sautéed in red chilli-garlic powder, peanut chutney, sambhar, papads, raita with yogurt, and for dessert banana-walnut cake and fruit (cantaloupe). It was so hectic; I couldn’t find time to take pictures of preparation and finished items.

Sunday- helped our friends who came here from India just one month back, move to Detroit. Packing, cleaning etc. Baked again another banana-walnut cake for them. Managed to take some pictures of cake.

Monday- We have planned to go to Pittsburgh for diva darshanam at the SV temple. But it was raining so hard, and I didn’t want to travel on the PA Turnpike, which is notorious for accidents. So instead we hit some local shops nearby, and dined out.

First long weekend of summer was over just like that.

Banana-Walnut cake

As much as possible, I try to avoid using eggs in my baking for cakes etc. Because I don’t like the strong chemical smell of egg yolks. It wasn’t like that back in India, but after coming here, the yolk smell and taste has started to make me very ill. I don’t know what they feed the hens here in US, the fertilizer smell of egg yolks is unbearable, and the taste, oy…awful to say the least.

I found out that very ripe bananas are good substitute for eggs, so I use them often in my cake and bread making.

1 cup Bisquick pancake flour. All-purpose flour works fine too. (The only reason I made the cake with Bisquick is because I wanted to finish off the big packet of Bisquick pancake flour that I purchased at Costco last year.)
1/2 cup – walnuts, chopped
1 banana, skin peeled, and ripe fruit mashed smoothly
1/4 cup – sugar
4 tablespoons – oil or ghee
1 tsp each, – baking powder and vanilla extract
Milk if needed

Banana-walnut cake Ingredients

You must be familiar with the baking drill. Wet first, dry next, and then combine the two together.

IN a big bowl, mix the wet ingredients – banana, oil and vanilla extract. Whisk to combine well.
Then add the flour, sugar, walnuts and baking powder. Combine thoroughly. If the batter looks tight, then add about quarter cup of water or milk.

Preheat the oven to 350 F.

Prepare the cake pan, by applying ghee or oil on the bottom and to the sides. Pour the cake batter. Spread evenly. Bake at 350° F for about 30 to 45 minutes. When a toothpick inserted into the baked cake, it should come out clean. Cool and then cut pieces. Enjoy.

Banana-Walnut cake

Light and Fluffy, Almost Egg-less, Good Tasting Banana-Walnut Cake

Slice of cake

Posted by Indira©Copyrighted in All-Purpose Flour(Maida),Bananas,Sugar,Walnuts (Tuesday May 31, 2005 at 8:38 am- permalink)
Comments (55)

The New Home of Mahanandi: www.themahanandi.org

Lentil & Almond Burgers (Toor Dal-Badam Cutlets)

These easy to prepare no-meat burgers are great on their own or on buns. The recipe is from Eating Well magazine. I tried it today and they turned out good.

Recipe:

1 cup toordal or (recipe called for French green lentils, but I used toordal)
½ cup sliced almonds (badam)
1 tsp of salt
Vegetables:
½ cup carrots
1 onion
5 green chillies
cilantro (whatever herb you prefer, celery, thyme) finely chopped.
2 teaspoons of lemon juice
Magazine recipe also used eggs as binding agent, but I skipped the eggs.

Ingredients for lentil-almond burgers Sauteed ingredients

Preparation:

Pressure cook lentils with little water or cook lentils in water until tender, drain the water, keep aside. Meanwhile, heat 1 tsp of oil in a skillet; add carrot, onions, chillies, cilantro and almonds. Sauté them until the almonds are lightly browned. Let them cool down a little bit. Then transfer the mixture to a food processor, add the cooked lentils and salt. Pulse several times, scraping the sides, until the mixture is coarsely ground. Take this mixture into a bowl, add lemon juice, and mix it well.

patties Browning the other side

Form the lentil mixture into round patties. Heat 1 tsp of oil or ghee in a cast iron skillet. Add the patties, cook for 3 to 4 minutes on medium low, each side, until lightly browned. They are delicate; use a big spatula to turn them.

Serve them hot with ketchup.

Toordal-Almond burgers with ketchup on top
Toor dal – Almond Burger with ketchup ~ our lunch today

Recipe source:Eating Well magazine

Posted by Indira©Copyrighted in Almonds,Toor Dal (Tuesday May 17, 2005 at 5:22 pm- permalink)
Comments (16)

The New Home of Mahanandi: www.themahanandi.org

« Next PagePrevious Page »