Mahanandi

Living in Consciousness ~ Indi(r)a’s Food and Garden Weblog

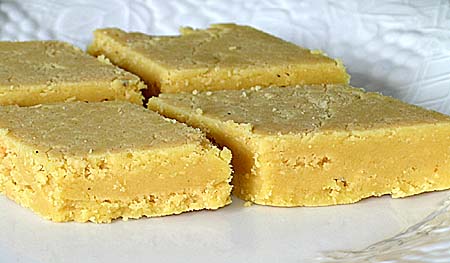
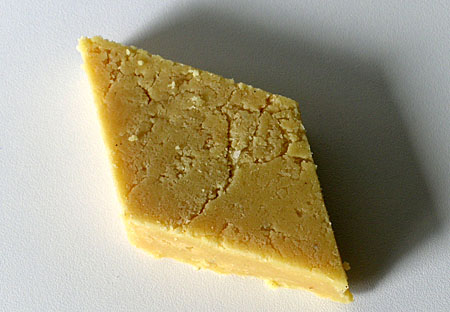
Pala Kova (Doodh Peda)

For Deepavali, I preprared ‘Pala Kova’ (Doodh Peda), one of the classic sweets from home.

Pala Kova , Paal Kova, Doodh Peda)

Recipe:

1 gallon of whole milk
1 1/2 cups of sugar
Cooking time : 3 hours

This is one of those recipes, which allows multitasking, at least for the first two hours. Also make it only when you have some good natured, dear friends or family nearby, so that they can give you moral support:) or help out, when you get frustrated with stirring and the slow way it takes for milk to thicken. Chit chat or clean up the kitchen, wash the dishes, cook up other recipes or fold the laundry and in between for every 2 to 3 minutes, stir the milk. This way you won’t notice the time.

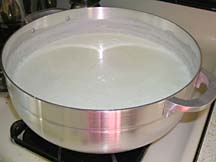
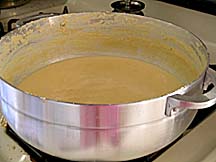
Milk after half an hour of boiling Milk after two hours of simmering

Preparation:

In a big sturdy pan, bring the milk to a boil. Keep the heat on medium high and boil/simmer the milk for about 2 hours, stirring in between. By the end of two hours, the milk reduces in volume, becomes quite thick and turns from white to color of gandham(sandal wood) paste.

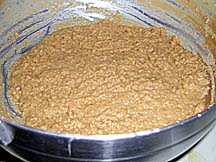
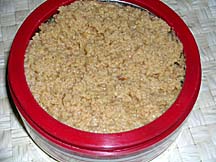
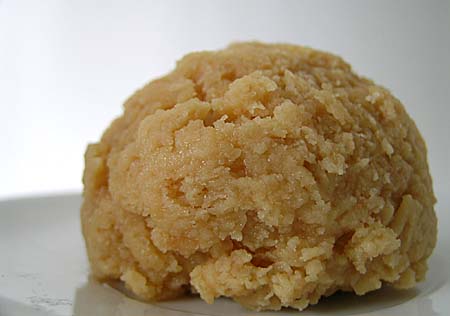
Milk and sugar simmering Pala Kova (Doodh Peda) - The final product of milk and sugar after 3 hours on the stove

Add sugar to the thickened milk. Continuously stirring on medium heat, cook for about 30 to 45 minutes. By the end of this time, the milk-sugar paste further thickens and when you think, you can almost make a ball with it, then only switch off the heat.

Ladle off the paste onto a clean plate or round dish. Let it cool completely. Cut it into squares or shape into rounds. If you want, decorate the sweets with toasted pistachios or almonds.
I used an ice cream scooper to make round balls of pala kova.

 Malai Ladoo,Pala Kova, Doodh Peda, Paal Kovah
Pala Kova (Doodh Peda) for Deepavali

Recipe Source: dear Vijay

Posted by Indira©Copyrighted in Amma & Authentic Andhra,Indian Sweets 101,Milk & Products,Mitai,Molasses,Sugar, Jaggery and Honey (Monday October 31, 2005 at 9:12 pm- permalink)
Comments (53)

The New Home of Mahanandi: www.themahanandi.org

Bitter Gourd Curry (Karela/Kakara Kaaya Kura)

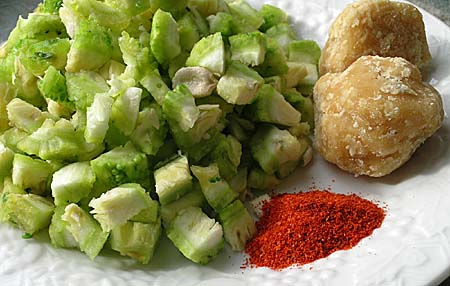
Bitter gourds, true to their name, are bitter and just like any bitter, sour things, they are an acquired taste. My mother’s recipe pairs the bitter gourd with jaggery and red chilli powder; the result is a sweet and sour, lip smacking good, bitter gourd curry. She made it impossible for us kids to hate this vegetable, really, who can resist a sweet and sour combination paired with hot, hot rice and ghee. Clever woman, she is.

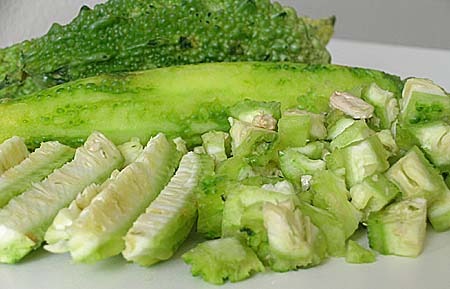
Indian Bitter Gourd, Karela, kaakara kaaya

Recipe:
4 to 6 fresh, good looking Indian variety bitter gourds (karela, kakara kaya)
( This recipe works only with karela, not good with chinese bittergourds. To know the difference, check the link)
½ to 1 cup powdered jaggery
½ tsp of red chilli powder
½ tsp of salt
A pinch or ¼ tsp of turmeric
For popu or tadka
½ tsp of mustard seeds, cumin and few curry leaves

karela pieces, jaggery and red chilli powder

Wash the bitter gourds (karela) and peel the outer rugged skin of each one. Cut into half. If you see white, kind of dried out seeds, they are good for consumption, proceed and cut them into bite sized pieces, including the seeds (They taste nutty and crunchy, add them as whole or cut them into pieces). If you see red colored seeds, the gourd is very mature and tastes impossibly bitter, so it is better to throw the whole thing away.

In a pan, heat one teaspoon of oil, splutter the mustard seeds, cumin and curry leaves. Add the cut bitter gourd pieces. Cover and cook them in their own moisture for about 5 to 8 minutes or until they are tender to touch. When you are sure that the pieces are tender, then only add the powdered jaggery, salt, turmeric, red chilli powder and one tablespoon of water. (Jaggery prevents further cooking of vegetable, so make sure the pieces are tender before adding jaggery.)

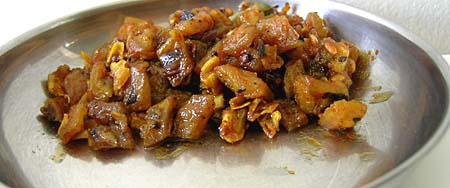
Mix them up thoroughly, cover and let them cook for about another 10 to 15 minutes on medium-low heat. In between sprinkle some water, taste and adjust the seasoning, add more jaggery if you think it’s needed. Jaggery melts and coats the bitter gourd pieces and ten minutes of simmering turns the melted jaggery into a gooey, thick, brown caramel like sauce.

Serve this gold colored, sweetly bitter, delicious curry with hot rice and some ghee.

Indian Bitter Gourd (Karela, kaakara kaaya) Curry

Bitter Gourd (karela, Kaakara kaaya) Curry.

Recipe Source: Amma

You can also find different and more recipes with bitter gourd (karela) by other fabulous Indian food bloggers –Manisha and Gini.

Posted by Indira©Copyrighted in Amma & Authentic Andhra,Jaggery,Kakara Kaya(Bitter Gourd) (Thursday October 27, 2005 at 7:09 pm- permalink)
Comments (26)

The New Home of Mahanandi: www.themahanandi.org

Chocolate Covered Sweet Sesame Spheres (Nuvvula Mudda)

Sweet sesame spheres or Nuvvula mudda as we call them in Telugu, are powerhouse of sweets, full of body building nutrients. Prepared with love and lot of manual work, they are especially made for pregnant women, children and people who are convalescing. We also prepare them traditionally for a festival called Naagula Chavithi. These kinds of sweets are very difficult to prepare without a stone mortar. That’s why from my recent trip to India, I brought a medium sized stone mortar and pestle from my hometown, Nandyala. I wanted it more than anything and I felt that it is more valuable and needed than the usual stuff that I bring from India, like dresses, sarees etc., Of 120 pounds of luggage that we are allowed to bring to this country, 30 pounds went to this thing. Changed priorities.:-)

Nuvvula Mudda:

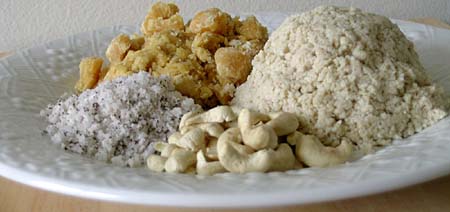
5 cups -sesame seeds, powdered
2 cups – jaggery, powdered
1 cup -dry coconut, powdered
1/2 cup- lightly roasted cashews, finely chopped

Sesame seeds made into powder, cashews, dry coconut powder, jaggery

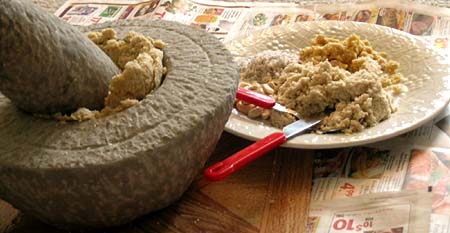
Traditionally, in our home in India, above ingredients are powdered manually, using a stone mortar and pestle. What I did here was, I used a food processor to coarsely powder the sesame seeds and dry coconut. And used a hammer for jaggery.

Then, I pounded these i.e. coarsely powdered sesame seeds, dry coconut and jaggery together for about 30 minutes using the stone mortar and pestle. This pounding process brings out the oils and real tastes of sesame seeds, coconut and jaggery, which is not possible if this was done in a food processor. Also a good strength workout for upper body.

Pounding the ingredients together in stone mortar at my house

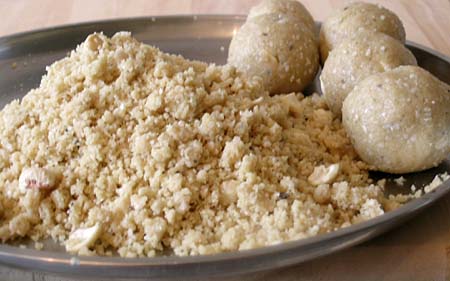
I removed this finely pounded mix from the mortar onto a plate and sprinkled the cashews, mixed them all together. Shaped this mixture tightly with hands into medium sized spheres.

Making of Sweet Sesame spheres (Nuvvula Mudda)

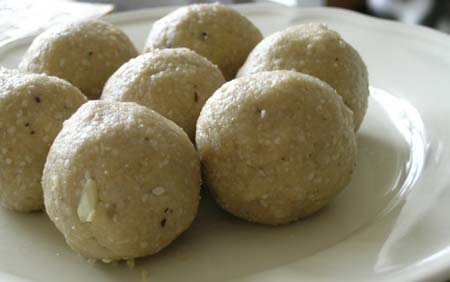
Viola.. first time making the nuvvala muddalu on my own is a sweet success. I am so happy for finally making these at my home, here in US.

Sweet Sesame Spheres (Nuvvula Mudda)

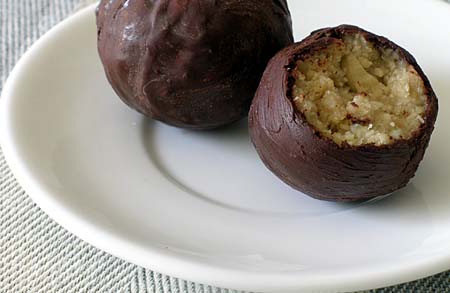
The thing that prompted me do all this is this month’s SHF. For one year anniversary celebration of SHF event, the lovely Kelli of Lovescool chose dark chocolate. She also challenged us to come up with something new and interesting with dark chocolate. So I envisioned the idea of dark chocolate covered sweet sesame spheres. Traditional Indian sweet meets this South American & Western treasure, resulting in wonderful, very delicious and healthy dessert. I think these are very original and are not already created by chocolatiers. Please correct me if my assumption is wrong.

Dark chocolate coating is very easy. I used Lindt’s brand dark chocolate bar. Melted the bar and some ghee in microwave oven and dipped the sweet sesame spheres in melted chocolate. Then refrigerated them for about one hour.

Dark Chocolate Covered Sweet Sesame Spheres (Nuvvula Muddalu)
Something new – Dark chocolate covered sweet sesame spheres (Nuvvula Mudda).

Posted by Indira©Copyrighted in Amma & Authentic Andhra,Cashews,Chocolate,Indian Sweets 101,Jaggery,Naivedyam(Festival Sweets),Sesame Seeds (Friday October 21, 2005 at 6:44 pm- permalink)
Comments (33)

The New Home of Mahanandi: www.themahanandi.org

Bhakshala Rasam (Bobbatla Chaaru)

As much as we like bhakshalu/puran poli on festival days, what we always look forward to is the tasty rasam, called bhakshala chaaru.

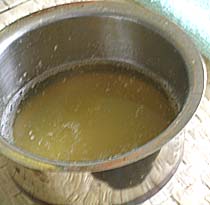
Bhakshala Chaaru is prepared with drained water from boiled chana dal of bhakshalu (Bobbatlu/puran poli). This leftover, rich in taste, chana dal water is simmered with tamarind juice and jaggery. A seasoning of tadka. That’s it. Prepared in small quantity on festival days, this tasty and nutritious bhakshala rasam is to die for. Saying this is a cliche, but I miss my mother whenever I make this recipe, because she prepares the best, the tastiest rasam I have ever had.

Water Drained from Boiled Chana Dal for Bhakshalu/Puran Poli
Drained Water from Chana dal of Bhakshalu

Recipe:

2 cups-drained water of boiled chanadal
Half onion, thinly sliced lengthwise (Optional)
2 tablespoons of tamarind juice
2 tablespoons of jaggery – powdered
¼ tsp of red chilli powder
¼ tsp of salt, or to taste
Pinch of turmeric
1 cup of water

For popu or tadka
1 teaspoon oil or ghee
¼ tsp of mustard seeds, cumin, hing & curry leaves

Preparation:

Heat one teaspoon of oil in a heavy pot to medium high. Add the mustard, cumin seeds, hing and curry leaves. When the seeds begin to pop, add thinly sliced onions and saute them for few minutes to soft. This rasam is also prepared without onions.

Add the chana dal water, tamarind juice, jaggery, red chilli powder, turmeric and salt. Add water and stir. Bring this mixture to boil. Reduce the heat and let it simmer, uncovered for about 10 to 15 minutes.

Serve hot or cold with rice.

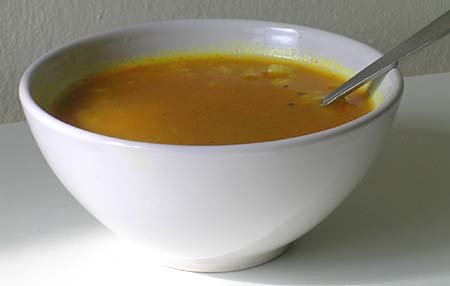
Bhakshala Rasam/chaaru with rice
Bhakshala Rasam with Rice – a Raayalaseema Sweet and Spicy Special Chaaru.

Posted by Indira©Copyrighted in Amma & Authentic Andhra,Chana Dal,Jaggery (Wednesday October 19, 2005 at 10:28 pm- permalink)
Comments (6)

The New Home of Mahanandi: www.themahanandi.org

Honey Whole Wheat Bread

I learned the basics of bread making by watching Breaking-Bread series by Father Dominic on PBS. His show demystified the whole bread making process for me. I grew up in Andhra Pradesh, the rice bowl of India, where bread is not an everyday food. It is an exotic thing associated with sickness, prescribed by doctors as an easy digestable food for people when they are ill. Only time I had bread was when I was under the weather and that too quite reluctantly.

When we moved to US, it took some time to get know that bread is not a bland tasteless cardboard kind of food that I remembered and also to separate the bread-sickness association from my mind. I was fascinated by the completely unknown world of bread making and different varieties of bread. I was curious and eager to learn the process so I tried the cook books about baking bread. With information overload, the whole process of bread making felt as easy as preparing for an entrance exam or tooth pulling.:)

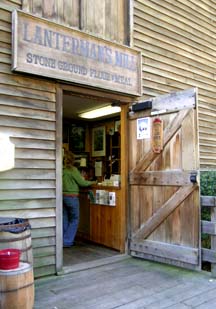
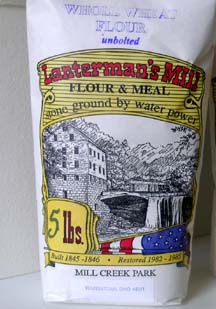
During that time, Breaking Bread series by Father Dominic started on PBS. This chubby, homely monk with a pleasant, fatherly disposition and witty, calming narrative showed the bread making in such a way, that I felt confident to try out. The bread I first baked was a plain whole wheat bread loaf. We both liked the taste of it and later on I experimented with adding honey, nuts etc., After moving to Ohio, I am using the whole wheat flour, produced in old style – stone grinding powered by water at Lanterman’s Mill (not only the major tourist attraction but also a functioning working flour mill of Boardman, Ohio) for my bread. The difference in taste is tremendous, the close thing I can compare it is that of great harvest bakery whole wheat bread. Lot of texture and full of flavor, just two slices would fill us up good.

Last weekend I tried again my bread making skills. Although the dough behaved with a mind of it’s own because of excessive rainy and humid weather, the loaf cameout good after baking. Here is the recipe and the whole process in images:

Lanterman's Mill, Youngstown, OhioStone ground Whole wheat flour  - Purchased at Lanterman's water mill, Ohio
Lanterman’s Mill……………..Stone ground Whole Wheat Flour

Recipe:

1 cup coarsely ground whole wheat flour from Lanterman’s mill
1 cup whole wheat flour (King Arthur brand)
1/4 ounce packet of dry active yeast
1 cup water
½ cup buttermilk
½ cup honey
½ cup of golden raisins and chopped walnuts
¼ cup of oil

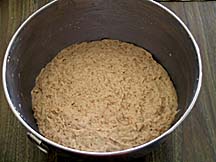
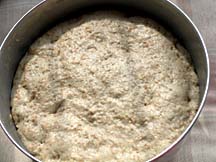
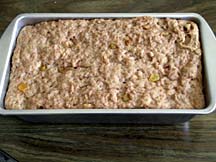
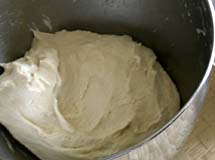
Just Prepared dough, waiting for a rise Two hours after - the dough has risen

First Rise:
Dissolve yeast in half cup of warm water. Measure the flours in a big bowl. Mix buttermilk, oil, honey, water and yeast mixture into the flour to make soft, sticky dough. Take the dough on a wooden board and knead it for about 5 to 10 minutes, handling it gently. Use a spatula to pick up the sticky dough and turn it over as you work. Place this kneaded dough back in the bowl, cover and place the bowl in a warm place and let the yeast do the work. Wait until it tripled in size for about 2 to 3 hours.

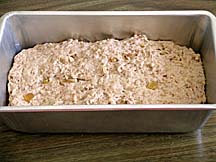
The Second rising in the Bread Pan Second rising done

The Second Rise:
When the dough has finished rising, add nuts and raisins and prepare the dough for the second rise. Take the dough again on flour board, deflate it by pressing the dough flat. Now sprinkle finely chopped walnuts and gloden raisins. Incorporate them into the dough by kneading for few minutes. Place the dough in a loaf plan, cover and let it rise to the top of pan, takes about another two to three hours.

After this final rise, place the loaf pan in preheated oven at 400° F and bake for about 30 to 45 minutes or until golden brown. Remove it from oven, bread slides out of the pan easily and let it cool completely before slicing.

The pearls of wisdom, I learned from Father Dominic is ” Let the dough rest and don’t peek and poke it too often”. Very true for successful bread making.

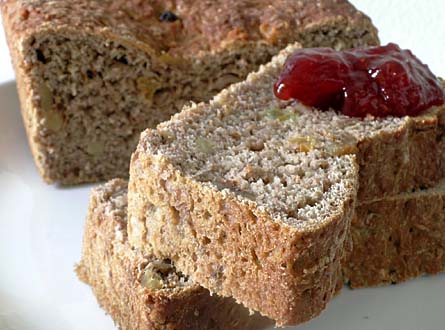
Honey Whole Wheat Bread with Walnuts and Golden Raisins with strawberry jam
Honey whole wheat bread with walnuts and golden raisins
Our weekend breakfast, lunch and dinner

Recipe Source: Cooking Show on Television.

Posted by Indira©Copyrighted in Goduma (Wheat),Honey,Sugar, Jaggery and Honey,Walnuts,Whole Wheat Flour (Monday October 17, 2005 at 12:15 pm- permalink)
Comments (22)

The New Home of Mahanandi: www.themahanandi.org

Bhakshalu (Bobbatlu, Puran Poli)

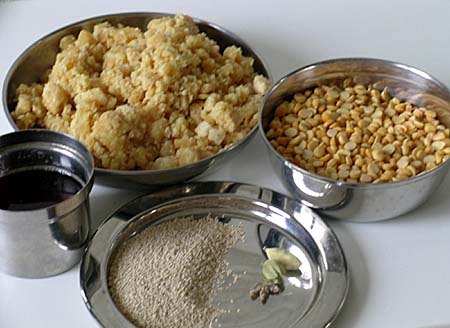
Chana Dal (Sanaga pappu), Jaggery, Ghee, Gasa Gasaalu (Poppy Seeds, Kash Kash), and Cardamom

Ingredients:

For Purnam
One cup chana dal(sanaga pappu)
One to one and half cups of jaggery– powdered
One tablespoon of poppy seeds(gasa gasaalu)
Two cardamom pods, seeds powdered
Purnam Wrap
One cup all purpose flour (maida)
Quarter cup of ghee
Half cup of water

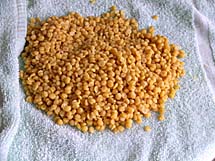
Dough made with All purpose flour(Maida) and ghee Cooked Chanadal on a towel

Preparation:

Step 1:(Two hours before)

Prepare soft, pliable dough with all purpose flour, water and ghee(1 or 2 tablespoons).

Pressure cook chana dal in plenty of water until one whistle. Do not Overcook the dal. The cooked dal must be rigidly soft and not broken. Drain using a colander. (We make a tasty rasam with this dal water called bhakshala rasam.) Spread out the cooked chana dal on a clean cotton cloth or on paper towels, for atleast one hour, so that all the moisture is absorbed from them.

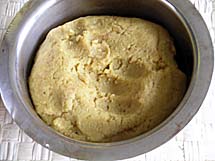
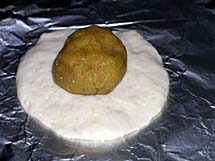
Purnam - Chanadal, Jaggery, Cardamom paste Purnam on maida wrap on a aluminium sheet

Step 2:(one hour before)

Purnam: Using a food processor/blender make a paste of cooked and now completely dried chana dal and powdered jaggery, cardamom powder. Do not add water. The purnam should come out as firm ball. In case if it is more on the runny side or soggy, cook it on stove top on medium-low heat for about 5 to 10 minutes, continuously stirring and let it cool. This will definitely make the purnam firmer and that is what we want consistency-wise for this recipe.

Take the dough on a flat surface, add ghee and knead it for few minutes then punch with your fist few times. Pour ghee knead and punch, do these steps for at least 5 to 10 minutes. All this is to make the dough more pliable and when pulled, it should stretch without breaking.

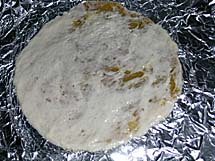
Making Bobbatlu/Puran Poli Making Bobbatlu/PuranPoli on Iron griddle

Step 3:(Show time)

Divide the dough into marble sized balls.

On aluminum foil or on the back of a steel plate (traditionally banana leaf is used), apply liberal amounts ghee and roll out each ball into a small round using a rolling pin or with your hand. Keep a lime sized Purnam in the middle and cover it by bringing the edges together. Dip your fingers in oil and using them, flatten the ball, starting at the edges, gradually pressing towards the center, into a thin, flat, circular shape.

Lay the foil on the griddle and carefully using a spatula, separate the bhaksham from the foil onto the warm(not hot) iron griddle. Fry or cook it on medium-low heat, applying liberal amounts of ghee, till golden (14 carat gold), on both sides. Sprinkle some poppy seeds on each side, keep on the griddle for few more minutes and remove.

Naivedyam is ready.

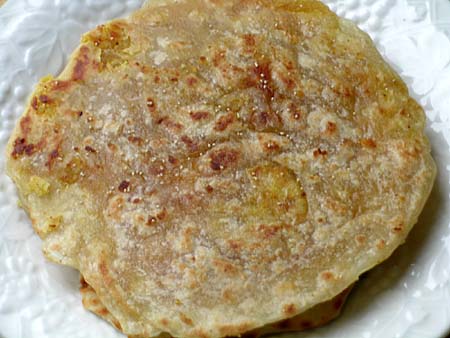
Bhakshalu / Bobbatlu / Puran Poli / Holige

Serve them with ghee, chitrannam and some bajjis. Festival Feast is ready!

Recipe Source: Family – Amma & Attamma

Posted by Indira©Copyrighted in All-Purpose Flour(Maida),Amma & Authentic Andhra,Chana Dal,Indian Sweets 101,Jaggery,Naivedyam(Festival Sweets) (Thursday October 13, 2005 at 4:58 pm- permalink)
Comments (40)

The New Home of Mahanandi: www.themahanandi.org

Cashew Sweet

Lovely Sam of Beck & Posh chose vegan theme for this month’s IMBB. I never knew that vegans are called by these names or they feel that way about themselves here in US until I read her introductory post to this event. With much improved knowledge of stereotypes, here is my vegan contribution, ‘cashew sweet’: a traditional snack, my mother used to prepare and give us after school, when we were kids. The only thing I did differently because of vegan theme is I applied peanut oil to the settling pan instead of ghee.
The following recipe is simple, easy and adaptable to other types of nuts particularly peanuts.

Cashew Sweet:

2 cups of lightly toasted cashews
2 cups of powdered jaggery
1 cup of water
A greased tray to pour the cooked cashew mixture

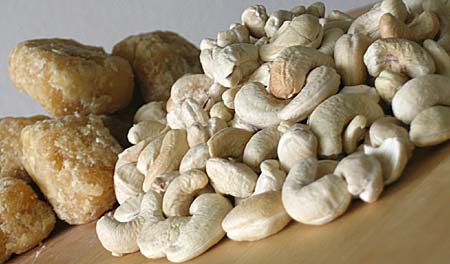
Cashews and Jaggery

In a large sturdy pan, combine jaggery and water. Cook over medium heat, stirring, until jaggery dissolves into water. Bring this to a boil. You see lot of bubbling and raising to the surface action going on by now. Cashew Sweet Cooling in a pan Stir, stir and stir until the jaggery syrup reaches soft- crack stage meaning when you drop a bit of this syrup into cold water, it will solidify into threads.

When jaggery syrup reaches this consistency, immediately & quickly add cashews, and stir constantly for few minutes. Turn off the heat and pour this mixture onto a greased pan. When it is still hot, make lines with a knife and leave it to cool. When cooled, break along the lines to make squares. Store them in an airtight container.

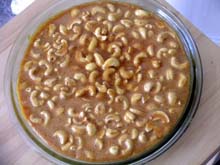
Cashew Sweet, Kaju Tikki,  Cashew Brittle, Jeedi Pappu Paakam

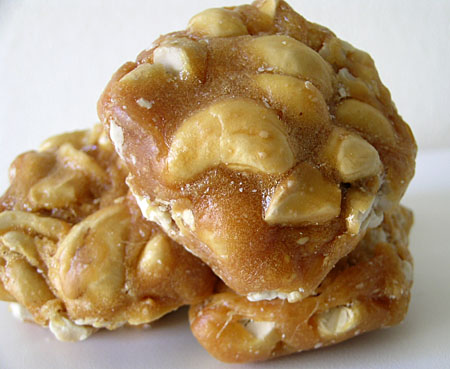
These Cashew brittles or tikkis are natural-food alternatives to the very fatty and sugary standard editions, a sublime and perfect pairing of nature’s goodness and man’s intelligence (or is it sweet tooth). The flavor is completely different and the jaggery really sings out. Go on.. try them.

Some tips:

1. Only a small quantity of water is sufficient while making the syrup. One cup of water is enough for upto 3 cups of jaggery powder.

2. Time it takes to make this sweet is maximum 30 minutes. Prepare to spend all this time infront of the stove, no multitasking.

3. And the most important thing is gauging the jaggery syrup readiness. When you are making this sweet, or any kind of brittle for that matter, always keep a cup of cool water by the stove side. You can check the readiness by drizzling a few drops of syrup into the cool water. If it forms strings that you can easily prod into a ball, it’s at the soft-crack stage. This is where you should add nuts to the syrup. As soon as you add the nuts to the syrup, the mixture starts to solidfy or reaches the hard-crack stage very fast, within a couple of minutes. You made a perfect brittle.
If the syrup dissolves and disintegrates in the water, the syrup is not cooked enough yet. If it tightly balls up and sinks to the bottom or if syrups color turns from gold to black, then you have overcooked it.
This website very clearly demonstrates the various stages of sugar syrup, check it out if you want to know more about candy making. It also has video demonstration of various sugar stages (applies to Jaggery syrup too) both in real player and quick time, cool!

4. Finally, even after following all these steps, if it doesn’t come out as brittle as it should be, then blame it on weather and high humidity. What I do in those cases is, keep the greased tray with cashew mixture in the freezer for atleast one hour. I don’t know how, but the freezer turns the sorry mess from saggy to solid brittle like and they can be easily breaked along the lines made earlier. This freezer version tastes ok but they will test your dental health. :)-

Tagged with: +

Posted by Indira©Copyrighted in Amma & Authentic Andhra,Cashews,Indian Sweets 101,Jaggery,Mitai (Friday September 30, 2005 at 9:07 am- permalink)
Comments (20)

The New Home of Mahanandi: www.themahanandi.org

Mysore Pak

I don’t know why but we both are losing weight, significant amounts, since coming back from India. We are not doing anything out of ordinary and on our recent yearly medical checkup, the family doctor billed our medical reports as excellent, so no problems there. This sudden weight loss is baffling us. The only reason for this I can think of is homesickness. Leaving the dear and near ones back home, I thought it would get easy with age and time, but not so in our case, it seems. The life we created here seems so dull, empty and purposeless. Is this what happens in 30’s, if so, I would love to go back to the carefree 20’s. Little bit early for a midlife crisis, I know.

To counter the weight loss and also to satiate my cravings for an Indian sweet, we made Mysore Pak last Sunday. A deliciously rich, decadent sweet, made of chickpea flour and pure ghee. South India’s favorite. The sweet is as colorful and mouthful as its name sounds. All of our sweets names are like that, unique and colorful… Badusha, Chandra Kala, Mohan Bhag etc.,

There are no shortcuts for this sweet; you need quality ingredients and no cutbacks on the amount of ghee. Otherwise you end up with not so tasty, yellow brick kind of mixture. So use freshest possible ingredients, mainly besan flour for this recipe. And also you need an extra pair of hands. So keep family or friends on the side.

Recipe:
1 cup Besan flour, sift to aerate & to remove any lumps
1 cup ghee, melted & at room temperature
3/4 to 1 cup sugar – your wish
2 cardamom pods, seeds powdered

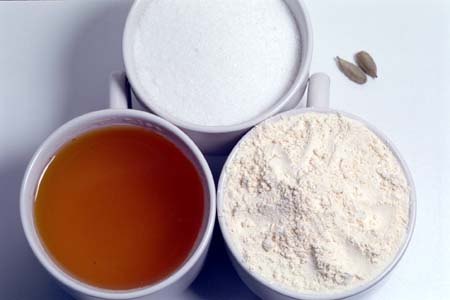
Besan Flour, Ghee, Sugar and Cardamom Pods

In a big sturdy pot, take one cup of water, add sugar and bring them to boil till the sugar syrup reaches one string consistency. Reduce the heat.
Now pour the ghee and besan flour in a steady stream into the sugar syrup while stirring. You need an extra hand here. Continuously and thoroughly stirring, cook until the ghee starts to leave the sides of the pan and the mixture starts to thicken and turns to become porous and light gold in color. Stir in the cardamom powder.

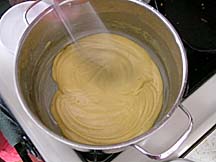
Sugar Syrup On the Stove Pouring Besan Flour in Sugar&Ghee Syrup

Immediately pour onto a greased tray & evenly level it out with a spatula. When it is still hot, cut into diamond shapes. Makes about 10 to 12 pieces.

Mysore Pak Right Out Of the Stove, On to the Plate, Cut into Diamonds

Mysore Pak - Traditional Indian Sweet
Mysore Pak – Simple, sinfully rich tasting, sweet golden diamond

Posted by Indira©Copyrighted in Amma & Authentic Andhra,Ghee,Gram Flour (Besan),Indian Sweets 101,Mitai,Molasses (Wednesday September 21, 2005 at 3:59 pm- permalink)
Comments (91)

The New Home of Mahanandi: www.themahanandi.org

Mini Custard Tarts

Lovely Elise of Simply Recipes selected custards for this month’s “Sugar High Fridays” theme. I know that I am not a big fan of custards. Still I wanted to give it a try. Why not? How I felt about certain foods changed with time and may be with the recipe I selected, I might like it. You never know until you try. So, I baked mini custard tarts.

The recipe is simple with only 5 ingredients. All Purpose Flour, butter, powered sugar, eggs and milk. Tart shell is made with the first three ingredients and the custard filling is made with the last three ingredients. All basic, nothing fancy sounds easy, right, so I gave it a try!

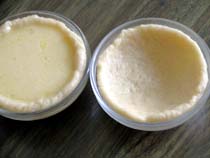
Recipe: Tart Shell, One Empty & the Other Filled with Custard

1 cup of all purpose flour
4 tablespoons of butter
2 tablespoons of powdered sugar
2 tablespoons of water

To make the dough, sift the all purpose flour into a bowl. Add the powdered sugar, butter and water. Mix and knead to form a smooth, firm dough. Cover and leave to chill in the refrigerator. Meanwhile prepare the custard filling.

Custard:

2 eggs
1/4 cup of powdered sugar
3/4 cup of milk

To make the custard, beat the eggs and sugar together. Gradually add milk and beat until well combined.

Take out the dough from the fridge; divide it into even sized pieces (makes about 6). Flatten the dough pieces into rounds and press into shallow tiny pans. Spoon the custard into the tart shells and cook in a preheated oven at 325° F, for about 30 minutes or until set. Remove the dishes, set aside to cool. To serve, run a knife around the edge of each dish and turn out onto a serving plate. Serve hot or chilled with or without cream.

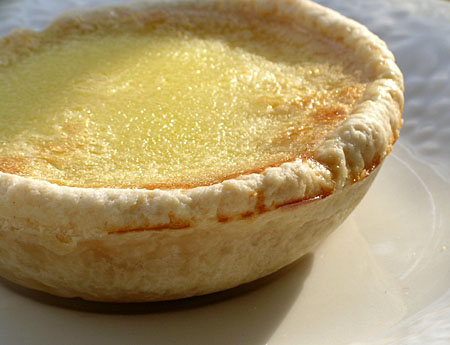
Custard Tart

The outcome looked, smelled and tasted good. But I am not going to go ga-ga over custard anytime soon. I should have baked a cheesecake instead. I read somewhere that cheesecake is also a sort of custard. Yum… that’d be the one I like more!

Take a look at custard and its many avatars at Elise’s Blog .

Posted by Indira©Copyrighted in All-Purpose Flour(Maida),Eggs,Milk & Products,Molasses (Friday September 16, 2005 at 9:21 am- permalink)
Comments (18)

The New Home of Mahanandi: www.themahanandi.org

Undrallu & Kudumulu

During festival times, the sugar of choice at our home for Naivedyam is jaggery.

Jaggery – the pure, wholesome and traditional sweetener of India is made out of raw sugarcane juice by slowly simmering it in big pans until all the water is evaporated. The final solid product is then poured into moulds. The complete process is 100% chemical-free, prepared in natural way and no animal parts (bones) are used or added at any stage. This process is unlike the commercial sugar manufacturing, where cane juice is subjected to a potpourri of chemicals as sulfur dioxide, lime, phosphoric acid, bleaching agents & viscosity reducers.

How do I know all this? Well, some of our relatives cultivate sugarcane and produce jaggery in small scale. They do that in the fields after harvesting the sugarcane. It is quite an event with all the relatives and friends come to help and taste. The thing I always remember is the smell. The sweet smell of boiling sugarcane follows you forever.

It is the ancient wisdom and is now scientifically proven that jaggery is known for its many medicinal benefits. One thing I know is jaggery is rich in Iron. In India, people who know, even doctors advise anaemics and pregnant women to take jaggery daily to increase their hemoglobin levels.

What can I say about the taste of jaggery- there is always the sweet taste but there is something more. The taste is not a mind numbing sweetness but more subtle, much more flavorful and makes us want more. Its sweetness is quite different from that of commercial sugar, brown sugar or even molasses. Because it contains the minerals and vitamins inherently present in sugarcane juice.

In addition to using it for traditional sweets of festival times, like Undrallu, Jaggery is my sweetener of choice always, for ragi malt, vegetable curries, rasam, occasionally for tea & coffee. Compare to commercial sugar, it is not that expensive. You can buy a 10-pound block of jaggery for about 5 to 8 dollars in an Indian grocery shop, here in US.
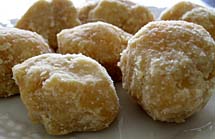
Jaggery I brought from India
Jaggery from India

Vinayaka Chavati Festival Sweet – Undrallu

Undrallu is a sweet, especially prepared on Vinayaka Chavithi festival. They are made with jaggery and chana dal then wrapped in dough and deep-fried in oil or ghee. The tradition is we have to prepare 9 varieties of undrallu with different fillings for this festival. My mother prepares 9 varieties for puja whenever we girls visit home. She has a saint like patience and great time management. You see we have to prepare all varities on the day of festival, by afternoon while on fasting. At least the person who does the puja and cooking must be on fasting till the puja is done. Family members would taste the festival specials only after the puja and naivedyam are done. Our customs dictate that the first offerings on festivals and special occasions must be to God, a sign of respect.

Recipe:
(For two)

For Purnam:

One cup – chana dal
One cup jaggery (pounded into tiny pieces)
6 cardamom pods, seeds separated and powdered

Wash chana dal and take them in a pressure cooker. Add the cardamom and about one cup water. Mix and pressure cook to 3 whistles, till the chana dal is firmly-soft. There should be no water left in pressure cooker. and we want a tight cooked chana dal. If there is excessive water, drain the dal using a colander and then spread the cooked dal on paper towels or on a cotton cloth to remove the moisture and to make them firm.

In a food processor (mixer), or in a stone mortar, take the cooked chana dal. Add jaggery and grind to smooth. The end product must be solid and it has to hold the shape. Make baby’s fist sized small rounds. My mother also dips the rounds in coconut gratings.

This is Purnam.
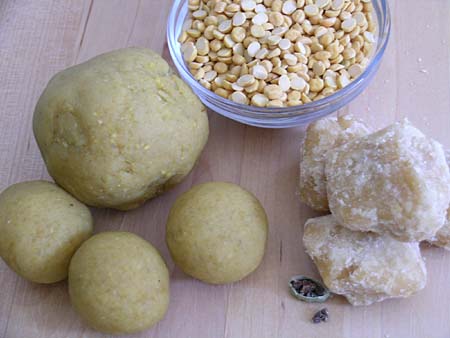
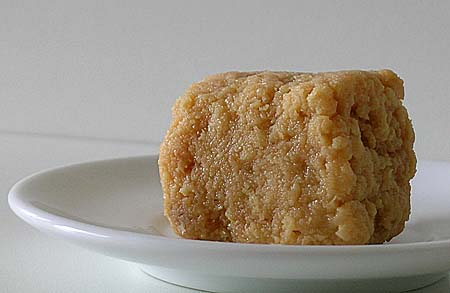
Chana dal, Jaggery, Cardamom. Cooked and combined into a paste called purnam or puran.
Chana Dal, Jaggery and Cardamom ~ Pressure-cooked, Mashed and Made to Small Rounds called Purnam

Preparing the Dough:

There are two kinds of wraps for the Purnam.

1. Urad dal and rice flour wrap called chovi. For it, take quarter cup of urad dal and soak them in water overnight. First thing in the morning, drain water and grind the dal in a blender to smooth adding very little water. Remove to a cup and half cup of rice flour. Mix them together thoroughly. Keep it covered for about 2 to 3 hours. This is called chovi. Purnam balls are dipped in this batter and fried in oil or ghee. Tasty and good.

2. Maida (all purpose flour) wrap: My mother’s method and I prefer this wrap.
Take one cup all-purpose flour (maida) in a bowl. Make a well in the center and add about half cup water. Mix and make a firm dough. Sprinkle about 2 tablespoons ghee and gently knead the dough, until it becomes very soft and pliable. Keep it covered for about 2 to 3 hours. Preparing the maida dough is the first thing I do in the kitchen on festival day morning.
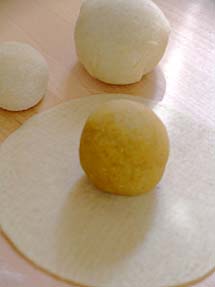
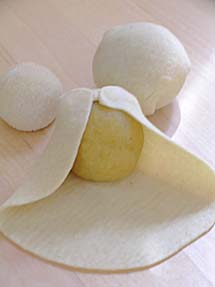
Preparing Undrallu step1 Preparing Undrallu step2

When you are ready with purnam:
Take out and knead the dough again adding ghee for about 5 minutes.
Divide the dough into marble sized rounds.
Roll out each one into a small round using a rolling pin or with hand, thin at the edges and thick in the middle.
Place a lemon sized Purnam in the middle and cover it by bringing the edges together. Place them on a plate and cover with a wet cloth, to prevent drying out.
Repeat the procedure for all the dough rounds with the purnam.

Once you are done, place a kadai on stove-top. Add and heat the oil or ghee for deep-frying.
Gently drop the rounds and deep fry them to pale gold. Offer them to God first, then enjoy.

I prepared them in two shapes, the round ones are called undrallu, and the other two are called Kudumulu in Telugu.
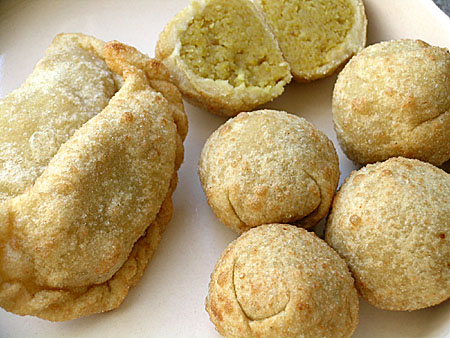
Undrallu or Boorelu(Round Ones), Kudumulu (The Other Two)

Posted by Indira©Copyrighted in All-Purpose Flour(Maida),Amma & Authentic Andhra,Chana Dal,Indian Sweets 101,Jaggery,Naivedyam(Festival Sweets) (Thursday September 8, 2005 at 1:30 pm- permalink)
Comments (24)

The New Home of Mahanandi: www.themahanandi.org

Cherry Clafouti

What can one do with cherries, when they are purchased at $1.19 per pound. Of course, bake them with all purpose flour, the only recipe I know using cherries. Giant Eagle, the chain grocery shop, near my home is selling bing cherries for 1.19 a pound this week. No, they are not damaged. They are perfect, plump, sweet and irresistible as always and as good as the cherries I bought at farmers market last week for 3 dollars a pound.

After downing about 3 pounds, we decided to make some sort of dessert with the remaining cherries. So I baked Cherry Clafouti or more like Cherry Custard or two-inch pancake filled with cherries. This is such an easy dessert that is very simple and quick to put together.

Recipe:

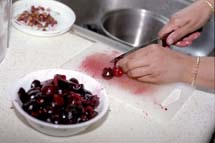
Half-pound cherries- cut in half and pits removed
Half-cup pancake mix (or all purpose flour)
One-cup whole milk and one egg
2-4 tablespoons of sugar
For flavoring I added dried and powdered ginger (sonti)

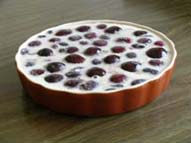
Removing the pits from Cherries Cherries flaoting in flour-milk batter

Preparation:

I’ve added the pancake mix, milk, egg, sugar andsonti in a mixing bowl and whisked them by hand until all the ingredients are well combined and the batter was smooth.

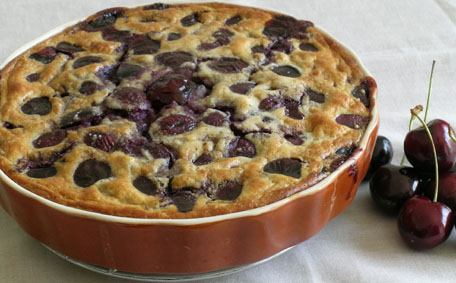
This was only for us two so I used a small 6-inch oven proof-serving dish for baking. After greasing the dish, I filled it with batter and arranged the cherries, more like jam-packed. Baked this in the preheated oven at 350° F for about 40 minutes, until risen and golden. The top will be browned like a pancake and the insides will be gooey with cherry sweetness.

Cherry Clafouti

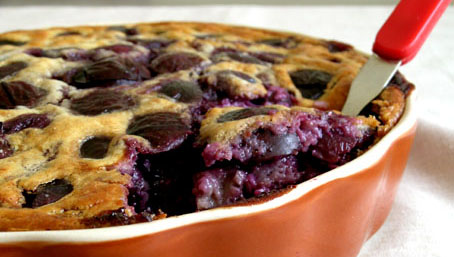
I didn’t add lot of sugar. The sweetness is all from cherries (I did the quality control by tasting half of each cherry:)). With mild sweetness and a texture falling between a custard and a pancake, cherry clafouti was such a delight. We loved this simple dessert.

Taking a bite of Cherry Clafouti
Cherry Clafouti

Posted by Indira©Copyrighted in All-Purpose Flour(Maida),Cherries,Eggs,Milk,Milk & Products,Molasses (Thursday June 30, 2005 at 3:45 pm- permalink)
Comments (13)

The New Home of Mahanandi: www.themahanandi.org

Tropical Fruit Tart

Stephanie’s beautiful fruit tart inspired me to make one myself. Also I saw this month’s SHF theme was tarts and that gave me the final push I needed.

I used a store bought lard-free pie shell as base for fruits. Did I say that this was my first time making tart, may be next time I might make my own tart shell. For now, this will do. For filling, I went with toasted walnuts and fresh fruits – ripe mango, strawberries, plums, cherries and cantaloupe.

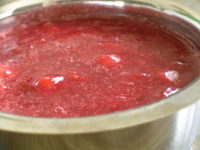
Baked the pie shell in the oven for 15 minutes as per instructions on the cover of the pie shell package. Meanwhile I started to cut the ripe fruits in different shapes needed for my tart. With all the remaining scraps of fruit, I made jam/jelly, just like that. I added 6 tablespoons of brown sugar and watched the fruit bits turn into bright, colorful mush on high heat. I let it cool, stored half of it as jam and to the remaining half, I added half a cup of toasted walnuts and pureed them together to a smooth paste. This was my tart filler.

bits of fruit for jam Jam/Jelly

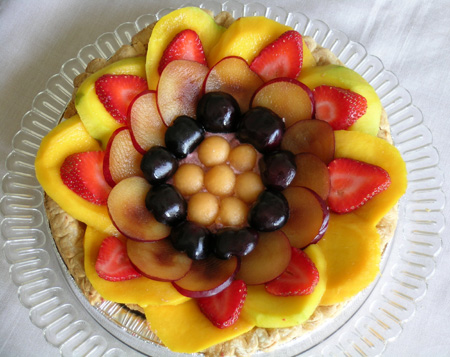
After filling the tart shell with the fruit-walnut puree, I arranged cut mangos, strawberries, plums, cherries and cantaloupe in order and refrigerated the tart for about one hour. Ta da… check the photo of fruit tart below, isn’t it colorful and pretty?

What a quick and easy recipe, but it gives the impression as if it took hours to prepare. We shared this delicious fruit tart with our next-door neighbor to congratulate on her new job.

Tropical Fruit Tart

My maiden attempt at fruit tart was a delightful success. I will definitely make many more.

Posted by Indira©Copyrighted in All-Purpose Flour(Maida),Fruits,Mango,Strawberries,Sugar,Walnuts (Friday June 17, 2005 at 7:49 am- permalink)
Comments (8)

The New Home of Mahanandi: www.themahanandi.org

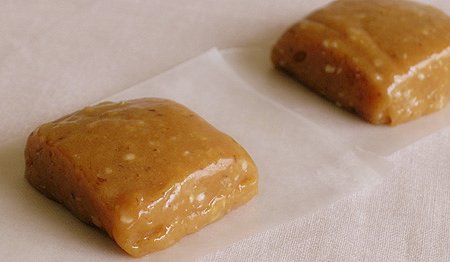
Walnut-Coconut Caramel Toffee

This weekend, I prepared a carrot cake and walnut-coconut caramel for weekend barbecue party at our friend’s house. Last month, they added a big deck to their house and also bought a new gas grill. It is a sort of opening party for the new deck and grill.

I initially started making the carrot cake, then I remembered my pregnant friend who had just passed very difficult first 3 months, when she couldn’t eat anything because of high case of nausea. I thought walnut-coconut toffee is the best in-between meals snack for her now. Just like that, I made the caramel toffee. I also used some of it as topping or dressing for the carrot cake. The cake was a big hit with the children. They loved it and one curious kid asked me why I made the caramel instead of cream cheese topping. I Knew caramel is unusual topping for carrot cake and told him that I was just trying something different. He told me that he loved caramel and he served himself a big piece. 🙂

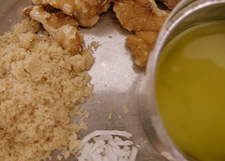
Walnut-Coconut Caramel Toffee: Walnuts, Dry coconut flakes, Light brown sugar and Ghee

  • 1-cup light brown sugar
    1/2 cup melted ghee
    1/2 cup toasted walnuts, finely chopped
    1/2 cup dry unsweetened coconut flakes
    1/2 can of 5 oz of Nestle evaporated milk

Preparation:

Combine ghee, brown sugar and evaporated milk in a thick-bottomed vessel. Cook them stirring occasionally until they reach the softball stage. Now add walnuts and coconut flakes, stir them until well coated or for about 2 to 3 minutes. Pour them into a greased flat dish, refrigerate until set. Cut into small squares and wrap them individually in wax paper.

Walnut-Coconut Toffee

I can never make this type of sweet for us. We don’t do enough work to spend the extra calories. But for a special friend in her special condition- they are prefect treats.

Posted by Indira©Copyrighted in Milk,Sugar,Walnuts (Monday June 13, 2005 at 2:36 pm- permalink)
Comments (7)

The New Home of Mahanandi: www.themahanandi.org

Sweet Beginnings with Sabudana

Coconut, saffron and ghee- the auspicious things in my cooking world, by adding the cashews, cardamom, golden raisins, sugar and sabudana, cooking them together, I just made a classic, delicious Indian sweet. Traditionally, it is prepared in liquid form (payasam), but I wanted to try something new and made it in pudding form. This light and luscious, very easy to prepare dessert is perfect on warm humid days like the ones we are having this past week.

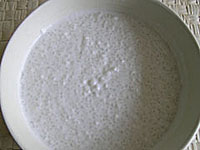
Recipe: Nylon Sagu (small and fine variety from India) soaking in Coconut Milk

  • 1 cup sabudana(sago) soaked in half cup coconut milk or milk for 3 to 4 hours
    1/2 cup sugar
    1/4 cup cashews and golden raisins lightly roasted in 2 tsps of ghee
    1 tsp of cardamom powder, 4tsps of ghee
    Few strands of saffron soaked in water

Preparation:

In a big saucepan, empty the soaked sabudana along with coconut milk, add another half cup of water or milk and sugar. Combine and cook them on medium heat, stirring to prevent the formation of the lumps until the sabudana turn translucent. Reduce the heat, add and stir – ghee, cashews, golden raisins, saffron water and cardamom powder. Let it simmer until the whole thing reaches the consistency of thick flowing magma. Turn off the heat, pour the mixture into jello molds or small cups and freeze them for 1 to 2 hours. The pudding can be removed from the cups by easing the sides off with a knife.

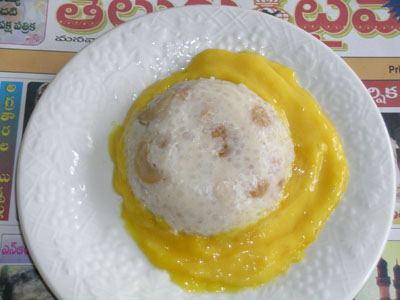
Serve them in different sweet sauces, your choice. I pureed ripe mango without adding sugar, added it as sauce to the pudding.

sabudana pudding

Sabudana (Sago) Pudding in Sweet Mango Sauce

Posted by Indira©Copyrighted in Indian Sweets 101,Mitai,Sabudana (Sago),Sugar (Friday June 10, 2005 at 3:37 pm- permalink)
Comments (8)

The New Home of Mahanandi: www.themahanandi.org

Banana – Walnut Cake

We had a three day holiday for Memorial Day, and this is how we spent the weekend:

Saturday- shopping, cleaning the house, preparing dinner with my husband Vijay’s help. Our Nandyala family friend and his college friends came all the way from Milwaukee. They made a pit stop at our house before reaching their final destination – SV temple, Pittsburgh.

For dinner, we prepared puri, rice, chana masala, chicken kurma, Boiled eggs sautéed in red chilli-garlic powder, peanut chutney, sambhar, papads, raita with yogurt, and for dessert banana-walnut cake and fruit (cantaloupe). It was so hectic; I couldn’t find time to take pictures of preparation and finished items.

Sunday- helped our friends who came here from India just one month back, move to Detroit. Packing, cleaning etc. Baked again another banana-walnut cake for them. Managed to take some pictures of cake.

Monday- We have planned to go to Pittsburgh for diva darshanam at the SV temple. But it was raining so hard, and I didn’t want to travel on the PA Turnpike, which is notorious for accidents. So instead we hit some local shops nearby, and dined out.

First long weekend of summer was over just like that.

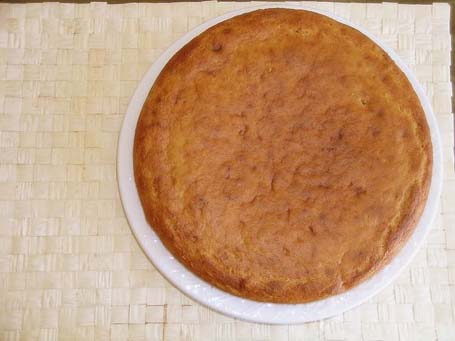
Banana-Walnut cake

As much as possible, I try to avoid using eggs in my baking for cakes etc. Because I don’t like the strong chemical smell of egg yolks. It wasn’t like that back in India, but after coming here, the yolk smell and taste has started to make me very ill. I don’t know what they feed the hens here in US, the fertilizer smell of egg yolks is unbearable, and the taste, oy…awful to say the least.

I found out that very ripe bananas are good substitute for eggs, so I use them often in my cake and bread making.

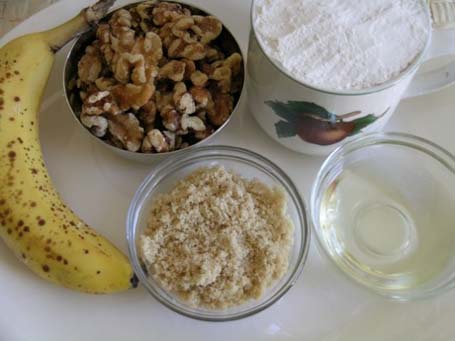
1 cup Bisquick pancake flour. All-purpose flour works fine too. (The only reason I made the cake with Bisquick is because I wanted to finish off the big packet of Bisquick pancake flour that I purchased at Costco last year.)
1/2 cup – walnuts, chopped
1 banana, skin peeled, and ripe fruit mashed smoothly
1/4 cup – sugar
4 tablespoons – oil or ghee
1 tsp each, – baking powder and vanilla extract
Milk if needed

Banana-walnut cake Ingredients

You must be familiar with the baking drill. Wet first, dry next, and then combine the two together.

IN a big bowl, mix the wet ingredients – banana, oil and vanilla extract. Whisk to combine well.
Then add the flour, sugar, walnuts and baking powder. Combine thoroughly. If the batter looks tight, then add about quarter cup of water or milk.

Preheat the oven to 350 F.

Prepare the cake pan, by applying ghee or oil on the bottom and to the sides. Pour the cake batter. Spread evenly. Bake at 350° F for about 30 to 45 minutes. When a toothpick inserted into the baked cake, it should come out clean. Cool and then cut pieces. Enjoy.

Banana-Walnut cake

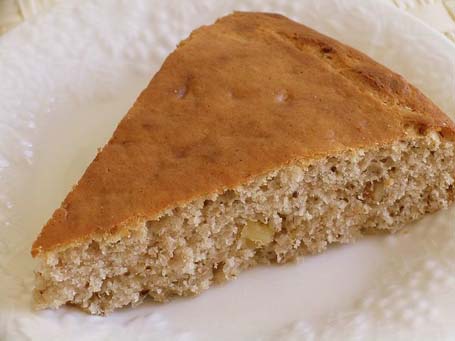
Light and Fluffy, Almost Egg-less, Good Tasting Banana-Walnut Cake

Slice of cake

Posted by Indira©Copyrighted in All-Purpose Flour(Maida),Bananas,Sugar,Walnuts (Tuesday May 31, 2005 at 8:38 am- permalink)
Comments (55)

The New Home of Mahanandi: www.themahanandi.org

« Next PagePrevious Page »