Veena Parrikar is a dear friend of Mahanandi and me and an occasional guest author on Mahanandi. Her first article was on Iceland. This is her second article, an insightful and engaging cookbook review. I thank Veena for this wonderful contribution!
~ Indira

There are perhaps as many misconceptions about Indian cuisine as there are restaurants named “Bombay Garden”.
Indian food is tandoori chicken, aloo-matar, saag-paneer, and naan.
It is hot and spicy.
Vegetables are cooked to death.
It starts with frying onions and tomatoes to pulp and ends with a garnish of coriander leaves
One can hardly blame the Western and even some of the Eastern world for harboring these notions. Most Indian restaurants outside India serve the same tired old fare under various guises. The exceptions to these are the upscale “fusion-Indian” restaurants; after all, Indian food cannot be admitted into the Michelin club without a French or “contemporary” accent (pun intended). Over the past few years, South Indian restaurants have slowly gained ground and it is not uncommon to see a Chinese eating masala dosa with her bare hands or a middle-aged white guy slurping rasam at the neighborhood Madras Cafe or Udupi Palace in the USA. The silly notions about Indian food, however, are far from being a thing of the past. For example, the threat of homogenization, albeit of a different kind, hangs heavy like the odor of yesterday’s takeout. The complexity and variation among and within the cuisines of the four states of Southern India (Karnataka, Kerala, Tamilnadu, and Andhra Pradesh) could never be guessed if one were to go by the menus of these South Indian restaurants. Most of them do not stray far from the familiar idli, vada, masala dosa, uttappam, sambar and rasam, with an indifferent nod to some rice varieties, such as curd rice, lemon rice and tamarind rice. Desserts are still “balls in sugar syrup” (gulab jamun), “ricotta cheese in evaporated milk” (rasmalai), or the occasional rava kesari, leaving in the cold a rich repertoire of jaggery-based sweets that is one of the hallmarks of the cuisines of Southern (and some other states of) India.
To be sure, even within India, availability of the authentic, traditional fare is limited to small niche restaurants, special festivals at star hotels, or if you are lucky, at the homes of neighbors and friends from other communities. Your best bet then, is to recreate many of these dishes in your kitchen, with the help of such cookbooks as Meenakshi Ammal’s Cook and See, Chandra Padmanabhan’s Dakshin, Saranya Hegde’s Mangalorean Cuisine, Saraswat Mahila Samaj’s Rasachandrika, and Jigyasa-Pratibha’s Cooking at Home with Pedatha.
A new addition to this stellar lineup of traditional Indian cookbooks is Ammini Ramachandran’s Grains, Greens, and Grated Coconuts: Recipes and Remembrances of a Vegetarian Legacy.
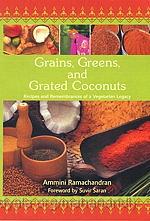
Grains, Greens and Grated Coconuts ~ Cookbook by Ammini Ramachandran
Ammini’s book fills a lacuna in the Indian cookbook landscape. Books on the cuisine of Kerala abound; however, most of them have a predominance of seafood dishes. Small wonder then that Kerala food, like most other coastal cuisines, is perceived to be primarily non-vegetarian. One food writer and journalist in India even declared that most Malayali vegetarian dishes are terrible! One knows, of course, not to take such statements without the proverbial pinch of salt, and a large one at that. Having encountered the delectable and varied vegetarian fare of the coastal cuisines of Goa and Karnataka, I had always suspected a similar treasure existed in Kerala. Eating and learning it, was another matter altogether, what with the lack of Kerala-food restaurants, close friends from the state, or opportunities to set forth on a voyage of discovery to its shores. With Grains, Greens, and Grated Coconuts, some of the vegetarian food of Kerala is now just a coconut (or two) away.
The present state of Kerala was formed by the merger of Kochi (Cochin), Tiruvithamcore (Travancore), and Malabar. Each of these regions, originally Hindu, was subject to varying degrees of Muslim and Christian influences. Accordingly, Kerala cuisine represents the confluence of Hindu, Muslim, and Christian traditions. Grains, Greens, and Grated Coconuts presents the traditional vegetarian cuisine of central Kerala including some from the Kochi royalty. It is one of the first cookbooks to focus on a Hindu culinary tradition of Kerala.
Grains, Greens, and Grated Coconuts is one of the finest Indian cookbooks to have been written in recent times. Here’s why:
1. Traditional food, when presented for a worldwide (read Western) audience, undergoes a simplification, motivated largely by the authors’ and publishers’ goal to widen the book’s market reach. Recipes are modified to exclude exotic or not-easily-available ingredients; difficult processes might be eliminated or substituted with commercial alternatives; and dishes that do not conform to the health fad of the day might be passed over. Except for a few dishes, food from Kerala is obscure even to many Indians, leave alone the non-Indian readers. Ammini has barely made any changes to her family recipes, yet her presentation makes them seem extremely do-able. She does not hesitate to include preparations with such exotic vegetables as breadfruit, jackfruit, and suran. Ammini has pulled off a seemingly impossible feat in Grains, Greens, and Grated Coconuts: she has preserved the originality of her traditional family recipes, and made them accessible to those outside the tradition, without overwhelming the reader with tedious detail. Novice cooks might miss having pictures of the finished dishes; the clarity of instructions, however, make up for this to a very large extent.
2. There is none of the anything-goes attitude to ingredients adopted by many modern Indian cookbooks published in the West. No false assurances are provided about difficult ingredients such as coconut milk. She tells us that coconut milk powder can be used instead, but clearly informs that the taste will not be authentic. We are told right at the onset: “My mother always insisted, “Never skimp on the quality or quantity of ingredients,” and I believe it is the first lesson in good cooking.” This is reflected in the meticulous detail provided in the chapter on ingredients.
3. Ammini’s family recipes create dishes that would go a long way in dispelling some of the popular myths about Indian cuisine. Spices are used in skillful moderation (garam masala powder never makes an apperance in this book), the vegetables and grains hold their shape and retain their flavour, and you will encounter delicate and subtly-flavoured curries that will never be found in a restaurant.
4. There is a detailed chapter on the history and development of ancient spice trade in Kerala, and to those who have not previously enquired into such matters, this chapter offers many surprises. The book also provides a very engaging account of the kitchens, culinary customs, and festivals and celebrations of Ammini’s maiden family. A world that is now almost extinct rises vividly from the pages and for a brief while, you forget the harried and hurried pace of your existence (and the pre-made frozen food in your kitchen). This is a serious yet enjoyable work, not just another cloying food “memoir” that is in fashion these days.
The book has been written for a Western audience, but readers in India will find much of profit. Such ancient traditional recipes do not come by very often. I am no alarmist, but it seems as though our traditional cuisines will soon exist only within the homes of determined souls or in five-star hotels. Even wedding feasts in India – the last stronghold of traditional food – seem to have embraced a global integration philosophy: Mushroom Pasta and Gobi Manchurian now jostle for buffet space with tava vegetables, Spanish rice, and Shahi Paneer.
Our culinary traditions, not unlike our ancient classical music, have been poorly documented for far too long, what with the practitioners jealously guarding their treasures from outsiders for various reasons. With the passing of generations, more and more of this body of knowledge will be lost. We hope there will be many more Amminis, who will not only document their family or community recipes painstakingly and truthfully, but also share it generously with others.

Srimati Ammini Ramachandran ~ Cookbook Author
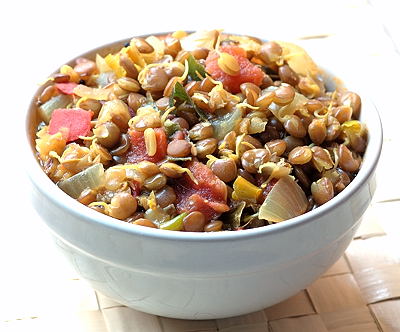
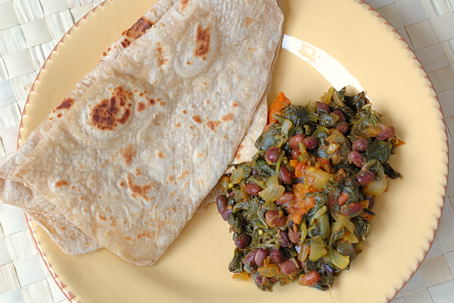
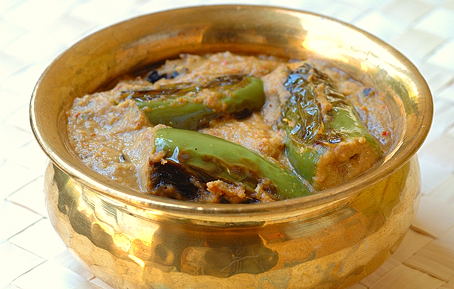
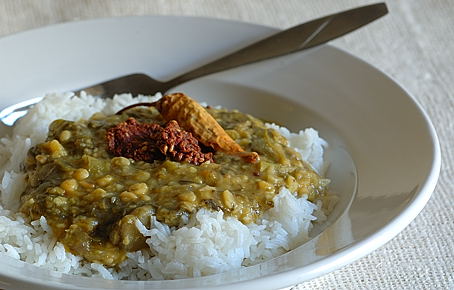
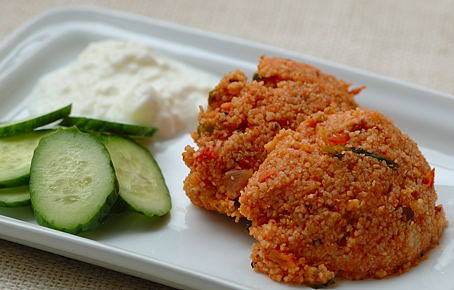
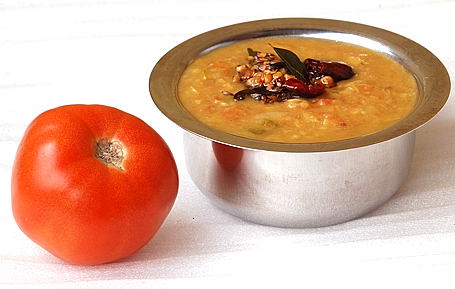
Pacha Sambar: Sambar with Fresh Green Spices
(Recipe from Grains, Greens, and Grated Coconuts)
I was intrigued by this recipe as it did not include sambar powder, and at first glance, seemed similar to some of my daal-vegetable preparations. The finished dish was neither like the familiar sambar nor my usual daal-with-vegetables. With powdered spices (except asafetida and turmeric) as well as ginger-garlic absent, the flavour of toor dal is allowed to hold centerstage, complemented by the freshness of the potatoes, herbs, and lemon juice. I stayed faithful to the recipe as I am wont to do when attempting traditional recipes for the first time. There is a slight error of omission in the recipe, but a missing pinch of turmeric is not a show-stopper.
Recipe:
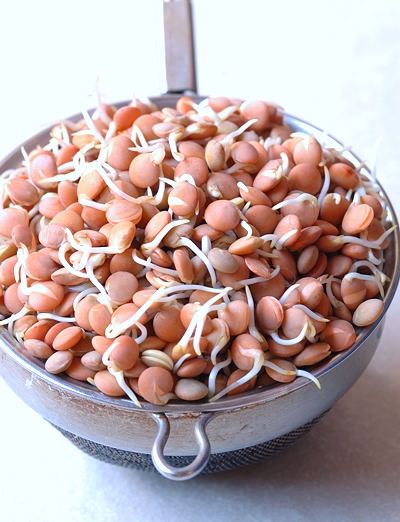
1 cup toor dal
1 medium russet potato or 3 taro, peeled and cubed
2 medium tomatoes cubed
Salt to taste
½ teaspoon turmeric powder
¾ cup finely chopped cilantro leaves
¼ cup finely chopped fresh fenugreek leaves (preferred, if available)
or ½ teaspoon ground fenugreek
6 fresh green chilies (serrano or Thai), thinly sliced (less for a milder taste)
4 tablespoons lemon juice
For seasoning and garnish:
2 tablespoons vegetable oil
1 teaspoon mustard seeds
1 dried red cayenne, serrano, or Thai chili, halved
¼ teaspoon asafetida powder
20 to 25 fresh curry leaves
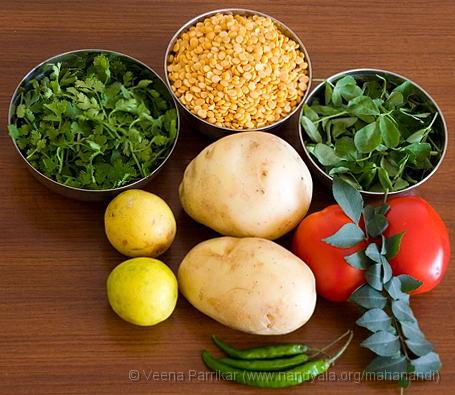
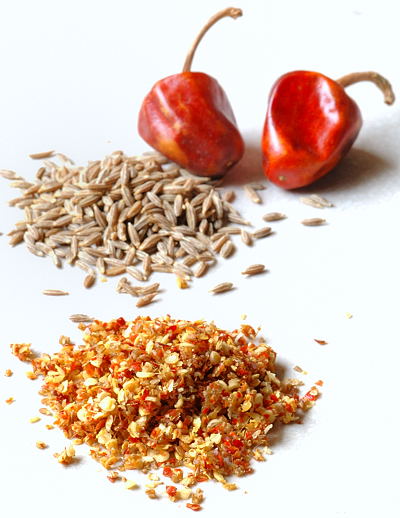
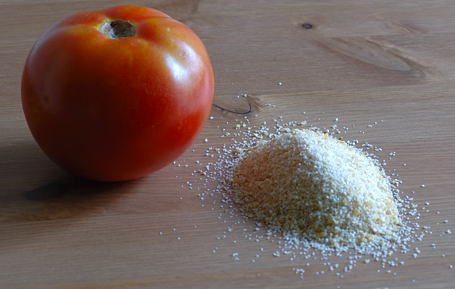
Clockwise:Toor Dal, Fresh Fenugreek, Tomatoes, Curry Leaves, Green Chillies, Potatoes, Lemons, Cilantro
Wash and clean the toor dal in several changes of water, until the water runs clear. If you are using oily toor dal, the oil must be washed off before starting to cook. Place the toor dal in a saucepan with two and a half cups of water and a half-teaspoon of turmeric powder. Bring it to a boil over medium heat, then turn down the heat, and cook for twenty-five to thirty minutes. (As an alternative, you may use a pressure cooker to cook the dal, following the manufacturer’s directions. It will take about six to eight minutes to cook in a pressure cooker.) As the dal cooks, it should be fairly thick but still liquid; stir in another half-cup of water if it is too thick. Mash the cooked toor dal thoroughly with a spoon, and set it aside.
Combine the potato (or taro), tomatoes, salt, turmeric, and two cups of water in a saucepan over medium heat, and bring it to a boil. Stir in the cilantro, fenugreek, and green chilies. Reduce the heat, and cook until the potatoes are fork tender. Stir in the cooked toor dal, and simmer for four to five minutes. Stir in the lemon juice. Remove it from the heat, and set it aside.
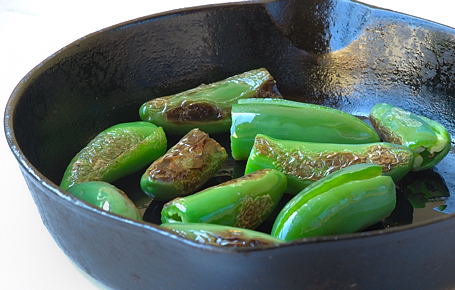
Heat two tablespoons of oil in a small skillet, and add the mustard seeds. When the mustard seeds start sputtering, add the halved red chili, asafetida, and curry leaves. Remove it from the stove, and pour the seasoning over the cooked curry. Cover and set aside for ten minutes, to
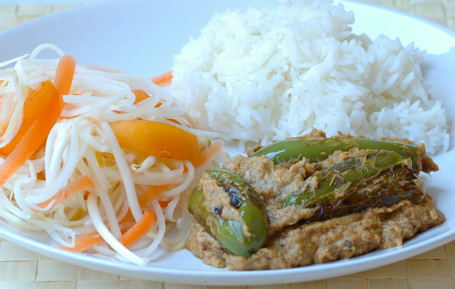
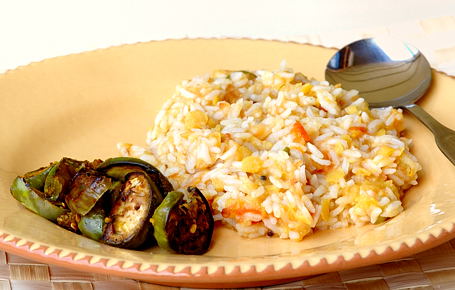
allow the flavors to blend. Serve hot with rice and a second curry.
Makes 4 to 6 servings if served with another curry, as is traditional.
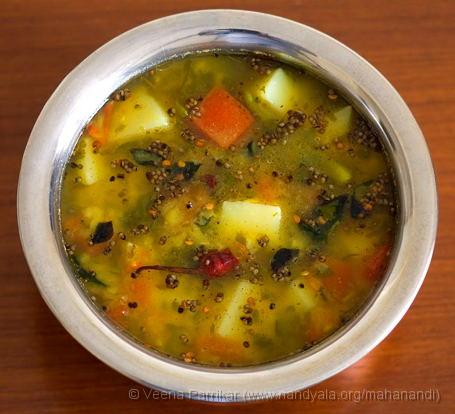
Pacha Sambar: Sambar with Fresh Green Spices
~Guest Post by Veena Parrikar
Notes:
Ammini Ramachandran’s website : Peppertrail.com.
For a detailed list of contents and exceprts from the book, see www.peppertrail.com.
Grains, Greens and Grated Coconut is available at Amazon.com, iUniverse.com and Barnes&Nobles
Recommend this cookbook to your local libraries
Author and Book Cover Photo Credits: Ammini Ramachandran, Recipe Photo Credits: Rajan Parrikar
Veena Parrikar’s previous article at Mahanandi: Iceland