Mahanandi

Living in Consciousness ~ Indi(r)a’s Food and Garden Weblog

Bottle Gourd in Yogurt

Dear L.G, before writing at her fabulous food blog Ginger and Mango, used to comment on ‘Mahanandi’ occasionally. Her comments were delightful and informative just like her current blog posts. In one of her comments in response to my mother’s recipe of sorakaya, she detailed a Kerala recipe of yogurt based bottle gourd curry and asked me to give it a try.

I have always wanted to visit God’s Own Country – “Kerala”. I don’t know when I am going to do that, but for now I am content to try at least Kerala cuisine. Yogurt and coconut based curries are hallmarks of Kerala cuisine and they call them “kaalan“. Here is my first attempt at bottle gourd kaalan, I hope I did justice to this traditional recipe and will be allowed to enter the God’s own country.:)


Yogurt, Bottle Gourd Cubes, Curry Leaves, Coconut-Chilli Paste

Recipe:
1 cup of cubed bottle gourd pieces
1 cup of day old, homemade Indian yogurt (sour curd)
6 green chillies and 1 tablespoon of fresh grated coconut (made into smooth paste)
½ teaspoon of each – turmeric and salt
For popu or tadka:
1 tsp of oil
1 tsp of cumin and mustard seeds, few pieces of dried red chillies and curry leaves

In a saucepan, heat oil on medium heat. Add and toast the tadka ingredients. Add the bottle gourd cubes and also green chilli-coconut paste. Stir in turmeric, salt and about quarter cup of water. Close the lid and cook on medium-low heat, until the bottle gourd pieces are tender. Reduce the heat to low and stir in the yogurt. Turn off the heat and remove the saucepan from the stove. Cover the pot with a lid and let the curry sit for about 15 minutes, for the flavors to mingle well. Serve warm with rice.

The curry tasted superb! Vijay more than me couldn’t get enough of this curry and we finished all in one setting. Thanks L.G for sharing this wonderful, traditional recipe.


Bottle Gourd in Yogurt Curry with Rice ~ Our Simple Meal Today

Posted by Indira©Copyrighted in Coconut (Fresh),Green Chillies,Sorakaya(Dudhi,Lauki),Yogurt (Wednesday July 19, 2006 at 3:07 pm- permalink)
Comments (41)

The New Home of Mahanandi: www.themahanandi.org

Bottle Gourd in Sesame (Sorakaya-Nuvvula Kura)

Few months ago, I wrote about my mother’s recipe of bottle gourd. It is a standard, no fuss kind of recipe with minimum ingredients. I like the taste of that curry and played around with the recipe little bit and came up with this one. It is also a simple no-nonsense recipe and supplies carbos (bottle gourd), protein (black chana) and fat (sesame seeds). I love the taste and also the ease with which it can be prepared.

Bottle gourd Pieces (Sorakaya, Lauki)
Bottle Gourd (Sorakaya, Dudhi) – Peeled, Cut into Cubes

Recipe:

Prep Work:
One cup of black chickpeas (kala chana) soaked in water overnight.
Half of medium-sized bottle gourd (sora kaya, dudhi), peeled and cut into half-inch pieces (about 2 cups)

Cook:
Heat a teaspoon of peanut oil. Toast a teaspoon of cumin, mustard seeds and curry leaves (for tadka).
Add the bottle gourd pieces and soaked kala chana. Saut? for few minutes on medium heat. Add about a cup of water and close the lid and cook.

SesameDalia paste:
Meanwhile prepare the curry thickener. Grind in a blender:
3 tablespoons of each – sesame seeds and dalia
½ tablespoon of each – tamarind juice and powdered jaggery
1 teaspoon of each – coriander seeds (dhania), cumin and red chilli powder
½ teaspoon of salt or to taste
Grind them to smooth paste by adding about one cup of water.

Simmer:
Add the sesame-dalia paste to the curry. Stir in half teaspoon of turmeric. Mix and on medium heat, simmer for about 15 to 20 minutes, until the curry reaches the consistency you desire.
Tastes great with chapatis/naans and with sorghum rotis.

Bottle gourd curry with chapatis

Posted by Indira©Copyrighted in Chana Dal-Roasted (Dalia),Jaggery,Sesame Seeds,Sorakaya(Dudhi,Lauki) (Tuesday July 18, 2006 at 7:21 pm- permalink)
Comments (15)

The New Home of Mahanandi: www.themahanandi.org

Stuffed Bell Peppers (Capsicums)

Capsicum (Bell Pepper)

Hollywood often portrays the pretty blonds as cute and dumb. The same role in vegetable world is filled by bell peppers or capsicums. I think.

Bell peppers are colorful! Look so pretty, cute and also would bring that much needed (in some eyes) color and attraction when added to a dish. They are popular mainly for that reason and they have hollow insides, giving the impression of empty pretty heads just like the blond stereotype. No wonder we are tempted to fill them up. Almost every cuisine has several stuffed recipes for bell peppers. Rice, meat, lentils, nuts and cheese, every other thing in food world is used to stuff the bell peppers. Even other vegetables,… aah, the humiliation. The bell peppers must feel mortified when we fill them up with other veggies. But graceful they are, they won’t show it. They stand our mistreat and still look pretty. Such graciousness always invites strong reaction; people would hate or love them. But few could resist their charms.

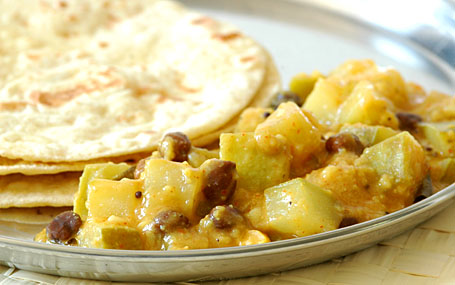
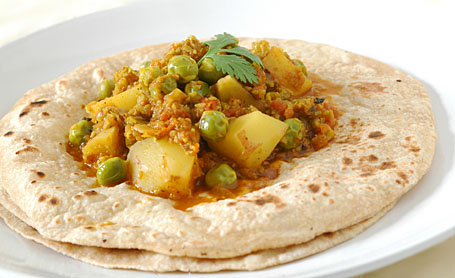
One such charming, capsicum recipe is from India. Here the bell peppers are stuffed with spiced mashed potatoes and cooked to brown and then placed in peanut-sesame sauce. Served with rice or chapati, this is a meal fit for a rani (queen). Though the recipe makes us work like kitchen helpers in a rani’s kitchen, once you wipe off the sweat from the brow, once it’s plated, you would feel like a rani. Worth the effort, that’s what I am saying.:)


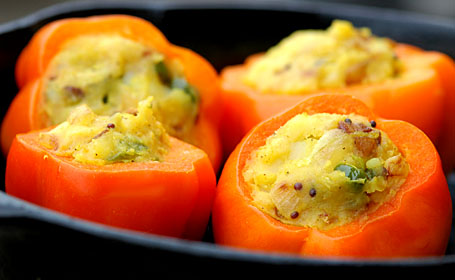
Capsicums Stuffed With Potato Curry – Ready For Browning

Recipe:

Potato Stuffing:
Good quality potatoes (red or baby alu) – 3 or 6, Pressure-cook or boil them in water, until tender. Remove the skins, mash them to smooth paste.
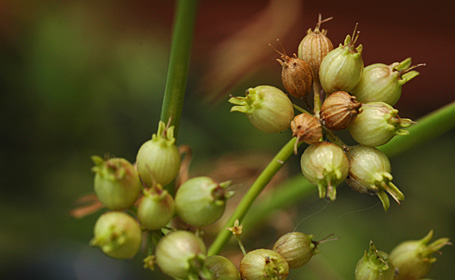
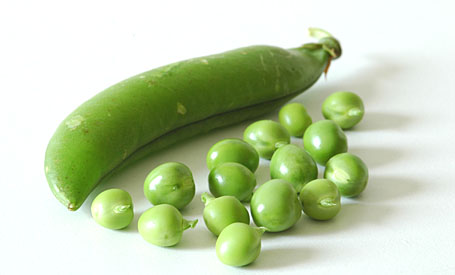
In a pan, heat a teaspoon of oil, do the tadka (toast ¼ tsp each – mustard seeds, cumin and curry leaves). Saute finely chopped pieces of one onion, 4 green chillies and a fistful of fresh peas. Add the mashed potato. Stir in salt, turmeric and one teaspoon of clove-cinnamon-cumin-coriander seed powder (garam masala). Mix them all well. Cook covered on medium-low heat for about 10 to 15 minutes – That’s our potato stuffing for bell peppers.

Bell peppers (Capsicums):
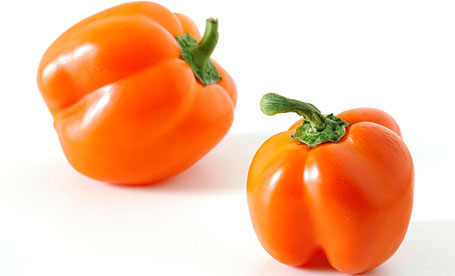
Pick 6 small sized, fresh and firm bell peppers – any color (green, red, yellow or orange) or color combination is fine. This curry is all about appearance and size matters. Small sized capsicums are perfect for this curry. Jumbo regular grocery (US) type are too big and the curry won’t look good when prepared with them. (Local farmers markets here in US, often carry small sized ones during summer time.)

Cut the tops off. Remove the seeds and membranes inside and make a hollow. Fill them up with potato curry to the top.

In a big iron skillet, heat about 1 tablespoon of peanut oil. Place the stuffed bell peppers neatly in a circle and cook them covered on medium heat for about 15 to 20 minutes. Turn them to sides in-between so that they could get brown evenly on all sides. (You could also cook these stuffed bell peppers in oven – baking and broiling at 375 F until they are soft and tender to touch.)


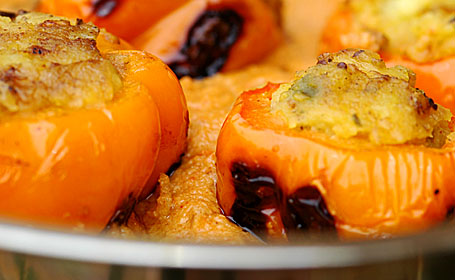
Stuffed and Cooked Capsicums in Peanut-Sesame Sauce

Peanut-Sesame Sauce:
Toast quarter cup each – peanuts and sesame seeds to golden color. Take them in a grinder, add 2 cloves and 2 one-inch pieces of cinnamon, half teaspoon each – chilli powder and salt and a tablespoon of tamarind juice and powdered jaggery . Grind them to smooth paste.

Heat a teaspoon of peanut oil in a big pan. Add the peanut-sesame sauce and about a half cup to one cup of water. Mix well. Simmer on medium heat for about 10 minutes. Have a taste and adjust salt, sweet and sour levels to your liking.

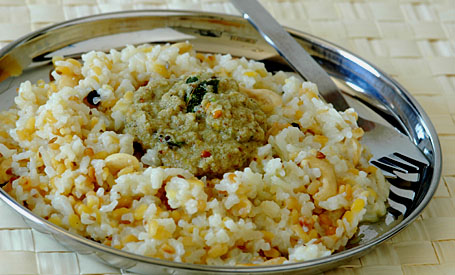
Add the stuffed capsicums to the thickened sauce. Cook for another 10 minutes on medium heat, covered. Serve with rice or with chapatis.


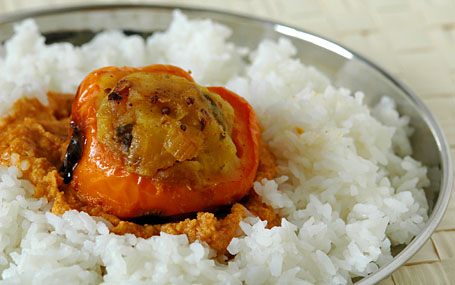
Stuffed Capsicum Curry with Rice

Notes:
Traditional North- Indian recipe does not inlclude the gravy, and cooking the stuffed peppers in peanut-sesame sauce is my version. Adding little bit Andhra touch.

Posted by Indira©Copyrighted in Bell Pepper,Peanuts,Sesame Seeds (Monday July 17, 2006 at 2:04 pm- permalink)
Comments (36)

The New Home of Mahanandi: www.themahanandi.org

Weekend Reading

56 Dal Entries – JFI:Dal (Lentil) Roundup

Dosa – A Love Story

Monsoons and Coconut Trees – Breathtaking Oil Paintings

Migrating Back to India – Ten Points

Who is responsible for bombings in India?

Exercise in Writing – Once in a Lifetime (Short Story)

Sit and Roll Over, Find Your Own Keys

Posted by Indira©Copyrighted in Zen (Personal) (Saturday July 15, 2006 at 10:10 am- permalink)
Comments (6)

The New Home of Mahanandi: www.themahanandi.org

Chocolate~Chilli~Pecan Mini Cakes

chocolate cake

To the naive palate, cheese is mind numbingly bland. But with few tries, one would know that there are many subtle flavors even in cheese blandness. Same thing with chillies. They are hot, but there is remarkable variation of “heat” among chillies and within any given chilli type. When added to taste, chillies would bring incredible flavor to all types of foods. One example that I recently found out is chocolate. The South and Central American culture often combine cocoa and chillies in recipes and their cuisine is famous for this terrific combination for centuries.

Last weekend, I tried this ancient tradition at my home and baked some little cakes of chocolate-chilli-pecan combination. I went as far as I could go to follow the tradition:). I couldn’t get pure (or good quality) chocolate but was able to buy few bars of dark chocolate. I experimented by adding half teaspoon of pure chilli powder from India, to the melted chocolate. The recipe I followed is from “Bittersweet” by Alice Medrich, is actually for cookies. Recipe title is “bittersweet decadence cookies”, and in her introduction to these cookies she wrote “Ultrachocolatey and richer than sin, slightly crunchy on the outside with a divinely soft center, these are not delicate or subtle, but the jolt of bittersweet is irresistible.”

They were all that and more. Trembling with anticipation, that is how I felt while preparing these little dark delights. The taste was purely out of this world and I give full credit to the recipe that I followed (adapted) and of course to the almighty, all-powerful chilli.


Chocolate, Chilli Powder and Pecan – Ingredients for the mini cakes (cookies)


Mini Cakes Ready for Baking

Recipe:

Flour and chilli:
All-purpose flour – ¼ cup
Pecans – roasted and finely chopped about 2 cups
Chilli Powder – ½ tsp
Baking Powder – ¼ tsp
Salt – ¼tsp
Sift the flour in a vessel and stir in the remaining ingredients.

Sugar and Eggs:
Eggs – 2
Sugar – ½ cup
Vanilla extract – 1 tsp
Break eggs in a vessel (I have removed yellows, my preference). Stir in sugar and vanilla. Whisk for atleast 2 minutes.

Chocolate and Butter:
Bittersweet or semi sweet chocolate – 8 Oz (2 chocolate bars)
Unsalted butter – 2 tablespoons
Break chocolate bars and chop them finely to small pieces. Take them in a microwavable bowl and add butter. I microwaved the bowl for about 1 minute. After stirring once, I put it in the microwave for another minute. Chocolate melted to smooth and was warm but not hot. (I waited few more minutes for warm chocolate to cool little bit and then added the egg mixture. This is done to prevent egg curdling.)

Mixing and Baking:
Add the egg mixture to chocolate and combine. Stir in the flour and nut mixture. Mix thoroughly.
Preheat the oven to 350 F.
This recipe is actually for cookies and the cookbook author instructed to line 2 baking sheets with parchment paper and scoop the batter into small rounds and place them 1½ inches apart. And bake for about 12 to 14 minutes, until the surface of the cookies looks dry and set.

I, on the otherhand scooped the batter into tiny aluminum cake pans that I bought recently and baked them for about 20 minutes at 350 F.

End result looked like this and tasted really good.


Mini Chocolate-Chilli-Pecan Cake ~ My Entry to Barbara’s “Spice is Right – Chilli” Event

Recipe adapted from Bittersweet by Alice Medrich
Ebay Listing for mini cake pans – Here

Posted by Indira©Copyrighted in Caffeine,Chicory & Cocoa,Chocolate,Sugar (Thursday July 13, 2006 at 4:19 pm- permalink)
Comments (37)

The New Home of Mahanandi: www.themahanandi.org

Peach Pie

I am not an American still I like pies! Apple, peach pies and from my Houston days the pecan pie of Texas, are my favorites. One of the new recipes that I tried for my friends visit last weekend was baking a lattice topped peach pie. Lattice topped pies are the prettiest pies of all I think. They look so delicate and so delectable, you just want to rip off the lattice top and devour.

Though the traditional American pie is made with enough butter that a ordinary Indian would eat in a year, I designed my pie keeping health in mind – reduced the butter quantity in pie shell drastically, still it came out great. The base was like thin crust pizza pie base, and the peach fruit topping – I read that peaches are the kind of fruits that would come alive with touch of heat. I picked peach filling mainly for that reason and I agree, they tasted great after baking. And the lattice top – it was fun to weave the top.

Both Vijay and I, we are the offspring of silk and cotton weavers, so it didn’t take long for us to figure out how to weave the dough strips, and also Barbara’s post helped me a lot. Thanks Barbara. All and all, even with shortcuts, the pie came out good, I imagine just like a traditional rural pie would; firm-flaky crust that tasted little more than browned butter and flour and a peach filling that was naturally sweet and juicy. A blue ribbon winner for sure.:) If you are interested to try this recipe, please keep in mind that peach pie is little bit acquired taste, also depends entirely on the quality/ripeness of peaches.

Recipe:
(for 9-inch pie pan)

Prepare the dough:
2 cups of all-purpose flour (sifted),
Quarter cup of cold, solid butter finely chopped and
1 tablespoon of sugar and 1 teaspoon of salt –
Take them in a vessel. Mix (rub) the flour with butter pieces and adding few drops of cold water inbetween – prepare a tight dough. Cover the dough and keep it in the refrigerator for at least 30 minutes. Meanwhile prepare the fruit filling.

Fruit filling:
6 to 8 ripe peaches – peel, cut and remove the seed. Slice the fruit into thin pieces lengthwise
Quarter cup of sugar
2 tablespoons of corn starch (added to absorb the fruit juices and to prevent saggy base)
1 teaspoon of limejuice
Take sliced peaches in a vessel; add sugar, cornstarch and limejuice, toss to mix. (Because this fruit mix could ooze lot of juice with time, mixing with sugar etc., do it just after you roll out the pie shell.)

Rolling out the dough:
Remove the pie dough from the refrigerator. Divide it into two portions, ¾ and ¼ part, the big one for pie shell and the small part for lattice top. Roll the big portion of dough into a big round that would fit the pie pan. Lift and place neatly into the pie pan.
With the remaining small portion of dough – roll it into another big round. Cut the dough into thin strips lengthwise with a sharp knife. Make a lattice weave following the instructions here. (Do you remember how folks back home weave cotton rope layers for sleeping cot? Same thing here, quite easy.) I did it on the back of wax paper covered steel plate; it was easy to place the lattice top on the pie.

Assembling and baking:
Fill the pie shell with fruit slices neatly in a level, to the top. Carefully place the lattice weaved dough strips onto the fruit pie. Brush the top with milk and sprinkle some sugar on top.
Preheat the oven to 400 F. Place the pie pan on a flat big baking sheet and bake at 400F for about 20 minutes and then at 350F, for about 30 minutes, until the top turns to golden brown and fruit inside becomes soft and juicy. Do not underbake.
Remove and cool. Slice and serve.


Lattice Topped Peach Pie – Ready For Baking


Baked Pie Removed to a Plate to Cool


Peach Pie


Traditional American apple pie – Recipe in images.
How to weave lattice top for pies – Barbara’s post here.

Posted by Indira©Copyrighted in All-Purpose Flour(Maida),Fruits,Peaches,Sugar (Wednesday July 12, 2006 at 1:39 pm- permalink)
Comments (26)

The New Home of Mahanandi: www.themahanandi.org

Sad Day!

Terrorist attacks in India and loss of innocent life.

If you are looking for any information or assistance to locate your loved ones in Mumbai, the following website by bloggers of Mumbai might be helpful to you. If you are a blogger, I request you to provide a link to this website from your blog. Thanks!
Mumbai Help

Thanks Payal.

Posted by Indira©Copyrighted in Zen (Personal) (Tuesday July 11, 2006 at 12:56 pm- permalink)
Comments (28)

The New Home of Mahanandi: www.themahanandi.org

Coriander~Tomato Chutney

Coriander-Tomato Chutney and Fresh Coriander

We had my dear friends comeover for weekend visit. They brought ThumsUp, lots of laughter and fun stories to share and we on the other hand fed them until they said no more. All and all we both filled up each other to our heart’s content.

What’s good company without good food so I tried some new recipes for them. One is dear Karthi Kannan’s (writes at Kitchenmate and proud mother of cutest toddler ever) coriander chutney. She mentioned in her fabulous food blog, that this chutney is her favorite recipe and got it from her mom. What I liked about her recipe is – no prep work is needed like roasting peanuts or cracking a coconut open as with peanut and coconut chutneys. Also it uses one whole bunch of cilantro. During summer, the sky-high prices of cilantro come to earth level at Boardman. 2 bunches for 1 dollar here at local farmers market. Not bad, right? Perfect recipe to finish off lot of cilantro in one setting, I thought, so prepared the chutney for utappams and it was indeed tasted super. Sometimes cilantro can be overwhelming, but here in this chutney roasted tomato and onion addition, balanced out the intense cilantro flavor, making it pleasant chutney to have.

I followed Karthi’s recipe mostly. First chopped one red onion, 8 dried red chillies and 3 tomatoes to big pieces and roasted them in an iron skillet until they are golden brown and wilted. Meanwhile I washed and chopped a big bunch of fresh cilantro (leaves and branches included), added them to the skillet for few minutes of saute. Took them all in a blender, added a small piece of tamarind and a pinch of sugar and quarter teaspoon of salt – blended them to coarse puree. Removed the chutney to cup and added the tadka (toasted cumin, mustard seeds and urad dal in 1 tsp of oil) to the chutney.

We had the chutney with utappams. My friends who are very much interested in our food blogging wanted to play food stylists. Grated carrots and red radishes for the chutney, was their contribution, which made it look more attractive, I think. Thanks my dear friends for the stylish touch and thanks Karthi for this wonderful recipe.

Coriander-Tomato Chutney with Utappams

Coriander~Tomato Chutney Ingredients:
1 big bunch of fresh coriander
1 red onion
3 tomatoes
6-8 dried red chillies
1 inch piece of tamarind
A pinch of sugar
Salt to taste or ¼ tsp
For Popu or Tadka:
1 tsp of peanut oil
¼ tsp each – cumin, mustard seeds, urad dal and few curry leaves

Recipe adapted from:
Food blog: Kitchenmate

Posted by Indira©Copyrighted in Kottimera(Cilantro),Tomato (Monday July 10, 2006 at 2:01 pm- permalink)
Comments (13)

The New Home of Mahanandi: www.themahanandi.org

Coriander Seeds (Dhania, Kottimera)


Coriander Seeds – Young


Coriander Seeds – In Different Stages of Drying


Coriander (Dhania, Kottimera) – Fresh leaves, Seeds (young and drying), Coriander Seeds
Photography By Vijay Singari ~ For This Week’s Indian Kitchen

Posted by Indira©Copyrighted in Indian Ingredients,Indian Kitchen,Kottimera(Cilantro) (Sunday July 9, 2006 at 7:06 pm- permalink)
Comments (26)

The New Home of Mahanandi: www.themahanandi.org

Weekend Kittaya & Some Music


Click on the button in the center to watch “Vande Mataram” song. Enjoy!

Photo by Vijay Singari
Hello, let me in people!

There are some bushes and grass behind our home. Kittaya goes there everyday for sometime, to meet his chipmunk and squirrel friends. After his play time, he comes back running to the porch glass door and acts so impatient to let him back in to the house. This is one of his impatient standing poses to get our attention and to have us open the glass door for him.

Posted by Indira©Copyrighted in Kittaya (Saturday July 8, 2006 at 2:55 pm- permalink)
Comments (20)

The New Home of Mahanandi: www.themahanandi.org

Nimona

Fresh Green Peas of Summer

Sometime back while surfing the web, I came across a recipe with fresh green peas and I couldn’t get it out of my mind. I had book-marked the site and also printed a copy, just incase the website disappeard. What attracted me to this recipe were the introductory words – “fresh green peas, strictly home-fare, and Awadh”. Also, more than anything, I loved the recipe name-“Nimona”. How pretty!

The recipe is from this website, dedicated to Awadh (The cuisine of Lucknow, India). I am not sure who wrote this particular recipe, but this unknown author’s description of nimona captivated me. Here is the author’s introduction to Nimona.

“The cuisine of any region is incomplete unless the contribution of the housewife or home-cooking is mentioned. So it is with Awadh. Besides the contribution of bawarchis and halwais there are recipes handed down through generations by grannies which lend that special something to the food. Regional cuisine lives in the home kitchens, and Nimona is one such example of strictly home-fare. Cooked in winters with fresh green peas, spring onions and mungories or wadis which are spiced and dehydrated lentil dumplings, it is a delectable dish. Some people like to substitute green peas with green chick-peas which are available in spring and are equally tasty.”

June and July are fresh pea season here in Ohio and I bought few pounds of fresh peas keeping this recipe in mind. I tried to get ‘mungories‘ or wadis from local Indian store, but they never even heard of them. So I replaced them with new crop potatoes. The recipe is multistep, little bit time consuming and the end result is – Fresh green peas and potato cubes in pureed green pea-onion-tomato sauce. Fantastic!

Here is my version of Nimona:

Step 1 – Prep Work:
(Things needed: skillet, oil/ghee and a blender/mortar)

Peas:
2 cups of freshly shelled peas. Separate one cup of peas and keep them aside. Puree the second cup of peas into coarse mixture by adding a pinch of asafetida. Saute this coarse mixture of peas for few minutes, (to remove the raw smell).

Onions, ginger, garlic and cilantro:
Finely chop 2 onions length-wise, saute them in oil until golden and brown. Add 3 garlic cloves, one inch of ginger and few sprigs of cilantro and together make a paste.

Tomatoes:
Chop 4 tomatoes into chunks; saute them on high heat for few minutes. Make a smooth paste.

Potatoes:
3 potatoes – peel, cube and saute them for few minutes and keep aside.

Masala Powder:
2 cloves, 2 cardamom pods and one small cinnamon stick – powdered together

Step 2: Cooking them all together

Heat a teaspoon of oil in a big pan. Add the following items listed below in that order and Saute:
2 bay leaves
Onion-ginger-garlic paste
Tomato paste
Coarsely ground green peas
One cup of fresh peas that were kept aside
Potato cubes
Cloves- cinnamon- cardamom powder
½ tsp each, or to taste – turmeric, salt and red chilli powder
Add about 1 cup of water. Mix and close the lid. Simmer for about 15 minutes on medium heat, until the curry thickens. Switch off the heat and let the curry sit for half an hour to absorb the flavors. Serve warm with chapati or rice.

Nimona with Chapatis

More about Awadh (Cuisine of Lucknow): Here
Recipes from Awadh Cuisine: Here
Photo of ‘mungories’ or ‘wadi’ – from Green Jackfruit

Posted by Indira©Copyrighted in Onions,Peas (Bataani) (Wednesday July 5, 2006 at 2:55 pm- permalink)
Comments (44)

The New Home of Mahanandi: www.themahanandi.org

Few Baking Pans and A Mamiya

July 4th Weekend Shopping:

We have been looking for these things for a while and this weekend got lucky. Vijay got his camera from an online store and I got my cute baking pans at local flea market, both at great prices. Here they are – baking pans and a Mamiya.

Posted by Indira©Copyrighted in Zen (Personal) (Monday July 3, 2006 at 4:40 pm- permalink)
Comments (16)

The New Home of Mahanandi: www.themahanandi.org

Bhakthi ~ Bhukthi (SV Temple and Temple Food)


Sri Venkateswara Temple, Pittsburgh and Swarna Ratham

Temple food is the best way to enjoy traditional Indian food and no restaurant can match the taste and the quality. In Pittsburgh, the SV Temple canteen is open during temple hours and has a small kitchen and big dining hall to the side. The food is freshly prepared daily by the temple chef. The standard items you would find are – pulihora, yogurt rice, sambar rice, upma, pongal, mixture: sweet&hot varieties and also pickles. There is also a machine, where you can make your own tea and coffee.

The canteen has a separate entrance and open to all. Everything is priced very reasonable ($1.50, a box). My favorites are pongal, upma and mixture and I always buy them whenever I visit temple. Because of recent increase in number of people visiting this temple, temple management is fund-raising to build a more modern and big kitchen and also planning to include more items to serve.

Summer is the travel season here in US and temples are the most common tourist destinations to lot of folks like us. Our visits to temple are not only for divine darshan and also for homely dining. So thought I would share about SV Temple food. Bhakthi and bukthi fulfilled at the same time.


Temple Canteen


Yogurt Rice, Pulihora, Upma, Mixture, Pickle, Pongal and Sambar Rice

Bhakthi & Bhukthi – For Summer Travel:
Do you have a temple in your town/city? Join and share “Bhakthi and Bukthi” (divine and dine), experience, if you are interested, at your blogs. Thanks!
Temple Food: Ganesha Temple, Flushing, NY

Posted by Indira©Copyrighted in Bhakthi~Bhukthi,Zen (Personal) (Sunday July 2, 2006 at 4:24 pm- permalink)
Comments (33)

The New Home of Mahanandi: www.themahanandi.org

Sunnundalu(Urad Dal Laddu)~Indian Sweets 101

Sunniundalu

When Sailaja of Sailu’s Food selected dals to feature this month’s Jihva For Ingredients, I was ecstatic. The one and only ingredient that truly represents India is the variety of dals, in my opinion. There are rice states and there are wheat states, but common to all 28 states in India are dals. Each state has dazzling array of dal dishes both sweet and savory. Menus always include dal dishes for everyday, for celebrations and as well as for festivals. Even in a foreign land, our meals always would include dals in one way or other. It’s not stretching the truth, when I say dal dishes are the true heart and soul food of India.

By the way, if you haven’t been to Sailaja’s blog already, please go visit now. She blogs from calm, coastal city of Vishakapatnam by the Bay of Bengal, from my home state Andhra Pradesh. Her recipes are visual delight and pure gold. Whenever I visit her blog, I feel happy to see her creations and also feel nostalgic about what I am missing being away from home.

As an entry to JFI~Dals, I have prepared Sunniundalu, a traditional Andhra sweet. Roasted urad dal is ground with sugar into super fine sand like powder, mixed with pure ghee, and the mixture is shaped into round balls. This sweet is much beloved because of its unique taste and nutritional value. These are often prepared for special occasions like baby showers (srimantham) etc., I am so happy that I am able to recreate this favorite sweet of mine for JFI, an event created to celebrate the natural ingredients.

Recipe:
(for 15 medium-sized laddus)

3 cups of whole urad dal – roasted to golden color slowly and on low heat, continuously stirring in a big iron skillet
1½ cups of sugar
1 cup of melted ghee at room temperature
For grinding – esirayyi (grain mill) or Food processor
How this sweet tastes, 50 percent, depends on grinding method. Old world stone grain-grinder is the traditional method of choice. High powered, sharp bladed, food processor comes close. Whatever machine/method you use, the end product must be like fine sand.

Whole urad dal - Roasted to light gold color
Whole urad dal – Roasted to light gold color

Grinding urad dal and sugar to superfine sand like powder using a grain mill

Adding melted ghee to the urad dal-sugar powder

Urad dal-sugar powder and ghee mixture being made into laddus
Urad dal-sugar powder and ghee mixture being made into laddus.

Sunnundalu
Indian Sweets 101 ~ Sunnundalu for JFI-Dals

Many thanks to Sailaja for hosting this month’s Jihva For Ingredients. I am sure the roundup of this event is going to be spectacular. The entries that I have seen so far – Munthirikkotthu (Sweet Moong Dal Balls), Dal Podi Sushi Roll (Indianized Sushi roll), Mid-Eastern Mujadarah (rice-lentil dish) and Azuki paste ravioli in caramel sauce make this obvious. Have a fun and happy dal day on this July 4th weekend, everyone!

Notes:
Grain mill brand Name: PORKERT’s Kitchen Grinding Mill, Type 150
Purchased at a clearance sale from Tuesday Morning.
Sailu’s Sunnundalu – Link

Posted by Indira©Copyrighted in Amma & Authentic Andhra,Ghee,Indian Sweets 101,Jihva For Ingredients,Mitai,Sugar,Urad Dal (Washed) (Saturday July 1, 2006 at 12:02 am- permalink)
Comments (53)

The New Home of Mahanandi: www.themahanandi.org

Pongal (Pongali)

Rice, Roasted Yellow Moong Dal, Roasted Cashews, Cumin and Peppercorn
Sona Masuri Rice, Roasted Yellow Moong Dal, Roasted Cashews, Cumin and Peppercorn

Some foods are simply divine, pongal belongs to that category. There isn’t anything quite like pongal! Creamy and luxurious rice dish that you get by cooking rice with toasted moong dal in little bit of ghee. Lots of water, sometimes milk is added and seasoned with cumin, black peppercorn and salt. The whole mix is cooked in a big pot until the rice and dal are soft. Roasted cashews are sprinkled at the end. This simple dish is so fragrant, the whole house will be filled with wonderful aroma. And the taste, I won’t gush but I will say this; it’s often prepared and offered to Gods in temples. Can we, mere mortals resist the pongal temptation? I don’t think so!

Pittsburgh’s Sri Venkateswara Temple serves the best pongal I have ever tasted out side India. At the temple’s kitchen, the chef prepares pongal in a big caldron following the traditional method. The secret is not only quality ingredients but also the method of cooking, no pressure-cookers there. I think that’s why temple pongal tastes so good. Since last year I have been preparing pongal in a big pot and stopped cooking it in pressure cooker. The difference in taste is tremendous and surprisingly the preparation is also easy.

Here is my recipe:
(for two)

1½ cup rice (preferably Sona Masuri)
1 cup yellow moong dal
2 tablespoon of ghee
1 tsp of cumin
½ tsp of black peppercorn
1 tsp of salt
½ cup of cashews
7 cups of water and
I also add 2 cups of milk (my preference and optional)
A big sturdy pot (Big sauce pan)


Pongal – Starting Point


Pongal – After 15 minutes of cooking


Pongal – at 20 minutes of cooking

1. Heat a teaspoon of ghee in an iron skillet on medium heat. Add and roast moong dal to golden color, constantly mixing. Take care not to black. Remove them to a plate. In the same skillet heat another teaspoon of ghee. Add and roast cashews to golden.

2. In a big sturdy pot, heat a tablespoon of ghee. Add and toast cumin and black peppercorn for few minutes. Stir in the toasted moong dal and rice. Mix them with ghee for few minutes. Pour water and milk and stir in salt. Cover the pot with lid and cook on high heat. Within 10 to 15 minutes, you will see the water gurgling and trying to lift the pot lid. At this stage, remove the lid. Mix the cooking mixture once and partially cover the pot with lid, leaving little bit of gap for water vapor to escape.

3. Within 5 minutes, you will see whole thing coming together. Rice-dal mixture will be doubled in volume. Each grain will be plumped but not broken open. Turn off the heat, and stir in roasted cashews. Close the lid fully and let the rice sit for about 10 minutes. At this stage, you can stir in more ghee if you want to and also add salt to suit your taste.

Rice-dal mixture absorbs the remaining water-milk liquid and becomes little bit tight. Pongal’s consistency can vary from something resembling a thick soup to a creamy porridge, but never like a tight hard ball. Resist the temptation to overcook and turn off heat early.

Usually we will have this pongal with chutney, potato kurma or with a cup of yogurt depending on the time of the day.


Pongal with Coconut Chutney ~ Traditional Indian breakfast
My first entry to JFI – Dal hosted by Sailu of Sailu’s Food and also to Paz’s For the Love of Rice


Along with cumin and black peppercorn, curry leaves are also added to the ghee. I didn’t have any curry leaves when I prepared this recipe so the omission.

Posted by Indira©Copyrighted in Amma & Authentic Andhra,Biyyamu (Rice),Cashews,Moong Dal (Washed),Sona Masuri Rice (Thursday June 29, 2006 at 1:46 pm- permalink)
Comments (41)

The New Home of Mahanandi: www.themahanandi.org

« Next PagePrevious Page »