
To Mothers Who Visit My Blog and To My Dear Sisters ~ Happy Mother’s Day!
The Political Crucible of Motherhood
The Political Crucible of Motherhood
(Revisiting the Mahanandi’s Recipes on Fridays):

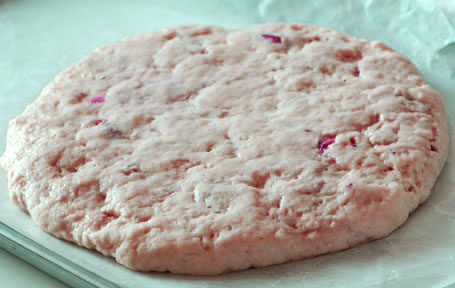
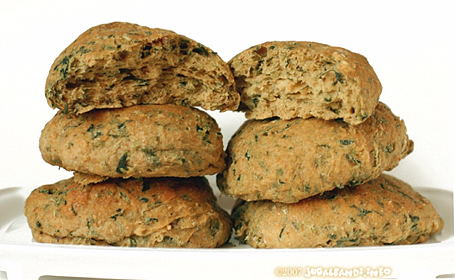
Strawberry mango scones are crisp outside. Crumbly and soft inside. What makes them stand out is the flavor combination of sweet and tart in the same bite. This dessert is delicious, attractive and easy to prepare. Don’t fear the fancy title, scones are nothing but freeform style baked cakes.
Recipe:
All purpose flour : 2 cups
Sugar : 4 tablespoons
Salt : ½ teaspoon
Baking powder : 2 teaspoons
Baking soda : ¼ teaspoon
Cold and solid butter : 3 tablespoons, finely chopped
Wet Ingredients
Firm and fresh Strawberries : 1 cup, chopped
Dried mango : ¼ cup finely sliced
Yogurt : ½ to 1 cup of fresh yogurt
Lemon glaze
Lime juice – ¼ cup and sugar- 2 tablespoons. Bring them to a boil in a small saucepan and let the juice thicken a bit – lemon glaze is ready. (Prepare this while baking the scones.)
In a mixing bowl, sieve together the flour, baking powder and soda. Stir in sugar and salt. Add and mix the finely chopped butter until mixture resembles breadcrumbs.
To this flour mixture, add strawberries and dried mango pieces. Add the yogurt gradually and mix to form tight, sticky dough. Gently knead the dough for 2 minutes, take care not to break and bleed the strawberries.
Turn the dough out onto a floured or parchment covered baking sheet and press out into a big round with a thickness of half to one inch. (This is the messy and sticky part. Apply oil or ghee to the rolling pin or use flour to prevent dough from sticking. )
Preheat the oven to 425 F. When the oven is ready, place the baking sheet and bake. The dough will puff up and increase in volume. Bake until golden brown, for about 15 to 20 minutes. Remove and drizzle the lemon glaze on top. Let it cool a bit. Slice to 6 to 8 triangle pieces. Serve warm and enjoy.


Notes:
Recipe first blogged on Mahanandi on June 1st 2006.
Recipe Adapted from Foodblog – “Delicious!Delicious!”
Dried mango Source: Indian grocery shops.
Flour Choice: King Arthur’s All Purpose Flour
Recipes with chillies are many. Pickled, stuffed, stewed, sun-dried, consumed raw or added in desserts like cakes or in ice creams – different varieties for different flavors and strengths. All of them are highly cherished by chilli enthusiasts.
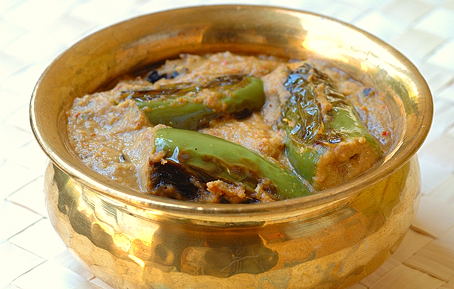
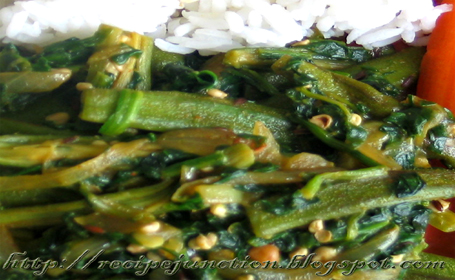
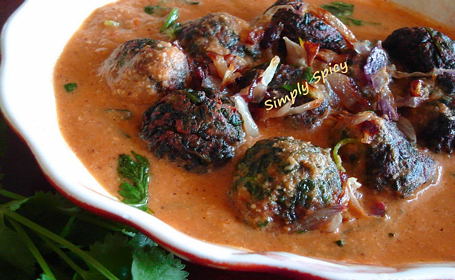
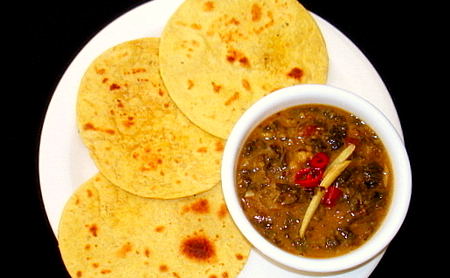
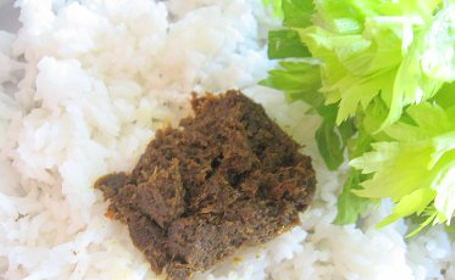
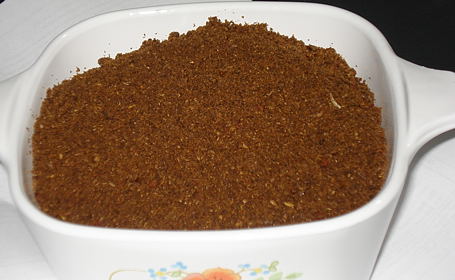
One chilli recipe that stands out from the bunch is the famous Mirchi Ka Salan recipe from Hyderabad (capital city of Andhra). Whole green chillies pan-fried and simmered in sesame-peanut spicy sauce. The dish is easy to prepare and has a refreshingly pleasing taste. But if you don’t know what you are doing, the chances that it could blow your head off are high. Whether one call it pushing the limits or perspiration-inducing love affair, Mirchi ka Salan is the culinary expression of an Andhra vasi‘s adventurous spirit and fun-seeking nature. Nutritious, dangerous and deeply satisfying – that is what Mirchi ka Salan is in a nutshell.
Recipe:
Mirchi (Green Chillies):
12 medium-sized jalapeno peppers
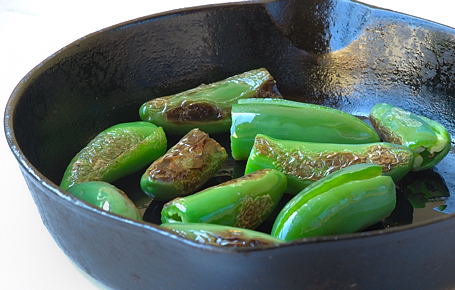
To lessen the heat: Remove the stem and slice each jalapeno lengthwise on one side, use caution not to cut into half and to keep the tail end intact. Pluck the white pitch and seeds like shown in this photo. (Wear gloves for sensitive skin.)
Salan:
½ cup peanuts – roasted and skins removed
¼ cup sesame seeds – toasted
½ cup sauteed pieces of shallots or red onion
4 dried red chillies – toasted
1 teaspoon each – coriander seeds, cumin, cinnamon and cloves, toasted lightly
Take them all in a blender and add about a teaspoon each – ginger, garlic, salt and about 4 tablespoons of tamarind juice. Pour in about a cup of water and grind to smooth paste. I usually add about 2 tablespoon of jaggery/sugar to bring a mild-sweet flavor to the dish.
Making of Mirchi ka Salan:
In a wide skillet, heat about a tablespoon of peanut oil. Bring the oil to smoking point. Add and sear mirchi (jalapenos) to sand color. Take care not to black/burn.
Add the prepared Salan paste to the seared chillies. Add about a cup of water and mix. Have a taste, adjust salt, sour(tamarind), sweet(jaggery) levels to your liking. Cover the pot and simmer for about 15 to 20 minutes on medium-low heat, stirring in-between. The color of the sesame-peanut sauce darkens and sauce thickens. Mirchi ka Salan will be ready.
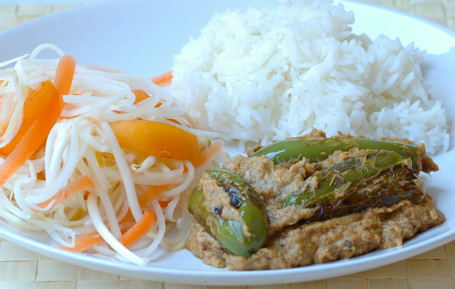
Serve warm with rice/chapati/parathas. A cup of soothing saaru(chaaru/rasam), salad or yogurt on the side helps a lot. Best place to have this meal is balcony/patio’s shady spot or with windows open/fan whirring at a low speed. Cool breeze enhances the chilli experience.
More salaam to Salan:
Mirchi ka Salan – from Past, Present and Me
Mirchi ka Salan – from Elaichi et Cetera…
Mirchi ka Salan – from Hyderabadi Kitchen
Mirchi ka Salan – from Vindu
Regional Cuisines of India (RCI), a fresh food blogging event is started by Lakshmik of Veggie Cuisine last month. I loved this event idea very much. Great opportunity for those of us who would like to move away from restaurant created regional cuisine constraints. For example, stereotypes always associate dosa, sambar, green beans-coconut curry/poriyal and laddus with South India. The four southern sister states of India, share these. They are the Kohinoors, I agree but explore further, the chance to write/learn about the khajana of gems that sustain individual home plates are plenty. Certain recipes are much hard to find than others and that location is different for every enthusiast. You never quite know where you will find that great regional gem recipe that speaks to you. That’s why I am attracted to this concept very much. For this month, RCI is celebrating Andhra Cuisine and is hosted by lovely Latha of Masala Magic.
Although I am from Andhra Pradesh, India, I don’t dare to speak for all Andhra vasi. What can I do is to share my family recipes from Nandyala. My mother and father, my in-laws, they are all from this town and surrounding villages. The relations we have in this town go back at least 4 generations. The roots are deep. Nandyala may be a tiny town in Andhra but it sparkles like an electric dream at my blog, Mahanandi. Vijay and I are the first ones in the family who moved so far away from Nandyala. I think, that explains why the pull is so strong for us.
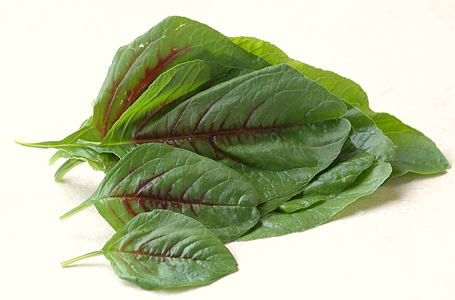
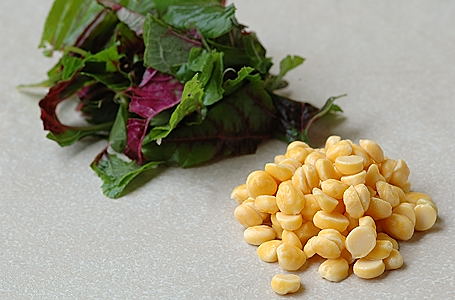
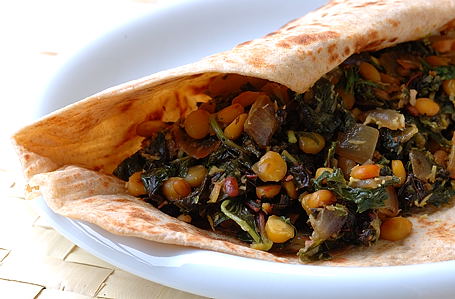
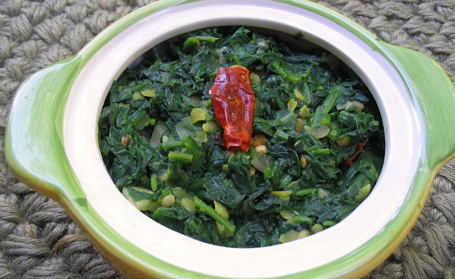
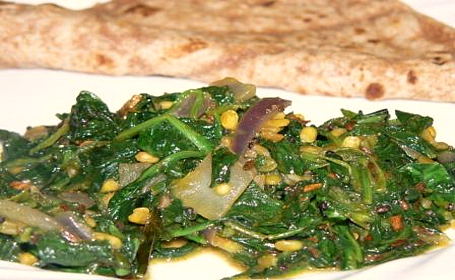
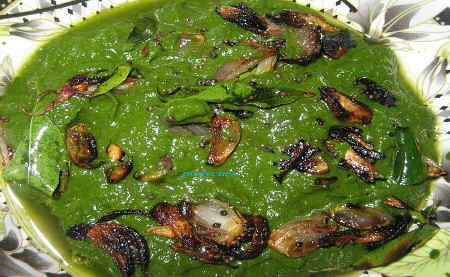
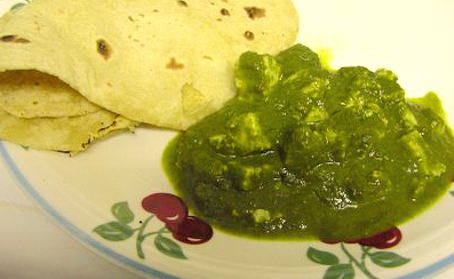
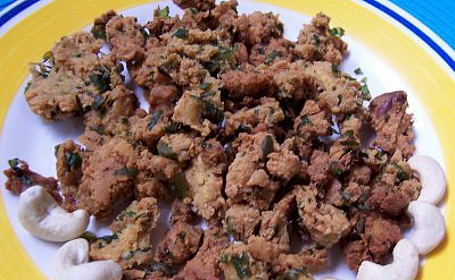
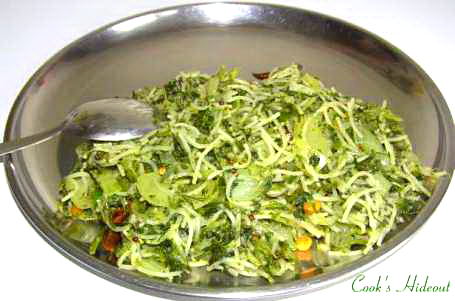
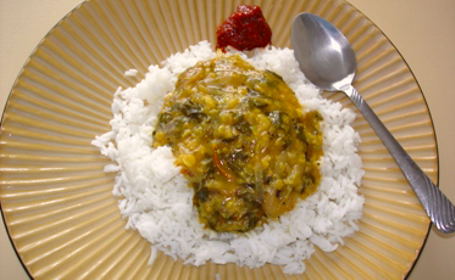
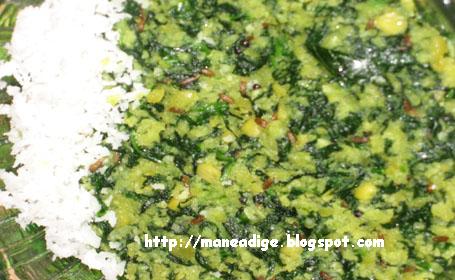
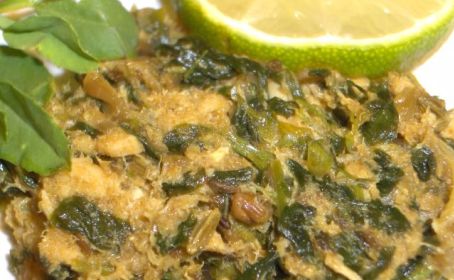
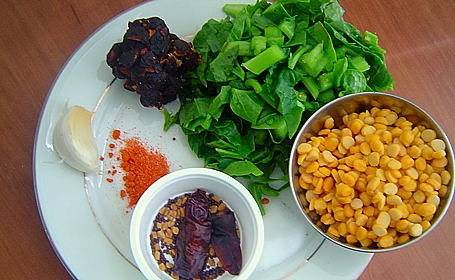
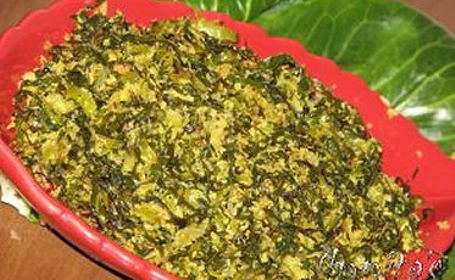
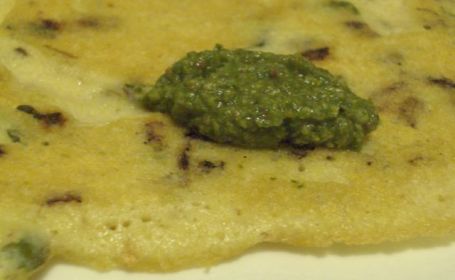
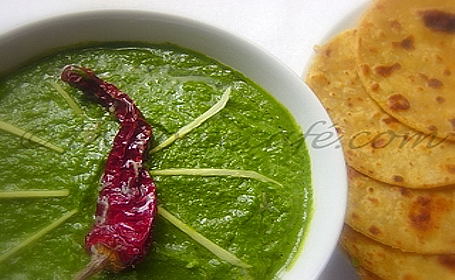
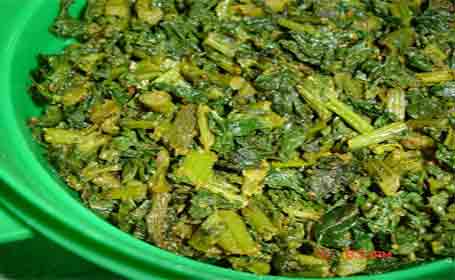
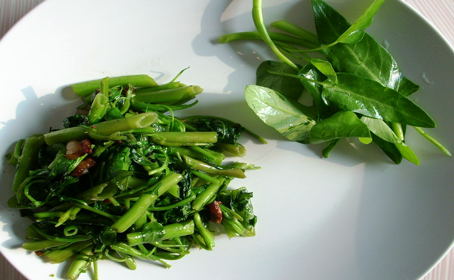
RCI provides me another chance to share Nandyala bounty. One special recipe is Chana dal-Amaranth Curry. The ingredients are all from around here (Seattle), but the method is from Nandyala. Fresh amaranth leaves and chana dal saut�ed with onions, grated coconut and green chillies make a deeply satisfying curry that tastes great with sorghum roti or with chapatis. Very tasty, very much Nandyala! Another must try for amaranth fans.
Recipe:
I bunch fresh amaranth – washed and finely chopped, about 2 quarts
Half cup chana dal – soaked in water for about 2 hours
1 jumbo red onion – finely chopped
2 tablespoons of coconut and 5 green chillies – grind to smooth
Popu or tadka ingredients –
1 tablespoon peanut oil
¼ teaspoon minced garlic, cumin and mustard seeds
Heat oil in a wide skillet. Add and toast garlic, cumin and mustard seeds.
Add and saute onion and chana dal on medium heat for about 5 minutes. Onions become soft and chana dal turns to crisp.
At this stage, stir in the chopped amaranth leaves, along with coconut-green chilli paste, turmeric. Mix once and cook on medium-high, covered for couple of minutes until the leaves wilt. Increase the heat. Remove the lid and cook another couple of minutes until the water evaporates from the skillet. Sprinkle salt in the end, mix and serve hot.
The soft nutty chana dal plus potent amaranth makes a great combination and tastes quite good when eaten with sorghum roti or with chapatis.
Recipe Source: Amma
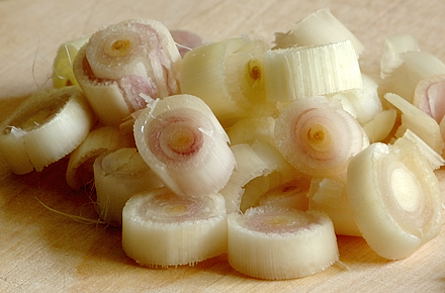
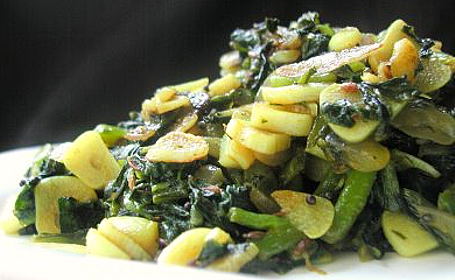
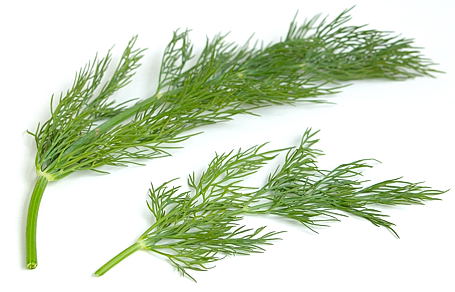
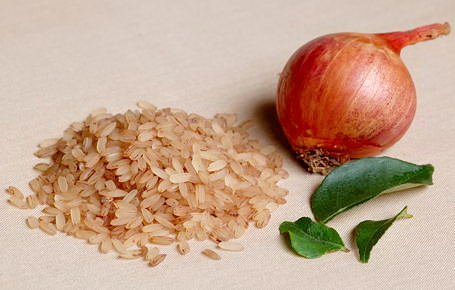
I have been cooking with lemon grass a lot lately. Thanks to the strong presence of fresh seasonal produce from Asia, I can buy almost all kinds of vibrant looking vegetables readily here in Seattle. That includes fresh curry leaves and also herbs like lemon grass etc.
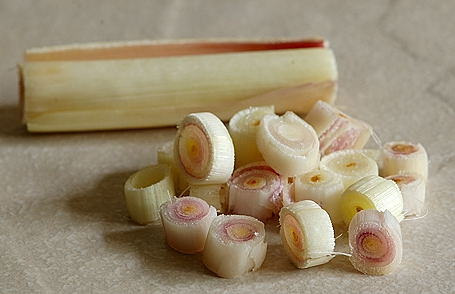
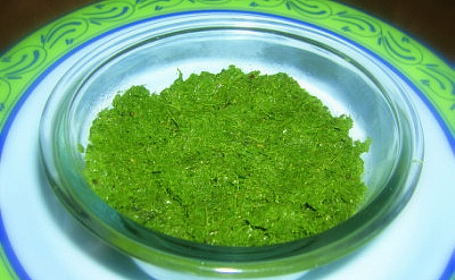
Prepping the lemon grass for cooking is easy. For the supermarket variety, cut and remove upper two thirds of dried out green grass/stalk. Lower part, the white bulbous portion is what we want. Make a shallow cut lengthwise in the middle of bulbous portion and remove at least two fibrous, woodsy looking outer layers. That would reveal a pale pinkish-white, citrus smelling lemon grass root. Finely slice the root into thin rings or pound in a mortar to a coarse paste. The soothing, refreshing lemony aroma is what makes this herb so special to me and I have been adding it to tea, rasam, and sambar and also to flavor the rice, mainly in stir-fried rice recipes.
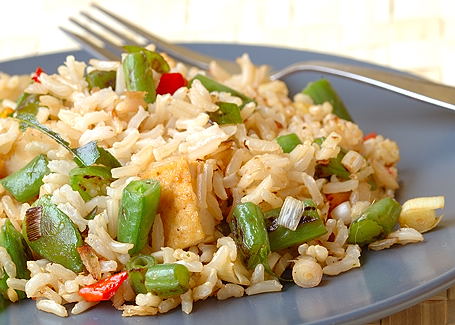
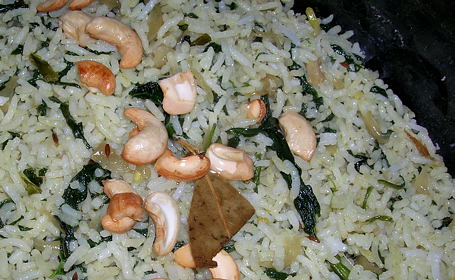
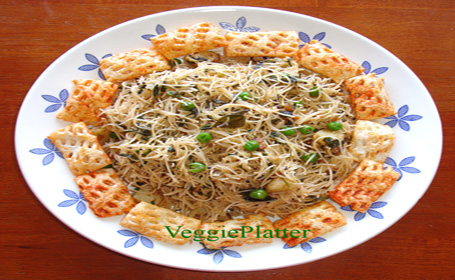
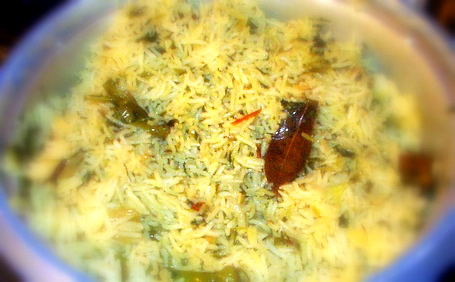
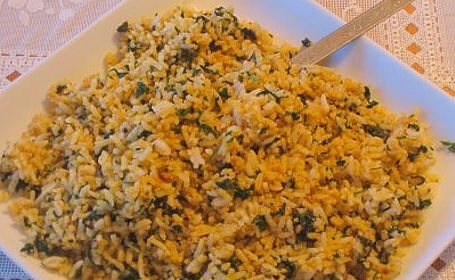
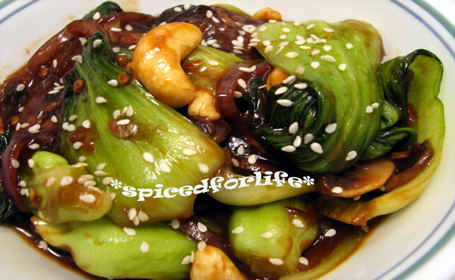
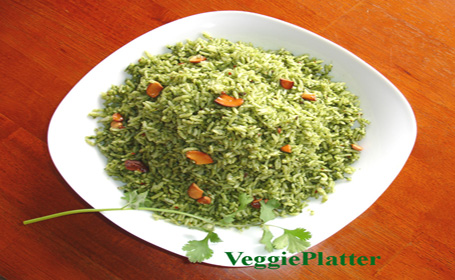
Stir-fried brown basmati rice from India with crisp tasting sugar snap peas and green beans, liberally flavored with lemon grass and curry leaves – this recipe has become the most frequently prepared rice in our home for the past few weeks. It is easy to put together, makes use of spring vegetables that snap, and filled with lots of flavor. Scrambled paneer, tofu or eggs adds the protein component and makes this a complete meal for us.
Recipe:
Cook 2 cups of brown basmati in 4 cups of water to tender. Cool to room temperature. ( Brown basmati offers a certain chewiness and richness of flavor. Cold rice makes better fried rice.)
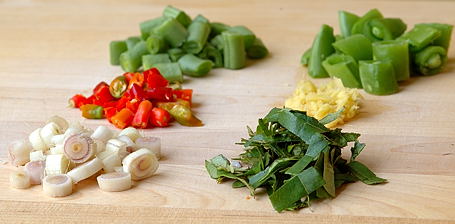
Meanwhile prep the ingredients.
Cut fresh green beans and tender sugar snap peapods – quarter cup each
Finely slice Lemon grass and curry leaves – about 3 tablespoons each
Finely chop fresh red chillies- about a tablespoon
Grate fresh ginger -1 tablespoon
Grate fresh coconut – 4 tablespoons
Heat a tablespoon of oil in a wide skillet on high heat. One by one add the ingredients listed above in the order mentioned and stir-fry few minutes each. Add the cooked rice. Sprinkle a pinch of sugar and a teaspoon of salt. If you want you can also add little bit of soy sauce and chilli sauce at this stage along with scrambled paneer/tofu/egg. Stir well for a minute or two. Finish by adding some lemon juice and serve. Fragrant fried rice would be ready.
Recipe Notes:
Brown basmati avialable in most Indian grocery shops here in US.
I’ve purposely avoided adding onions/shallots, not to clash with lemon grass and curry leaves. This is a very adaptable recipe, experiment with different fresh vegetables like bell peppers, zucchini etc.
Cooling, Fragrant Vetiver Root Water for Summer Time
~ from Revathi’s En Ulagam

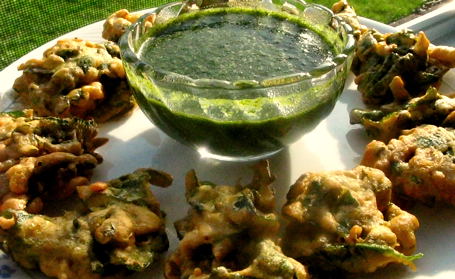
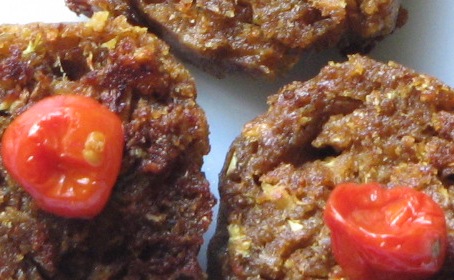
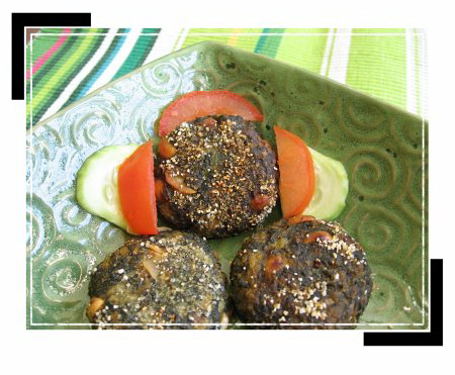
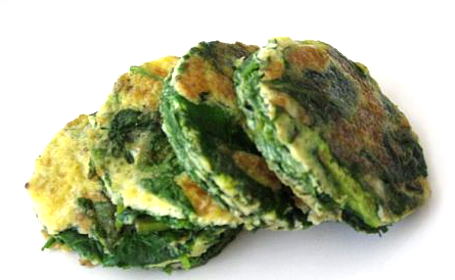
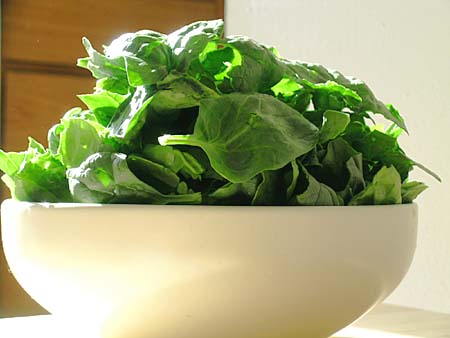
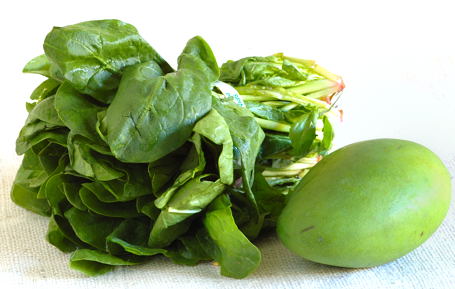
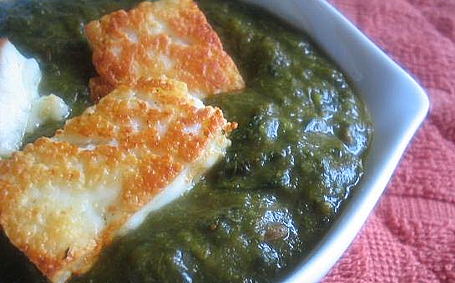
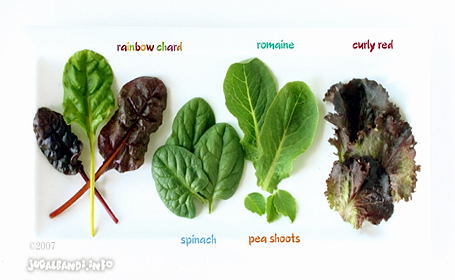
Green leafy vegetables demand respect! Delicate leaves of ethereal beauty, they are a test of the cook’s patience and prudence. From plucking the leaves to preparing and presenting them in an appetizing manner, they present quite a challenge. As with many matters in life, deal with a light hand and greens will reward you by being tasty and nutritious. Use a heavy hand, they will wilt and weep into nothingness. The spirit or saaram of the greens disappears just like in any abused case. No wonder then, even the experienced cooks use caution and a gentle touch, when it comes to handling greens.
By combining different types of greens, and by accentuating each preparation with the appropriate seasonings and garnishes, it is easy to create a different dish with green leafy vegetables everyday of the year. Fresh leaves, tender stalks, sprouts, sprigs and herbs, each with its own varied texture and complex flavors present an opportunity for the sensitive cook to ceaselessly creative, and also to reflect on the nourishing nature of mother earth.
That is what we, the food bloggers did for “Going Green -JFI:WBB Event”.
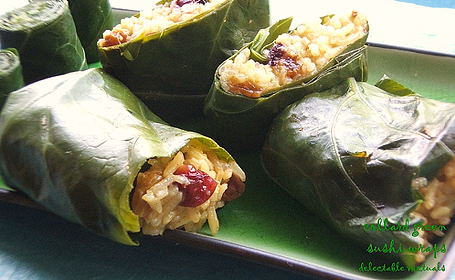
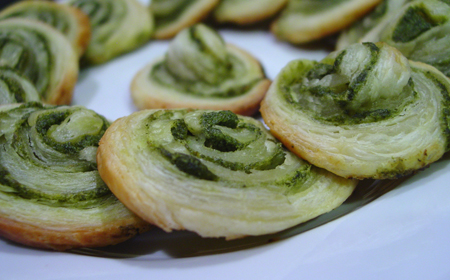
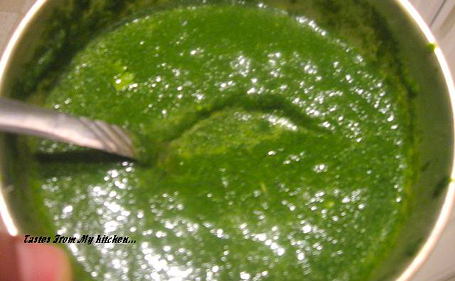
Raw, baked, boiled, deep fried, stir-fried, steamed, sauteed, sauced and saucy – some well-treated and some veg-vandalized:), all done of course with well-intentioned love and affection. Here they are – green leafy vegetables in their glorious avatars presented in all colors of rainbow.


I thank Nandita of Saffron Trail for giving me the opportunity to host and combine the WBB Event with JFI on this special anniversary occasion. Thanks to everyone for participating in this event with great interest and enthusiasm. Meet you all again for June Jackfruit Jihva at Bee and Jai’s Jugalbandi.
Found a green gem that you like? Please click on the photo or title to visit and share your joy with the participant food blogger. I am sure they would appreciate hearing from you. Thanks!
May 1st, 2007 marks the completion of one year of Jihvā for Ingredients (JFI) , the food blogging event that showcases a food ingredient each month. This event was born out of my desire to celebrate natural ingredients and what they can do for our Jihvā.
From a nervous, tentative beginning, JFI evolved into a confident, inspiring event that captured the hearts and minds of many food lovers. Some of them went from being onlookers and supporters to active participants. Visitors to the event roundups started their own food blogs because they wanted to participate in Jihvā. Such is the attraction of Jihvā. Each month a natural, wholesome ingredient was selected and featured, and over a span of 12 months, a total of about 800 entries and recipes flew in from across the world.
Before beginning another Jihvā year on May 1st, I wanted to pay tribute to the gracious hosts of Jihvā and their ingredients. When I contacted them, they generously opened their hearts and shared their thoughts. From ingredient selection, invitation, fellow bloggers’ response to the time and effort expended in the process, here is the Jihvā experience.
Sailaja of Sailu’s Food, the host of JFI: Dals :
“Jihva to me denotes – food, fun and a culinary learning experience. Each round up is like a well laid out feast with gorgeous pictures, that touch upon food and diverse cultures of our country and the lesser known recipes are highlighted, adding that extra zing to each entry. Living in a country with such diverse cultures, we are hardly aware of the different regional cuisines our country offers. Throughout the length and breadth of the country, rice and lentils are our staple. I chose our beloved nutritious dal as an ingredient to showcase to the world the range of dal dishes our regional cuisines have to offer and also to learn more about the lesser known dal recipes. There are gems out there. And I love dal!
It took me about 3-4 days or 22-24 hours to actually put it all together, right from receiving the entries, compile a list, read each post and get it all together. It was worth all the effort because it our cuisine we are showcasing to the world, we want to present it well so that they understand the rich and diverse culinary heritage of our country and the importance we Indians give to our daily food.
Last but not the least, the utter passion of each blogger and how they all look forward to the final round-up further motivated me and not to mention their genuine warmth, overwhelming encouraging and appreciative response. I always look forward to the next ingredient with each host trying their best to enhance the flavor of Jihva manifold with sincerity and there is a high expectation and anticipation each month as Jihva unfolds with a new ingredient.”
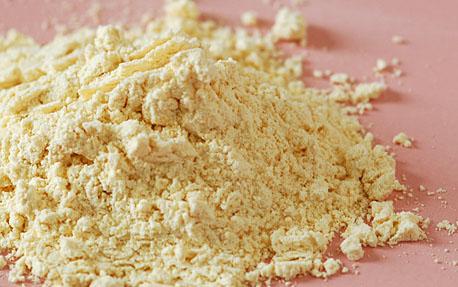
Santhi of Me and My Kitchen, the Host of JFI-Flours:
“The variety of flours used in Indian cooking are so very many and such a huge variety of culinary possibilities with it. And I was not at all disappointed with the out come. Some fantastic and innovative recipes were send in. I had in my mind that I will have two round ups one for sweets and one for savory. I created two folders and sorted the entries as soon as I receive them so that I could keep track of all the entries. I will be honest. It is not very easy to do a round up. My admiration for hosts who do it week after week and month after month has increased tremendously after doing it. But Let me tell you that with all the visual delights every single minute has been most enjoyable. It was just so incredible to see so many fellow bloggers being passionate about food. And the enthusiasm you all have shown has been fantastic. And that is what is bringing me back into blogging world. One incident I have to tell you. When I did not receive an entry from Vaishali of Happy Burp, I was disappointed and so demanded an entry from her. And she responded immediately with an entry! That’s the kind of bond that I have shared with some of you out there. It has been a great pleasure to host this event. Thank to everyone involved with JFI in anyway. This success is a result of everyone out here in food blogosphere.”
Vee of Past Present and Me, the Host of JFI – Special Diwali Edition:
“I loved hosting the Diwali Special. It made my Diwali even more exciting than it already was. It was fun going to all blogs and seeing what they were cooking up and their memories and anecdotes and nostalgia about past Diwali’s. It is what a festival is about, isn’t it? Traditions and memories we grow up with. It was also so much like a virtual diwali meet and greet and exchanging new year wishes. I really got attached to that feeling that it generated. Which is why I opted to host it every year. Thanks for the oppurtunity. Until next time, take care.”
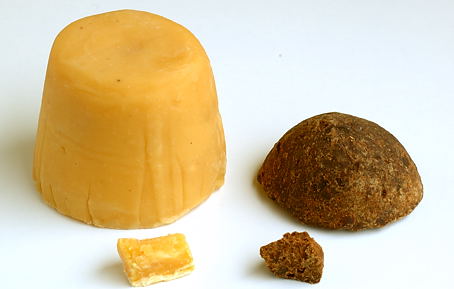
Kay of Towards a Better Tomorrow, the Host of JFI:Jaggery:
“When I first read about JFI – The idea of Jihva and celebration of those ingredients and their Indian flavors sounded wonderful. Little did I know it will do so much more to me.
As I mentioned in my blog, December is my favorite month for many reasons and I thought I’ll be ready to blog again, by December, after some post-partum recovery. I wanted to choose something very very Indian and very very authentic. Jaggery and Coconut tied till the final round and the queen of all sweeteners – Jaggery won! I also wanted to make it more special and requested participants to try out something new – either a dish they had eaten/read or even concoct some new dishes. This was just that – a request! A purely optional one. But wow! When I saw the entries pouring in and saw those new dishes, I felt so overwhelmed. People did try some new stuff and Some had ‘created’ new dishes! I felt so overwhelmed. Thank you guys, for paying heed to my whimsical request and creating some lovely stuff.
Kiran, a lovely nonblogger, sent in her post by mail and what did I find? Methi kheer! Something for a new mom, to help with lactation! How sweet of her to do that? And Lakshmi Ammal had written about ‘sweet fenugreek pongal’ for nursing moms. I was touched by these gestures. As fate would have it, My mom couldn’t come to Canada to be with me during the childbirth and recovery. I was missing her ever since I got pregnant and even more, after childbirth, this added to the stress and postpartum blues. Let’s say, I was longing for some motherly comfort… And these people whom I had never met, never exchanged emails with, cared and made something for me. Bless their heart! It was a very emotional moment for me. Thanks Kiran and Lakshmiammal. Puja of Creative Pooja had to type out her post, in one hand, on time, because the other hand was beautifully decorated with Mehendi.:) How sweet of her and how punctual of her! And now, I’ve learnt so much more about jaggery and a few other types of jaggeries and I’ve got tons of new dishes to try out – All with my favorite ingredient on earth. Ain’t that sweet? (Pun intended!):)
About hosting and writing the round up, it didn’t really take much time. After posting the roundup, I sent an email thanking every participant and letting them know about the roundup. Boy! I got some sweet responses to that mail. People are wonderful. What did hosting JFI do to me? After hosting the event, I feel like doing many more in the future and yes, participating in many other events. But the most important thing is, It has brought a sense of ‘belonging to a community’ in me. After studying in many schools and many colleges and worked and lived in many places, I never felt I ‘belonged’ anywhere. But after hosting this event, I feel like I belong here – with my blog friends, where I can truly be myself.”
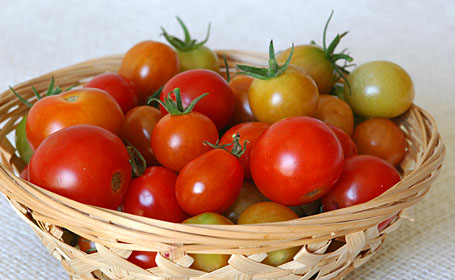
RP of My Workshop, the Host of JFI:Tomatoes:
“I really had a hard time picking one ingredient. I wanted to choose something that is used in all cuisines. I wanted to make it easy for the participants. So I picked tomatoes, something that is essential in every kitchen. It was easier than I thought even though I got a little nervous before publishing the roundup. Special thanks to Shn of Mishmash, Mallugirl of Malabar Spices, and kitchen fairy of Secret of Taste for supporting me when I needed it. Many have congratulated me for the hard work. I got a couple of how-did-you-do-it mails. To be frank, it wasn’t difficult at all. I used batch processing which made things easy. Adding the caption, of course, had to be done individually. I spent like 10-15 minutes everyday and the roundup was ready in a week. I was so thrilled and wanted to finish it in one sitting, but I didn’t want anyone in my home to suffer because I was busy with the roundup. About the generous response from fellow bloggers – Delighted! I have never received so many mails that are not junk.:) Entries started flowing in since mid March, and everyday I got more and more excited. Sometimes I thought I was getting lost in the middle of so many entries, but I picked up in no time. I received more than 100 entries. I am so happy and I thank everybody again for making it possible.”
Baking Fairy, the host of JFI-Strawberries sent her wishes from Costa Rica. She moved to Costa Rica from SF and opened her own bakery there. She wrote “I bought a small bakery and runnning my own place. I have breakfast and lunch items, most “Indian” base recipes because I love them so much. Hope you will come to visit one day. It is really a great place…Very peaceful…”.
Rosie of What’s the Recipe Today Jim?, currently vacationing in Mexico sent her thanks and wishes to all the participants.
My sincere thanks to Baking Fairy, Sailaja, Santhi, Vineela, Love 2 Cook, Vee, Kay, Ashwini, Rosie, Vaishali and RP for laying the foundation of Jihva tradition.
My heartfelt thanks to all the participants and fellow bloggers who embraced this event to make it their own, and opened up their families’ culinary heirlooms and treasures with such selflessness. Preserving food traditions is critical in these days of globalization and I hope that together we contributed to this effort through Jihvā.
Here are the stars of Jihvā: 2006. May they be part of our culinary traditions forever!


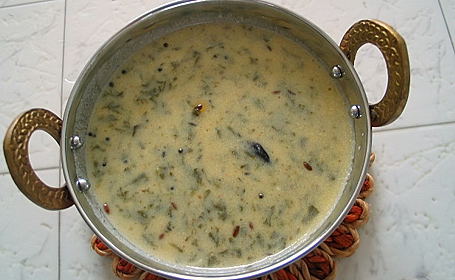
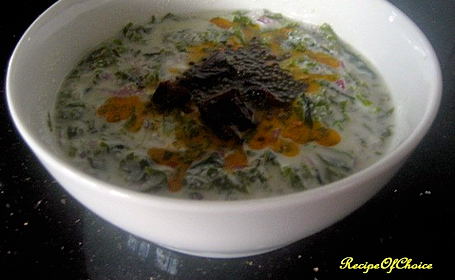
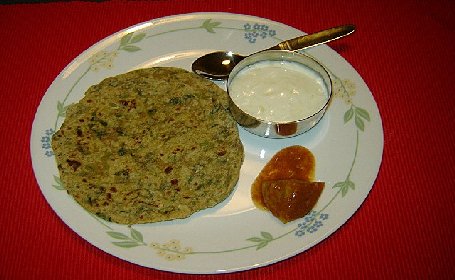
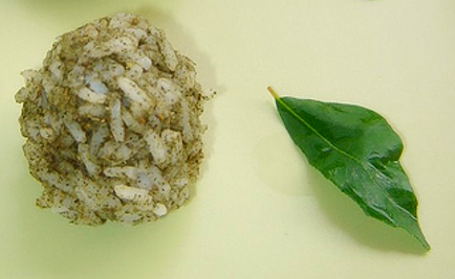
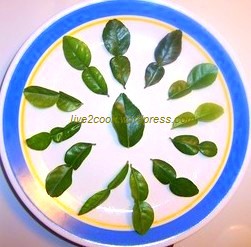
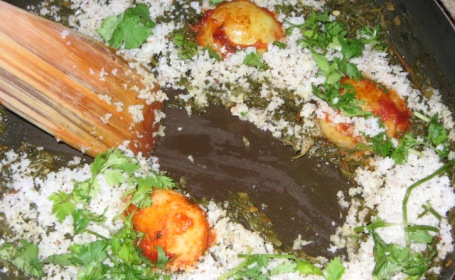
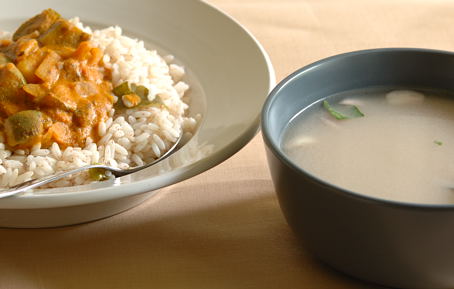
I think curry leaves are nature’s helping way to make our cooking better, one meal at a time. How? – You might ask. Nature picked the prettiest shade of green, selected a pleasing shape and packed the most enticing scent known to mankind, and the result is the curry leaves. Add few leaves while cooking, even the mundane daily dishes become magnificent with minimum effort. Example is ganji. Ganji, Kanji, Congee, Jook or Okayu, not only several names, there are also different ways of ganji preparation across Asia. Almost in all recipes in India, curry leaves are added. The elixir of life needs curry leaves perfume.
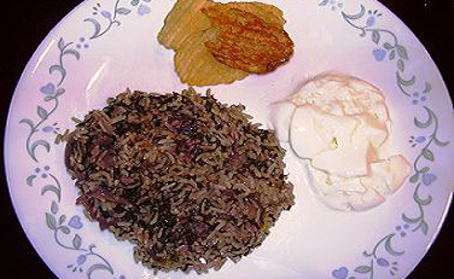
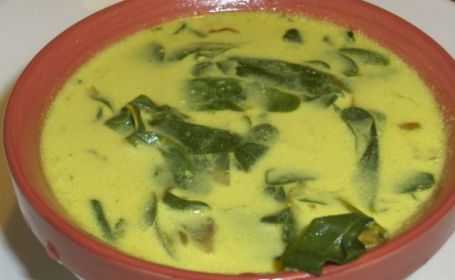
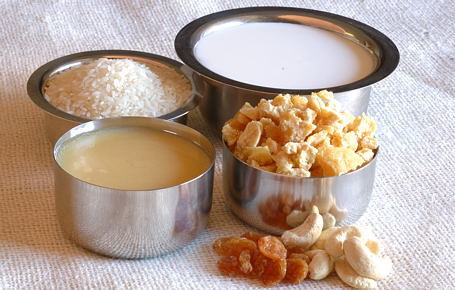
Inspired by Mathy Kandasamy’s recipe and Ammini Ramachandran’s article, I have prepared ganji for our meal today. I changed the method little bit to suit my taste. I cooked Rosematta rice (the wholesome red rice from Kerala) in lots of water. I have also added curry leaves along with ginger and green chillies. (Adding them in the beginning is what I did different.) Once the rice is cooked, the rice water is drained and saved. To this nutrient packed, curry leaves-ginger infused rice water, I’ve added little bit of coconut milk. The result is a pleasant, pale-pink colored ganji. It’s been ages since I had a taste of ganji and my ganji meal today did not disappoint me. Rosematta goodness and curry leaves fragrance gave the ganji a distinctive and appealing flavor. A must try for fans of curry leaves and Rosematta.
Recipe:
1 cup Rosematta rice
8 cups water
12-15 curry leaves, finely chopped
4 to 5 green chillies – finely chopped
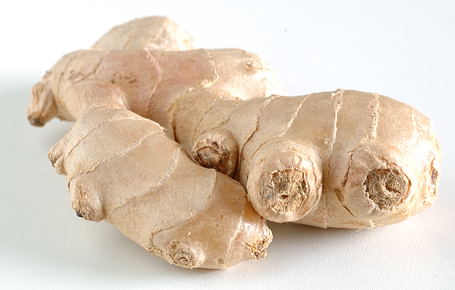
1 tablespoon of grated ginger
½ teaspoon of salt
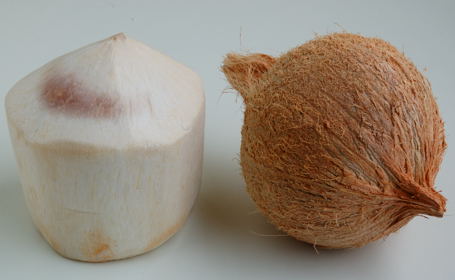
1 tablespoon of coconut milk – homemade or store-bought
Take Rosematta rice in a big vessel. Wash first and then add about 8 cups of water. Sprinkle finely chopped curry leaves, green chillies, grated ginger and salt. Mix. Bring the water to a boil. Reduce the heat, cover the pot and let it simmer, until the rice cooked to tender. Takes about 30 to 40 minutes.
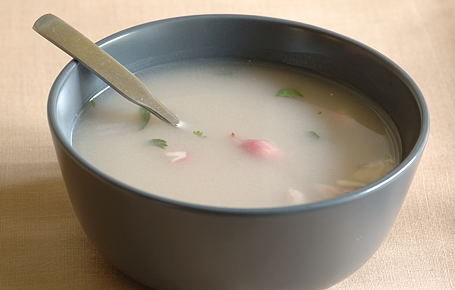
The cooked rice water will be simmered down to about 4 cups. Lightly concentrated and infused with Rosematta, curry leaves and ginger goodness – ganji is ready for the final touch. Using a colander, drain rice into a big pot and save the rice water (ganji).
To this ganji, add coconut milk and mix. Adjust salt to your liking. Drink the ganji warm.
when times are hard, people have known to depend on ganji for sustenance. Also, it’s a blessing to people who wants to cut back on consumption. Exhaustng times or greedy glutton times, ganji is a great way to start a meal – any meal, that’s how I felt. No wonder, even to this day ganji is continued to be “Asia’s Bowl full of Comfort”.
Notes:
Congee: Asia’s Bowl full of Comfort ~ Informative article by Ammini Ramachandran
Recipe source: Virundhu of Mathy Kandasamy
Ganji is a Telugu word for Kanji, or Congee. Ganji tastes great when made with broken parboiled rice.
Traditonally cooked rice, buttermilk, small shallots and fresh cilantro are also added to ganji.
Mathy Kandasamy of Virundhu, a dear friend of mine, and I have created a food blog aggregator called Food Blog Desam. It is a one place stop to know the latest happenings in food blog world. It took several days of hard work and we are very happy with how Food Blog Desam turned out.
Food Blog Desam aggregates RSS feeds from food blogs and provides them all in one place. There are hundreds of food blogs that update regularly. Food Blog Desam offers convenience to the readers and increases the readership of the food blogs. More than any thing, it is a time saver – a feature food blog fans like us always wanted and any food blog fan would appreciate.
Update January 08:
We had great time providing traffic to new and old food blogs through Food Blog Desam. It took lot of time and energy to maintain the site but it was an effort from the heart, so we enjoyed the work tremendously. Unfortunately due to some server and tech issues, we have decided to stop updating the Food Blog Desam. We don’t know when we be able to diagnose, let alone fix things, as we both are currently engaged to real life and the craziness that comes with it. The site will be online few more months, until we decide what to do with it. If there is any change in the situation, you will be the first to know.
Thanks for your support.
– Indira
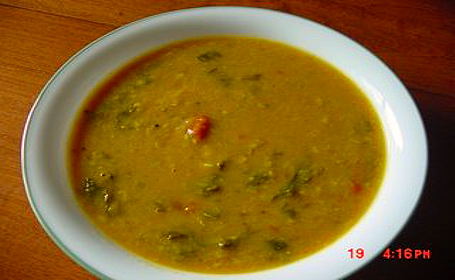
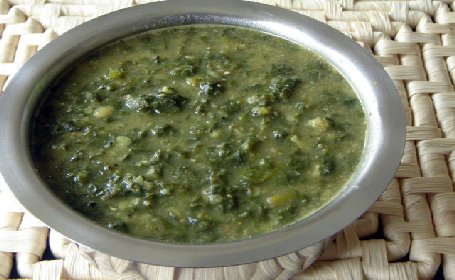
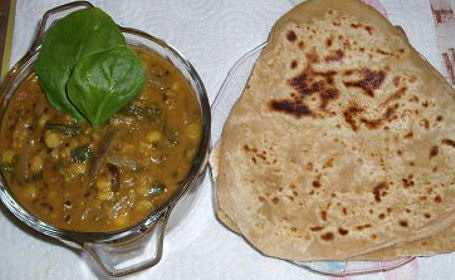
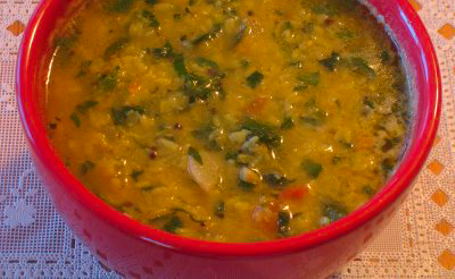
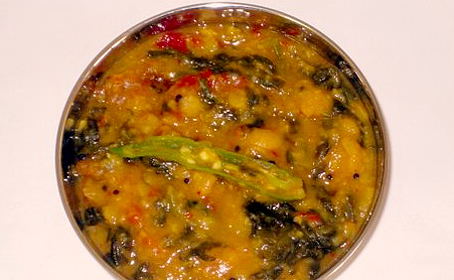
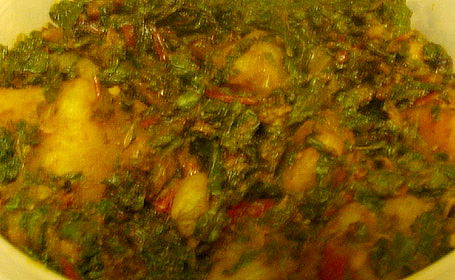
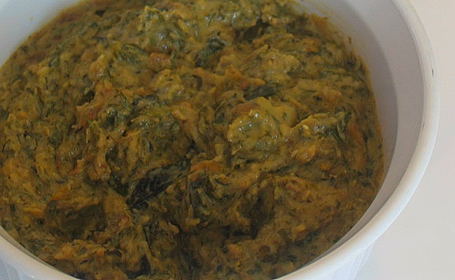
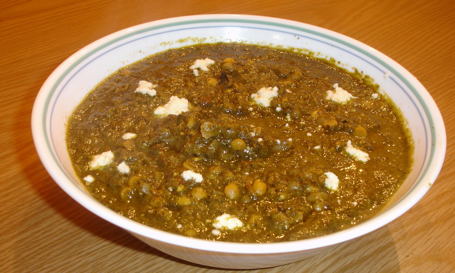
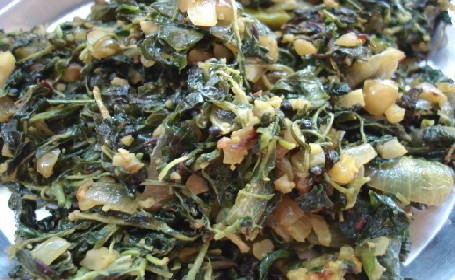
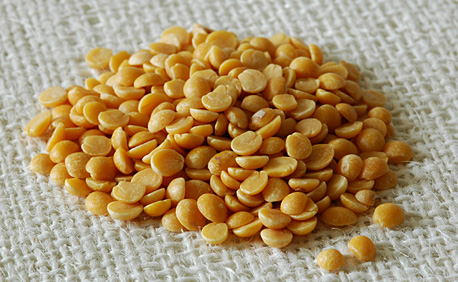
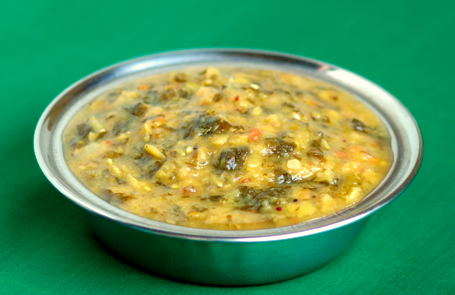
In a cake culture, the main ingredients, flour, sugar and butter remain constant. By changing just one or two ingredients that add special touch to the cakes, they are given different names. Ex: If walnuts are added, the cake is named walnut cake, with bananas – banana cake, and the list goes on. The same thing applies to dals (pappu) as well. The protein part is constant, and the side ingredients that change with the seasons give us abundant varieties of dals. This amaranth flavored dal is one of them, devised by homecooks of Andhra, to make a dent in the mother lode of fresh amaranth that appear during summer time. Not only fresh leaves, tender stalks are also used in cooking. Ideal dal for a waste not, want not cook. Makes a nutritious meal when combined with rice.
Recipe:
Take about one cup of toor dal and 4 cups of finely chopped fresh amaranth – leaves and tender stalks together.
Add one each – tomato and onion (cut into chunks). Also stir in about 8 to 10 finely chopped small Indian variety green chillies, quarter teaspoon of turmeric and a tablespoon of tamarind.
Add about 2 cups of water. Mix once and cook covered until the dal reaches fall-apart stage, stirring between. Or simply pressure cook.
Add half teaspoon of salt and mash the dal coarsely.
In a wide vessel, heat about a tablespoon of ghee or oil. Do the popu or tadka = add and toast quarter teaspoon each – minced garlic, curry leaves, urad dal, cumin and mustard seeds in the order mentioned. When mustard seeds start to jump around, add this popu or tadka to the mashed dal. Mix and serve hot with rice or with chapati.
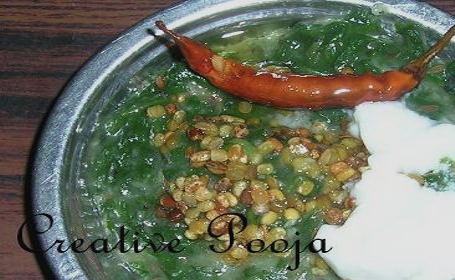
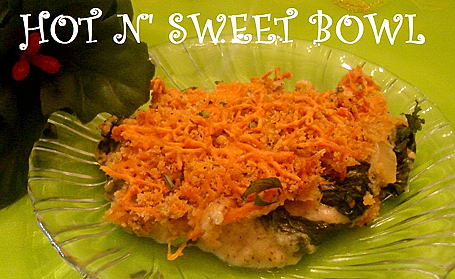
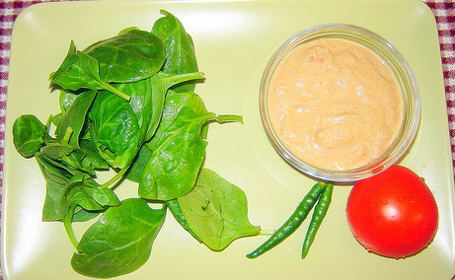
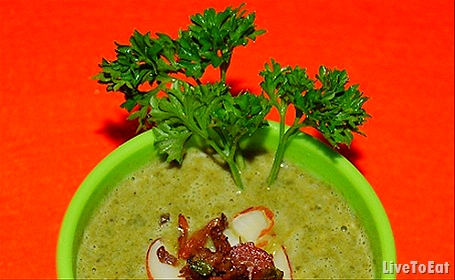
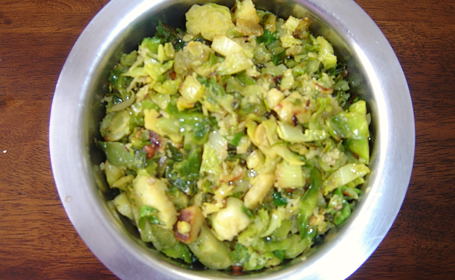
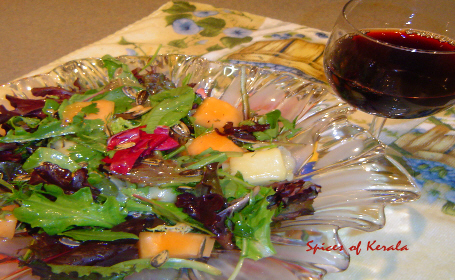
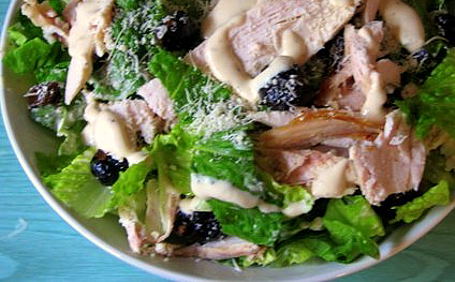
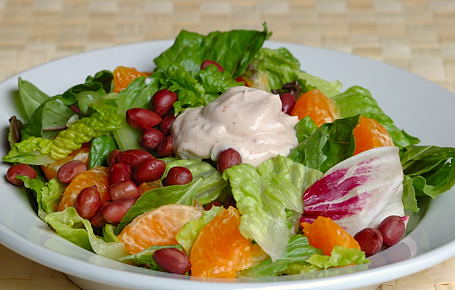
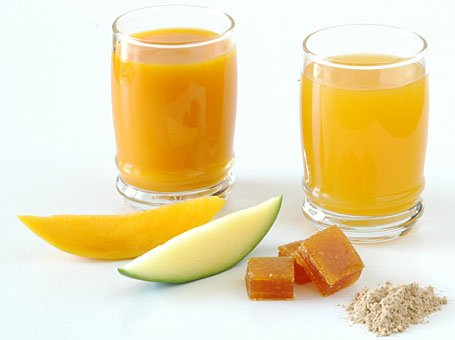
This colorful and tasty salad is Vijay’s creation. Boiled peanuts, salad greens served with homemade yogurt and black pepper dressing. A cup of tomato rasam on the side makes this a pleasant luncheon or light supper to have.
This is one of those recipes, where you buy ready to use ingredients and put together a meal at home. We bought boiled peanuts from a Vietnamese grocery shop and salad greens from another nearby grocery shop. The meal preparation went like this – opened the salad greens packet, washed and drained them. Shelled the peanuts. Coarsely crushed black pepper and added it to yogurt along with some salt and a teaspoon of gulkand. Took the salad greens and peanuts in a big bowl and mixed. Served with yogurt. (We also added orange slices.)

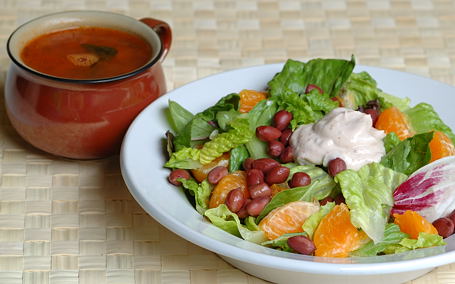
Notes:
Gulkand (Concentrated sugary rose petals) – available in Indian stores
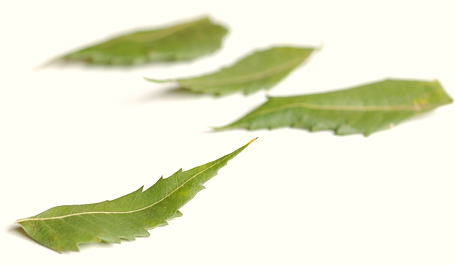
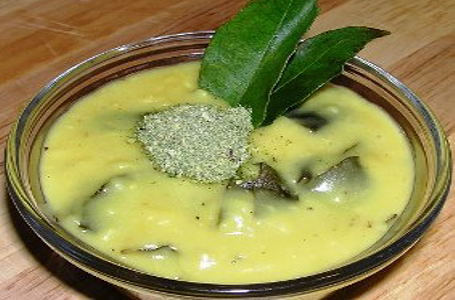
We worship the neem tree! For us Bharatiya, the neem tree is a sacred tree, standing along the magnificient Maamidi (Mango) and the bodhi vruksham–Peepal (Raavi). The beautiful evergreen neem tree with its numerous medicinal benefits is a precious gift from Mother Earth. Every part of the tree is utilized in some way in India. In home-based medicines and in religious ceremonies, neem plays an essential role, the protector against disease and evil eye. In the kitchen, delicate neem flowers and tender neem leaves are used in preparing the broth-like healing potions. The bark, branches and dried leaves of the neem tree are used to prepare medicinal powders in our homes.
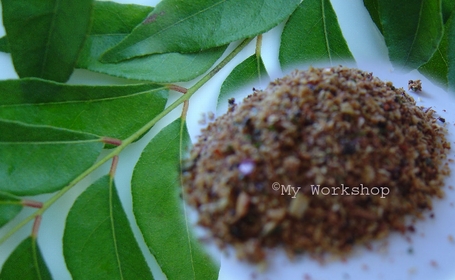
Since olden times, dental health is one of the well-known beneficial effects of neem. I have always desired to go back to the way my grandparents used to brush their teeth with homemade powders. Dried neem, tulasi leaves, cloves, little bit of rock salt and rice bran are ground together and stored in jars, to use as tooth-powder. Rice husk ash was also added to this mixture. Dental care routine in the days of yore went as follows – about half a teaspoon of the powder is placed in the palm of one’s hand and a small pencil-sized neem twig serves as the toothbrush. We had to dip the edge of the twig in this powder and brush the teeth. The taste of the toothpowder combined with neem twig packed quite a kick, which was sort of overwhelming to my young palate at that time. But we didn’t have a choice, because the commercial white toothpaste was considered poison in those days in villages. And people like my grandparents, who were well-versed in Western culture, consciously avoided using “foren” sounding, tasting chemical-laden white toothpaste. They had sparkling, healthy teeth and warm smiles.
I wanted to resuscitate that old tradition from memories. I purchased neem powder and tulasi powder from Indian stores. Ground few cloves to fine powder. I put together a fantastic-smelling tooth powder. Here is the result.
Recipe:
4 tablespoons – neem powder
2 tablespoons – cloves powder
1 tablespoon – tulasi powder
¼ teaspoon – rock salt
1 tablespoon – rice bran or of bran of any grain – (added to provide friction to dislodge the food particles while brushing.)
Take all of the above in a small bowl. Mix thoroughly and have a taste. Adjust cloves, salt and bran to your liking. Mix and store in a clean jar.
To use – place about half teaspoon of powder in the palm of your hand. Moisten tooth brush and dip the bristles in powder and apply to the teeth. Do like you normally brush. No foam while brushing and no artificial sweetener like after-taste. This homemade tooth powder provides a refreshing clean feel and an enticing potent after-taste that mature palates prefer.
We all know that mothers love children who take proper dental care. What’s better way to celebrate mother earth on Earth day than remembering the old wisdom and bringing those sparkling memories back? This recipe is my way of celebrating the ancient wisdom and the inspiration for it – the Mother Earth.
Notes:
All about Neem Tree
Neem: India’s Miraculous Healing Plant (book)
Sacred trees of India
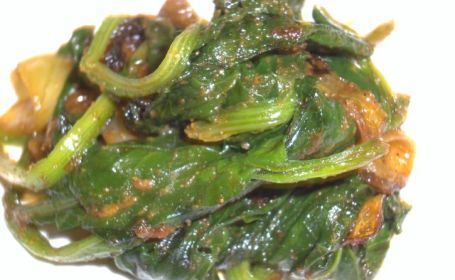
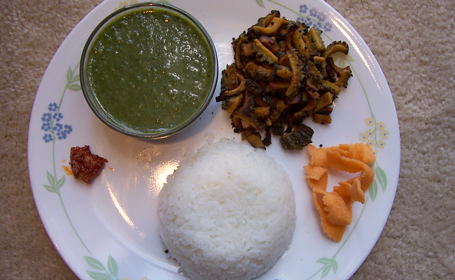
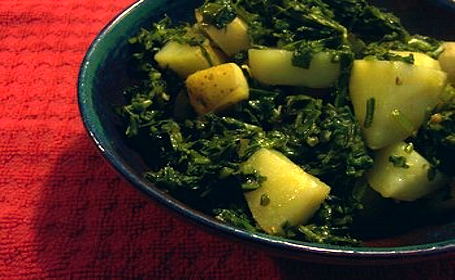
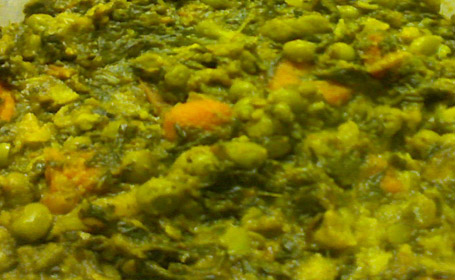
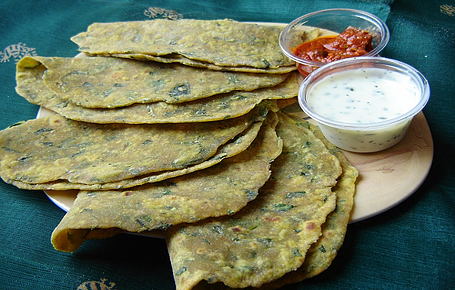
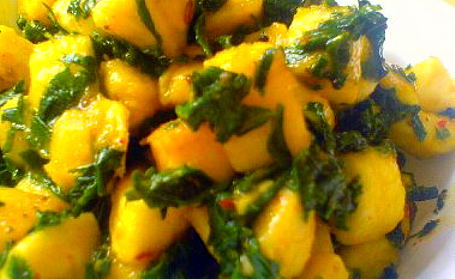
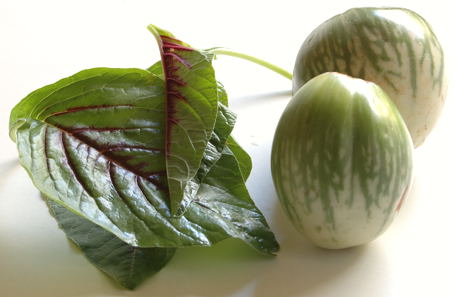
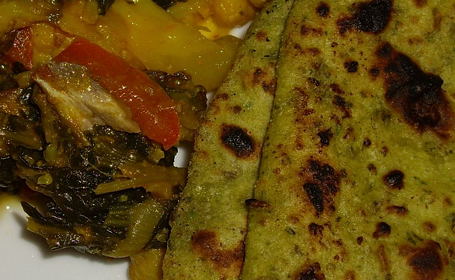
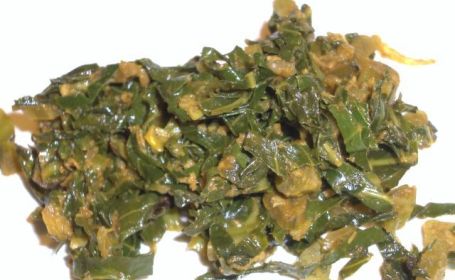
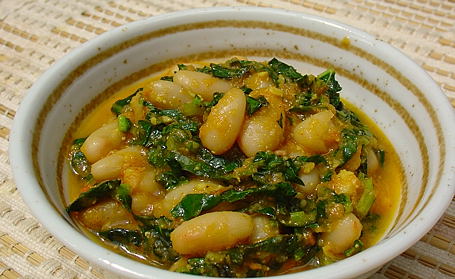
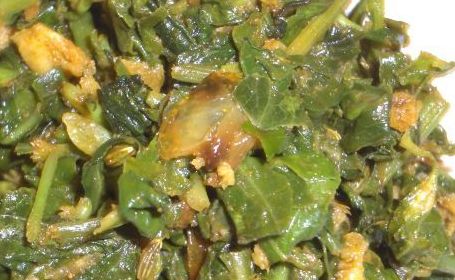
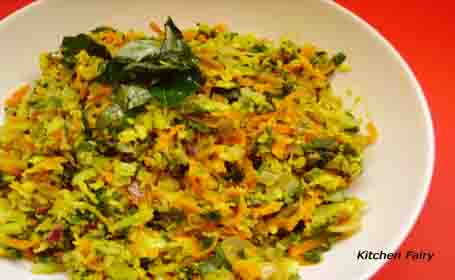
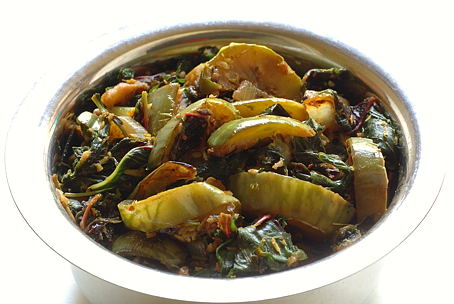
I have written about a type of small, green colored brinjals called Poluru Vankayalu that’s available in Nandyala region. My mother prepares a special curry with green brinjals and red tinged pretty looking amaranth leaves. Fresh ginger is also added. The combination creates a deep flavored curry, which has a unique, indescribable taste. This curry, rice/chapati, dal and yogurt are the routine fare for us. But today, I have prepared pasta in tomato based sauce and added the curry before serving. Good meal.
Recipe:
Prep work:
1 bunch fresh amaranth -pluck leaves and tender stalks, wash and chop finely.
12 green brinjals – wash, remove the petals and cut lengthwise into thin pieces. Add them to salted water
1 Rupee (dollar) coin sized ginger and 4 green chillies – grind to fine consistency
Cooking:
1 tsp of oil, ¼ tsp each- minced garlic, curry leaves, cumin and mustard seeds
Heat oil in a wide skillet. Add and toast garlic, curry leaves, cumin and mustard seeds.
Remove from water and add green brinjal pieces to the hot skillet. When added to skillet, they have to sizzle, so keep the heat high. Stir fry for few minutes. When they are turning to soft, add finely chopped amaranth leaves. Also sprinkle the grinded ginger-green chilli, a pinch of turmeric and quarter teaspoon of salt. Mix and cook on medium-high heat for about 3 to 5 minutes, until the leaves wilt and curry comes together. Serve hot with rice, chapati or experiment as pasta topping like I did.

| M | T | W | T | F | S | S |
|---|---|---|---|---|---|---|
| 1 | 2 | 3 | 4 | 5 | 6 | 7 |
| 8 | 9 | 10 | 11 | 12 | 13 | 14 |
| 15 | 16 | 17 | 18 | 19 | 20 | 21 |
| 22 | 23 | 24 | 25 | 26 | 27 | 28 |
| 29 | 30 | |||||

